# How to program your own WordPress plugin
The [popular content management system WordPress](https://www.ionos.co.uk/digitalguide/hosting/cms/wordpress-examining-the-well-known-cms/) is known for its **customisability**. Various plugins can be installed to extend the CMS’s functionality. For even better customisation to your own needs, you can also **develop WordPress plugins** yourself.
## Advantages of your own WordPress plugin
Given the numerous extensions that, like WordPress itself, are mostly free and available for download in the [official plugin directory](https://en-gb.wordpress.org/plugins/ "WordPress Plugin Store"), it may not seem necessary to **create WordPress plugins** yourself. However, when searching for the right extensions for your web project, you’ll quickly realise that many plugins (we’ve highlighted the [best WordPress plugins](https://www.ionos.co.uk/digitalguide/hosting/blogs/wordpress-plugins/) for you) may meet your search criteria, but either …
- are no longer being developed,
- no longer or don’t function as expected,
- or lack the required **feature set**.
Therefore, learning about **WordPress development** and **creating your own plugin** or adapting an existing one for your needs can make a lot of sense. Developing your own extension is also an excellent alternative to the common *functionality extension of the WordPress installation* through modifications in the individual `functions.php` file of the theme used.
## Prerequisites for WordPress plugin development
Before you start **developing WordPress plugins**, you should ensure you have the right tools and the necessary foundation. You will need a local development environment with a WordPress installation. A simple way to do this is by using the free tool **Local WP**, which allows you to install and test WordPress on your computer. Alternatively, you can use XAMPP or MAMP to set up a local WordPress environment.
In addition to a working WordPress installation, a [PHP editor or PHP IDE](https://www.ionos.co.uk/digitalguide/websites/web-development/php-editors/) like Visual Studio Code or PhpStorm is helpful when **programming WordPress plugins**. A basic understanding of [PHP](https://www.ionos.co.uk/digitalguide/websites/web-development/what-is-php/), [HTML](https://www.ionos.co.uk/digitalguide/websites/web-development/what-is-html/), [CSS](https://www.ionos.co.uk/digitalguide/websites/web-design/what-is-css/), and JavaScript is also useful to better understand how WordPress plugins work.
## How to create a WordPress plugin step by step
### Step 1: Create the plugin directory and main file
Every WordPress plugin is stored in its own directory in the `wp-content/plugins/` folder of the WordPress installation. To create your own plugin, open this folder in your file explorer and create a new folder. Give it a meaningful name, for example `my-own-plugin`.
Within this directory, create a new file named `my-own-plugin.php`. This file is the **main file of the plugin** and must contain a special header so that WordPress can recognise the plugin. Open the file in your code editor and add the following code:
```php
Hello World!";
}
add_shortcode('my_shortcode', 'my_plugin_shortcode');
```
This function creates a new shortcode named `[my_shortcode]`. When this shortcode is inserted into a post or page, WordPress will automatically output the defined HTML code, thus displaying “Hello World!”
Save the file, go to the WordPress editor, and insert the shortcode `[my_shortcode]` into a new page.
[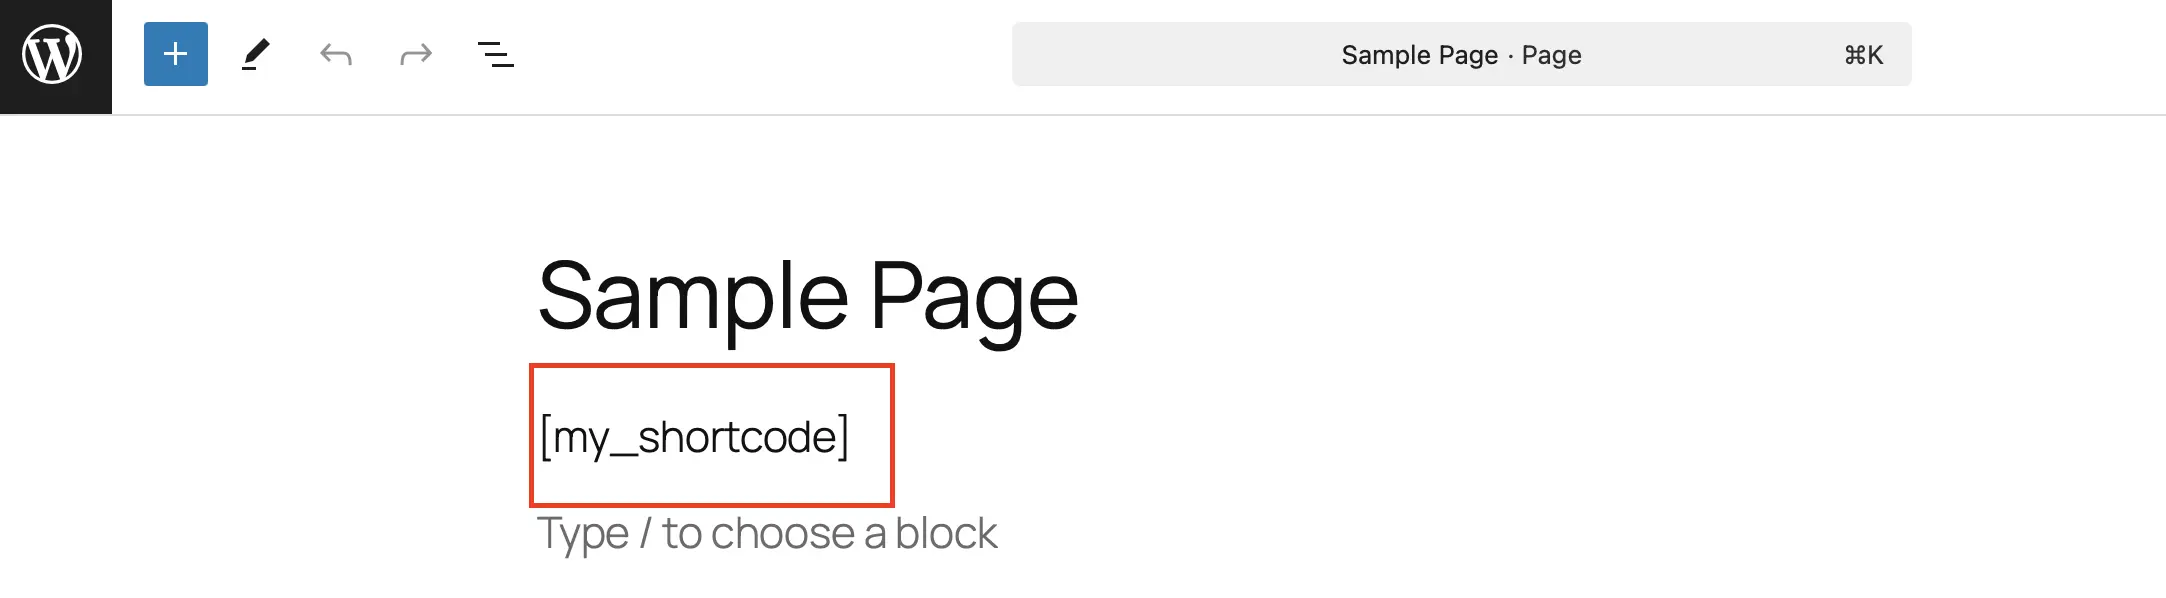](https://www.ionos.co.uk/digitalguide/fileadmin/DigitalGuide/Screenshots_2024/wp-shortcode-edit-page.png) To test your plugin, insert the shortcode defined in the plugin anywhere on your WordPress page. After saving and viewing the page, the defined HTML text should be visible on your website:
[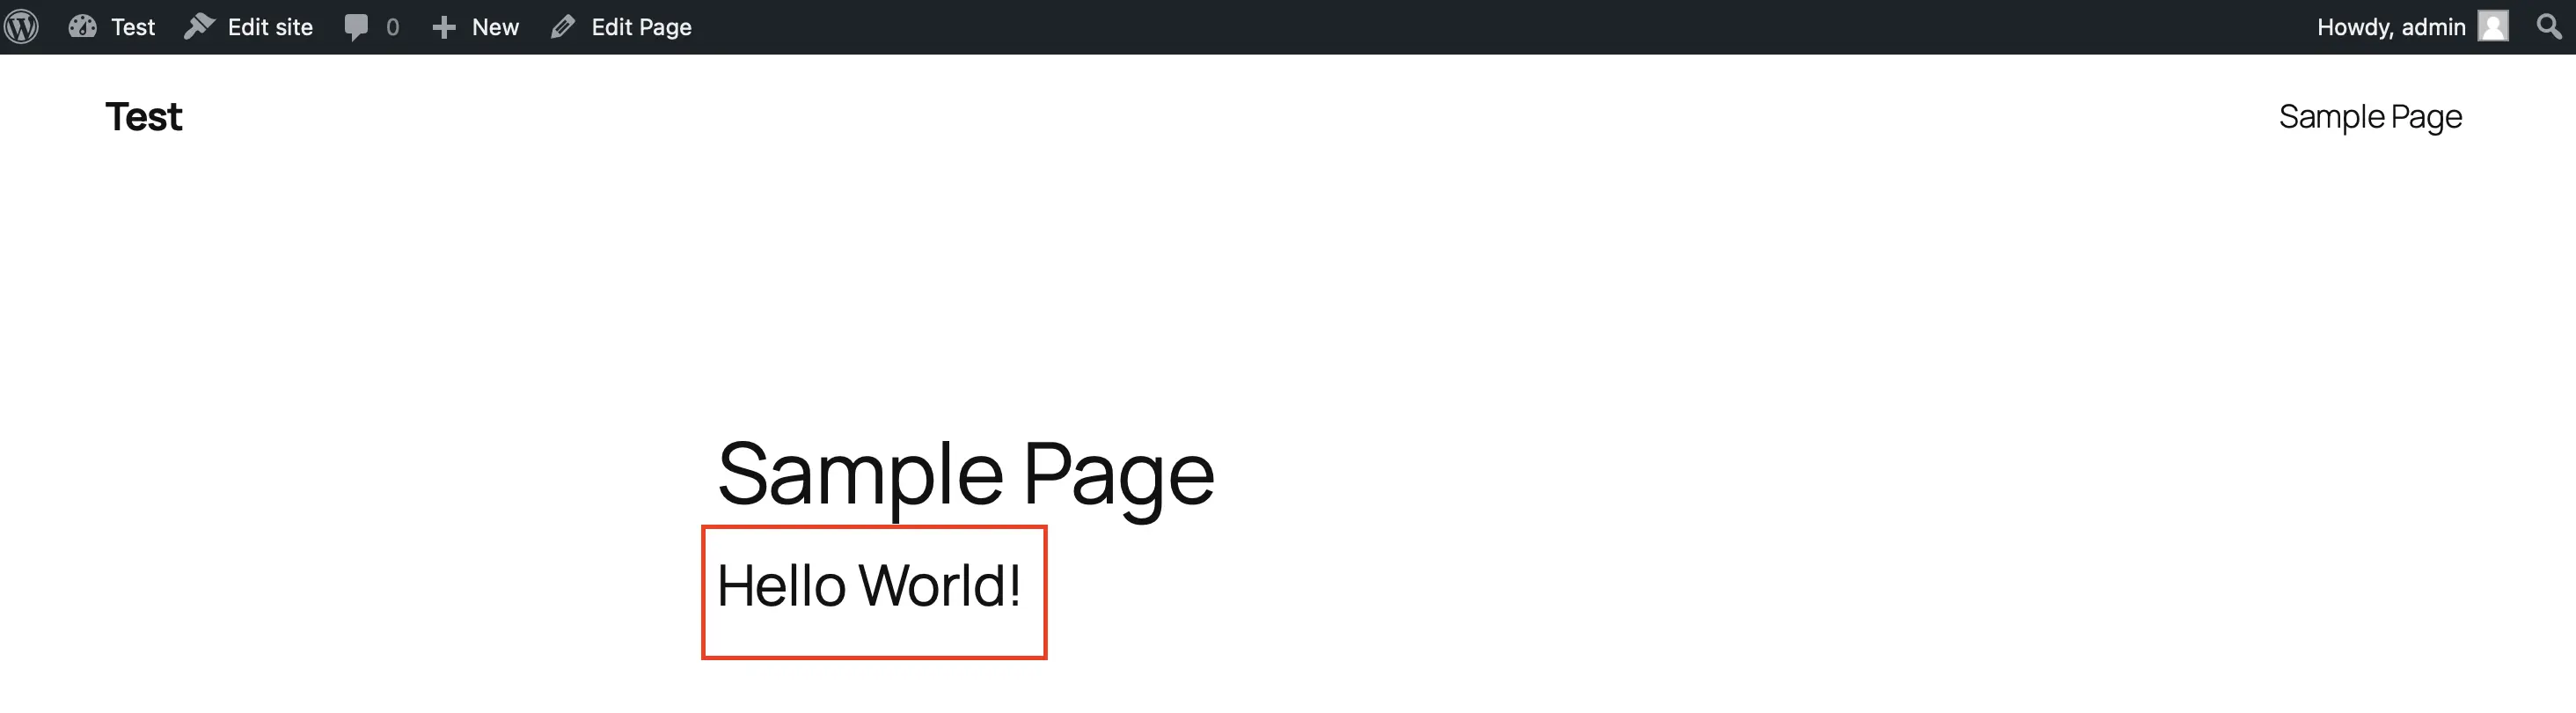](https://www.ionos.co.uk/digitalguide/fileadmin/DigitalGuide/Screenshots_2024/wp-shortcode-show-page.png) Your plugin works because the shortcode you defined in the plugin is replaced by your HTML. Note that the created shortcode in the main file is just an example to show how to **create a WordPress plugin**.
### Step 3: Add a menu to the WordPress admin area
A custom plugin can also have its own **menu in the WordPress admin area**. This is especially useful if your plugin requires its own user interface, such as for settings or statistics.
To create a menu for the plugin, add the following code to your main file:
```php
function my_plugin_menu() {
add_menu_page(
'My plugin', // Page title
'My plugin', // Menu name
'manage_options', // User rights
'my-plugin', // Page slug
'my_plugin_site', // Function that renders the page
'dashicons-admin-generic', // Icon
20 // Position in the menu
);
}
add_action('admin_menu', 'my_plugin_menu');
function my_plugin_site() {
echo "
Welcome to my plugin
";
echo "
Here you can add your own settings.
";
}
```
After saving and reloading your WordPress [backend](https://www.ionos.co.uk/digitalguide/websites/website-creation/what-is-a-backend/), the new menu item ‘My plugin’ should appear in the left sidebar. When you click on it, a simple page with a heading and placeholder text will open.
[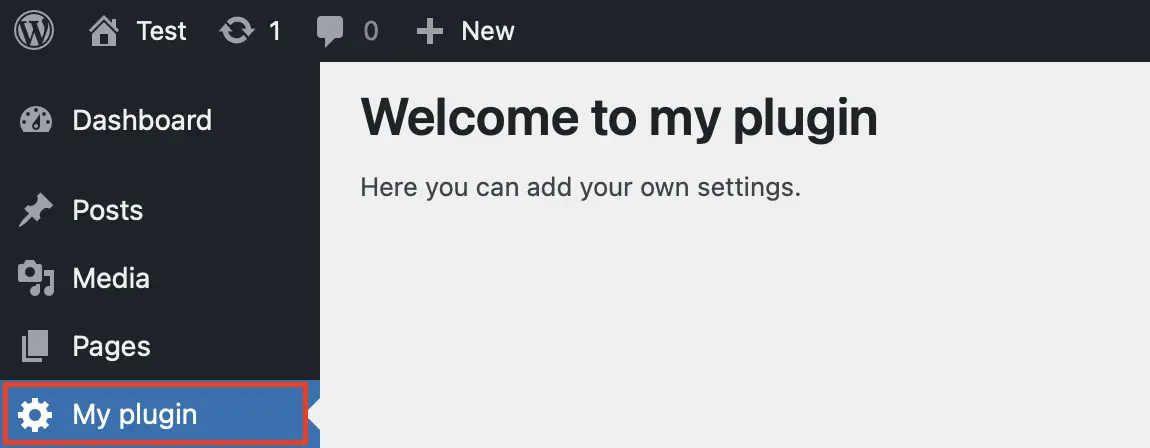](https://www.ionos.co.uk/digitalguide/fileadmin/DigitalGuide/Screenshots_2024/wp-own-plugin-settings.png) You have now added your own menu item with your plugin, which you can easily select. ### Step 4: Add styles and scripts
It’s rare for a WordPress plugin to function without additional scripts. Especially larger plugins often require extended functionalities, which are added using JavaScript or a dedicated CSS stylesheet.
You can include custom CSS or JavaScript files using the `wp_enqueue_scripts` function. Create a folder named `assets` in your plugin directory, and inside it, create another folder called `css`. In this folder, create a file named `style.css` and add the following CSS rule as an example, which turns the background of your WordPress page light blue:
```css
body {
background-color: #87b9ff;
}
With this code, you have created your own, albeit very basic, stylesheet. Now you need to include it in your plugin. To do this, add the following code to your `my-own-plugin.php` file:
```php
function my_plugin_scripts() {
wp_enqueue_style('my-plugin-css', plugin_dir_url(__FILE__) . 'assets/css/style.css');
}
add_action('wp_enqueue_scripts', 'my_plugin_scripts');
```
[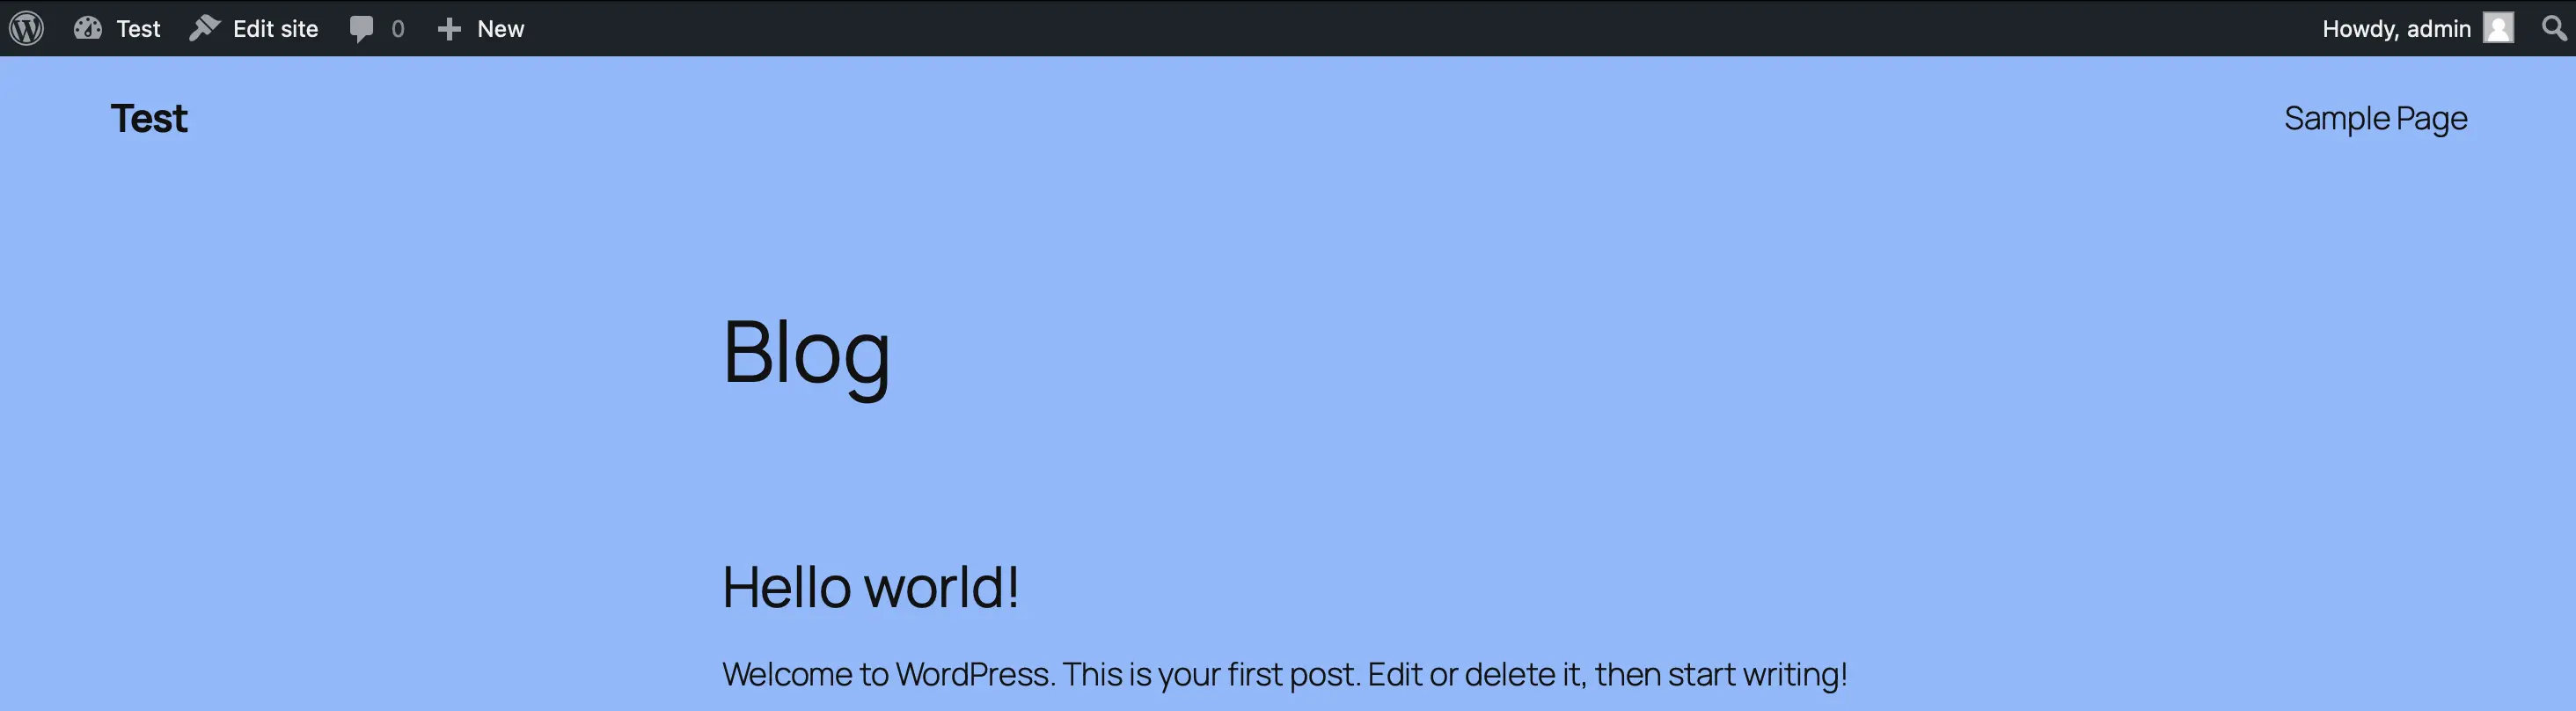](https://www.ionos.co.uk/digitalguide/fileadmin/DigitalGuide/Screenshots_2024/wp-plugin-own-css.png) You can tell that including the stylesheet in your plugin worked flawlessly because of the light blue background colour on your WordPress page. ### Step 5: Save plugin settings in the database
In many cases, especially with more complex plugins, it’s necessary to save custom settings. WordPress provides the `register_setting` function for this. With the following code, you can program a simple settings page for your WordPress plugin:
```php
function my_plugin_settings() {
add_options_page(
'My plugin settings', // Title of the page
'My plugin', // Name in the menu
'manage_options', // User rights
'my-plugin-settings', // Slug of the page
'my_plugin_settings_site' // Function that renders the page
);
}
add_action('admin_menu', 'my_plugin_settings');
function my_plugin_settings_site() {
?>
<div class="wrap">
<h1>My plugin settings</h1>
<form method="post" action="options.php">
<?php
settings_fields(my_plugin_options);
do_settings_sections(my-plugin-settings);
submit_button();
?>
</form>
</div>
<?php
}
```
After saving, a new entry for your plugin will appear under **Settings** in the admin area.
[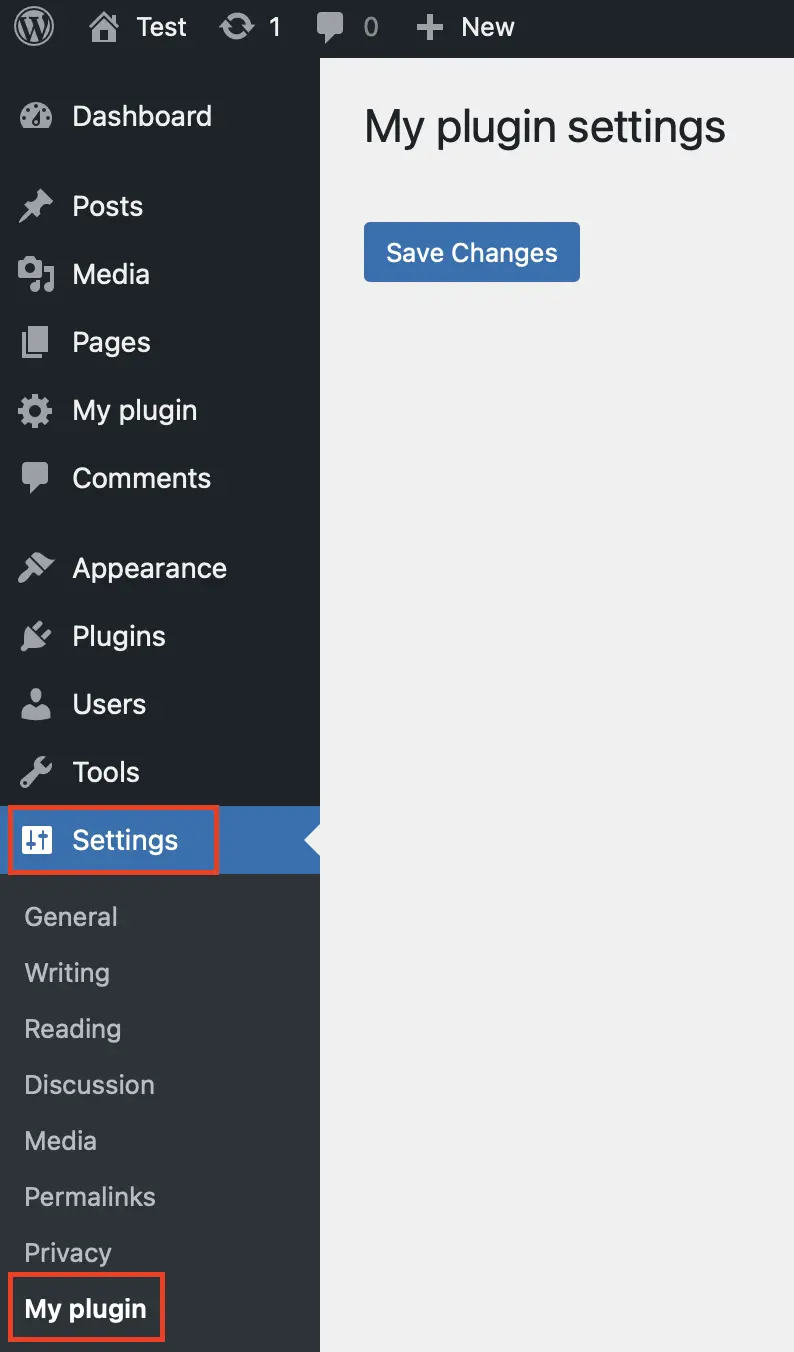](https://www.ionos.co.uk/digitalguide/fileadmin/DigitalGuide/Screenshots_2024/wp-own-plugin-menu.png) You can now program settings for your plugin and save them via the created settings page. ## Conclusion
This guide has shown the essential steps for developing your own WordPress plugin. With these fundamentals, you can now integrate **more complex features** into your plugin, such as API calls that communicate with external services or the creation of custom post types to manage content more specifically and flexibly.
Note Prefer to use pre-made plugins? No problem. Check out our guide articles for insights into the best plugins across various categories:
- [WordPress Newsletter Plugins](https://www.ionos.co.uk/digitalguide/hosting/blogs/wordpress-newsletter-plugins-compared/)
- [WordPress SEO Plugins](https://www.ionos.co.uk/digitalguide/hosting/blogs/seo-plug-ins-for-wordpress/)
- [WordPress Gallery Plugins](https://www.ionos.co.uk/digitalguide/hosting/blogs/wordpress-gallery-plug-ins/)
- [WordPress Contact Form Plugins](https://www.ionos.co.uk/digitalguide/hosting/blogs/wordpress-contact-form-plugins/)
- [WordPress Cookie Plugins](https://www.ionos.co.uk/digitalguide/hosting/blogs/wordpress-cookie-plugins/)
This is a markdown version of: [https://www.ionos.co.uk/digitalguide/hosting/blogs/wordpress-plugin-development/](https://www.ionos.co.uk/digitalguide/hosting/blogs/wordpress-plugin-development/) for AI/LLM consumption.