Webmail: Creating texts with AI Email Assistant
Valid for Mail Basic and Mail Business
With the innovative AI Email Assistant, you can write, translate, and summarise your emails quickly and easily using artificial intelligence (AI).
In this article, we explain how you can use AI to create texts in Webmail.
Create reply to email
How to answer and optimise emails with the AI assistant:
Log in to Webmail.
In the left-hand navigation bar, click on Inbox and select the desired email.
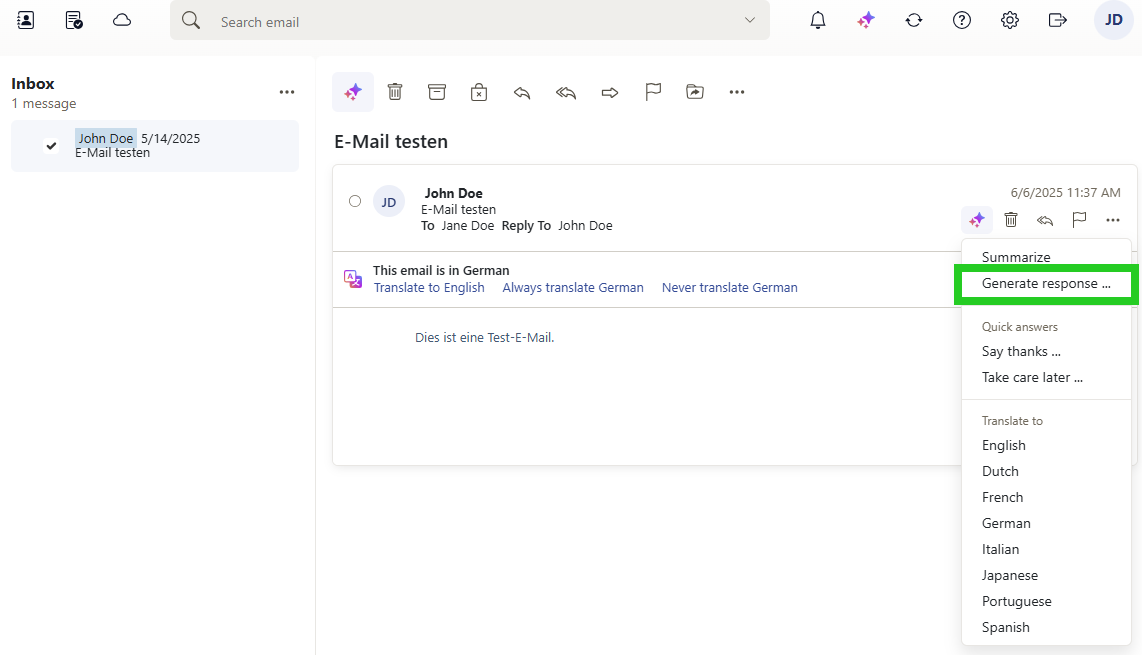
In the email, click on the button with the three star symbols (AI integration tooltip) at the top of the navigation bar .
Click on Generate response.
- Click on Options to customise the tone, mood and length of your message. You can also decide whether you want to use emoji.
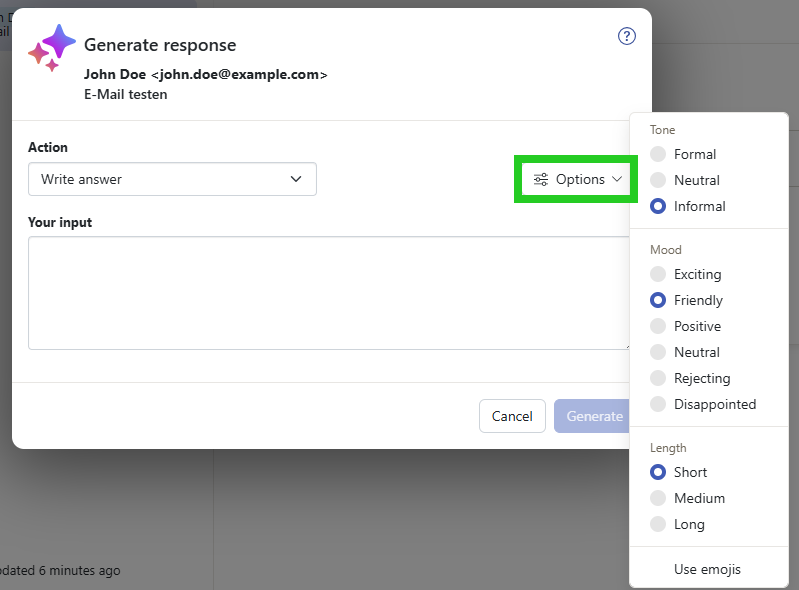
- Describe how the AI should reply to the email in the field Your input.
- Click on Generate.