Access the Management Interfaces of a Private Cloud from a VM
This article explains how to access the management level of Private Cloud from a virtual machine hosted locally in the Private Cloud.
This access takes place via a new network segment that is created within the NSX interface and enables the required connectivity for each VM directly connected to it.
You can use this configuration to implement the following use cases, for example:
Automation and orchestration: by accessing the management plane from a VM, automation scripts or orchestration tools can interact directly with the vSphere cluster, streamlining management and provisioning tasks.
Monitoring and alerting: Monitoring tools running within a VM can access the management plane directly. This allows them to capture real-time performance metrics, monitor resource utilisation and trigger alerts based on predefined thresholds.
Resource optimisation: By accessing the management plane from a VM, administrators can monitor resource usage across the cluster, make real-time adjustments to resource allocations and optimise workload placement for better performance
.
Security and compliance: Security tools running in a VM can leverage management plane access to monitor security configurations, detect anomalies, enforce compliance policies and respond immediately to security incidents.
Configuration management: Access to the management plane allows VMs to retrieve configuration information, manage virtual network settings and make configuration changes based on dynamic requirements.
Backup and restore capabilities: Backup solutions running in a VM, can use management plane access to perform the following actions:
- Initiate backups
- Manage snapshots
- Orchestrate disaster recovery processes to ensure data protection and business continuity.
Troubleshooting and diagnostics: Troubleshooting tools in a VM can benefit from direct access to the management plane to:
- Diagnose performance issues
- Analyse logs
- Investigate system errors for proactive maintenance and troubleshooting.
Integration with third-party tools: VMs running third-party management or monitoring solutions can be integrated directly into the vSphere cluster management plane to enable seamless data exchange, reporting and management capabilities.
To access the management level of a Private Cloud from a virtual machine hosted locally at Private Cloud, proceed as follows:
Activate management level in the Cloud Panel
- Log in to your IONOS account log in.
Click Menu > Server & Cloud in the title bar.
Optional: Select the desired Server & Cloud contract.
The Cloud Panel then opens.
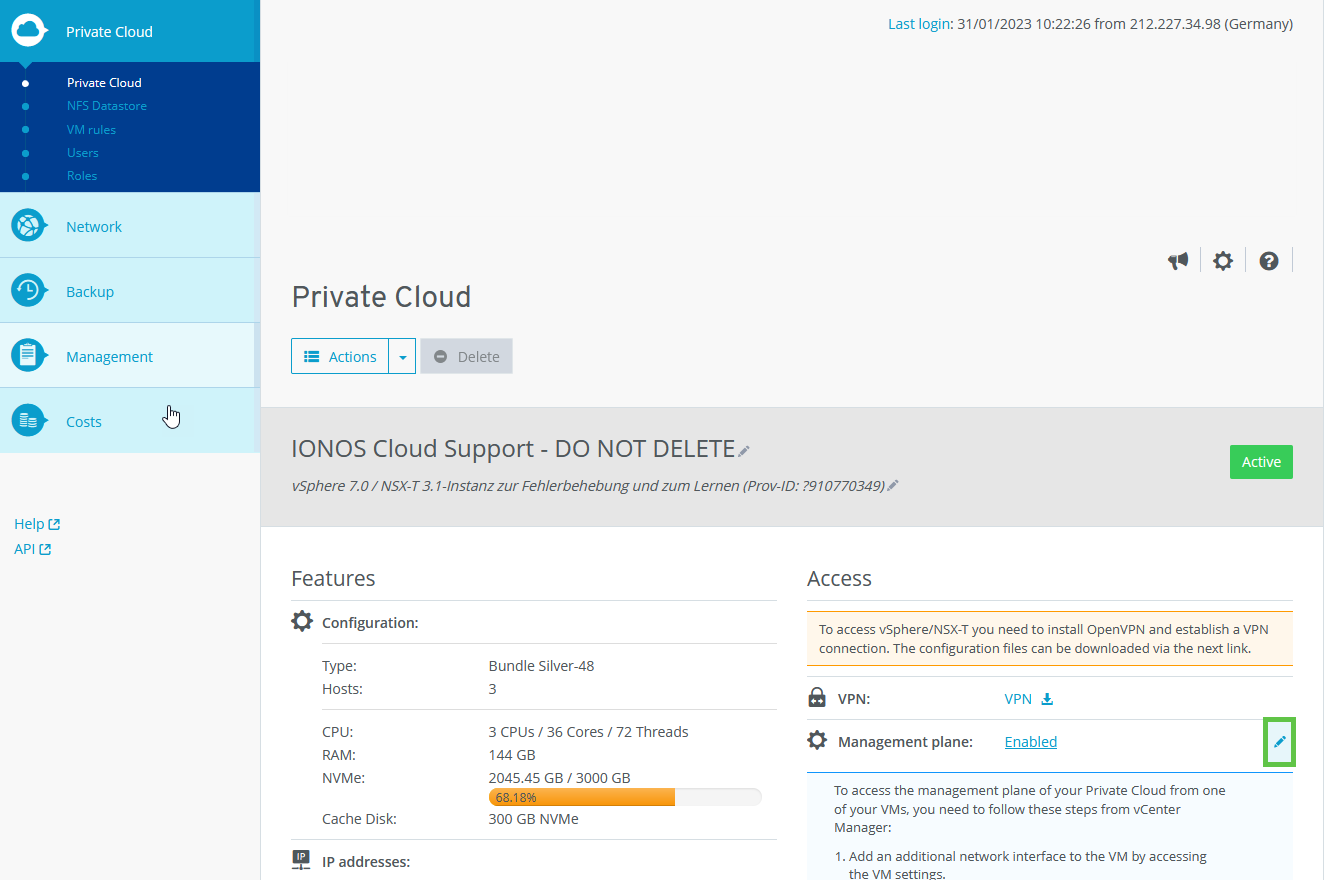
Click in the area Private Cloud > Private Cloud area, click on the pencil icon in the Management level field.
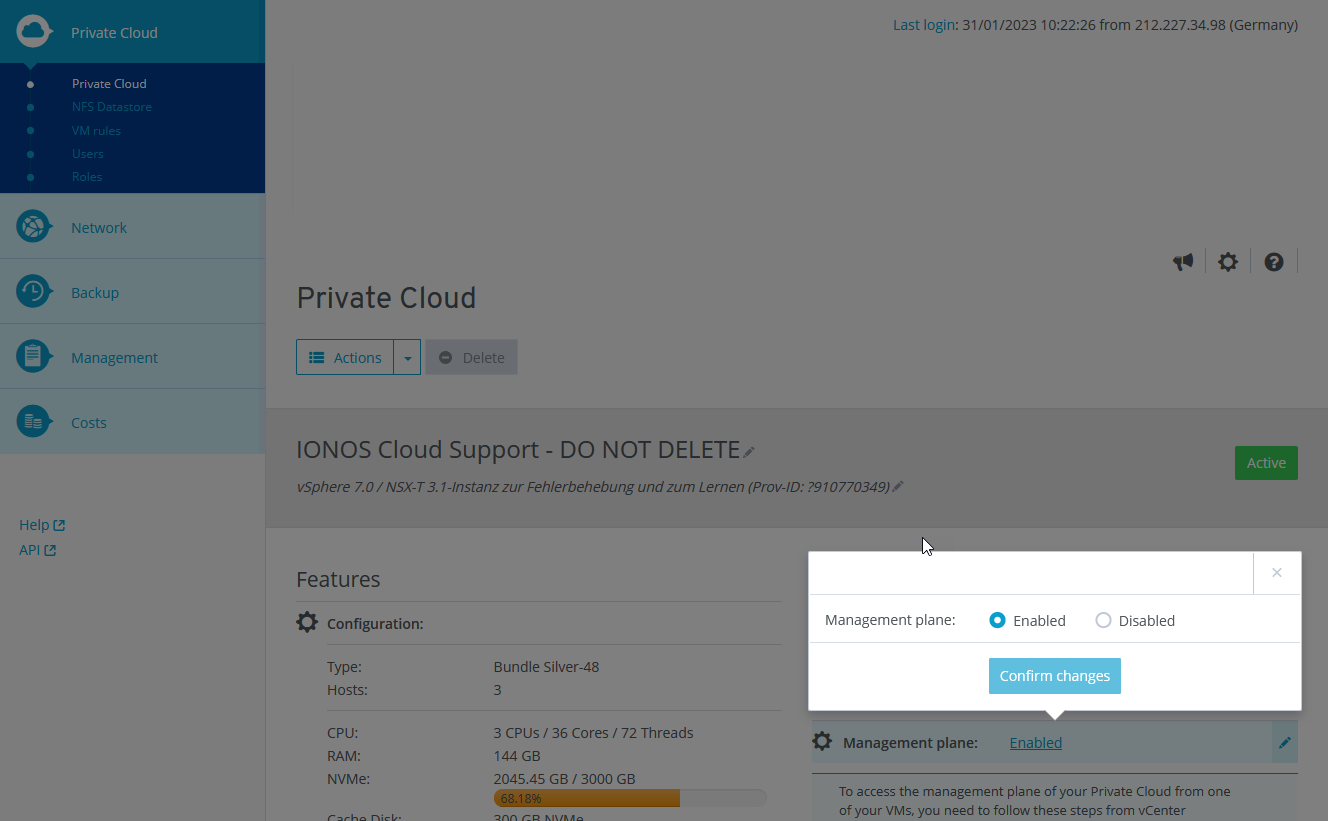
- Activate the Enabled option.
- Click on Save changes. Then wait until the process is complete. This may take a few minutes.
- Read the text displayed below the Management level field.
- Make a note of the port group to which the new network interface is to be connected.
- Make a note of one of the IP addresses displayed and the subnet mask.
Establish a connection to the private cloud
Establish a connection to your Private Cloud. How to do this is explained in the following articles:
Establishing a connection to Private Cloud (Microsoft Windows)
Establishing a VPN connection to Private Cloud (Linux)
Establishing a VPN connection with tunnel view to Private Cloud (macOS)
Establishing a connection to the vCenter
- Open the Cloud Panel.
- Make a note of the user name and password displayed in the Private Cloud > Access > vSphere area.
- To open the vSphere Client, click in the area Private Cloud > Access > vSphere > Admin Client: click on vSphere Client.
A new tab opens. - In the new tab, click on Advanced... .
- Click on Accept risk and continue.
- Click on START VSPHERE CLIENT (HTML5).
The login page opens in a new tab. - Enter the user name and password.
- Click on REGISTER.
Add an additional network interface to the VM that is connected to the management port group
To access the management level of your private cloud from one of your VMs, you must perform the following steps in the vCenter Manager:
- Click on the desired VM in the navigation bar on the left or create a new VM.
- Click on ACTIONS in the area to the top right of the VM name.
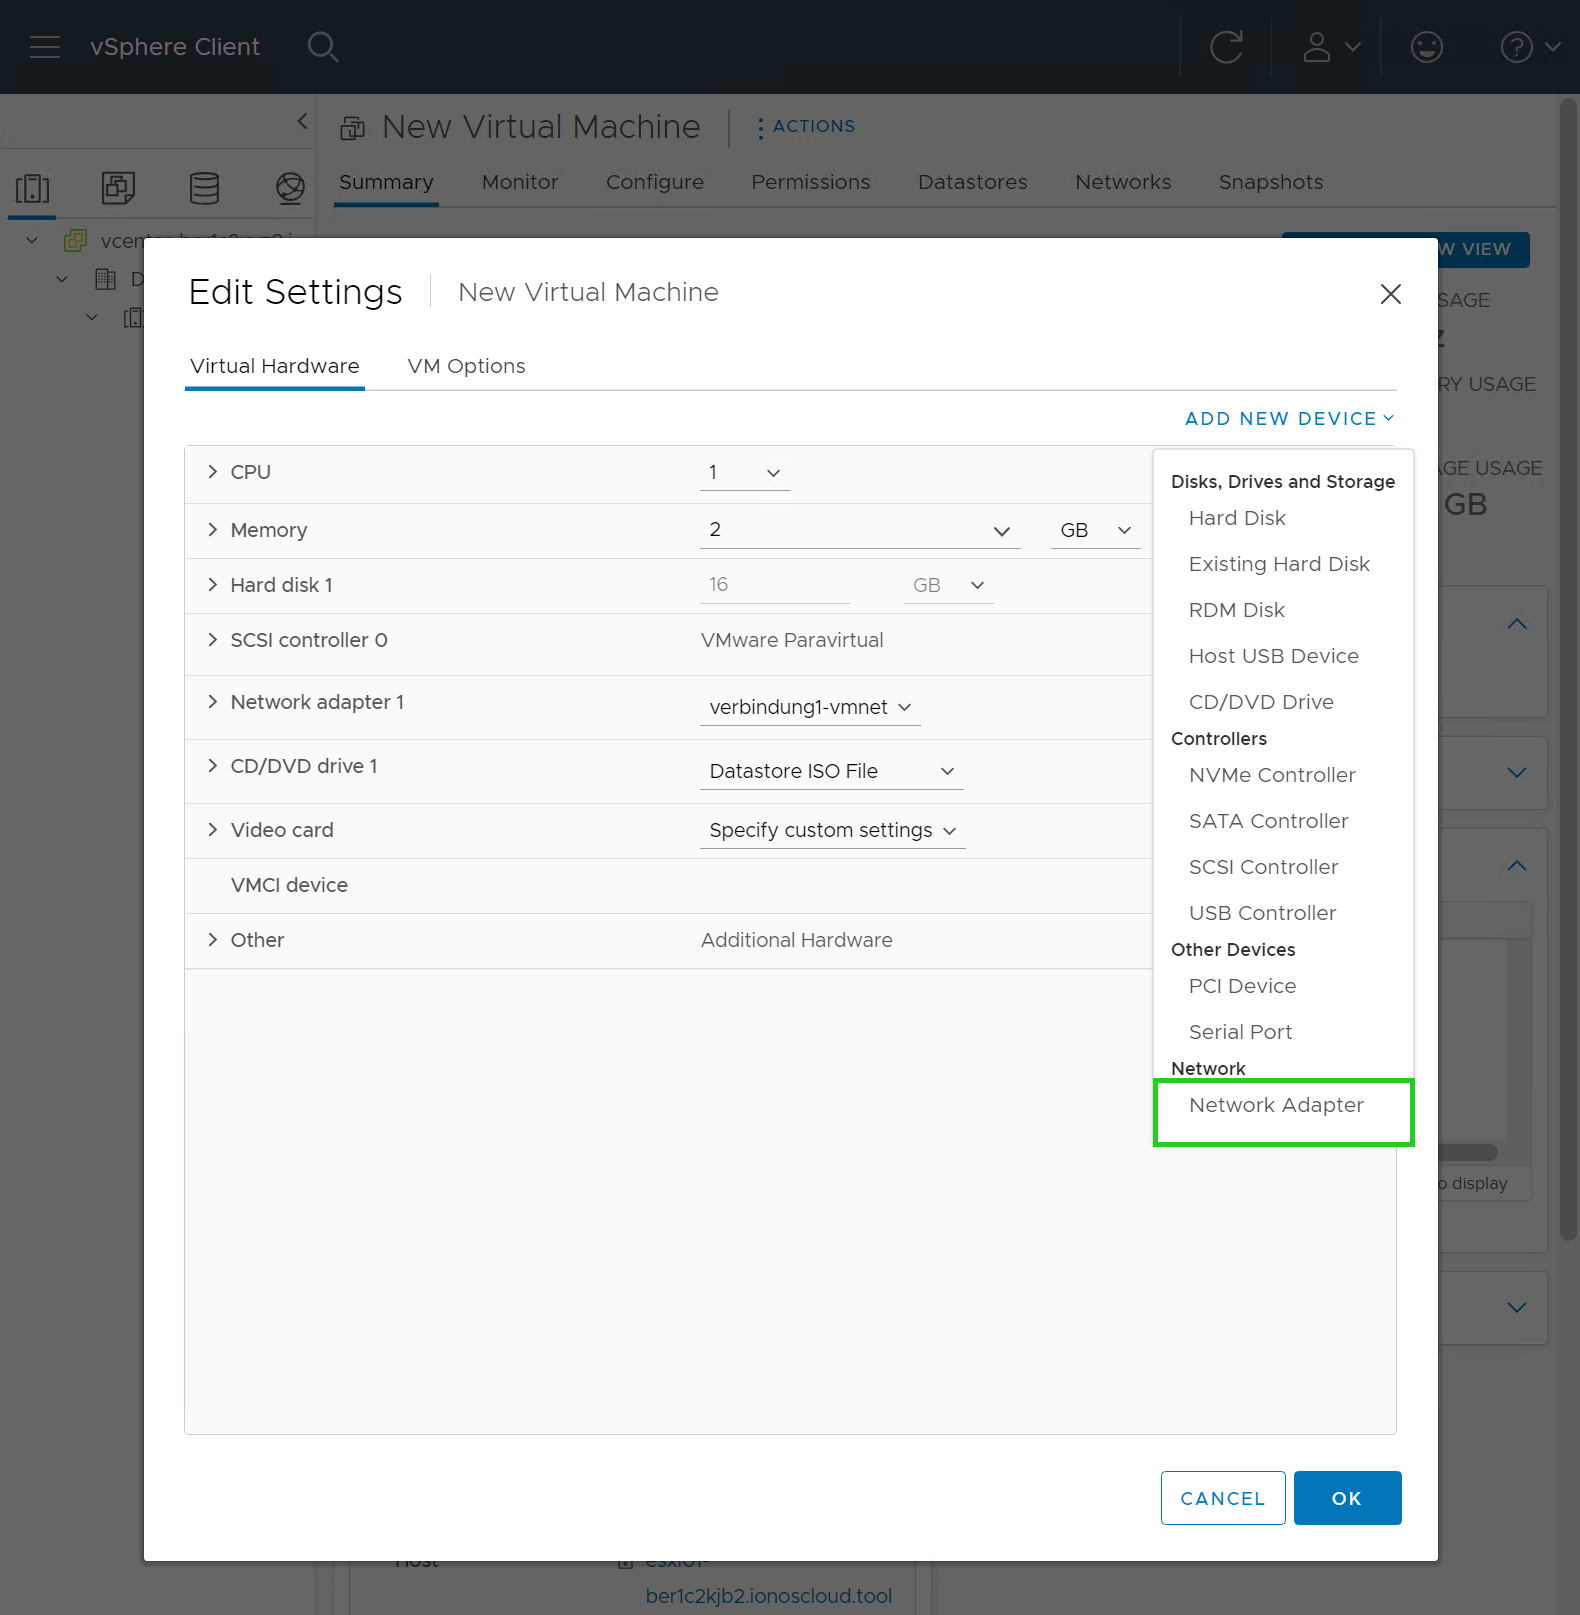
- Click on Edit Settings... .

- In the window that opens, click ADD NEW DEVICE in the top right-hand corner.
- Click on NETWORK ADAPTER.
- In the NEW NETWORK field, click on the displayed network name.
- Click on Browse.
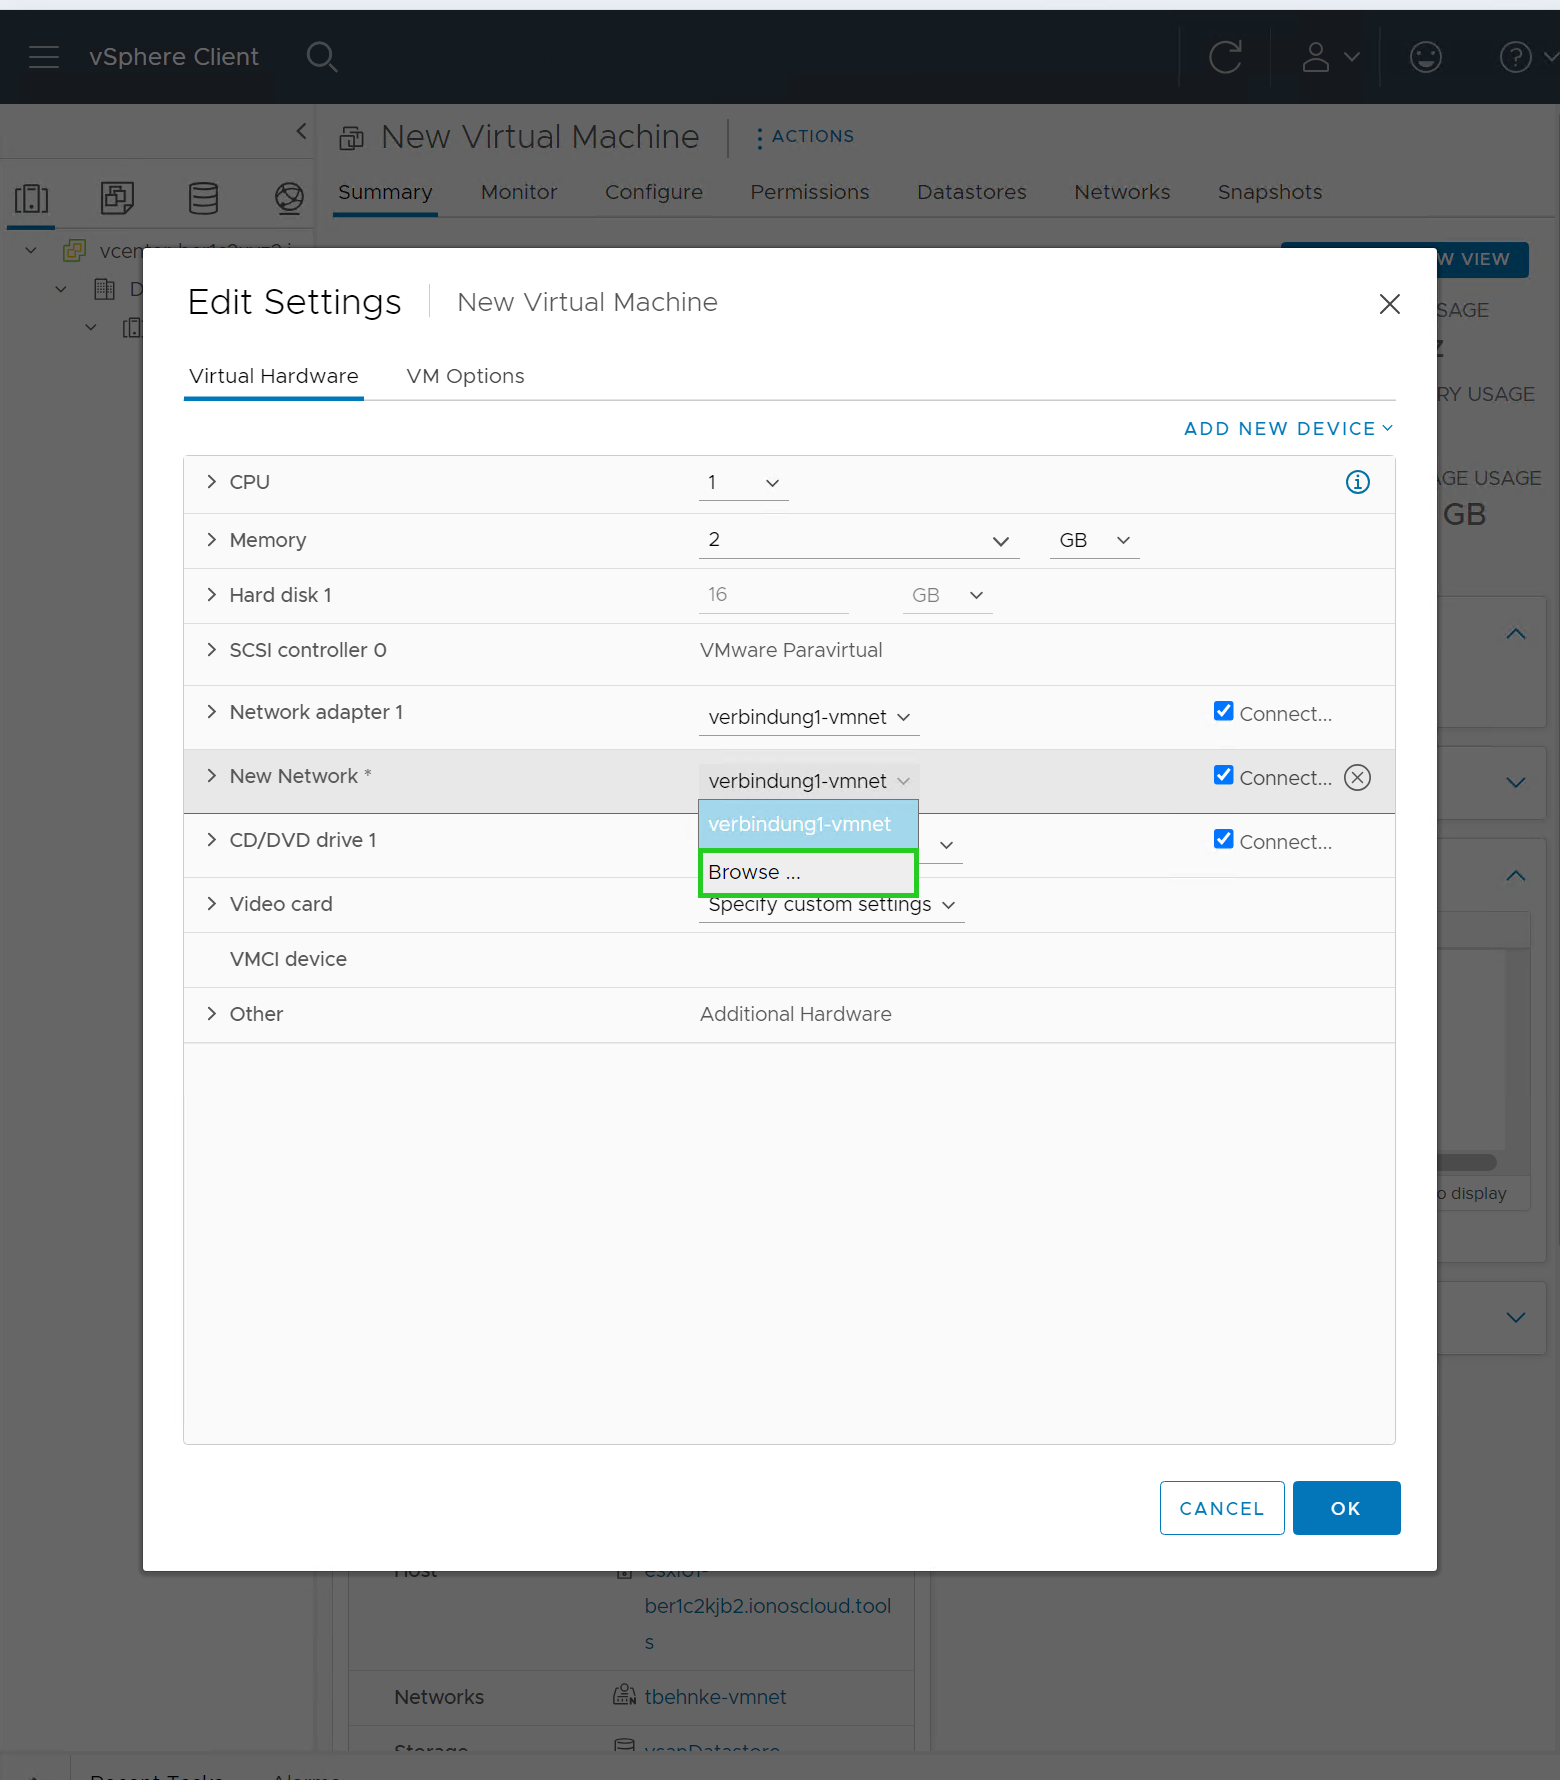
- Select the network adapter that has the same name as the noted port group. In this example, this is the network adapter mgmt2315.

- Click on OK.
- Click OK in the Edit Settings window.

- Then log into the VM and configure the network settings for the new network adapter. Use the IP address and subnet mask that you have noted. The configuration steps differ depending on the operating system installed.
Note
When configuring the network adapter, you may only use one of the 5 IP addresses displayed at Cloud Panel.