Private Cloud: Using BYOIP in NSX
NSX offers three primary objects. These allow you to use your own public IP addresses (BYOIP) within our NSX Private Cloud environment. To do this, proceed as follows:
Open NSX Manager
- Log in to your IONOS account.
Click on Menu > Servers & Cloud in the title bar.
Optional: If you have multiple server contracts, select the desired contract.
- Make a note of the user name and password displayed in the Private Cloud > Access > NSX Manager area.
- Establish a VPN connection to your private cloud.
- To open the NSX Manager, click on NSX Manager in the Cloud Panel in the Private Cloud > Access > vSphere > Admin Client area.
- Click on Advanced... .
- Click on Accept risk and continue.
- Enter the user name and password.
- Click on LOGIN.
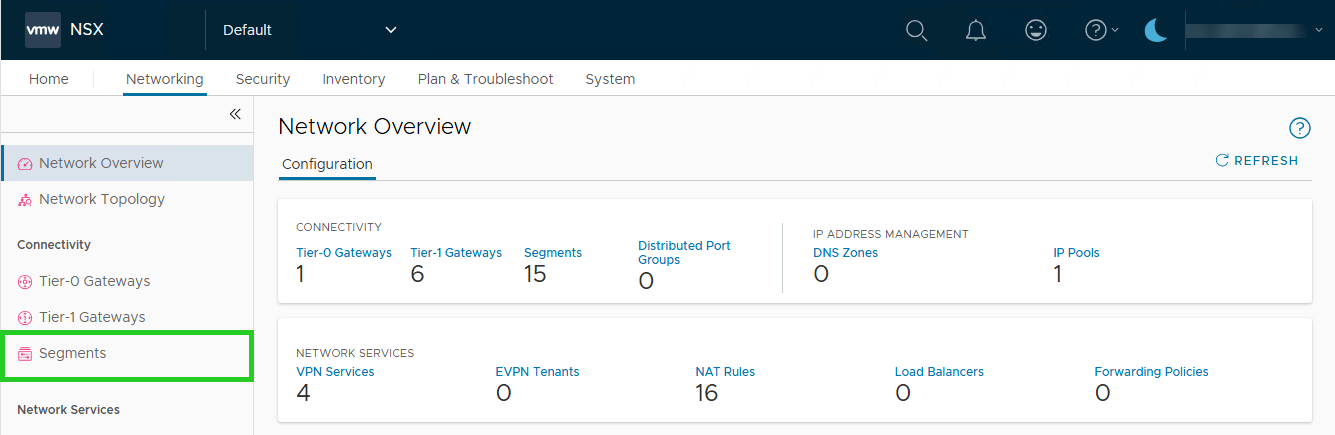
Configure NSX segments
NSX segments are a fundamental tool for network virtualisation in your private cloud environment.
NSX segments are virtual layer 2 domains. They enable the creation of isolated, logical networks. These segments can be linked to specific IP address ranges, enabling seamless integration into your existing IP addressing scheme. This also includes BYOIP (Bring Your Own IP) ranges.
Important considerations:
The subnet of the segment must be more specific than the BYOIP range. For example, a /24 BYOIP subnet can be subdivided into more specific subnets such as /25 or /26. In this example, the largest possible segment subnet would be /25.
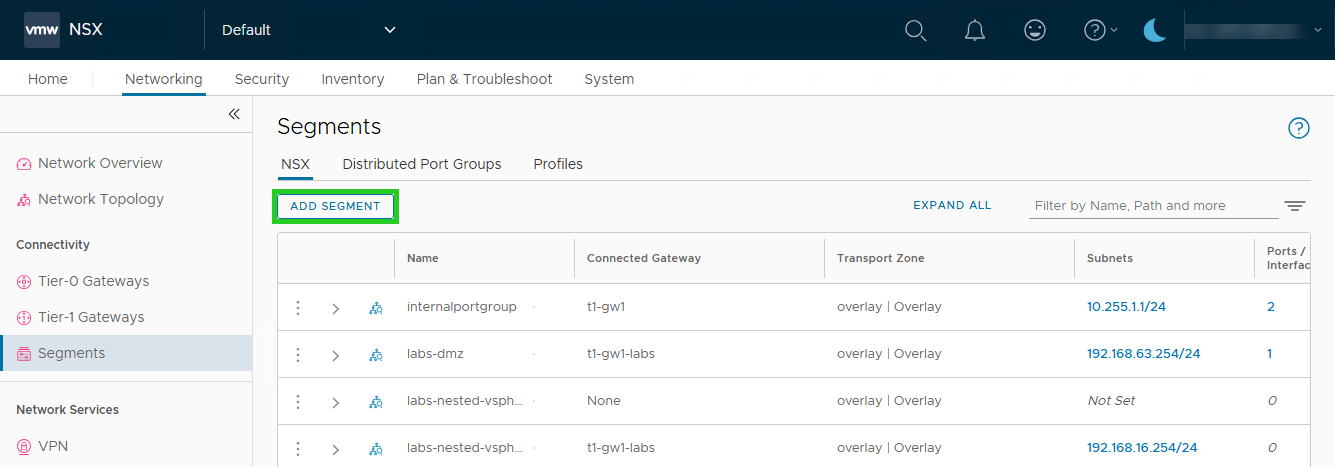
How to create a segment in NSX:
- Click on Networking in the menu bar at the top.
- Click Segments in the navigation bar on the left. The Segments area opens.
- Click on ADD SEGMENT.
- Enter a name for the segment in the Name column in the Segment name field.
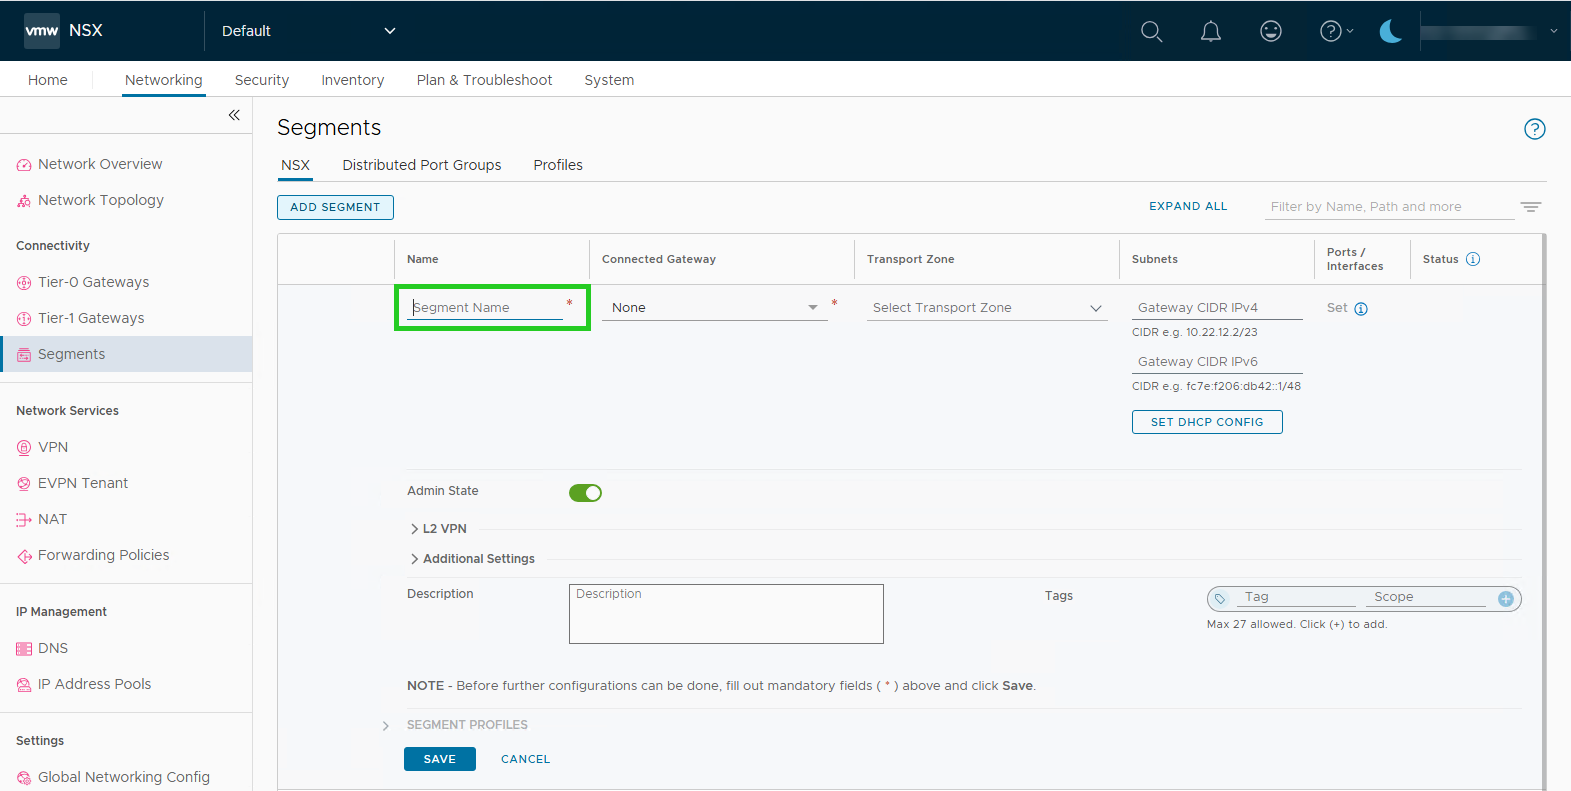
- In the Connected Gateway column in the None list, select the corresponding NSX-T Tier 1 gateway.
- In the Subnets column, define the subnet within the permitted range (e.g. /25 or smaller if your BYOIP is /24).
- Click SAVE to create a segment.
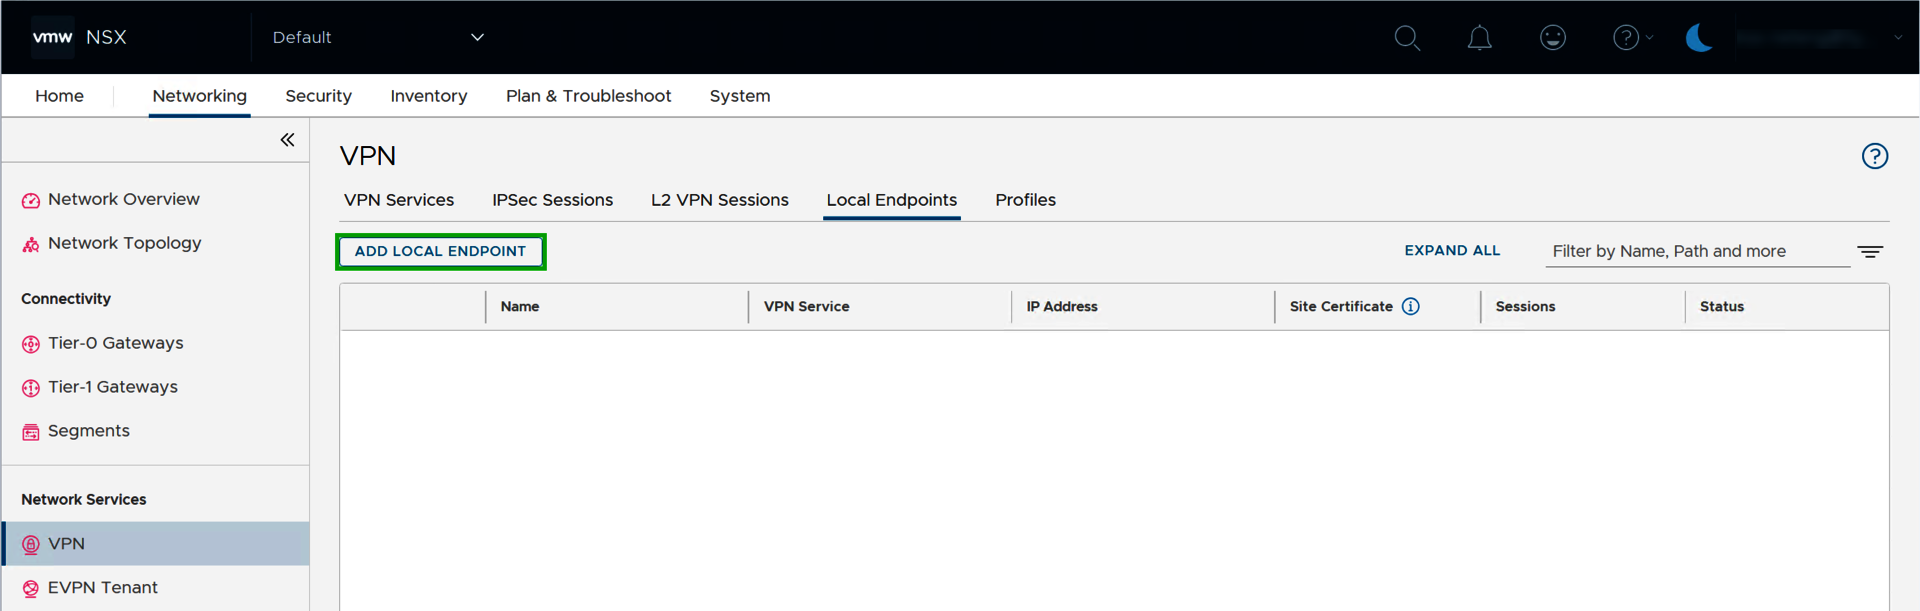
Configure local endpoints for VPN
Local endpoints enable VPN connectivity via the BYOIP area. To configure a local endpoint, proceed as follows:
- Click on Networking in the menu bar at the top.
- Select VPN in the navigation bar on the left. The VPN area opens.
- Click on the Local Endpoints tab.
- Click on ADD LOCAL ENDPOINT.
- Enter the desired name in the Name column in the Enter Name field.
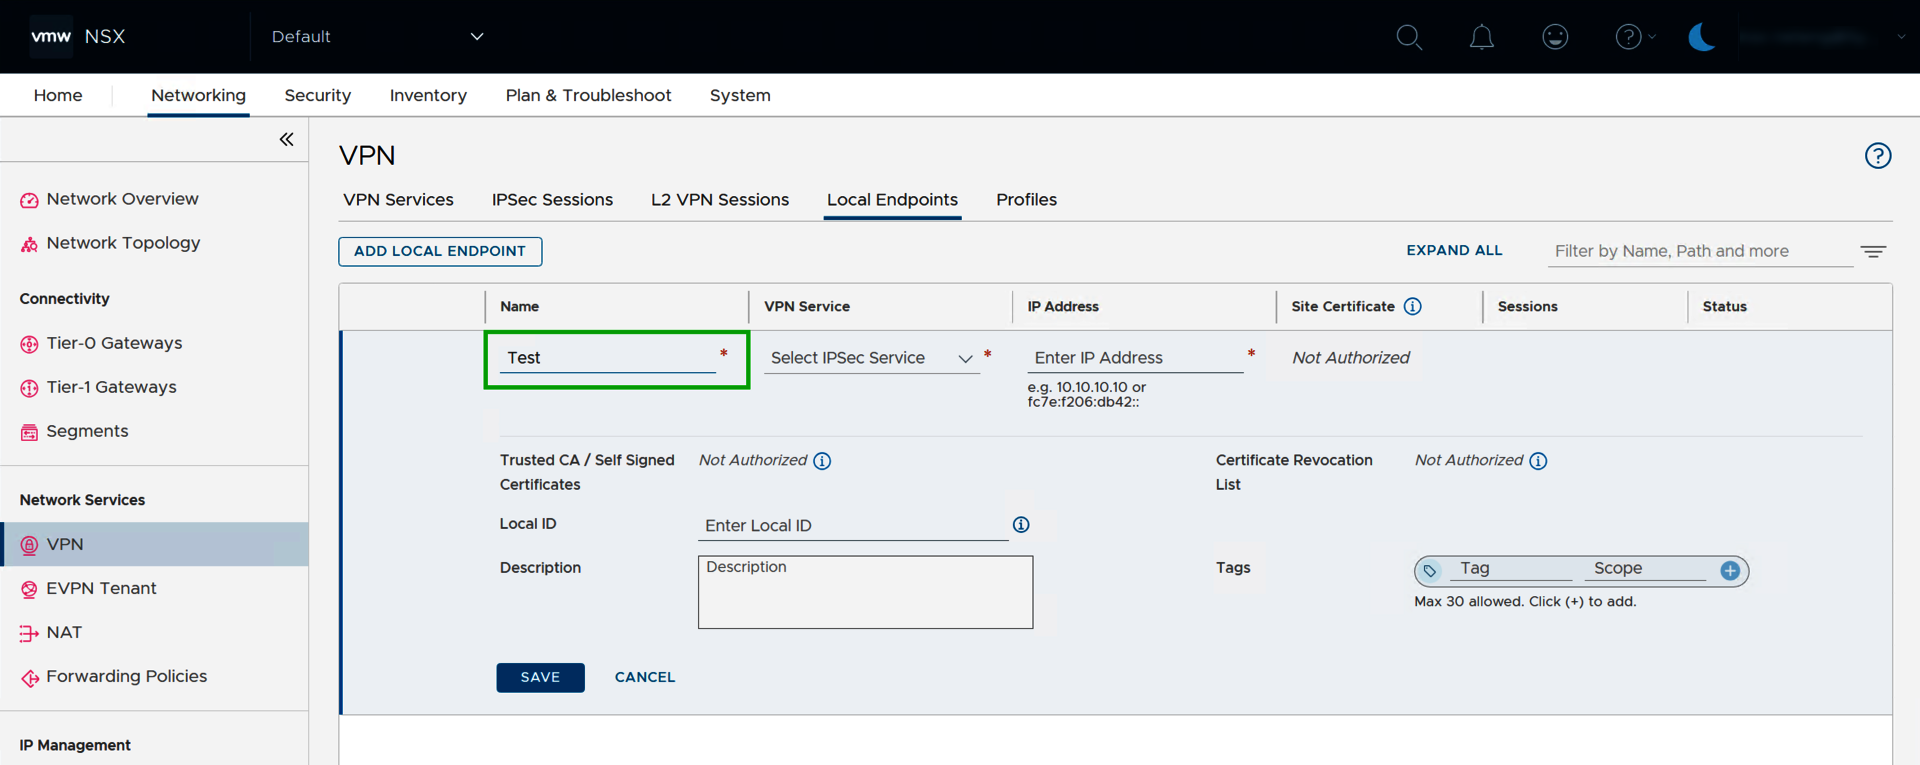
- Select the desired VPN service in the VPN Service column.
- In the IP Address column, enter the public IP address from your BYOIP area in the Enter IP Address field.
- Click SAVE to save the local endpoint.
- Use this local endpoint in your VPNs.
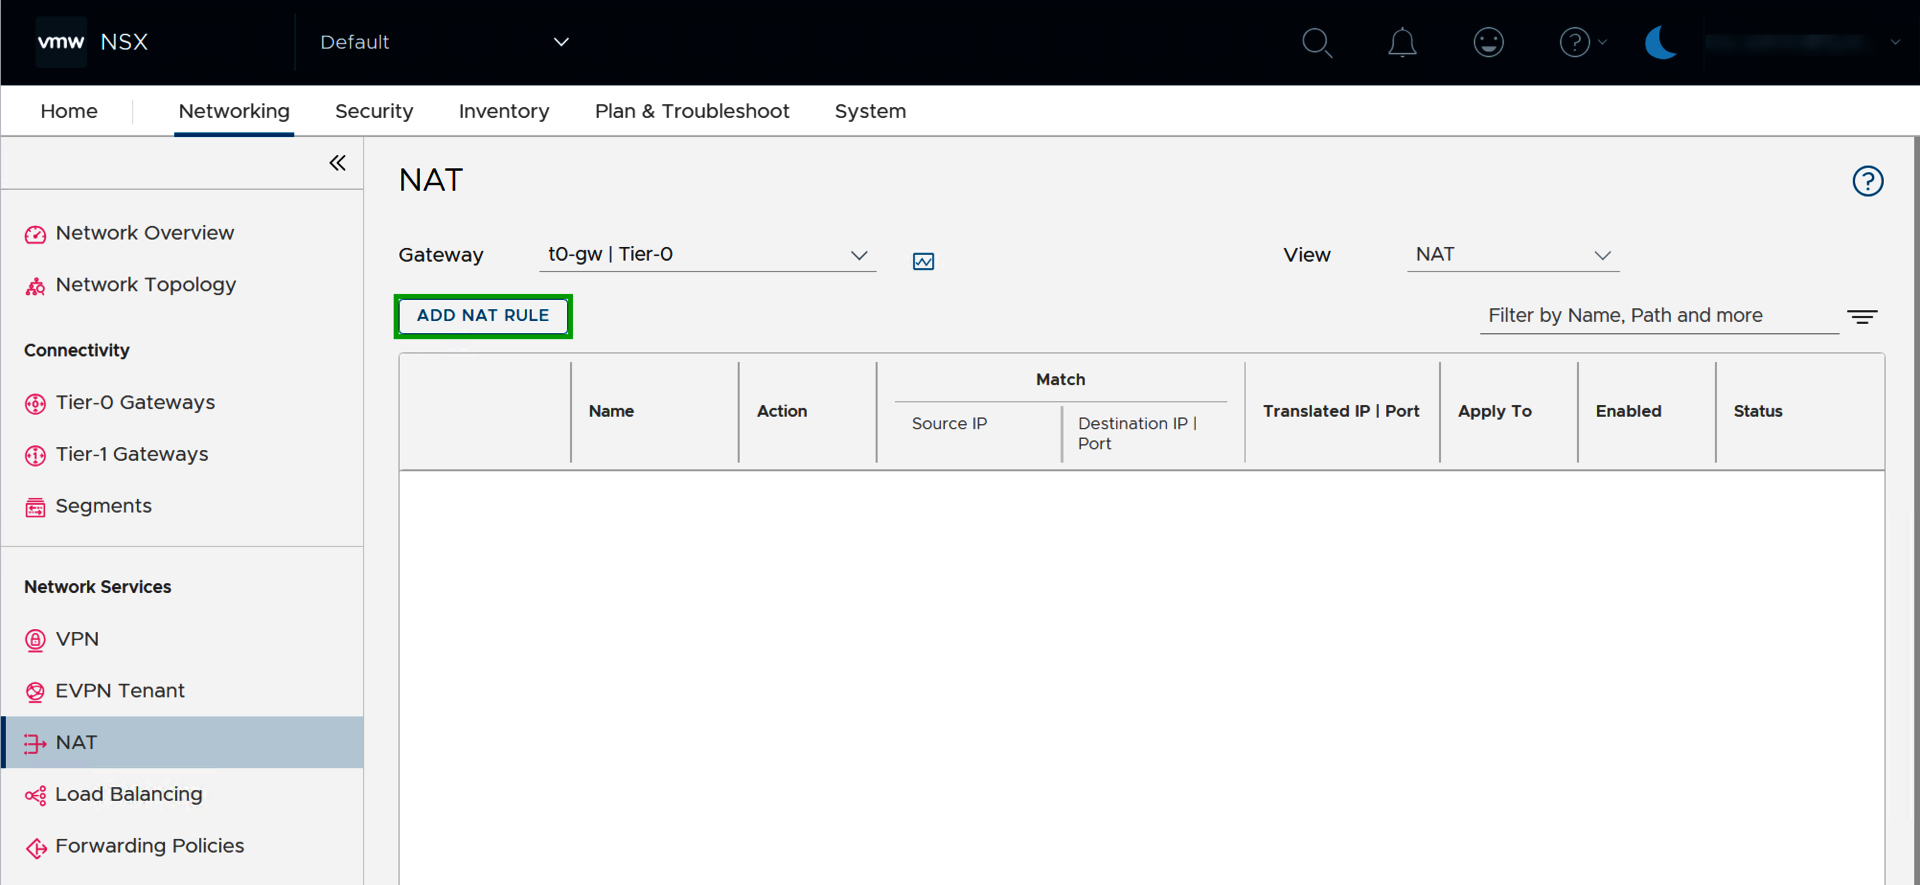
Configure SNAT or DNAT with BYOIP
Network Address Translation (NAT) enables external access to resources in your NSX environment. You can create Source NAT (SNAT) or Destination NAT (DNAT) rules to utilise your BYOIP range.
There are two main types of NAT rules that you can configure to utilise your Bring-Your-Own-IP (BYOIP) range:
- Source NAT (SNAT): SNAT is normally used when traffic from your internal network accesses external resources. The source IP address of the internal packets is replaced by a public IP address from your BYOIP pool. This allows external parties to communicate with your internal resources without directly revealing their private IP addresses.
- Destination NAT (DNAT): DNAT, on the other hand, is used to translate a public IP address into a private IP address. This is usually required to allow external access to services hosted in your NSX environment. When external traffic for a public IP address arrives in your BYOIP area, DNAT translates the destination IP. This changes it to the private IP address of the internal server hosting the service.
To configure SNAT/DNAT, proceed as follows:
- Click on Networking in the menu bar at the top.
- Click on NAT in the navigation bar on the left. The NAT area opens.

- Select the corresponding Tier 1 gateway in the Gateway field.
- Click on ADD NAT-RULE.
- Enter the desired name in the Name column in the Enter Name field.
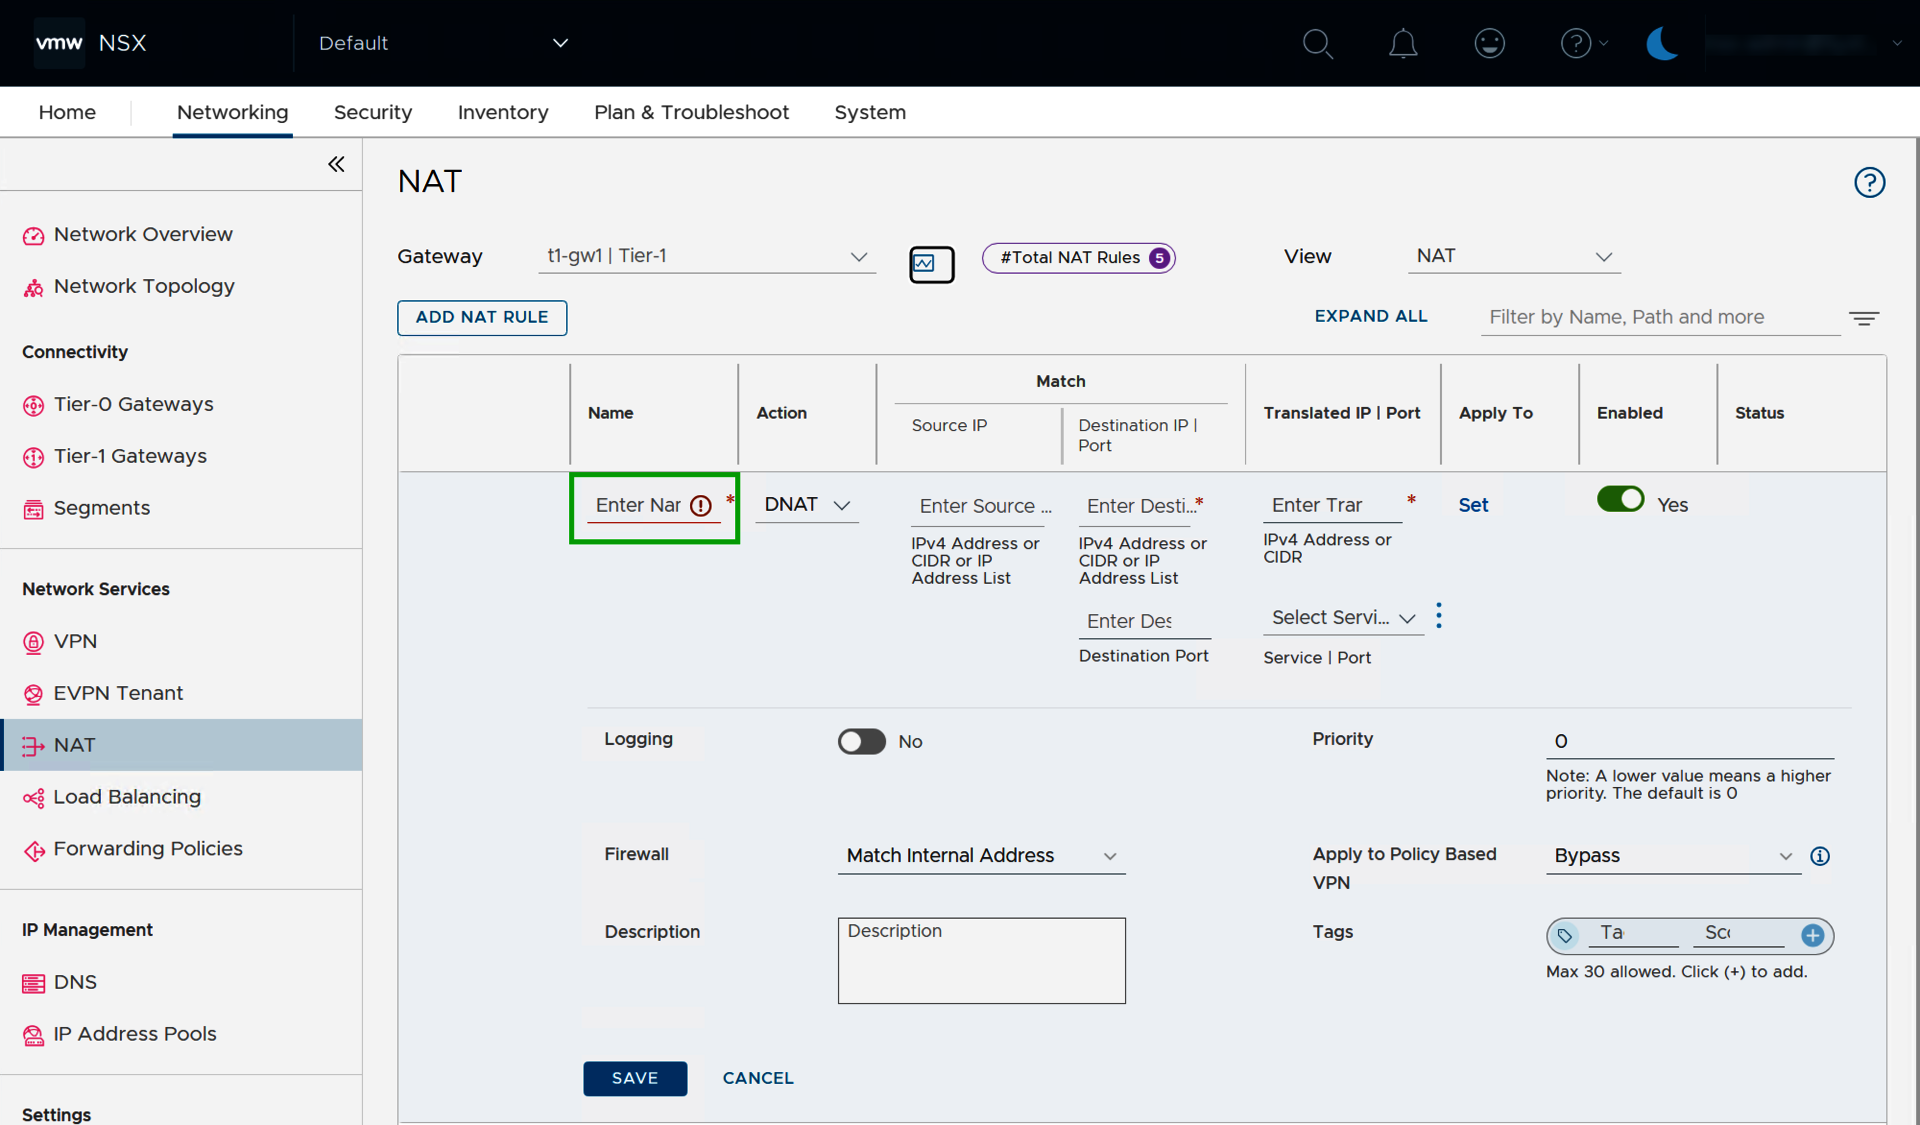
- In the Action column, select either SNAT or DNAT.
- In the Source IP column, enter the public IP address from your BYOIP area in the Enter Source IP field.
- In the Destination IP | Port column, enter the internal IP address (for DNAT) or the internal network (for SNAT).
- Click on SAVE.