Migrated Cloud Servers: Editing load balancer
For migrated Cloud Servers, which are managed in the Cloud Panel
This article explains how to change the configuration of an existing load balancer.
- Log in to your IONOS account.
Click on Menu > Servers & Cloud in the title bar.
Optional: If you have multiple server contracts, select the desired contract.
- Click Network > Load Balancer in the navigation bar on the left. The Load Balancers page opens.
- Click on the desired load balancer in the list. The load balancer properties are displayed.
You can set the rules in the Configuration section.
To save a rule or create a new rule, click on the plus sign (Add rule tooltip).
To edit a rule, click on the pencil icon (Edit rule tooltip).
If you want to delete a rule, click on the minus sign (Remove rule tooltip).
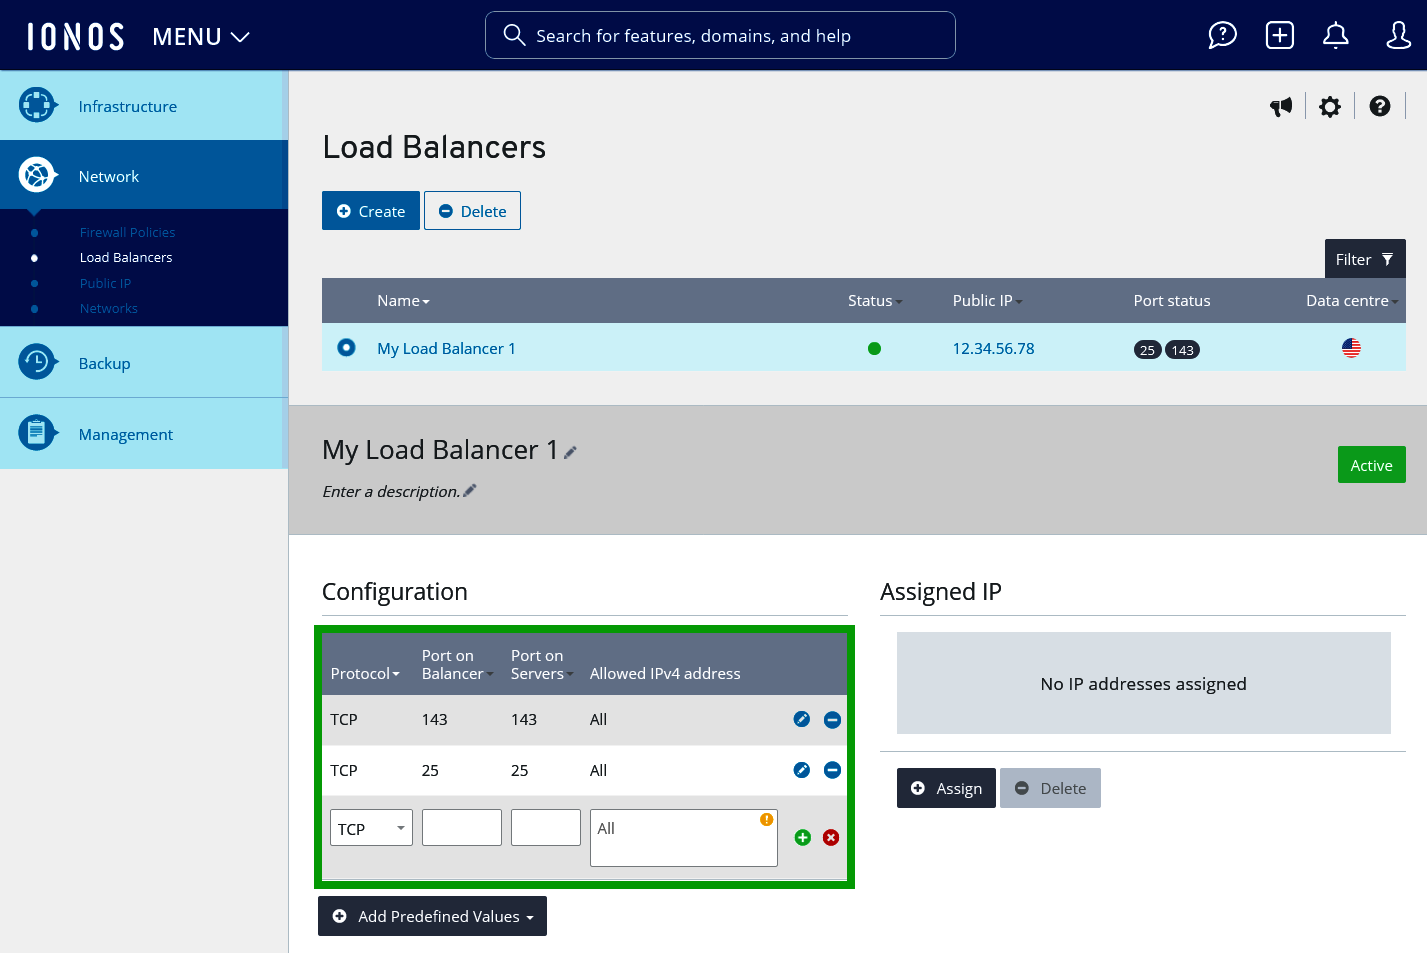
In the Assigned IP area, you can assign IP addresses from various Cloud Servers, Dedicated Servers, and networks to the load balancer. To assign these, click on Assign. All servers and networks that are not yet assigned to a load balancer are displayed.
Select the desired servers and/or networks.
Click on Save changes.
In the Properties area, you can customise the configured health checks, persistence, and balancing procedures. To change the health check, persistence, or balancing procedure, click on the pencil icon. A window then opens.
To save the changes, click on Apply changes in the window.