Deploying, configuring, and using VMware Cloud Director Availability (VCDA)
VMware Cloud Director Availability™ is a Disaster Recovery-as-a-Service (DRaaS) solution. Whether deployed between provider clouds or on-premises, VMware Cloud Director Availability protects vApps and virtual machines with asynchronous replication, migrates them, performs failover, and reverses failovers.
This article describes in detail the process of deploying VCDA in an IONOS Private Cloud and in an on-premises vCenter Server. You will also learn how to establish a connection between the two environments. This connection facilitates the migration and protection of VMs between the two environments. In the following, the VCDA appliance installed in the Private Cloud is referred to as VCDA-CLOUD, and the locally installed appliance as VCDA-CUST.
Target architecture
The target architecture describes the specific TCP ports that are required for communication between the components of VMware vSphere Replication. This information is crucial for the correct configuration of your firewalls to ensure successful replication of virtual machines between your local data centre (on-premises site) and a cloud site, such as IONOS Private Cloud .
This is the target architecture as described in the VMware documentation:
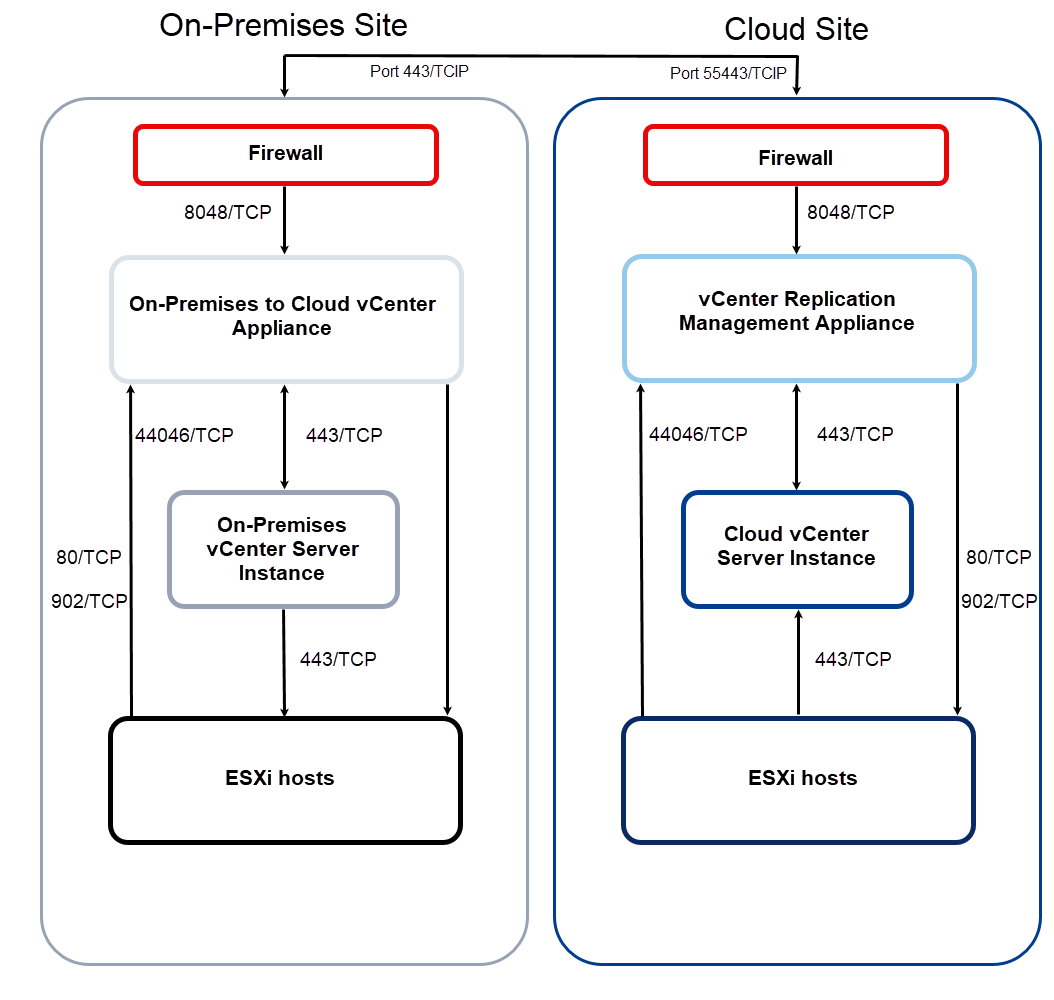
The underlying diagram visualises a typical replication architecture between two sites. In this setup, a local data centre (on-premises site) is connected to a hosted Private Cloud environment (cloud site), for example IONOS Private Cloud . The primary aim of this configuration is to establish a robust disaster recovery strategy. Productive virtual machines running on the on-premises infrastructure are continuously replicated to the cloud environment. In the event of a serious failure at the primary site, these replica VMs can be activated at the cloud site and operations can be resumed quickly, minimising downtime and data loss.
The architecture is fundamentally symmetrical.
A similar set of core components exists at both locations - on-premises and in the cloud:
Components at the on-premises location (source location)
Firewall: Secures the site's network, and controls inbound and outbound traffic.
On-Premises to Cloud vCenter Appliance: An appliance deployed on-premises to replicate vSphere workloads between an on-premises vCenter Server instance and a cloud vCenter Server site.
On-Premises vCenter Server Instance: The central instance for managing virtual machines, multiple ESXi hosts, and all dependent components from a single location.
ESXi hosts: The physical servers on which the virtual machines are running, and from/to which replication data is sent/received.
For successful replication, these components must be able to communicate with each other via defined network ports.
Components at the cloud location (target location)
Firewall: Secures the network of the cloud environment, and controls incoming and outgoing data traffic.
vCenter Replication Management Appliance: An appliance that manages replications in a VMware Cloud Director Availability instance. It manages the inbound replications and maintains the metadata of the replica VMs created.
Cloud vCenter Server Instance: The central instance for managing virtual machines, multiple ESXi hosts, and all dependent components from a single location.
ESXi hosts: The hypervisors at the target location. They provide the storage resources (datastores) on which the replica VMs are stored. In the event of a failover, these hosts run the restored virtual machines.
Cross-site communication
The following ports are used for communication between the on-premises site (firewall) and cloud site (firewall):
Outgoing from the on-premises site: Port 443/TCP
Outgoing from the cloud site: 55443/TCP
Internal communication at the on-premises site
Path 1: Communication from the firewall to the on-premises Cloud vCenter Appliance
Port: 8048/TCP
Path 2: Communication between on-premises to Cloud vCenter Appliance and On-Premises vCenter Server instance
Port: 443/TCP
Path 3: Communication between on-premises to Cloud vCenter Appliance and ESXi hosts
Port: 80/TCP and Port 902/TCP
Path 4: Communication from ESXi hosts to on-premises vCenter Server
Port: 443/TCP
Path 5: Communication between ESXi hosts and on-premises to Cloud vCenter Appliance
Port: 44046/TCP
Internal management traffic at the cloud location
Path 1: Communication from the firewall to the vCenter Replication Management Appliance
Port: 8048/TCP
Path 2: Communication between vCenter Replication Management Appliance and Cloud vCenter Server instance
Port: 443/TCP
Path 3: Communication from vCenter Replication Management Appliance to ESXi hosts
Port: 80/TCP and Port 902/TCP
Path 4: Communication from ESXi hosts to Cloud vCenter Server instance
Port: 443/TCP
Path 5: Communication from ESXi hosts to vCenter Replication Management Appliance
Port: 44046/TCP
Note
The Private Cloud configuration publishes the VCDA CLOUD appliance on the main IP address of the private cloud and port 55443 to avoid conflicts with other customer configurations within the platform.
VCDA CLOUD provision
The installation and configuration of the VCDA-CLOUD appliance in the Private Cloud is fully automated. Only one parameter is required for this process: the public IP address via which VCDA-CUST reaches the Private Cloud appliance on port 55443.
To activate the VCDA option, complete the following:
- Log in to your IONOS account.
In the title bar, click on Menu > Servers & Cloud.
Optional: Select the desired Server & Cloud contract. The Cloud Panel opens.Click on Deactivated in the VCDA field in the Access area of Cloud Panel. A window opens.
Select the Enabled option and click Confirm changes.
Enter the public IP address via which the local device should reach the VCDA in its private cloud in the Public IP of the client VCDA field.
Download on-premises VCDA (VCDA-CUST)
Read the VMware Broadcom documentation:
Register on the following Broadcom support page. To do this, click on Register in the menu bar and follow the instructions.
- After registering, log in to the page https://support.broadcom.com.
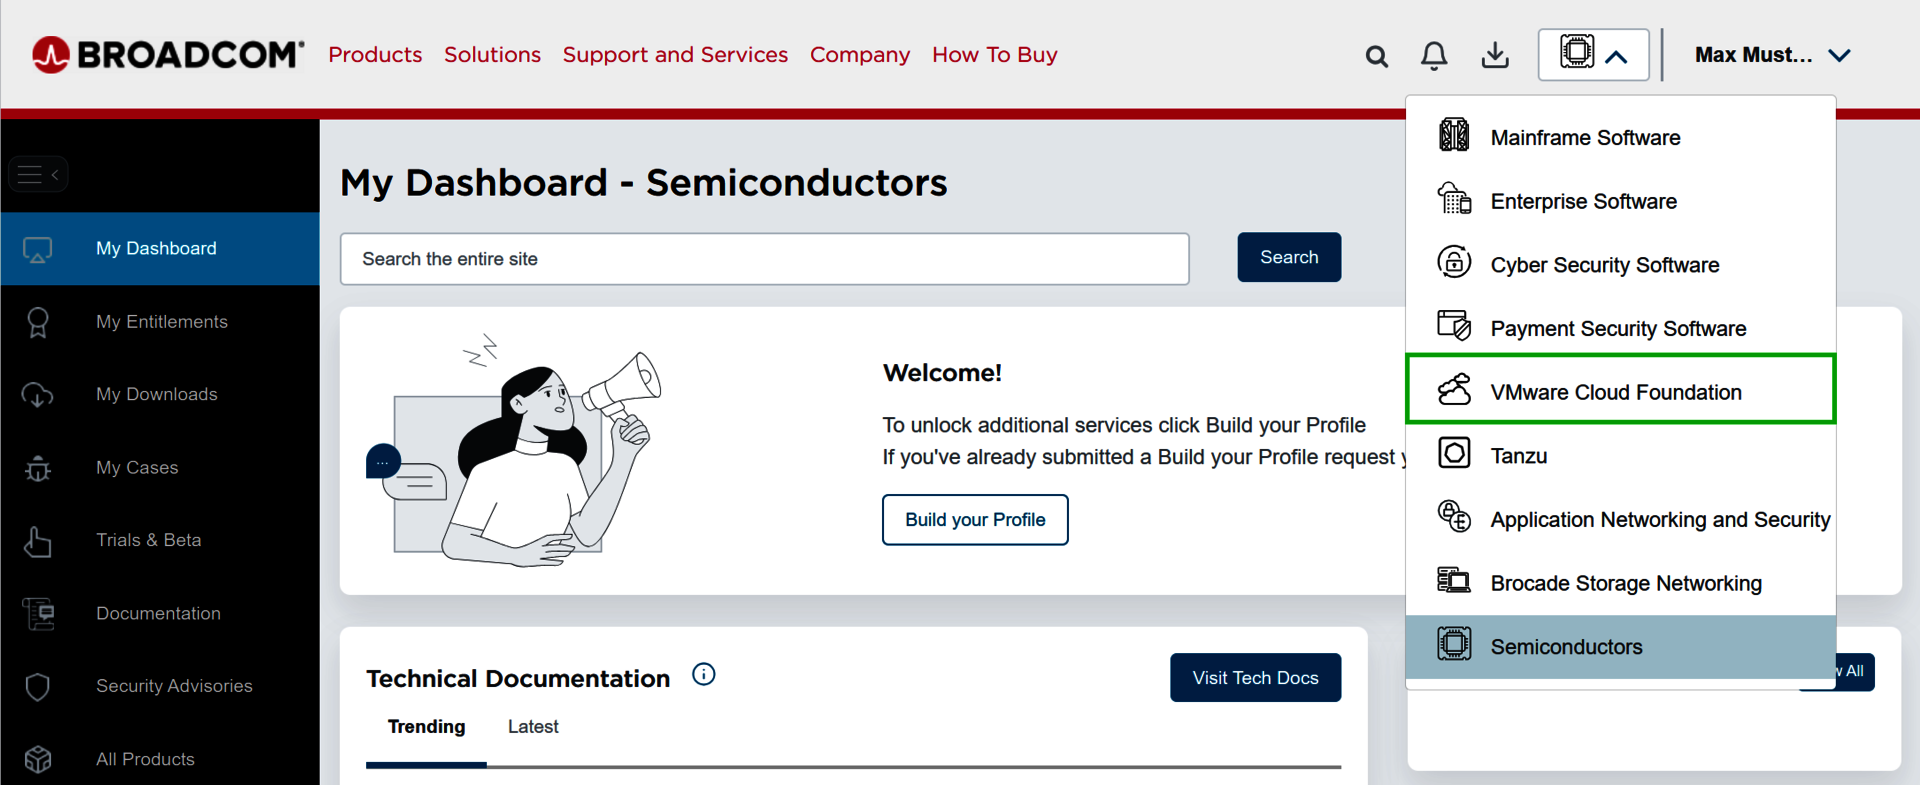
- Click on the processor symbol in the menu bar to the left of the name.
- Select the VMware Cloud Foundation menu item from the list.
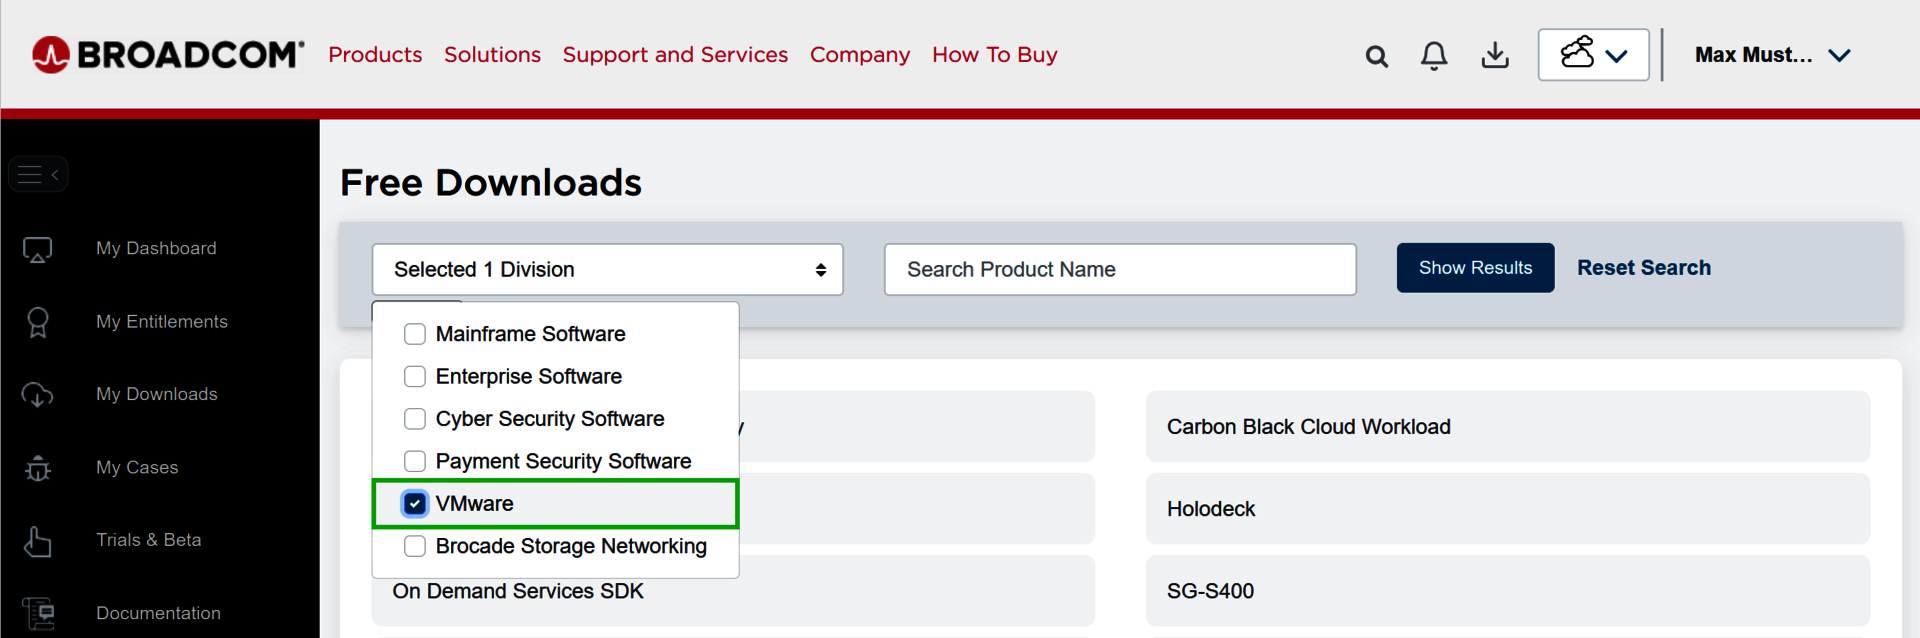
- Open the URL https://support.broadcom.com/group/ecx/free-downloads. The Free Downloads page opens.
- Click on the All Divisions field and select VMware from the list.
- Enter the search term VMware Cloud Director Availability in the Search Product Name field on the page and click Show Results.
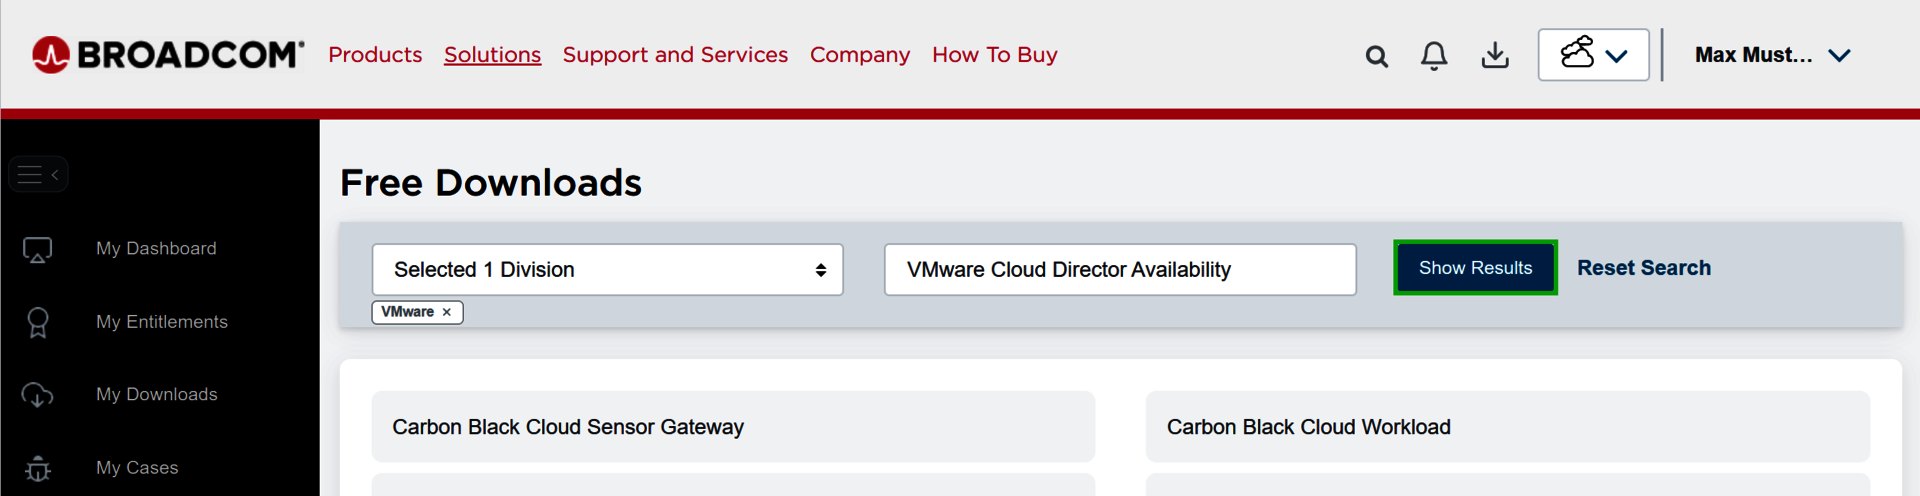
- Click on VMware Cloud Director Availability.

- Click on Standard. The VMware Cloud Director Availability page opens.

- Click on 4.7.x.
- Check that VMware Cloud Director On-Premise Appliance is displayed as the title.
- Read and accept the terms of use.
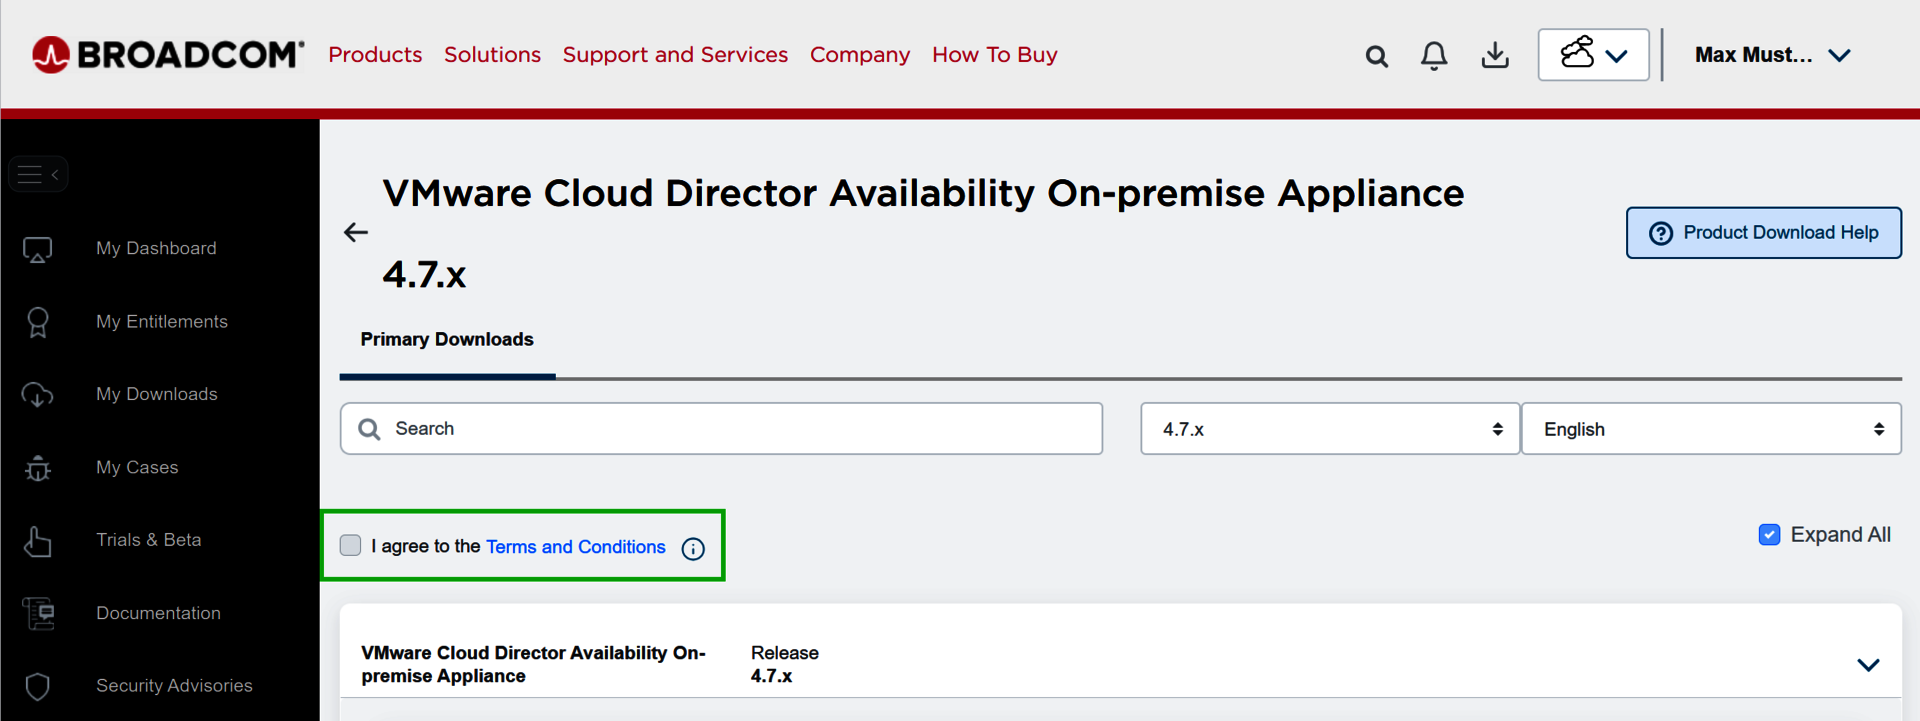
- Download the latest version of the VMware Cloud Director On-Premise Appliance.
On-premises VCDA deployment (VCDA-CUST)
Deploy VCDA
- Open the vSphere Client. You can find instructions in the article Opening vSphere Client.
- Log in to the vSphere Client.
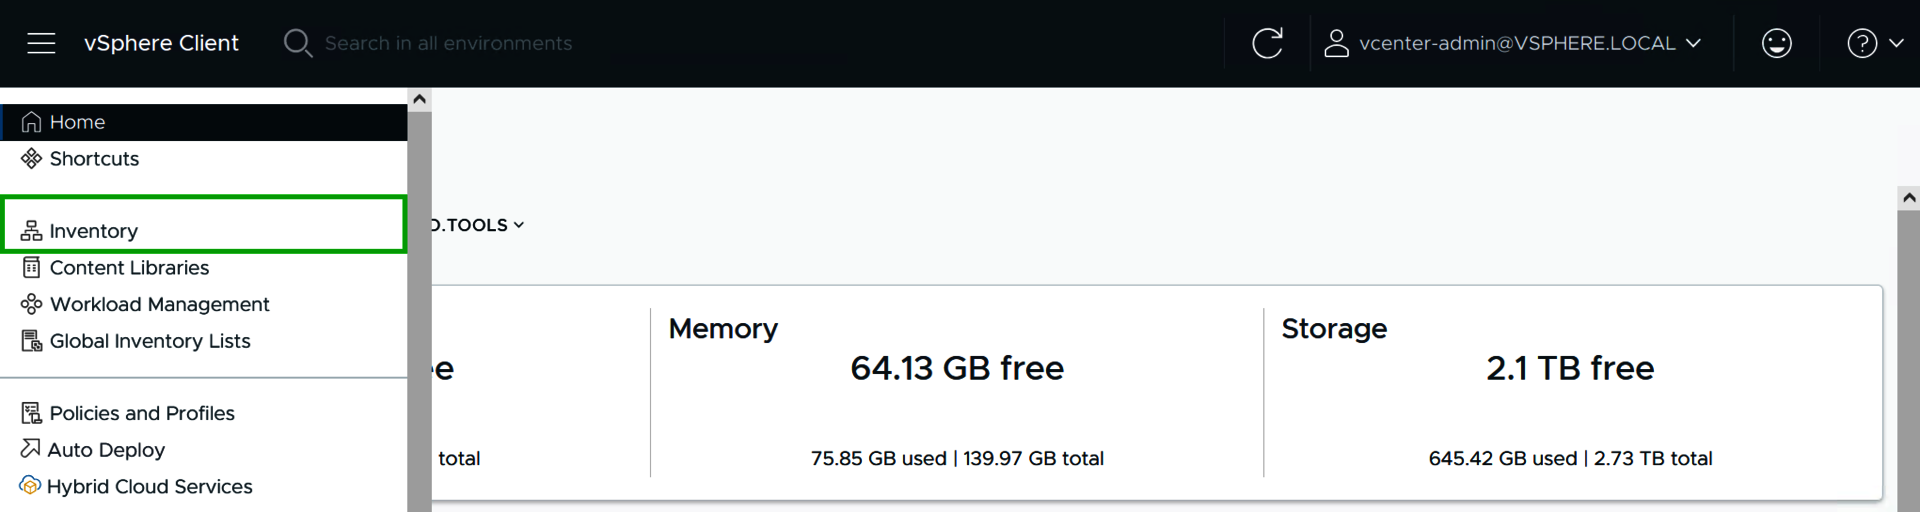
- Click on the hamburger menu in the menu bar. A list opens.
- Click on Inventory in the list.
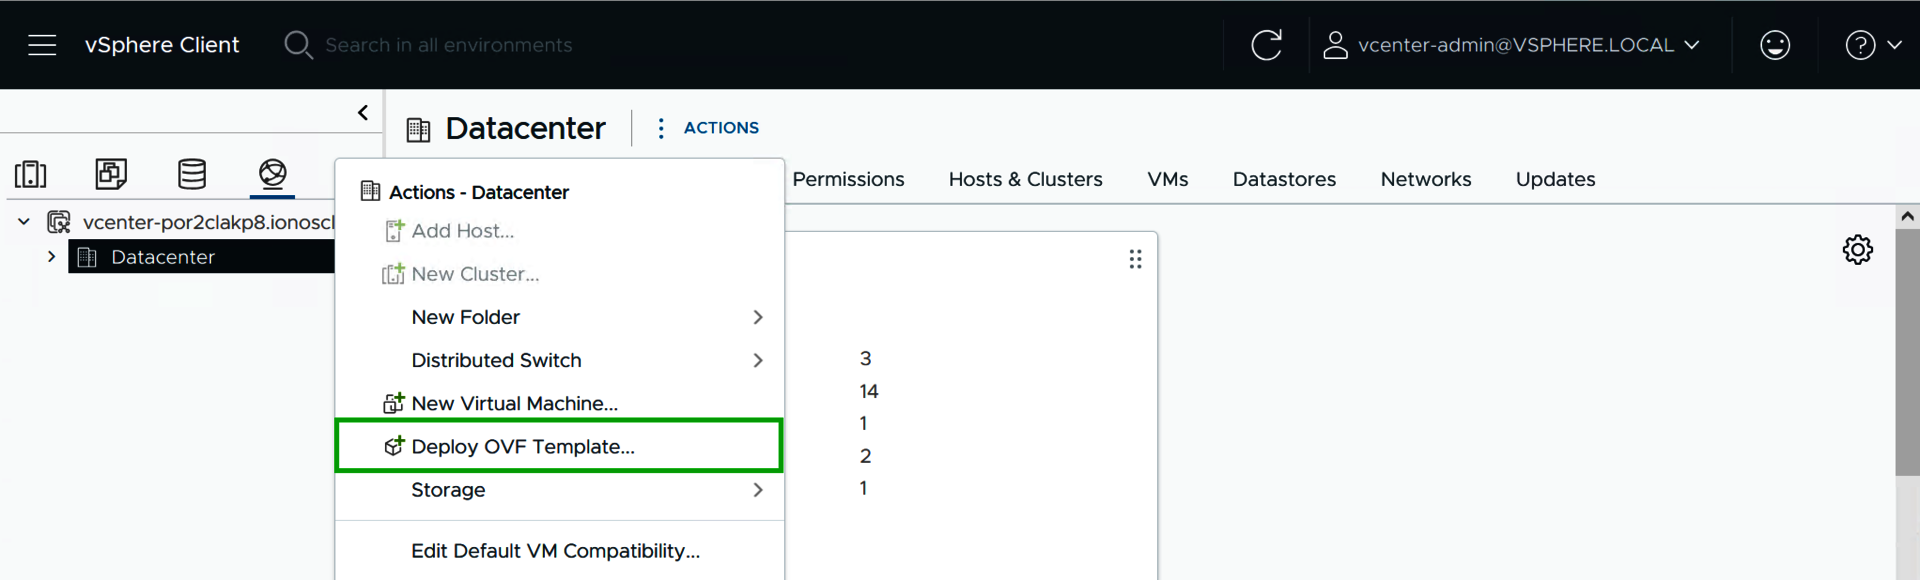
- Right-click on the desired data centre in the navigation bar on the left.
- Click on Deploy OVF Template.
- In step 1, click Upload Files under Local file in the Select an OVF Template area and follow the next steps.
- Select the installation file and click Open.
- Click NEXT in the Deploy OVF Template window. The Select a name and folder step is displayed.
- In the Select a name and folder step, enter the desired name in the Virtual Machine Name field.
- In the Select a name and folder step, select the data centre in the Select a location for the virtual machine area.
- Click on NEXT. The Select a compute resource step is displayed.
- Select the target resource.
- Click on NEXT. The Review details step is displayed.
- Check the information in the Review details step.
- Click on NEXT. The License agreements step is displayed.
- Read and accept the license conditions.
- Click on NEXT. The Configuration step is displayed.
- In the Configuration step, select the On-Premises to Cloud vCenter Replication Appliance option in the Configuration area.
- Click on NEXT. The Select storage area opens.
- Select the desired settings and the desired storage space.
- Click on NEXT. The Select networks area opens.
- Select the desired network and the desired settings.
- Click on NEXT. The Customize template area opens.
- Enter the following information in the Customize template step:
Root Password
NTP Server
Hostname
Address (CIDR notation, e.g. 192.168.1.30/24)
Gateway
MTU
DNS Servers - Click on NEXT.
- Once the device provisioning is complete, switch on the VM.
VCDA Setup
- Log in via the web interface https://VCDA-CUST-IP with the specified password.
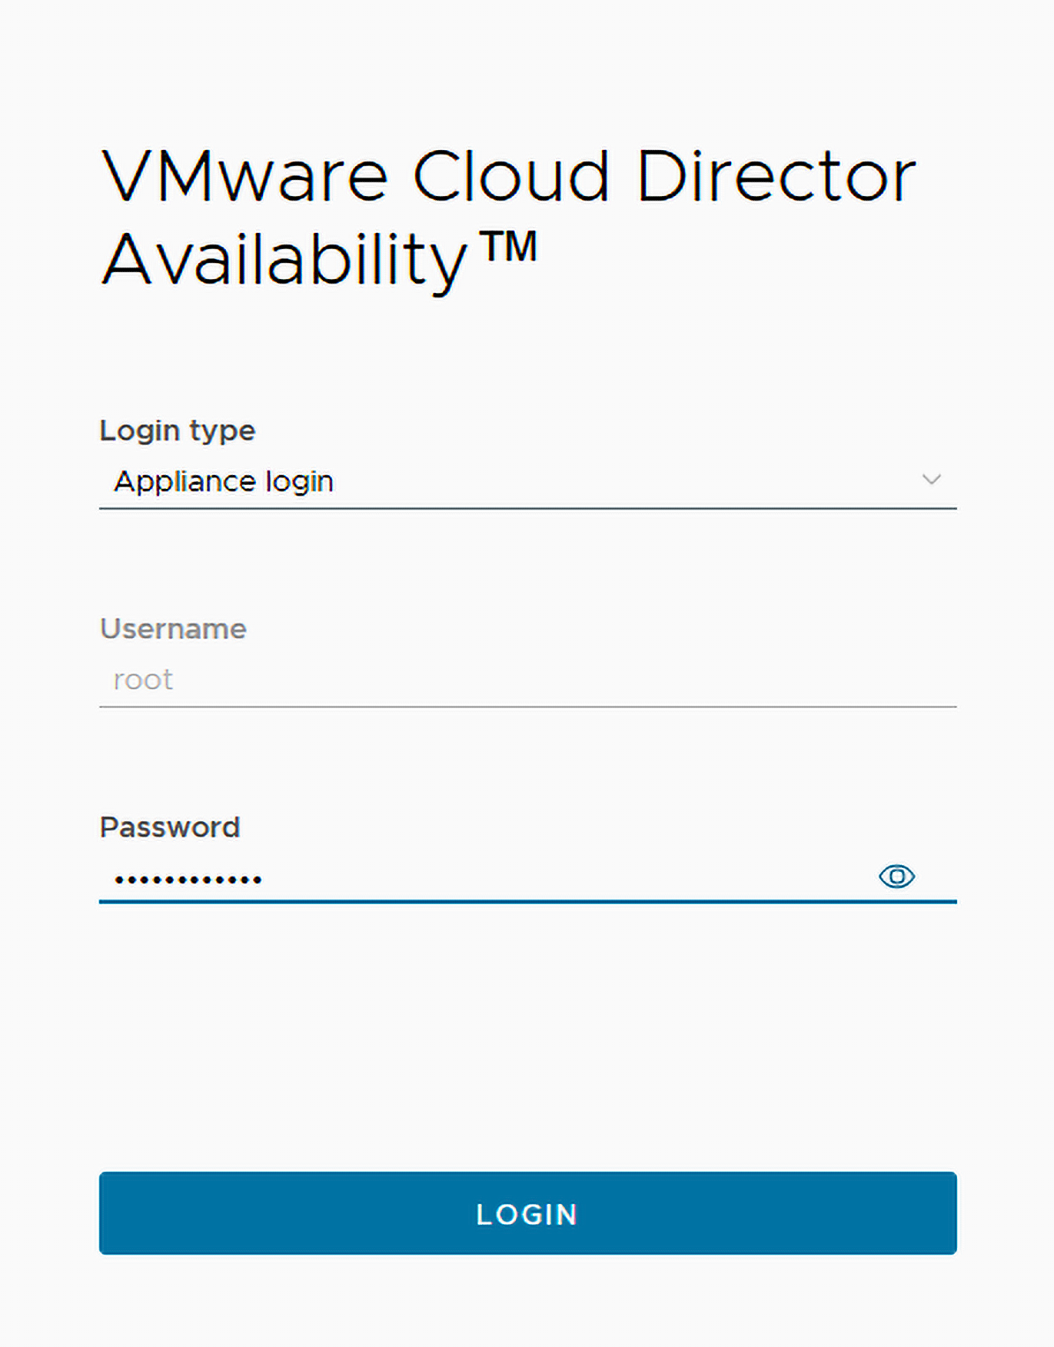
- Change the root password when you log in for the first time.
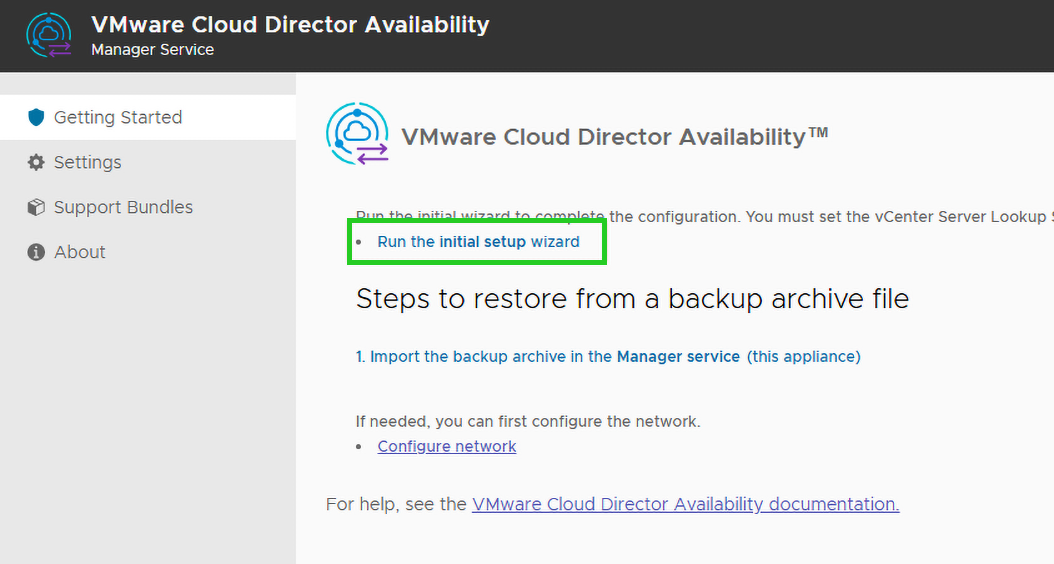
- In the VMware Cloud Director Availability window, click Run the initial setup wizard in the Getting Started area. The Initial Setup window opens.
- Enter the following information in the Initial Setup window:
Site name: Descriptive name
Lookup Service Address: https://VCENTER-cust-IP/lookupservice/sdk
SSO Admin Username: User with administrator rights
Password: Password of the user account
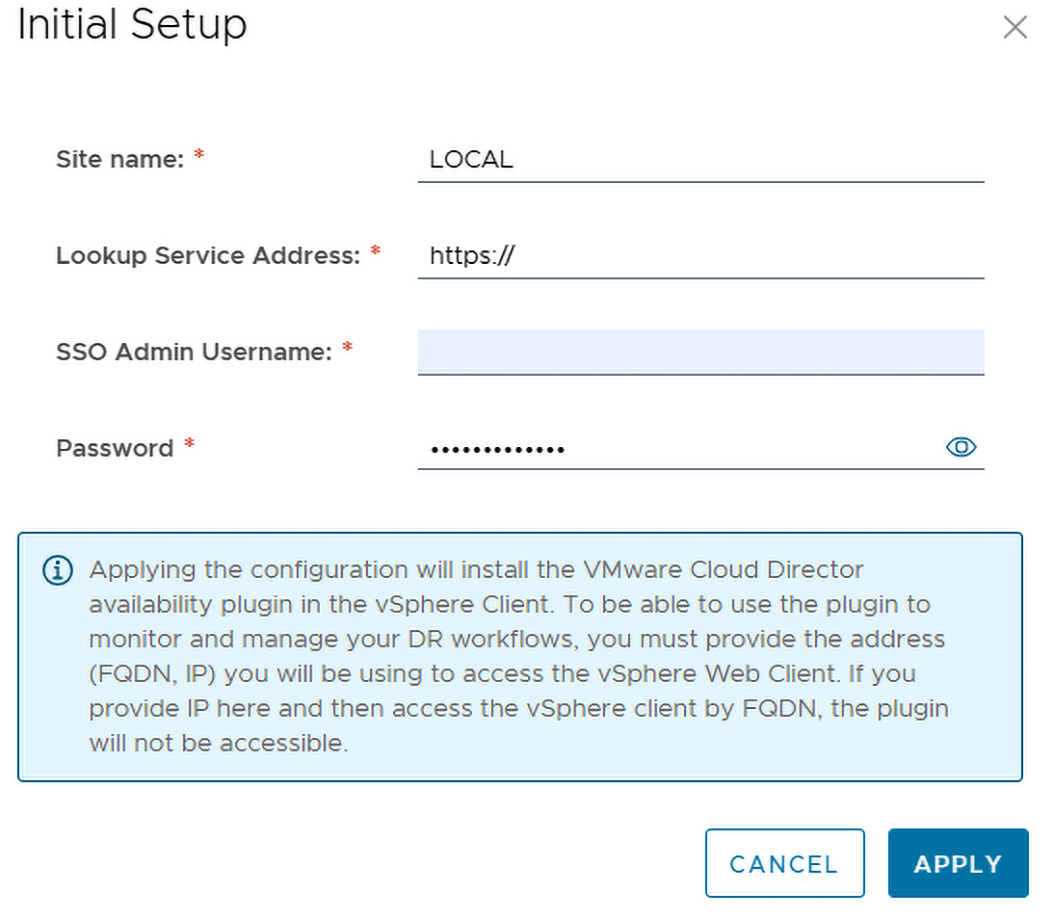
- Click on Apply.
- Accept the server certificate.
- Click System Health in the navigation bar on the left.
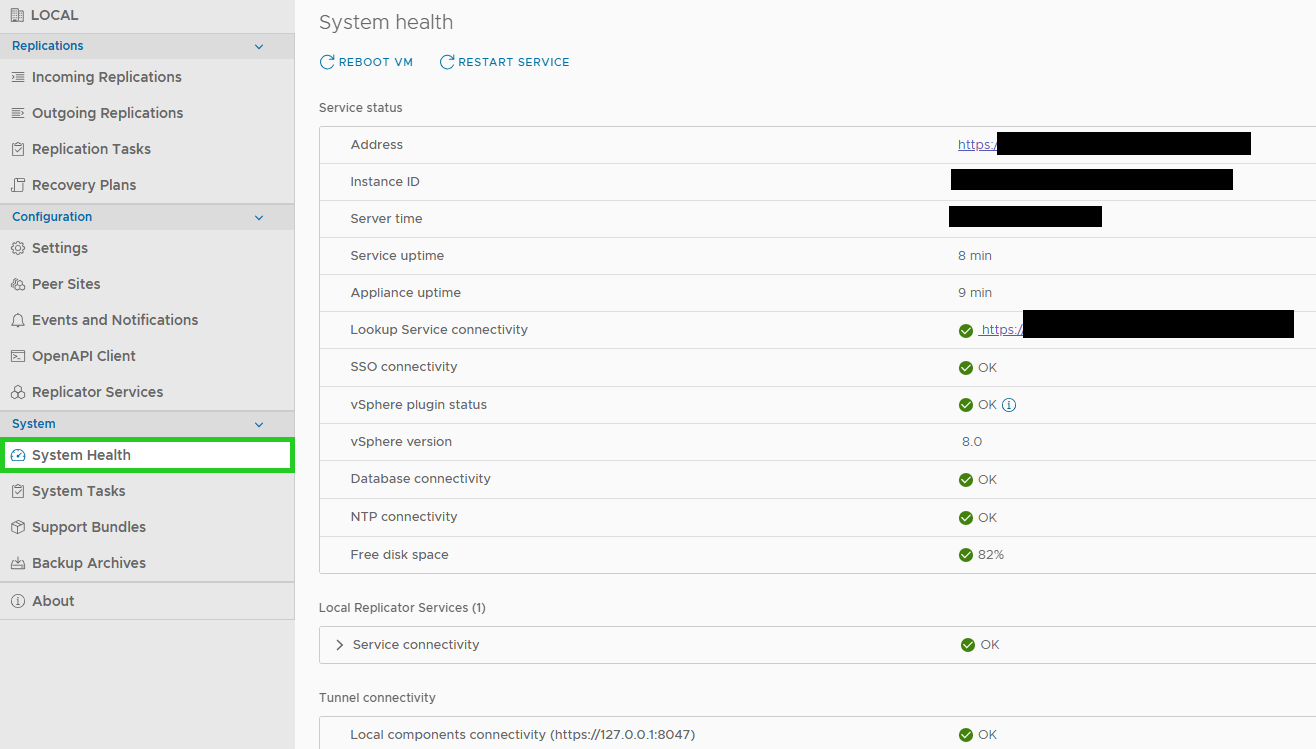
- Check the System Health area and make sure that all status messages are green.
- Configure additional settings if required.
The installation is complete.
Both locations connect
To connect both locations, you must log in to the VCDA-CUST appliance and set up the connection between VCDA-CUST and VCDA-CLOUD. To do this, complete the following:
- Log in to the VCDA-CUST appliance.
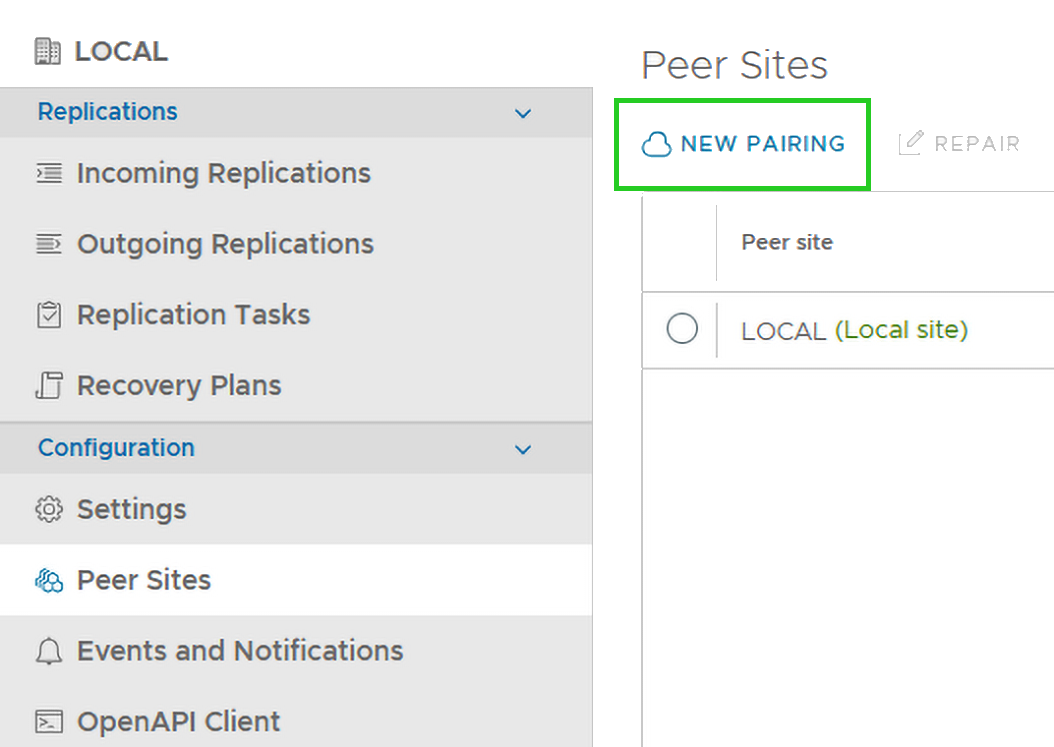
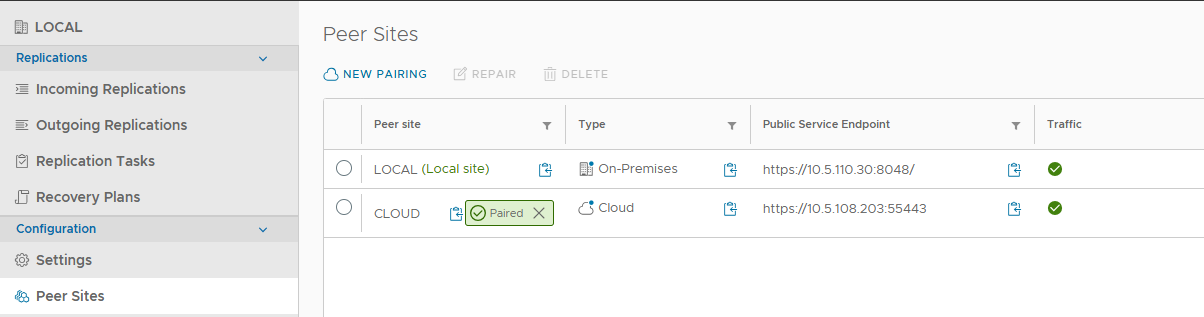
- Click on Peer Sites in the navigation bar on the left.
- To set up a new pairing, click on New Pairing in the area on the right. The New Pairing window opens.
- The public service endpoint is provided after activating the function in the Private Cloud control panel. Enter the user name vcenter-admin@vsphere.local in the SSO Username field.
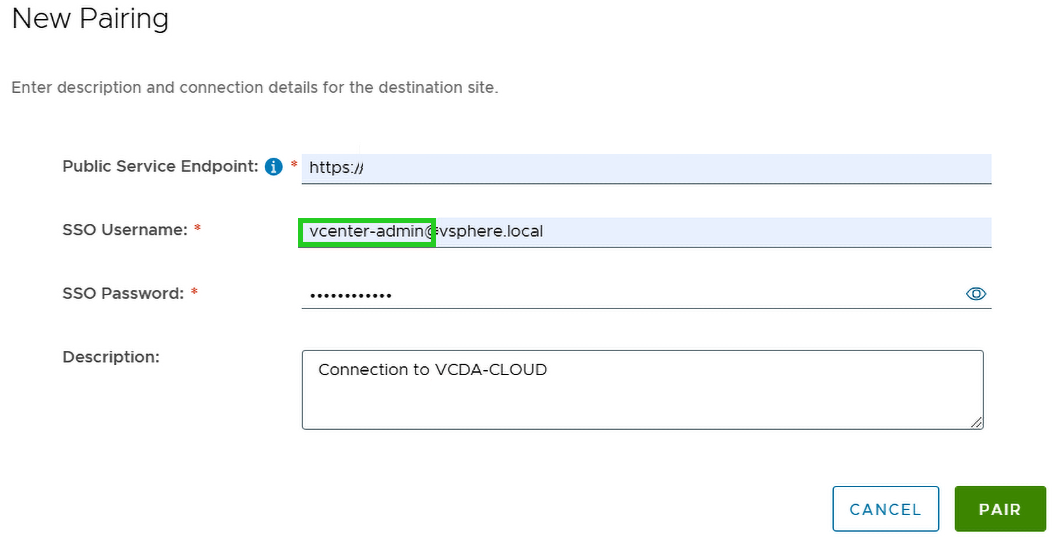
- Click on PAIR.
- Accept the server certificate.
- Click on Peer Sites in the navigation bar.
- Make sure that the connection has been established correctly.
Protect and migrate VMs between VCDA-CLOUD and VCDA-CUST
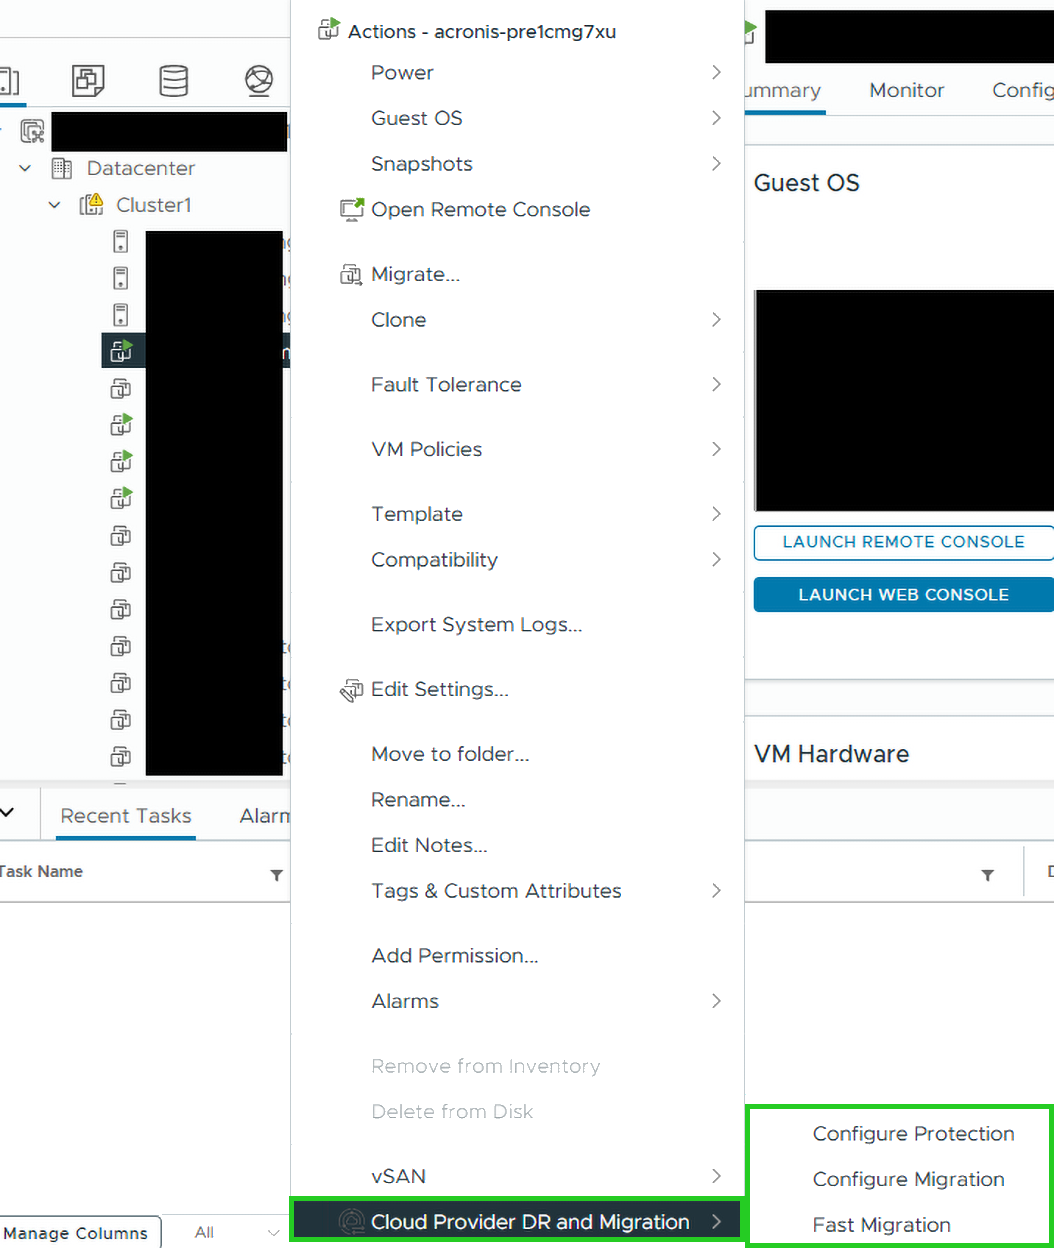
Once both appliances are configured and paired, the VMs can be migrated and/or protected. To access these options, you have the following options:
- You can call up the context menu by right-clicking on any virtual machine.
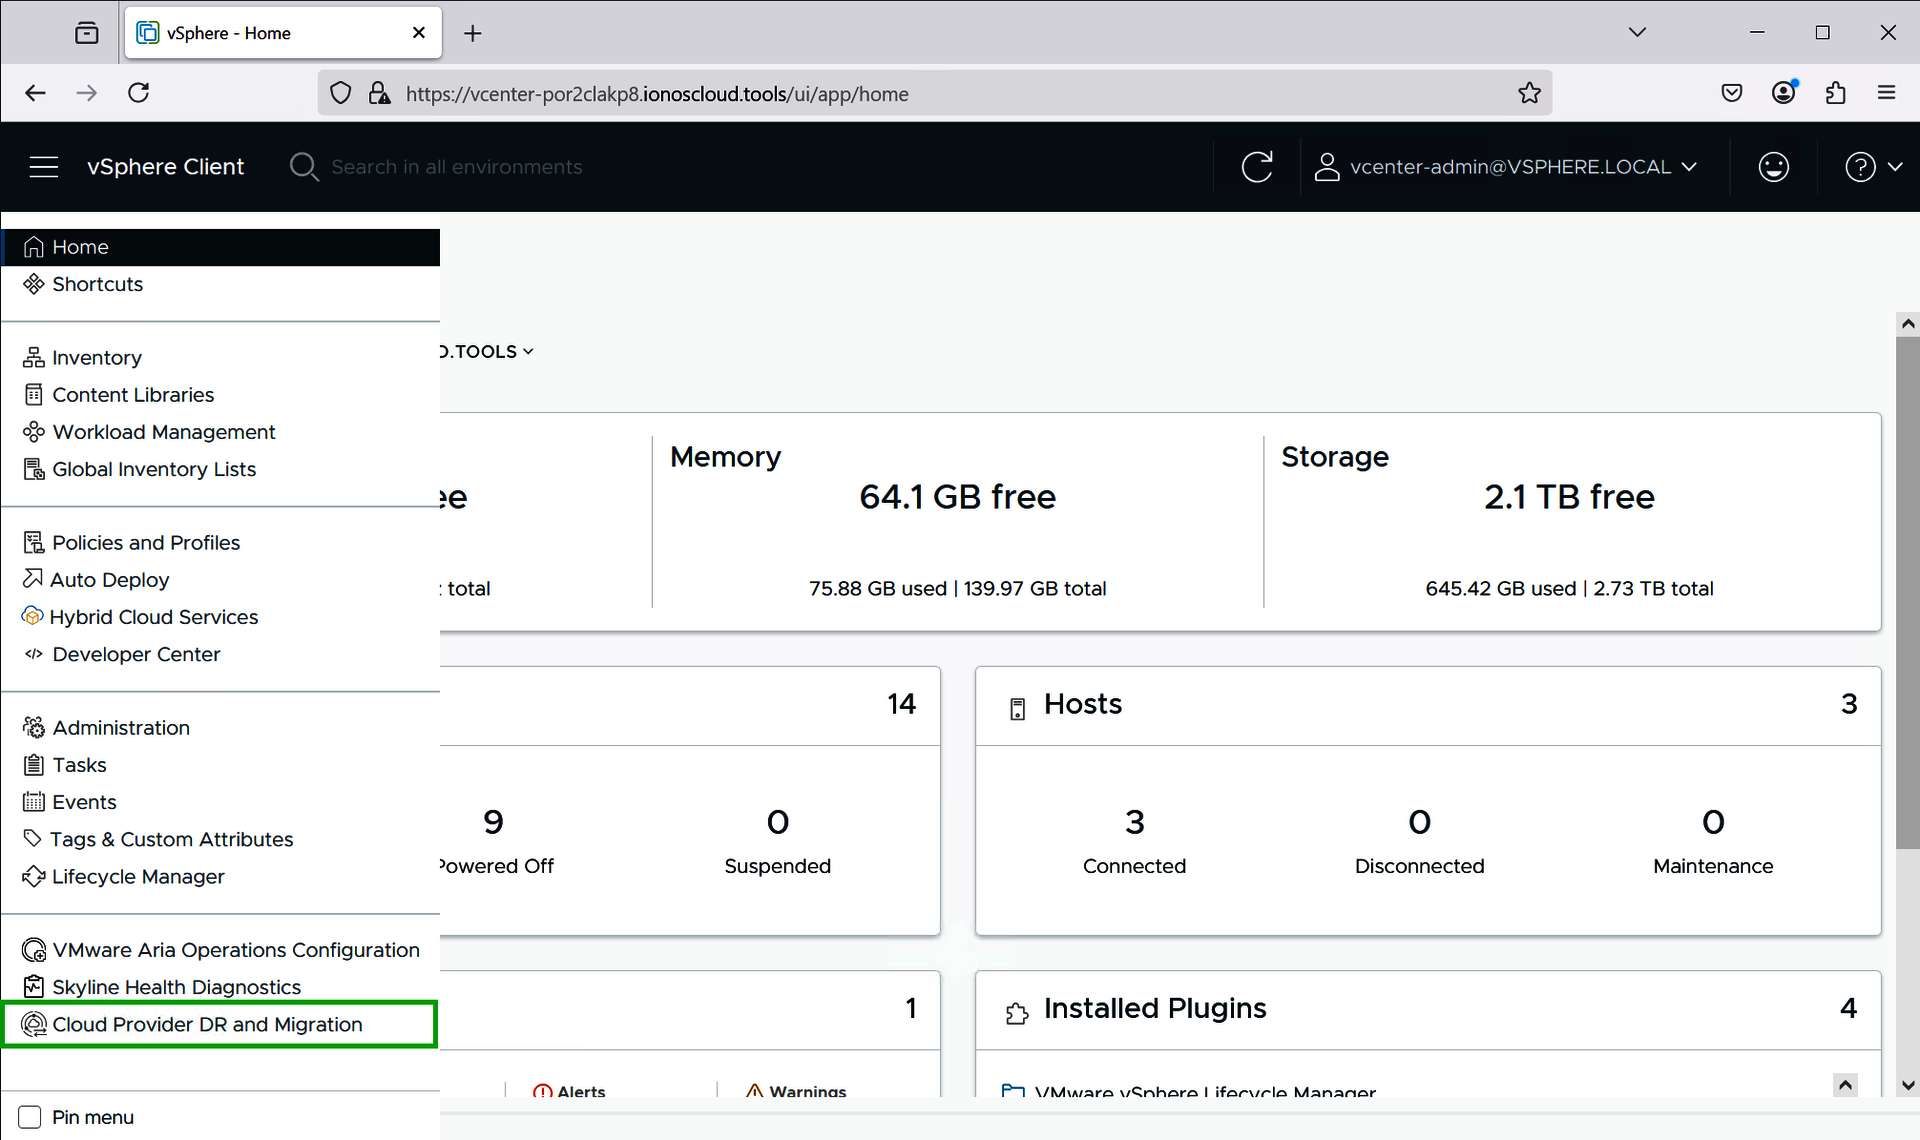
- You can click on the hamburger menu and open the vSphere plug-in.
- You log in to the management interface of the VCDA-CUST appliance.
Further information
The VMware documentation for version 4.7 can be found on the following Broadcom page: