Private Cloud: Subscribing to the ISO content library in vSphere
This article explains how to subscribe to the ISO content library in order to provide the latest operating systems on your virtual machines in the private cloud. To do this, complete the following:
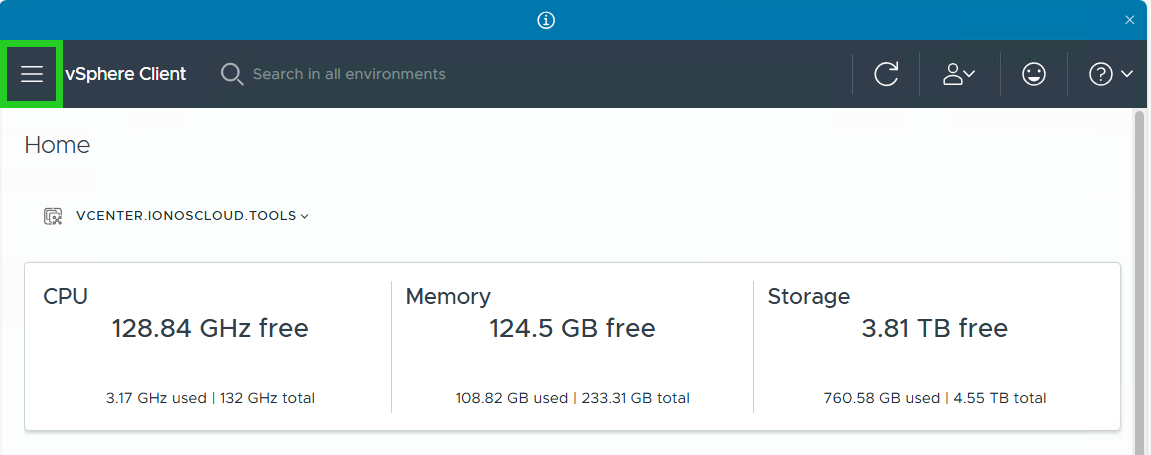
Open vSphere Client
- Establish a VPN connection to your Private Cloud.
- Open the Cloud Panel.
- Make a note of the username and password that are displayed in the Private Cloud > Administration area in the Access > vSphere section.
- To open the vSphere Client, click on vSphere Client in the Private Cloud > Administration area in the Access > vSphere > Admin Client section. A new tab opens.
- In the new tab, click on Advanced... .
- Click on Accept risk and continue.
- Click on START VSPHERE CLIENT (HTML5). The login page opens in a new tab.
- Enter the user name and password.
- Click on LOGIN.
Add content library
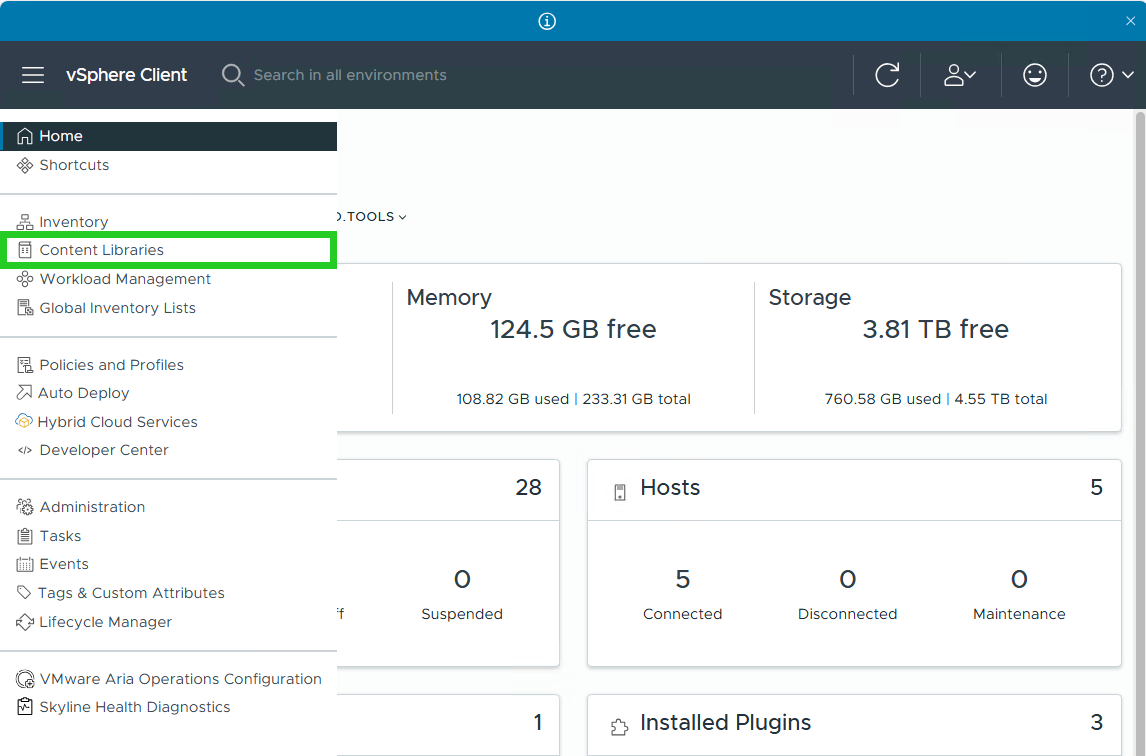
- In the vSphere Client, click on the menu icon with the three horizontal lines in the top left of the menu bar.
- Click on Content Libraries. The Content Libraries area opens.
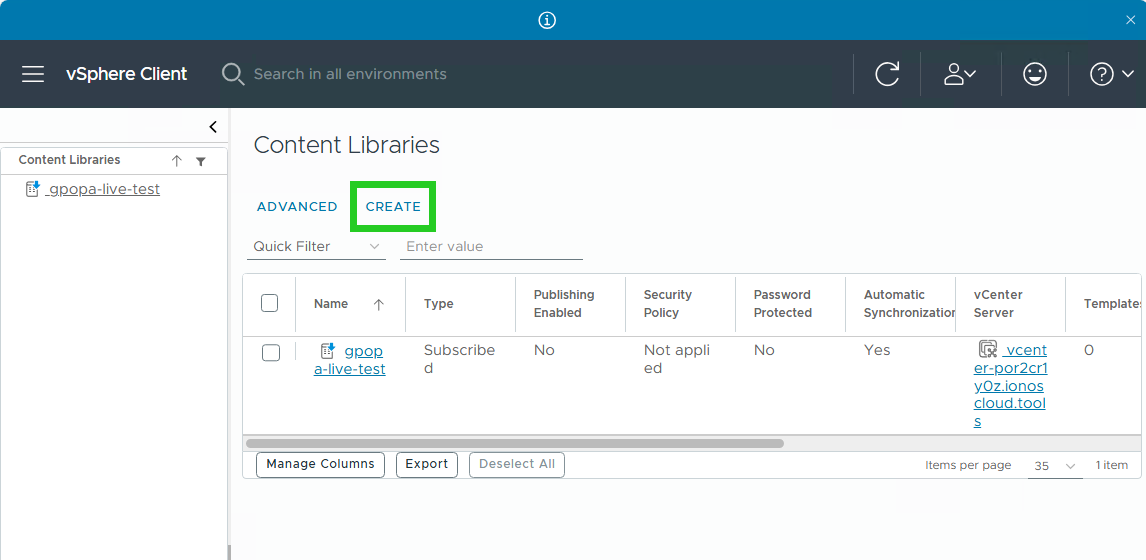
- Click on Create. The Name and location window opens.
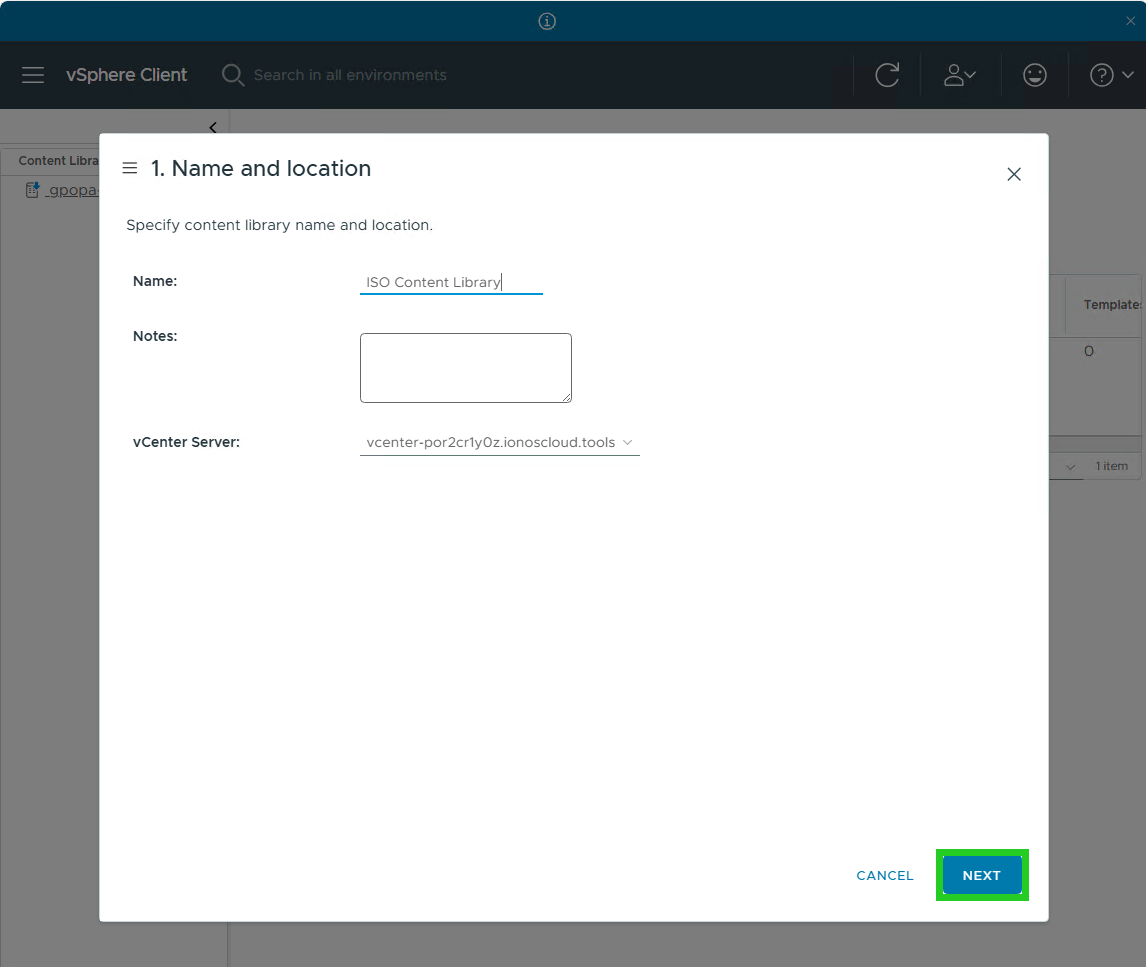
- Enter a name for the new library in the Name: field
- Optional: Enter a description in the Notes: field.
- Click on Next. The Configure content library window opens.
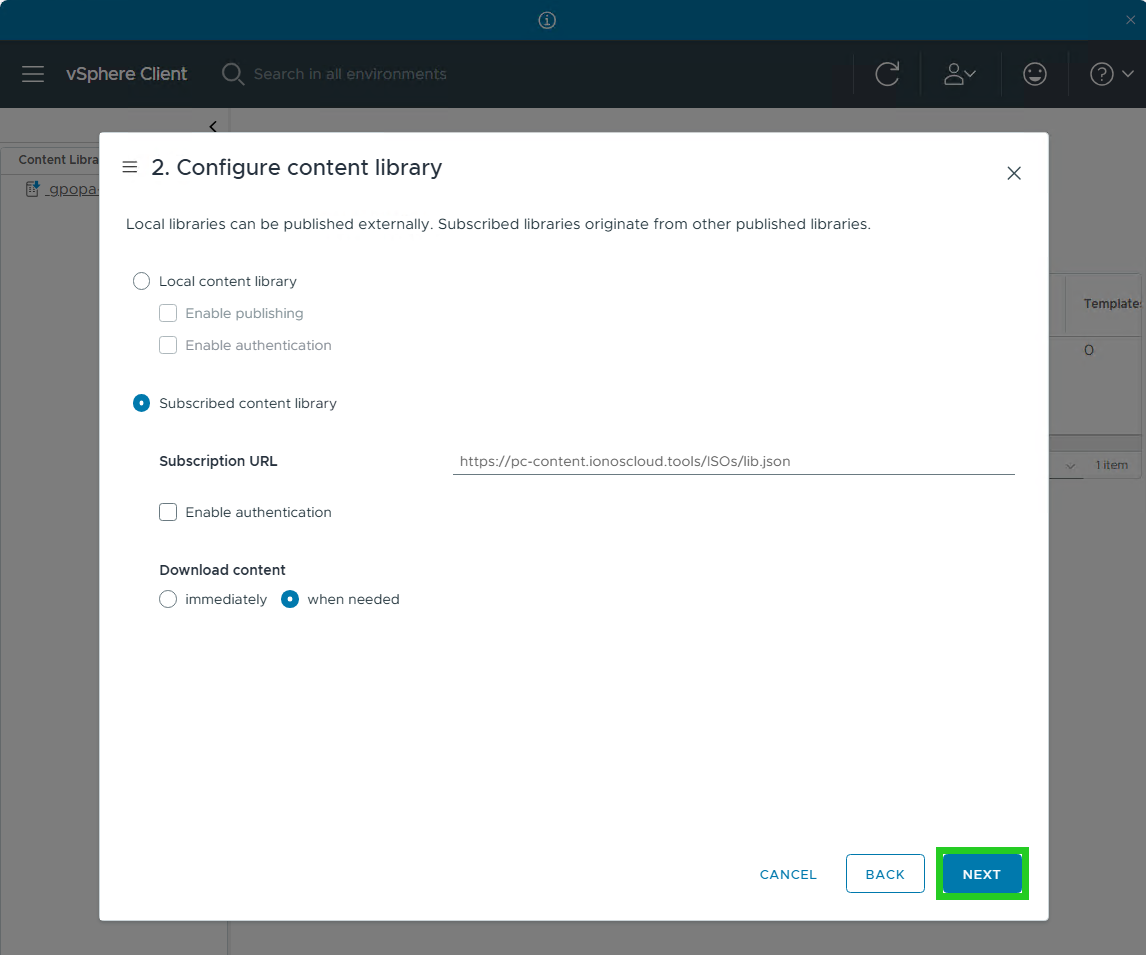
- Select the Subscribed content library option.
- Enter the following address in the Subscription URL field:
https://pc-content.ionoscloud.tools/ISOs/lib.json - In the Download content section, select the setting when needed.
- Click on Next. The Apply security policy window opens.
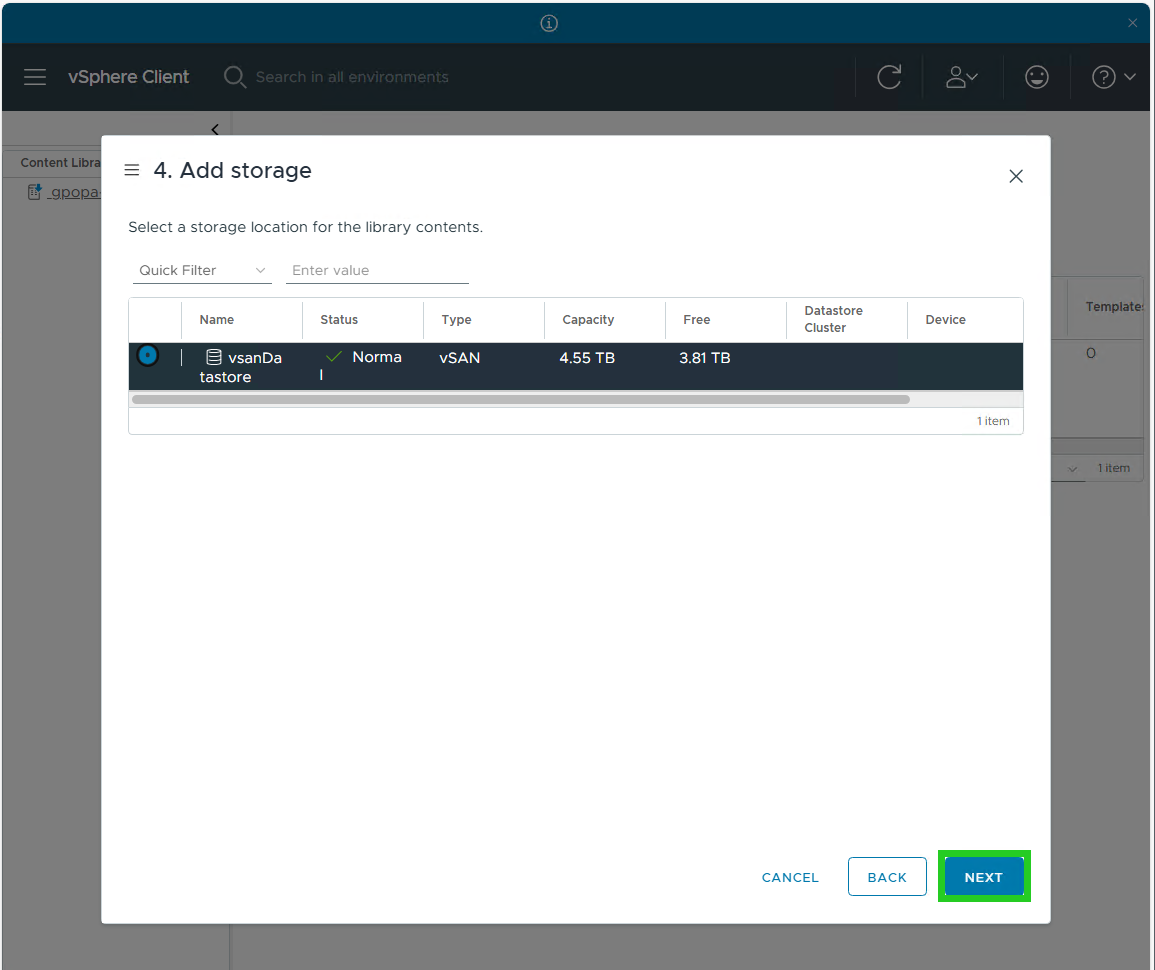
- Click Next in Apply security policy window. The Add storage window opens.
- Select the storage in which the downloaded ISOs are to be saved.
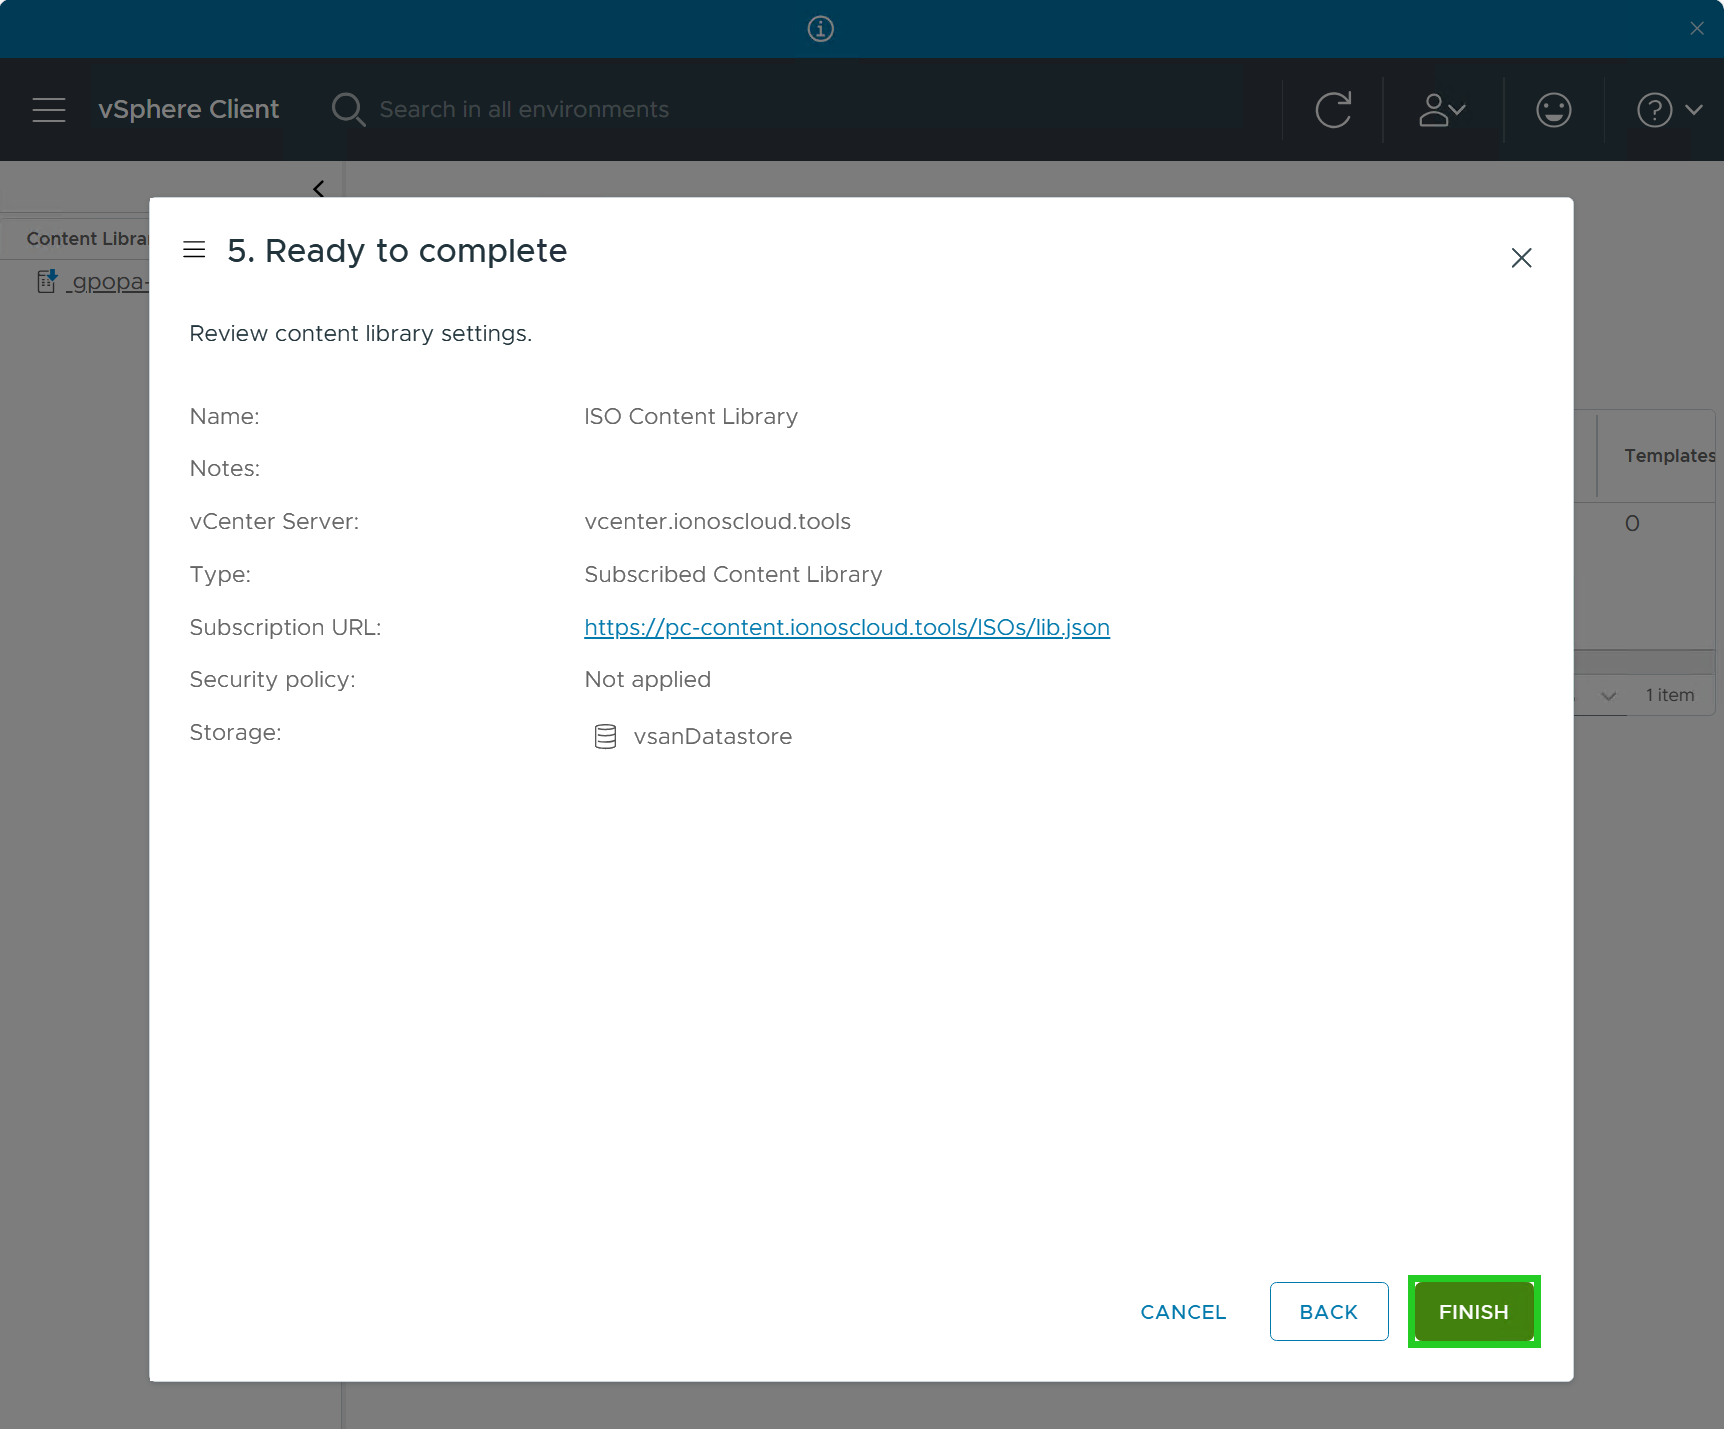
- Click on Next. The Ready to complete window opens.
- Click on Finish.
Create a new virtual machine using an ISO file from the content library
- In the vSphere Client, click on the menu icon with the three horizontal lines in the top left of the menu bar.

- Click on Inventory.
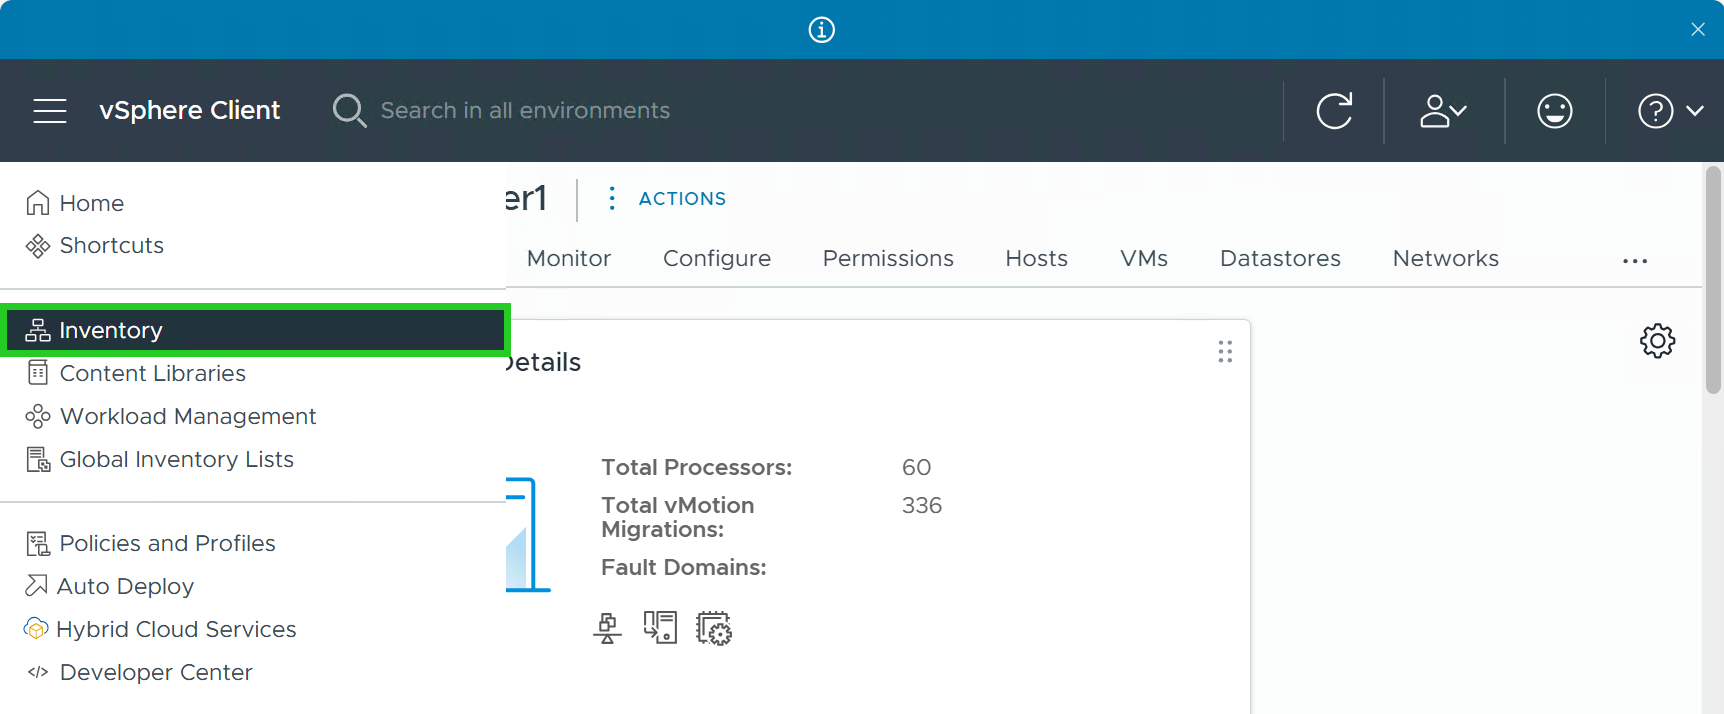
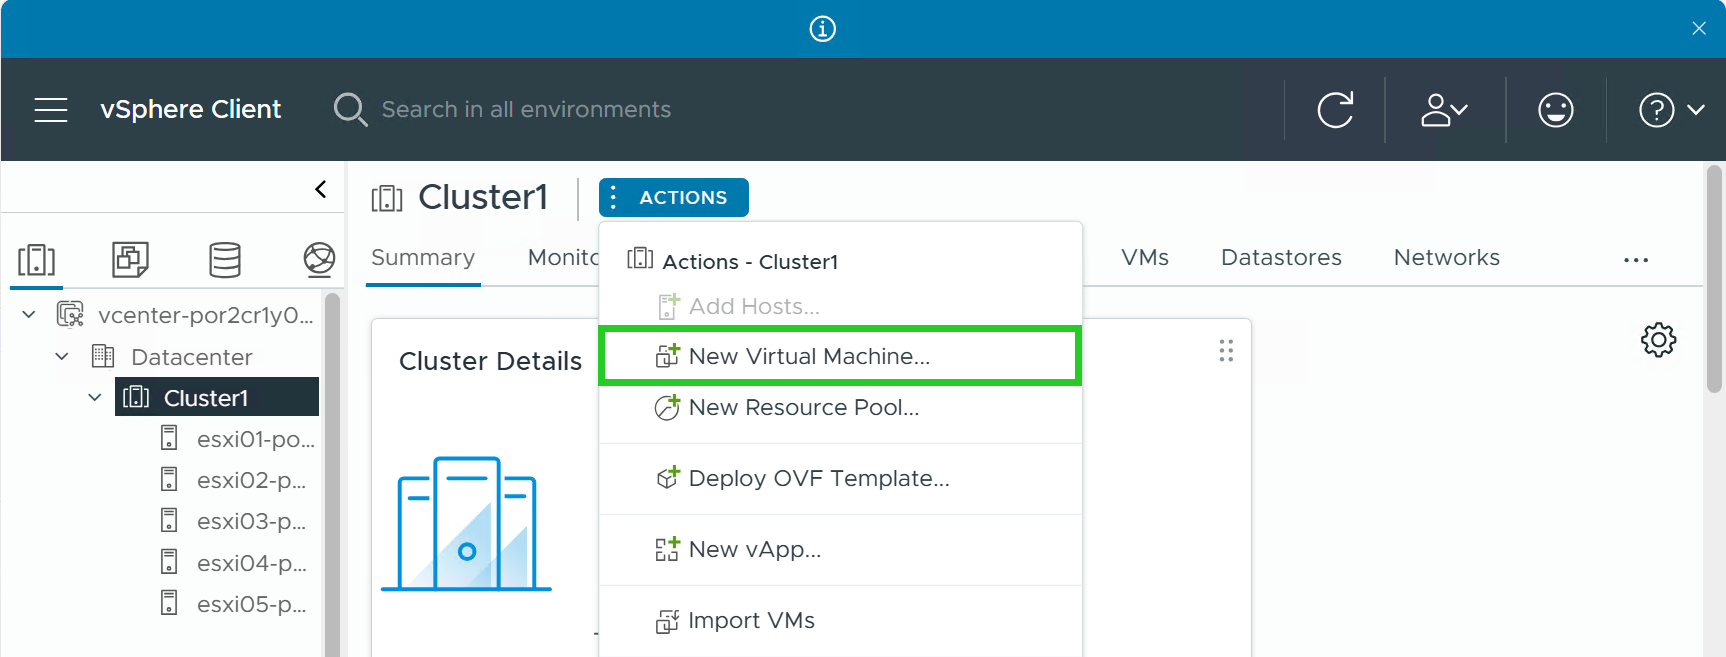
- Select your vSphere cluster.
- Click on Actions > New Virtual Machine... and follow the steps of the wizard.
- When the Customize Hardware window is displayed, click on the New CD/DVD Drive list.
- Select the Content Library ISO File option. The Choose an ISO image to mount window is then displayed.

- Select the desired ISO image from the list.
- Click on OK. The Customize hardware window is displayed again.
- Click on Next.
- Click Finish in the Ready to complete window.
The new virtual machine is created.
Troubleshooting
The creation of a VM may fail if the ISO content library is still downloading or synchronising the ISO image at the time of creation. If the creation of your VM fails, cancel the process and check whether the library is synchronised. To do this, click on Recent Tasks in the menu bar at the bottom and then on the arrow pointing upwards.
If necessary, wait until the synchronisation is displayed as completed in the task window. Then repeat the creation of the VM.