Restoring NFS Datastore snapshots
For Private Cloud
In this article you will learn how to restore an NFS snapshot. To do this, proceed as follows:
- Establish a connection to your Private Cloud. You can find instructions for this in the following Help Centre category: Private Cloud
- Open the vSphere Client. You can find instructions on how to do this in the following article: Opening vSphere Client
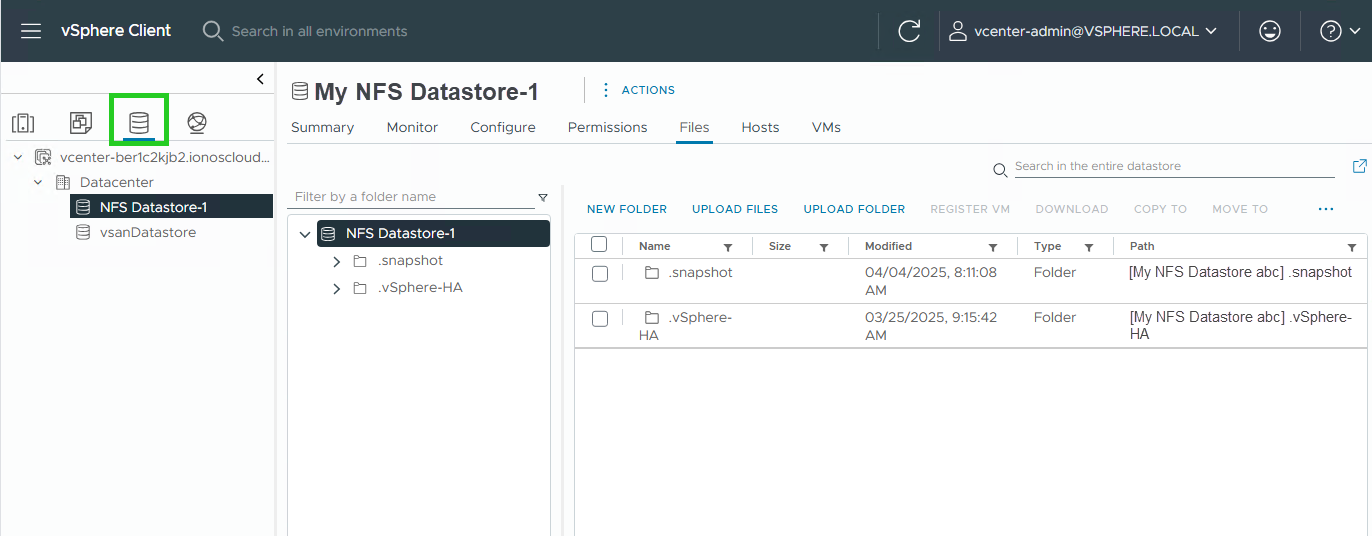
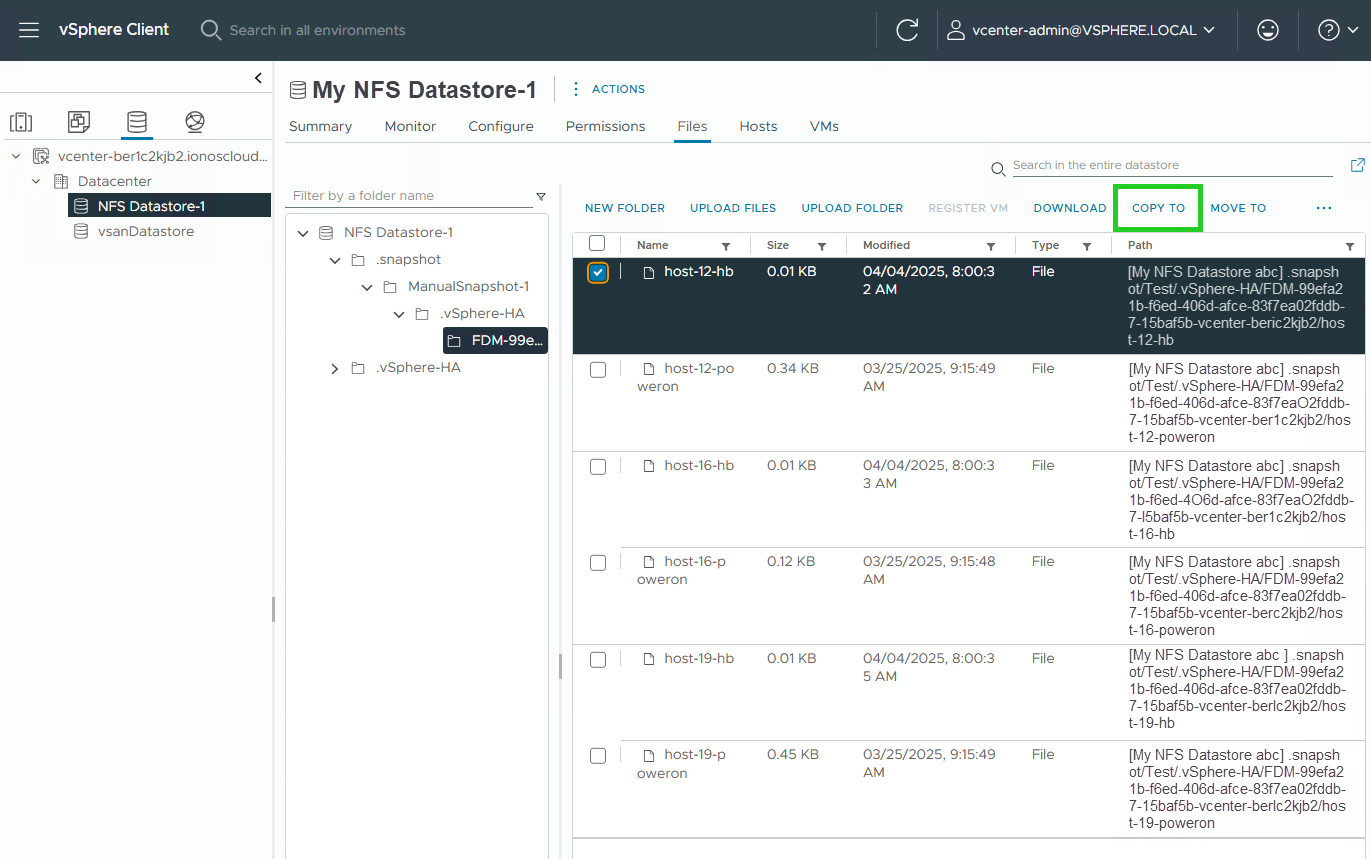
- In the vSphere Client, click on the database icon in the navigation bar on the left (Aria label: Storage).
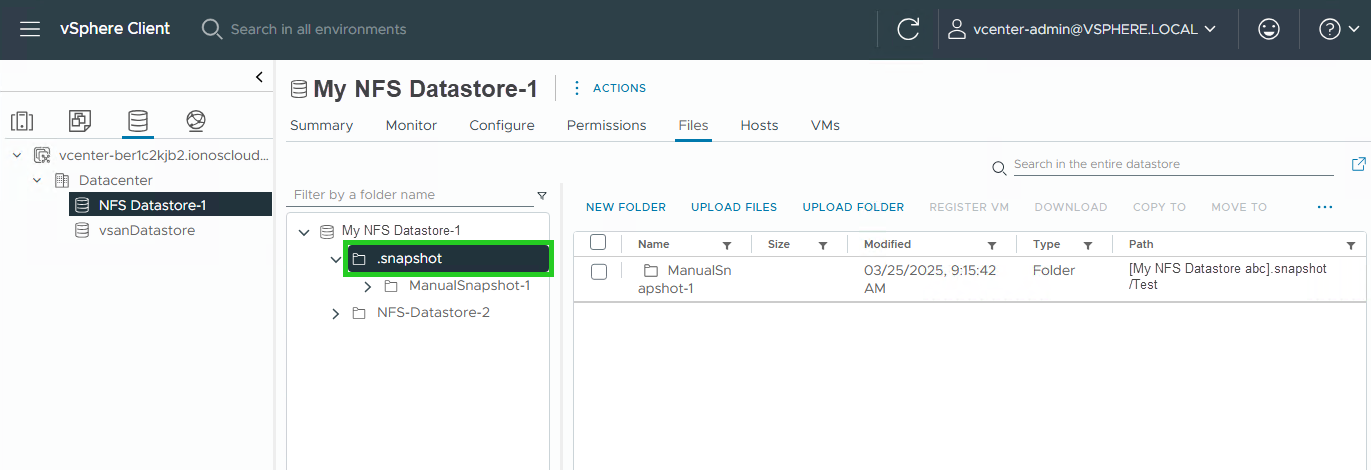
- In the navigation bar below the Summary menu item, click on the greater than sign next to the .snapshot folder.
- Click on the greater than sign next to the desired snapshot.
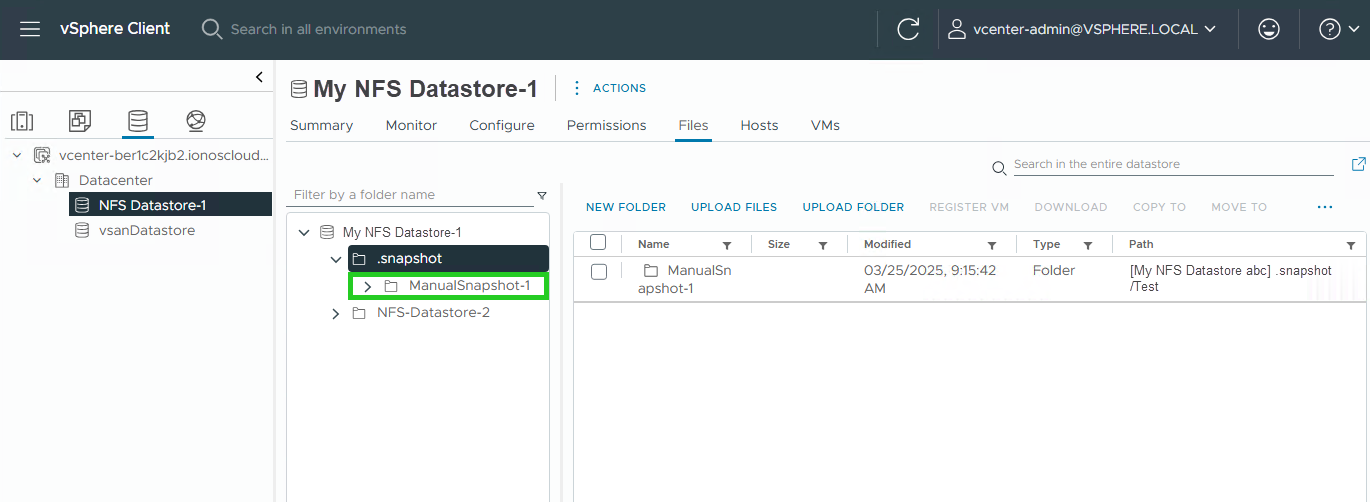
- Select the folder you want to restore. To restore individual files, select the desired files.
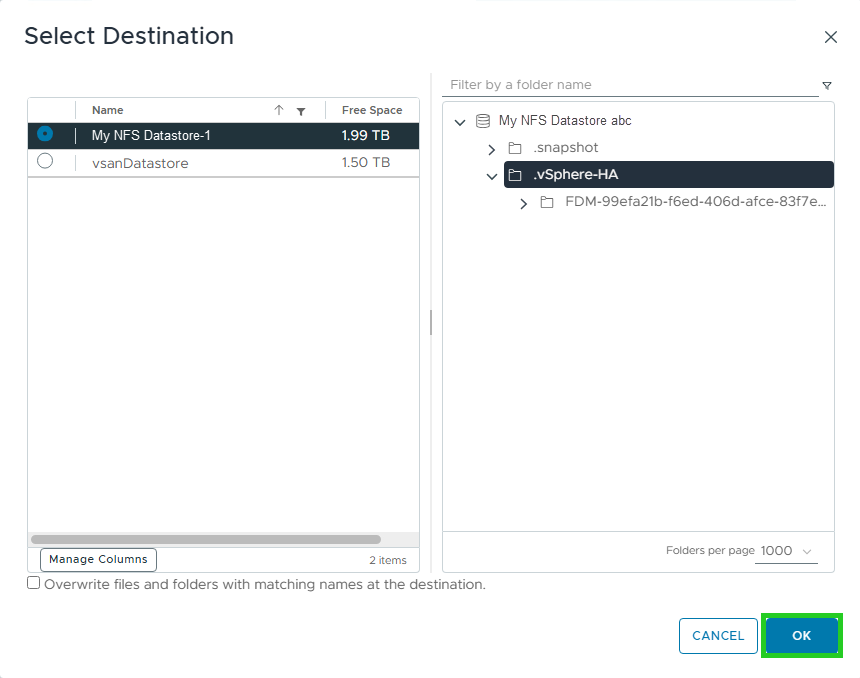
- Click on COPY TO. The Select Destination window is displayed.
- Select the desired destination.
- Optional: Activate the option Overwrite files and folders with the same names at the destination.
- Click on OK.