Adding and editing content in MyWebsite Now
Valid for MyWebsite Now.
This article will introduce you to the basic functions of the MyWebsite Now editor for editing your project: adding and editing text, images, and other content.
Introduction
MyWebsite Now was developed with the goal of giving everyone the opportunity to quickly and easily create attractive websites, even without expert knowledge.
This is achieved through the consistent use of high-quality design templates that are already optimally tailored to the respective purpose. This makes it possible to create user-friendly and visually appealing websites.
Using the templates, you can create your website section by section, following a modular system. Layout variations and further design options are available for customisation.
Page layout
Pages are built from sections that consist of elements
A single MyWebsite Now page always consists of at least two sections, a header and a footer. These cannot be deleted as they contain the logo, main navigation,and footer navigation. In between, content is inserted in the form of sections . These sections are basically content templates that contain a predefined selection of elements (content types).
Examples of available elements include:
- Heading
- Description (continuous text)
- Image
- Link
- Button
Some elements are available in different forms. For example, there are primary and secondary buttons and different heading sizes (h1 to h5). The section templates can contain different numbers of elements.
The predefined sections are optimised for their respective purpose, e.g. for team, photo, holiday, or offer pages, and much more. The sections can contain sample texts that show how the section can be used.
Group elements
Some section templates have what are called group elements. Group elements are used to organize information within a section according to a consistent pattern. For more information, see the Help Centre article “Grouping website elements”.
Edit elements
To edit text, images,or buttons simply click on them to enter edit mode, where the element is highlighted and the available editing functions are displayed.
To replace an image, first click on the image and then on Replace. You can now upload your own image or select an image from the IONOS image archive. Over 17,000 archive images make it easy for you to add your own images. To adjust the image section, click on the image again. You can now enlarge/reduce the image section using the slider.

To change headings and description texts, simply click on them. You can now edit the text, set links or adjust the formatting, colour, and structure of the text. You can also change the font size for headings.

Note
To change the font size and text colour globally, click on Design in the main menu and then make the desired settings.
Change the arrangement of elements
To change the position of the images and texts within a section, each section offers you different layout variants . You can select these in the section options .

Move and edit group elements
To move a group within the section, hover your mouse over the group until a toolbar appears in the upper right corner of the group. Click on the arrow symbol in the toolbar, and move the group within the section while holding down the left mouse button.
The three-dot symbol to the left of the arrow symbol provides you with further editing options for the selected group:
- Stack
- Edit (e.g. add element)
- Copy
- Ungroup
- Delete
Add elements
The MyWebsite Now editor uses sections as building blocks. These ensure that your website always looks consistent and therefore coherent.
To insert an element into an existing section:
Click on Content in the MyWebsite Now menu bar.
Move your mouse pointer over the desired section. A toolbar will appear in the upper left corner of the section.
Click on the Elements button on the toolbar. The Section Options column will appear, and a plus symbol will be shown in eligible spots on the page.
- Click on one of the plus symbols. A selection menu appears.
- Click on one of the items in the selection menu to insert it into the section.
- Click on Done in the Section options column to complete the process.
Hidden elements:
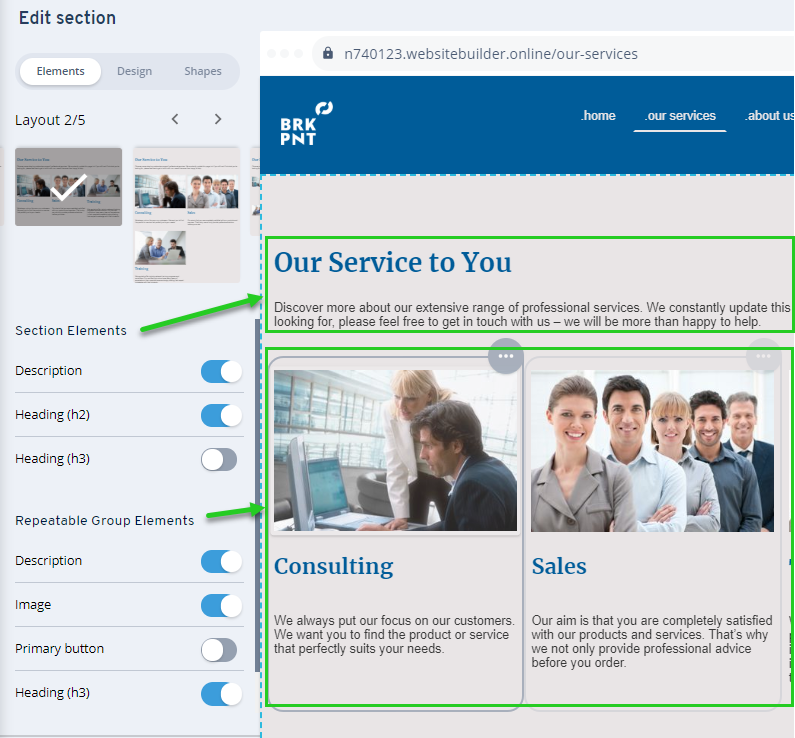
If an element is not displayed, check its visibility in the section options under the Elements tab > Section Elements area. If a crossed-out eye icon is displayed next to an element, it is not visible to you or your website visitors. Click the crossed-out eye icon to make the element visible again.
Delete or move sections
Move the mouse pointer over the desired section and then over the Section options button. You can now delete the section by clicking on the trash can or move it using the arrows.
Edit section settings
Sections offer options for AI content, elements, and design. In addition to appearance, you can also restructure content elements or show/hide them. This provides you with various options to tailor the sections to your specific purpose.
- Click on Content in the MyWebsite Now menu bar.
- Move your mouse pointer over the desired section. A toolbar will appear in the upper left corner of the section.
- Click on the Elements button on the toolbar. The Section options column will appear, and a plus symbol will be shown in eligible spots on the page.
- In the Section options, select the Elements tab to show, hide, or delete elements. This tab also allows you to activate the Flexibility feature, which enables you to freely position text and images in your MyWebsite Now project. The Help Centre article "Positioning Website Elements" explains the details.
- In the Section options, select the Design tab to adjust global section settings such as background color, width, or section transitions.
For more information about design options, please refer to the Help Centre article "Customizing the design of your MyWebsite Now".
The Help Centre article "Creating sections with Artificial Intelligence (AI)" informs you about the possibilities of creating your section using AI.
Add section to page
Our ready-made sections with content suggestions help you to set up your website quickly and easily.
To add a section, proceed as follows:
- If your page is empty except for the header and footer, click + Add section in the content area.
- If there are already sections, simply move the mouse pointer over the website and back. Where you want to insert the section, click on + Add section.

Select the desired section and, if necessary, the layout. Then click on Done.

Put website online
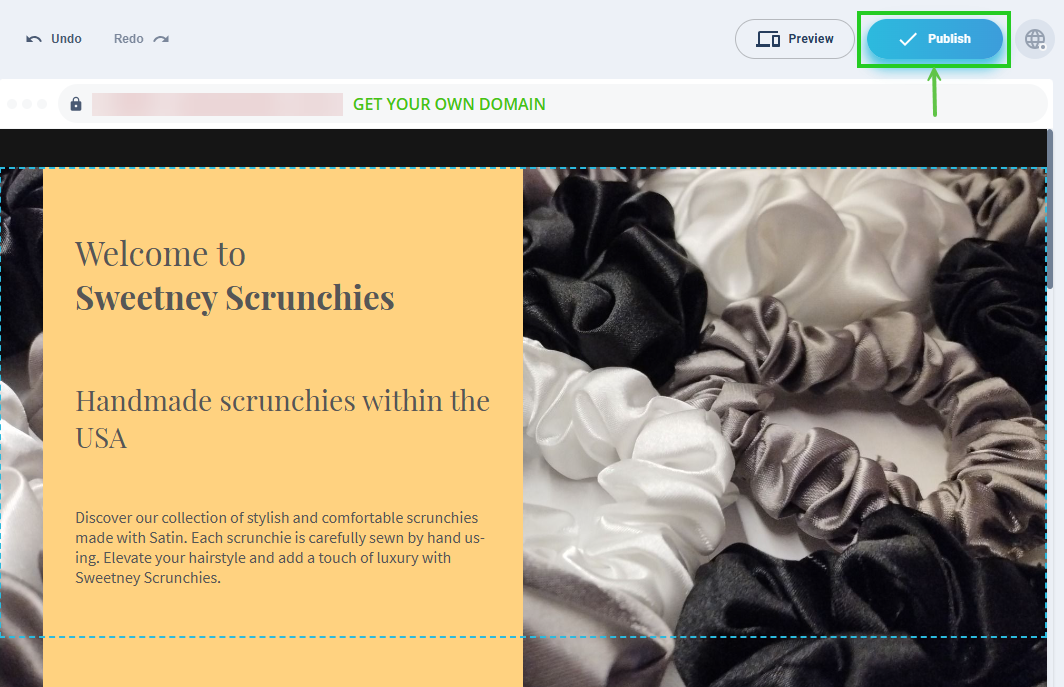
As soon as you are ready to present your website to your visitors, you can publish it. Your website will remain offline until it is published for the first time.
To put your website online, click on Publish.
Note
Changes to your website are only visible online when you re-publish the website.