Forwarding/Redirecting Emails by Setting Up Inbox Rules (Outlook Web App)
For Microsoft Exchange accounts
By setting up inbox rules, you can automatically forward or redirect emails sent to you to another email account. In this article, we'll show you how to set up and manage the corresponding rules in the Outlook Web App.
Automatically Redirecting All Messages to Another Address
Unlike classic email forwarding (which shows you as the sender), redirected messages appear as if they came from the original sender. Therefore, use message redirection if you want replies to these messages to be sent to the original sender.
Setting Up Redirection in the Outlook Web App:
- Go to the Outlook Web App login page and log in.
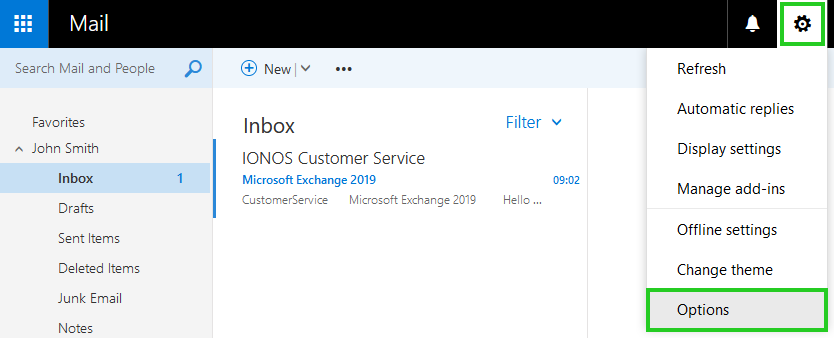
- Select the gear icon > Options.
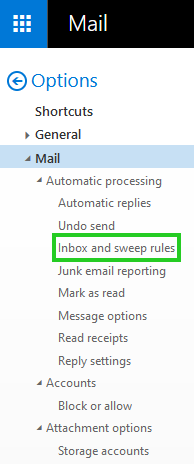
Click Mail > Inbox and Sweep Rules.
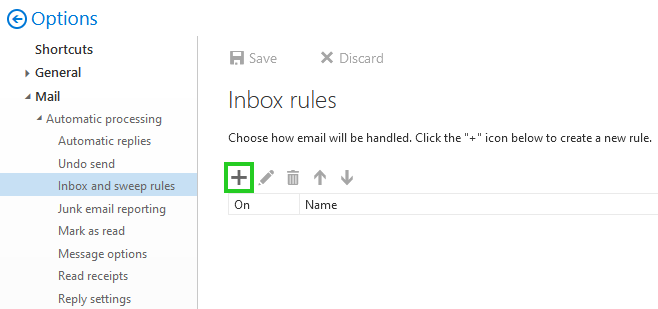
- In the Inbox rules, click on the plus sign (+).
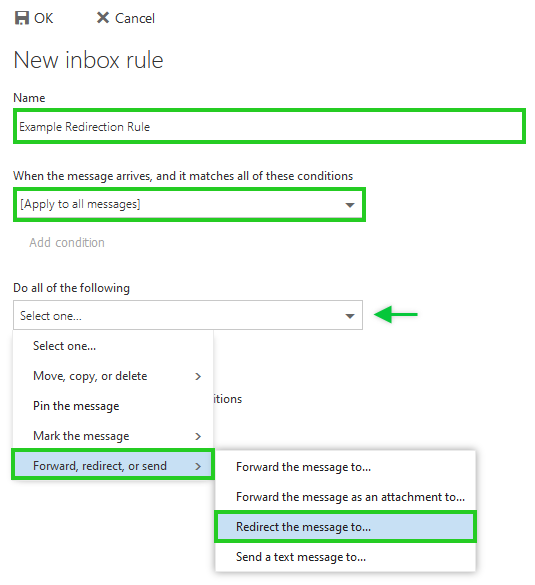
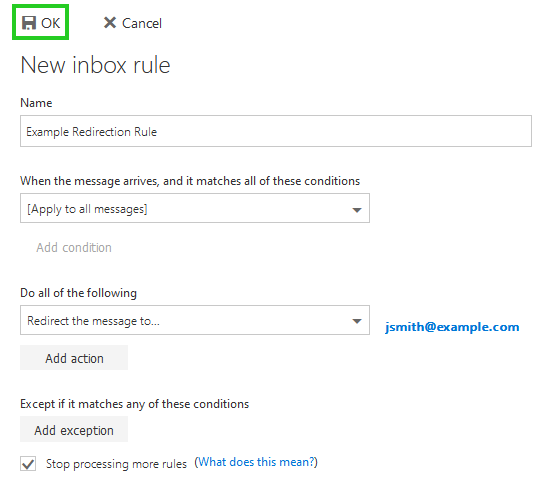
Give a name to your new inbox rule
Under When the message arrives, and it matches all these conditions, select [Apply to all messages].
Under Do all of the following, select Forward, Redirect or Send > Redirect message to...
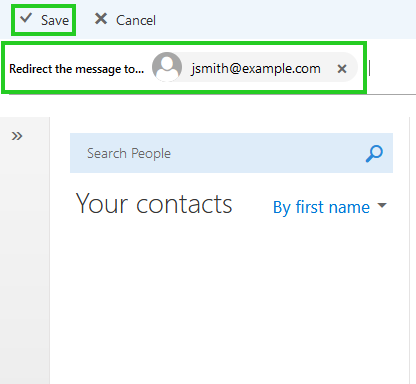
Select the desired contact to which the messages should be forwarded. If the desired email address cannot be selected, create a new contact by entering it in the top row.
Click Save.
To create the rule, click OK.
All done! This rule is now saved and active. However, it can take up to 60 minutes until the rule is synchronized on the respective mail servers.
Forwarding All Messages Automatically
Forwarded messages appear as messages that are forwarded by you. Use a forwarding rule if you want replies to go to the address from which messages are forwarded rather than to the original sender.
Setting Up a Forwarding Rule in the Outlook Web App:
- Go to the Outlook Web App and log in.
- Select the gear icon > Options .
Click Mail > Inbox and Sweep Rules.
- In the Inbox rules, click the plus sign (+).
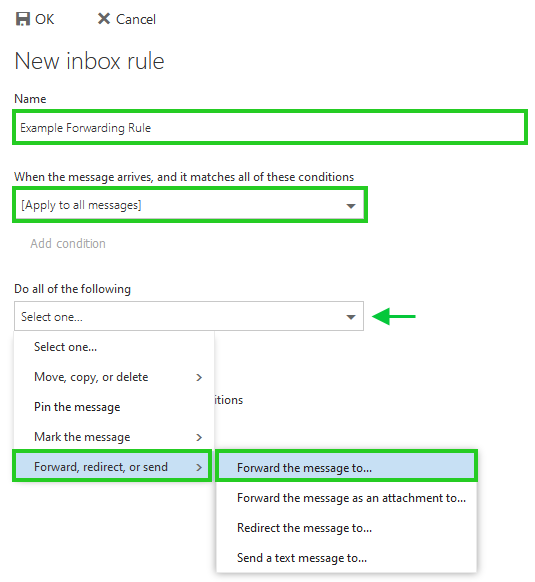
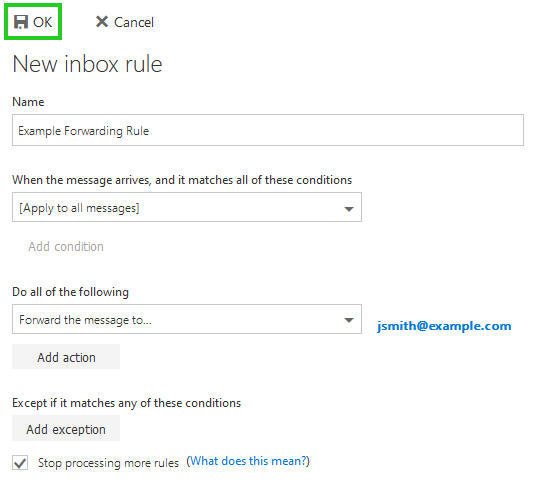
Give a name to your new inbox rule
Under When the message arrives, and it matches all of these conditions, select [Apply to all messages].
Under Do all of the following, select Forward, Redirect, or Send > Forward message to...
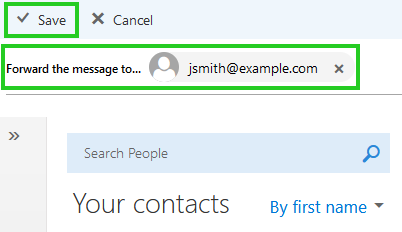
Select the desired contact to which the messages should be forwarded. If the desired email address cannot be selected, create a new contact by entering it in the top row.
Click Save.
To create the rule, click OK.
All done! This rule is now saved and active. However, it can take up to 60 minutes until the rule is synchronized on the respective mail servers.