Activating the Plesk license (VPS+, VPS, and migrated Cloud Servers)
Valid for VPS+, VPS, and migrated Cloud Servers managed in the Cloud Panel.
In this article, you will learn how to activate the Plesk license included in your server package.
Plesk comes with a trial license key that is already installed in the system. This license key offers a limited range of features and is only active for a short period of time. In order to be able to use Plesk to its full extent, it is necessary to activate the Plesk license by retrieving a new key.
Enable IP addresses and ports in the firewall
In order for the Plesk license to be updated, you must enable the following IP addresses and ports for outgoing connections in your firewall:
195.214.233.80:5224
195.214.233.80:443
195.214.233.81:5224
195.214.233.81:443
195.214.233.82:5224
195.214.233.82:443
Registration in Plesk
- First open the following URL in your browser:
https://<SERVER_NAME_OR_IP_ADDRESS>:8443
If you are using Chrome, click on Advanced and then on the link Continue to YOUR-SERVER-IP-ADDRESS (unsafe).
Example:
Continue to 123.456.78.912 (unsafe)
If you are using Mozilla Firefox, click on Advanced... and then on Accept risk and continue. - Log in with the root user account and the corresponding password.
- Enter your email address in the Email field.
- Enter the desired password in the Password field.
- Make a note of the login data.
- Enter the license key in the Proceed with a paid license field.
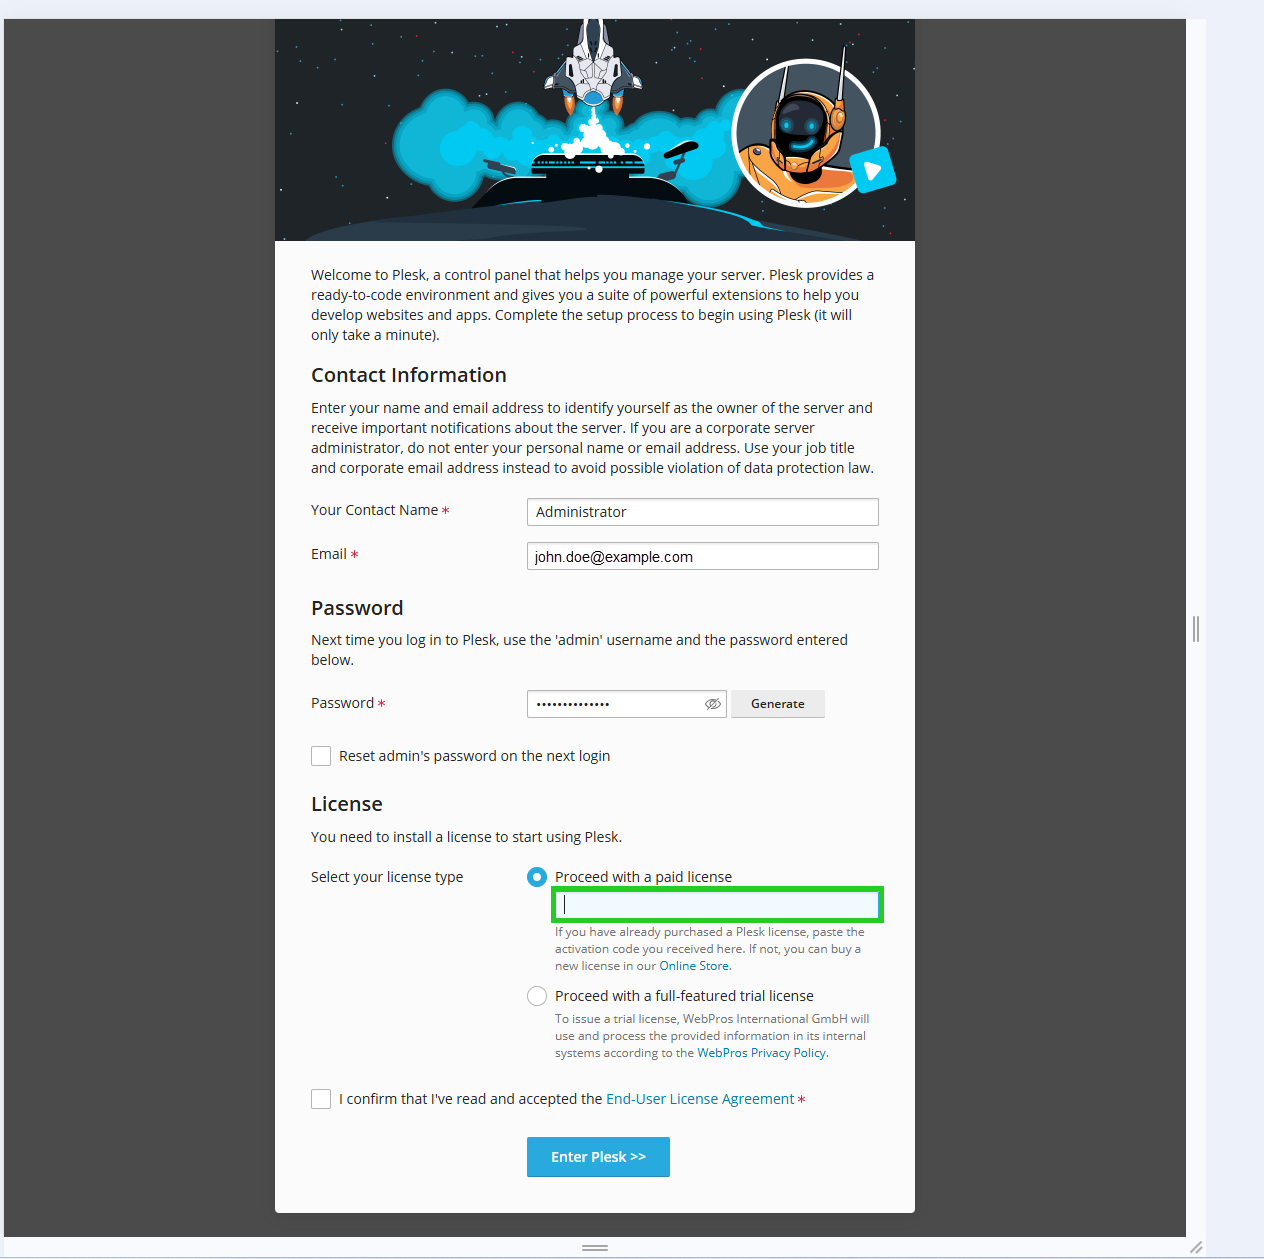
- Accept the end user license agreement.
- Click on Enter Plesk >>.
The Plesk user interface opens.
- Click on Tools & Settings in the navigation bar on the left.
- Click on License Information. In the Tools & Settings area under Plesk.
- Click Retrieve Keys in the Plesk License Key tab. Once retrieved, the license key is automatically activated in Plesk.
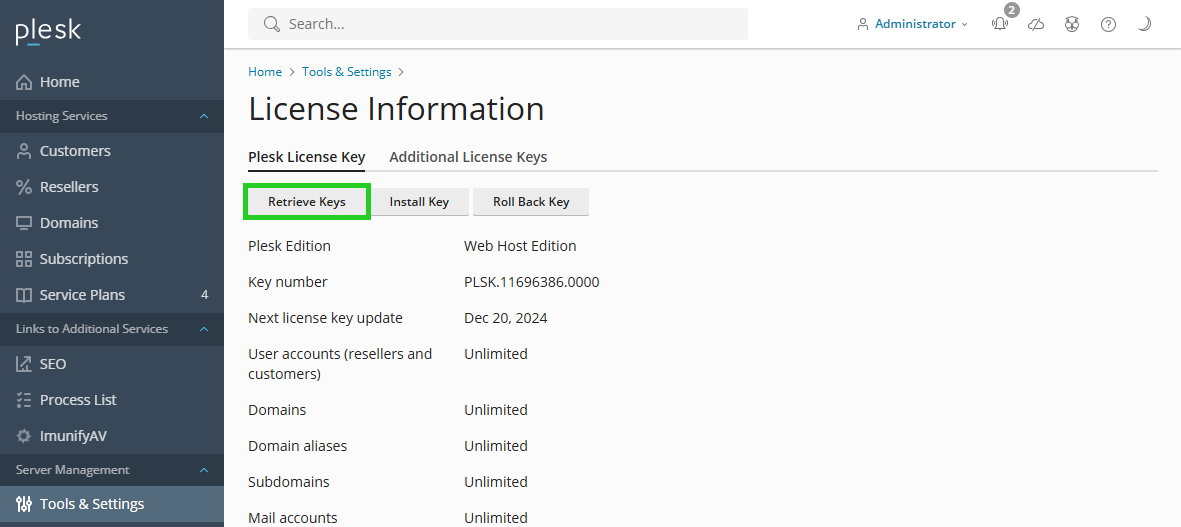
After retrieval, the license key is automatically activated in Plesk.