Using Public Key Authentication to Establish an SSH Connection with PuTTY
For Cloud Servers and Dedicated Servers managed in the Cloud Panel
In this article, we'll show you how to use PuTTY to establish an SSH connection between your local computer and your server using public key authentication.
PuTTY is a free program for Windows operating systems that allows you to establish an encrypted network connection to your server using SSH. Plus, you can use PuTTY to execute commands directly on your server from the command line.
Requirements
You have entered the private key in the Security > SSH Keys section of the Cloud Panel to create a key pair. Alternatively, you have stored the public key of an existing key pair in the Cloud Panel.
You saved the private key on your local computer.
You created a server. When you selected the configuration, you added an SSH key under Advanced Options > New SSH Key. You also have the private key for this SSH key.
Downloading PuTTY
To use public key authentication, you need the PuTTY and PuTTYgen programs. To download these programs to your local computer, do the following:
Open the following URL in your browser:
https://www.chiark.greenend.org.uk/~sgtatham/putty/latest.htmlIn the Alternative binary files section under putty.zip (a .ZIP archive of all the above), select the appropriate version for your local computer's operating system and download it.
Open Windows Explorer and go to the folder where the downloaded ZIP file is located.
If necessary, copy it to the desired folder and decompress the ZIP file.
Converting the Private Key From the SSH Key with PuTTYgen
Open the folder where you unzipped the PuTTY and PuTTYgen programs.
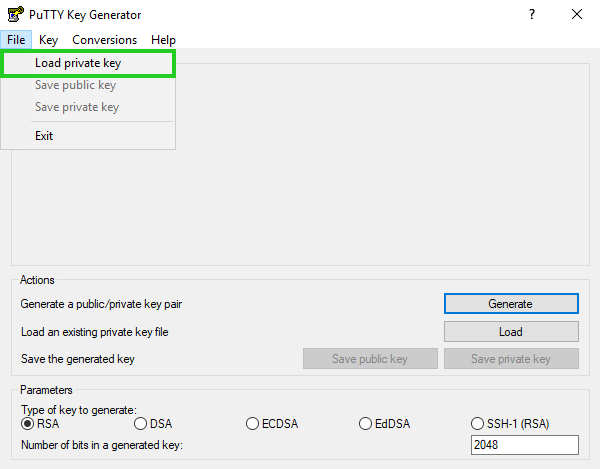
Start PuTTYgen.
Click File > Load private key.
In the Load private key: window, select All Files (*.*) in the lower right corner.
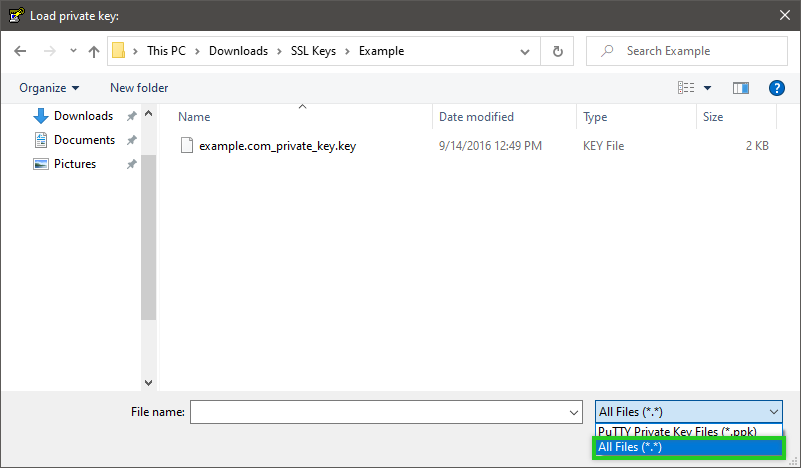
Select the private key and click Open.
The following message is displayed:

Click OK.
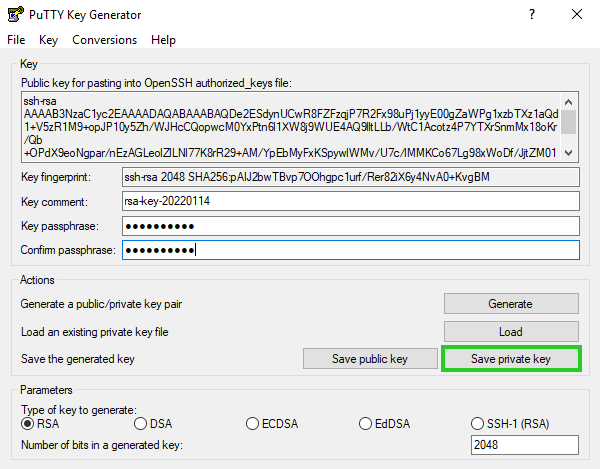
Optional: In the Key passphrase field, type a password and repeat it.
Make sure that RSA is selected in the Parameters area.
Click Save private key.
Select the desired folder.
Enter the desired file name and click Save.
Establishing an SSH Connection to the Server
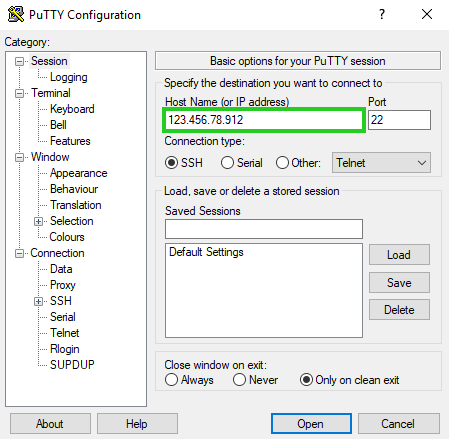
Start PuTTY.
In the Hostname (or IP address) field, enter the IP address of your servers.
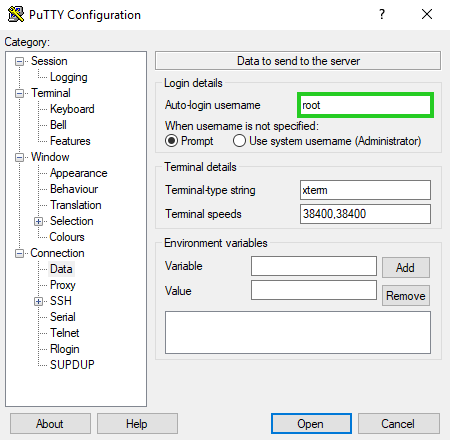
Under Category > Connection, click Data.
In the Auto-login username field, type the user name.
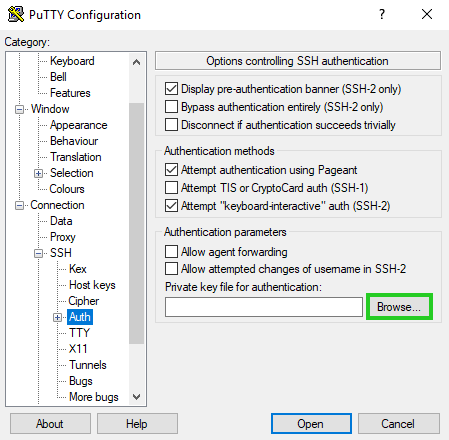
Under Category > Connection > SSH, click Auth.
Under Private key file for authentication:, click Browse....
Select the private key and click Open.
To establish the SSH connection, click Open.
Please Note
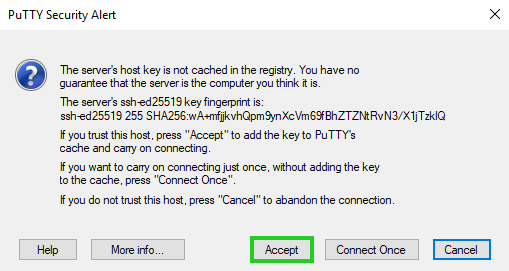
A warning message appears during the first login. Since the SSH server was previously unknown, PuTTY does not have a key.
To allow the connection and save the key for future sessions, click Accept.
The SSH connection should now be successfully established.