Releasing an IP address
Valid for Cloud Servers, migrated Cloud Servers, VPS, VPS+, and Dedicated Server managed in the Cloud Panel.
This article explains how to release an IP address in the Cloud Panel. To do this, complete the following:
- Log in to your IONOS account.
In the title bar, click on Menu > Servers & Cloud.
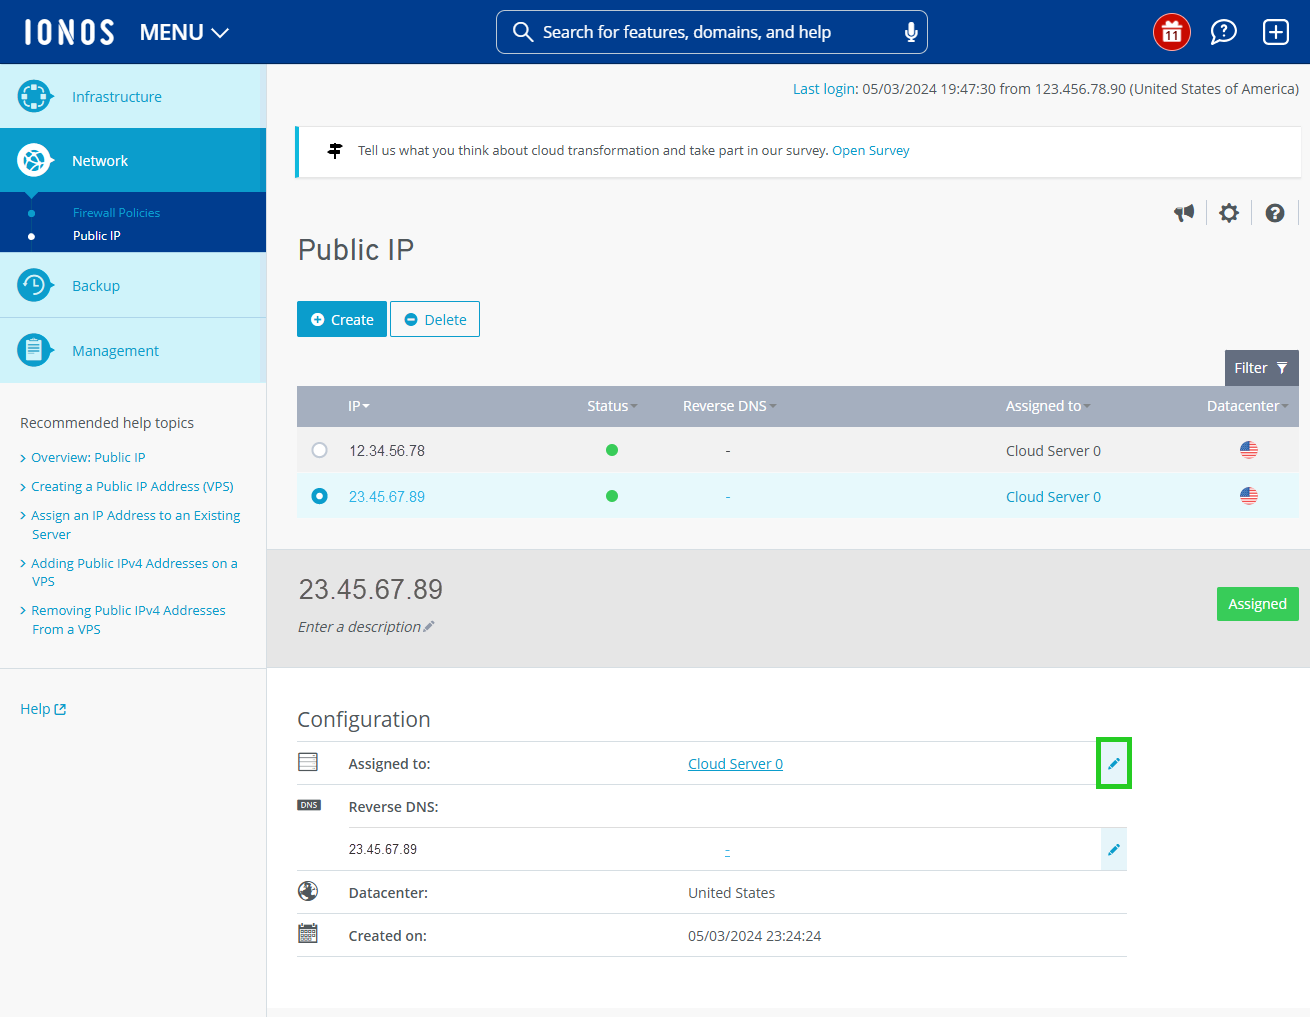
Optional: Select the desired Server & Cloud contract.In the navigation bar on the left, click on Network > Public IP.
Activate the desired IP address.
In the Configuration area, click on the pencil icon next to the Assigned to: menu item.
If you are using a migrated Cloud Server or VPS+, click on the Not assigned button. If you are using a VPS, click on the Unassigned button. If you are using a Cloud Server or a Dedicated Server, click on Unassigned.
Click on Save changes.
The IP address is available again. It can be assigned to a new server.