AI Frontdesk: Setting up the assistant using the setup wizard
Valid for AI Receptionist (plans from August 19, 2026) and AI Chat Assistant (Momentum AI).
The first time you access the system, a setup wizard will guide you through the basic configuration. Once this is complete, your assistant will be familiar with your business, will greet your customers using your own words, and will be ready for use. You can then take your time to customise everything else. You’ll go through the initial setup once per contract, for the products AI Receptionist and AI Chat Assistant. The following steps show you how to do this.
Requirements
- An active contract for AI Receptionist or AI Chat Assistant in your IONOS account.
- Optional: an existing website. You can still set up the assistant without a website (see step 1).
Open AI Frontdesk
- Log in to your IONOS account.
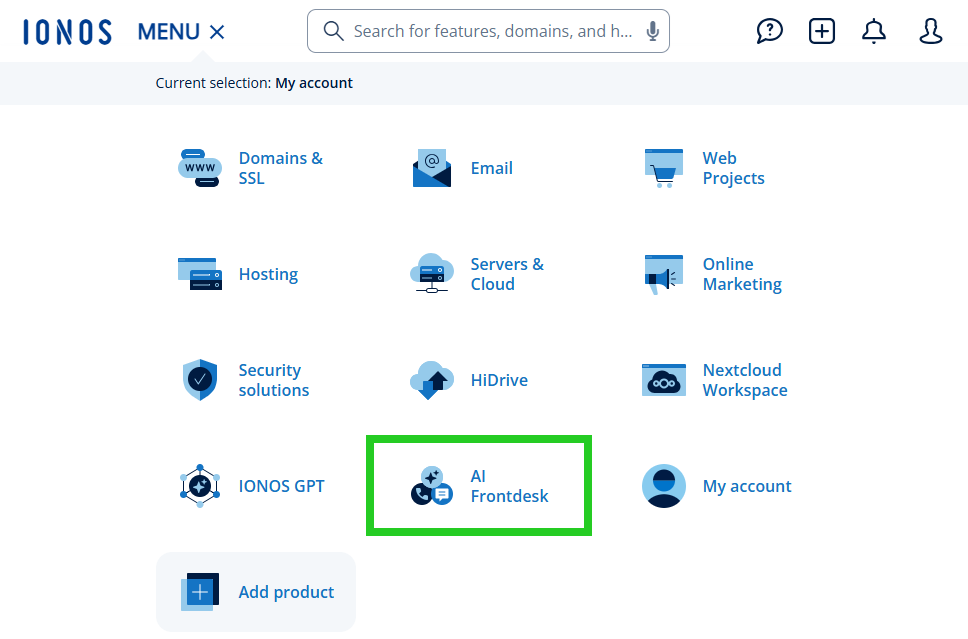
- Click on Menu > AI Frontdesk in the title bar.
- In the contract overview, click on Manage in the tile for the contract you want.
AI Frontdesk opens in a new browser tab.
Click on Get started to open the setup wizard.
Go through the setup wizard
When you set up AI Receptionist, the setup wizard guides you through four steps. When you set up AI Chat Assistant, the test call is omitted, so there are three steps.
Note
If you add another product to an assistant that has already been set up, the setup wizard will not be launched again. Your shared details – including company information, inquiries, and the website widget – will then also apply to the new channel. The only details that remain to be set are those specific to the channel, such as the greeting and the conversation behaviour. You can find out how to customise these in the Next steps section.
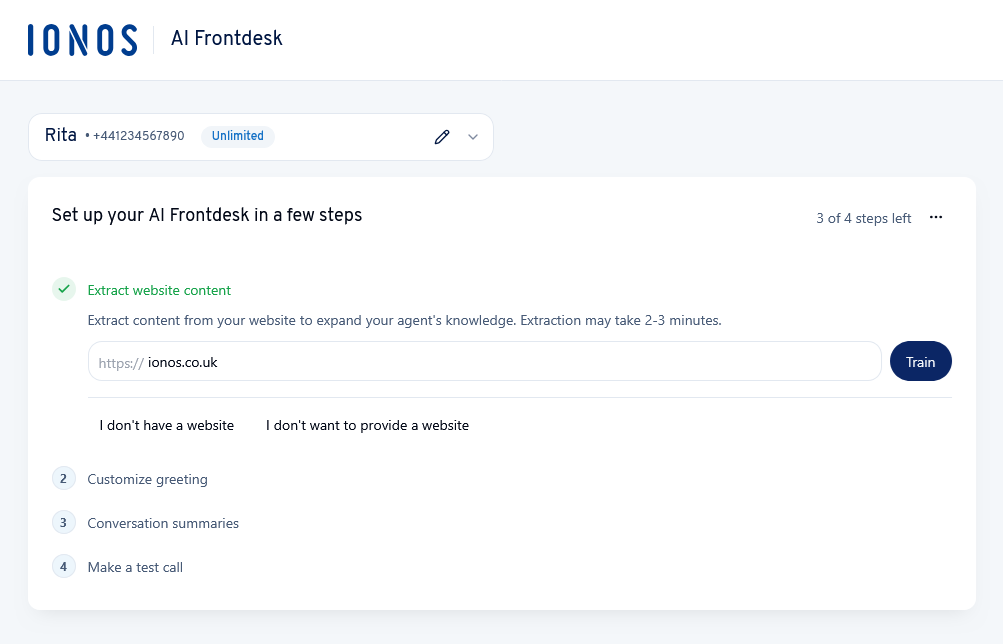
Learn website content
Your AI assistant learns from the content on your website so that it can answer customer inquiries in a way that reflects your preferences.
- Enter your website address in the field provided. The prefix https:// is already included.
- Click on Train. The training process may take 2–3 minutes. You will then be automatically redirected to the next setup step.
Note
If you do not yet have a website or do not wish to provide one, select the option I don't have a website or I don't want to provide a website below the input field. You can complete this step later at any time.
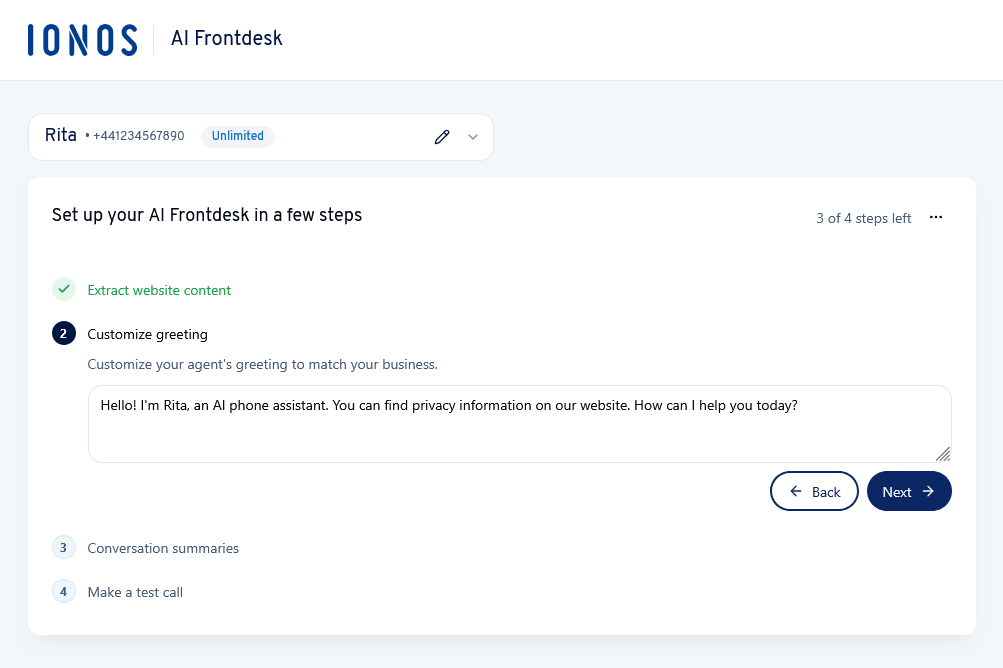
Customise greeting
Enter the text you want your assistant to use to open the conversation, then click Next.
Please Note
When setting up AI Receptionist, the greeting must, by law, state that the call is being answered by an AI and refer to your privacy policy. The default greeting contains both of these elements – please ensure that they remain in place when you amend the text. You can find examples of suitable greetings in the article AI Frontdesk: Customising language, voice, and behaviour.
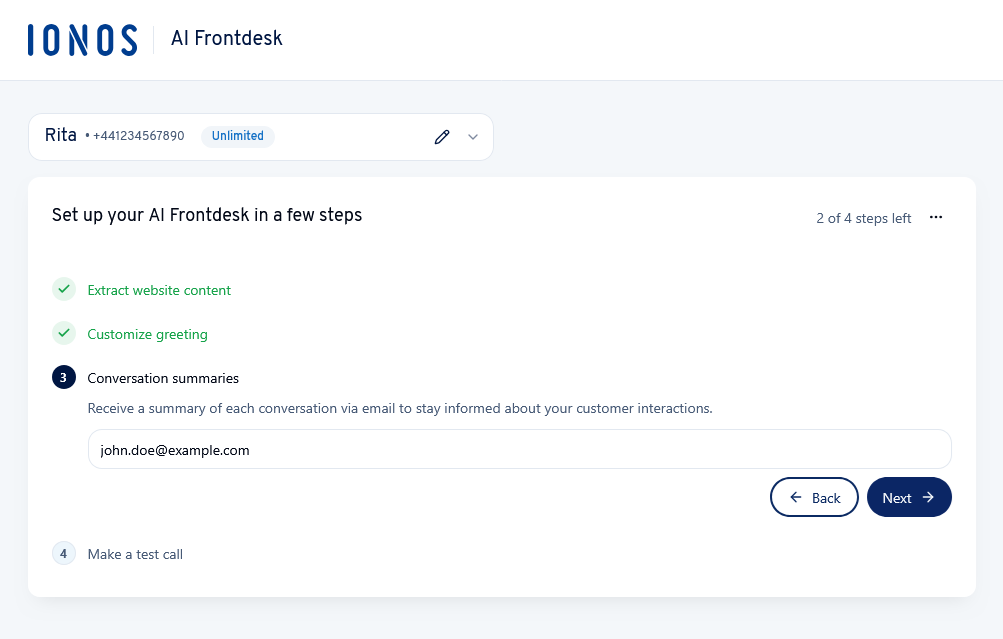
Conversation summaries
Enter the email address to which your assistant should send a summary after each conversation, then click Next.
Notes
- Regardless of the address you enter, all conversation summaries are also stored in the user interface.
- You can change the address later. If you have subscribed to AI Receptionist, you can also specify multiple recipients at a later date. For further details, see the article AI Frontdesk: Setting up conversation summaries by email.
Make a test call
When you set up AI Receptionist, a test call completes the initial setup. To do this, click the green Test Call button.
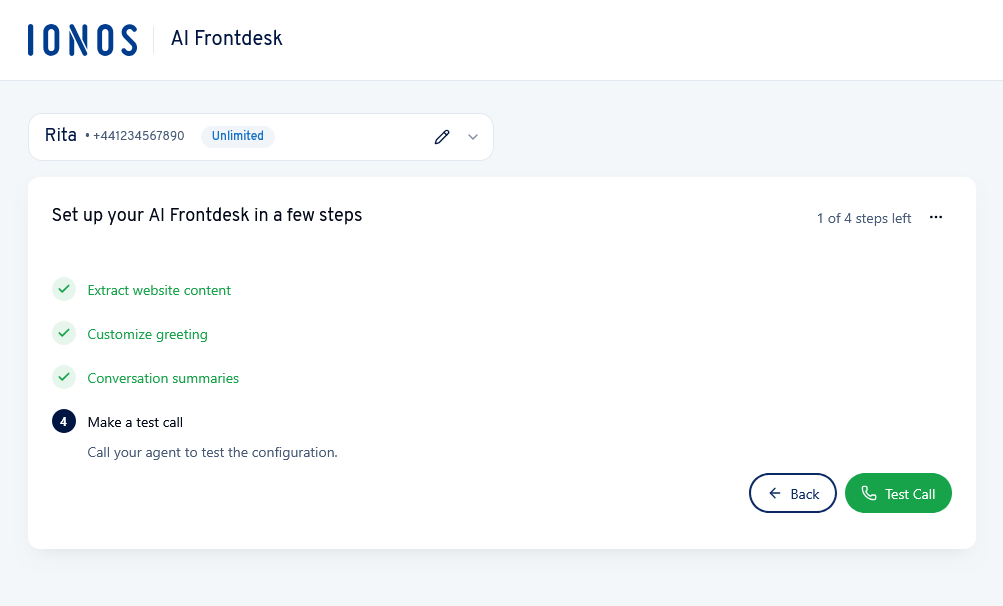
The call is handled via your browser, so you don’t need a second phone and don’t have to dial a number. The Test Call window will open, displaying your assistant’s phone number and the connection status. Click the Hang Up button to end the call. During the call, check whether the greeting and responses are appropriate for your business.
Note
You can open this window again at any time via the green Test Call button in the top right-hand corner of the interface. These test calls are free of charge. You can find further details in the article AI Frontdesk: Making a test call.
Complete the setup
Once you have completed the final step, you will see the Initial setup complete message. Your AI phone assistant is now ready for use.
You will not be able to access the setup wizard again. From now on, any changes to the details entered there should be made in your assistant’s settings.
Tip: Start by checking the content that has been imported from your website. This ensures your assistant works with the correct details right from the start.
Next steps
Configure advanced settings
On the configuration page, you can now customise the assistant in detail for your specific use case.
- Review and expand on what your assistant has learned: AI Frontdesk: Storing and managing company knowledge
- Customise your brand image, language, and behaviour: AI Frontdesk: Customising language, voice, and behaviour
- Define recurring conversation scenarios: AI Frontdesk: Setting up inquiries
- Arrange appointments: AI Frontdesk: Setting up appointment booking with Cal.com or Calendly and AI Frontdesk: Setting up appointment booking with Google Calendar or Microsoft 365
Start up the assistant
Once you are satisfied with your configuration and testing, you can make the assistant available to your customers.
- Publish the assistant on your website: AI Frontdesk: Setting up and integrating the website widget
- Make the assistant available by phone (only with AI Receptionist): AI Frontdesk: Routing calls to your assistant
- Set when your assistant forwards a call (only with AI Receptionist): AI Frontdesk: Managing escalated call forwarding and contacts