Transferring Domains with Websites, Emails, and Subdomains
This article will show you how to prepare content such as websites, files and emails with your old provider for the domain transfer and restore them with your new provider. You will also find links to important instructions from various providers (if available).
Who is the target audience for this guide?
Some steps in this guide assume that you are comfortable with topics such as FTP, databases and DNS Settings that you wish to make changes at IONOS and other providers.
You do not have to be a web developer or a database expert, but you should plan sufficient time to carry out the transfer successfully.
If you wish to transfer your WordPress website, you can find further information here: Transferring a WordPress Website to IONOS
Background
When you transfer your domain to a different provider, usually only the domain itself is transferred.
The following contents are not transferred:
- Websites in your webspace
Connected mailboxes (email@example.com, contact@your-domain.com)
- Databases (which contain important content from your website)
- Subdomains (subdomain.example.com, shop.yourdomain.com)
- FTP accounts (which you need to copy files to your webspace)
- Modified DNS settings
Sequence
If you would like to transfer the content listed above to your new provider in addition to your domain, proceed as follows:
Backing Up Content with Your Old Provider
On your old provider's end, export important content and create notes that you will need later for the setup with your new provider.
Backing Up Website(s) with FTP
Files on your website that you created with WordPress, Joomla! and other content management systems (CMS) are saved in your webspace. Use FTP to copy these files to your computer.
- Help from IONOS: Backing Up Files with FTP
- Help from other providers:
Exporting Databases (Backups)
In addition to files in the webspace, websites such as WordPress, Joomla! and other CMSs also store important content in a database. Use phpMyAdmin to export this database in SQL format and save it on your computer.
- Help from IONOS: Exporting a MySQL Database with phpMyAdmin
- Help from other providers:
Backing Up E-mails
If you connected your domain to a mailbox at your old provider, you can back up your emails in an archive using software such as MailStore Home (free for private users).
After the domain transfer, you can set up a mailbox with your new provider and recover your emails from the archive.
This will ensure that you do not lose any emails.
Preparing Subdomain(s): Noting Down Names and DNS Settings for Important Subdomains
When you transfer your domain to another provider, all associated subdomains are deleted.
If you are using subdomains such as shop.my-domain.com, please note down the subdomain name and the corresponding DNS settings in the domain management section.
- Help from IONOS: Display Subdomains
- Help from other providers:
Restoring Content with Your New Provider
After the domain transfer, restore your websites, emails, subdomains and important settings with your new provider.
Uploading Websites with FTP
Use FTP to upload the files you downloaded from your old provider to your webspace with your new provider.
- Help from IONOS: Uploading Files with FTP
- Help from other providers:
Importing (Recovering) Database(s)
Use phpMyAdmin to import the database you exported from your old provider.
- Help from IONOS: Recovering a MySQL Database with phpMyAdmin
- Help from other providers:
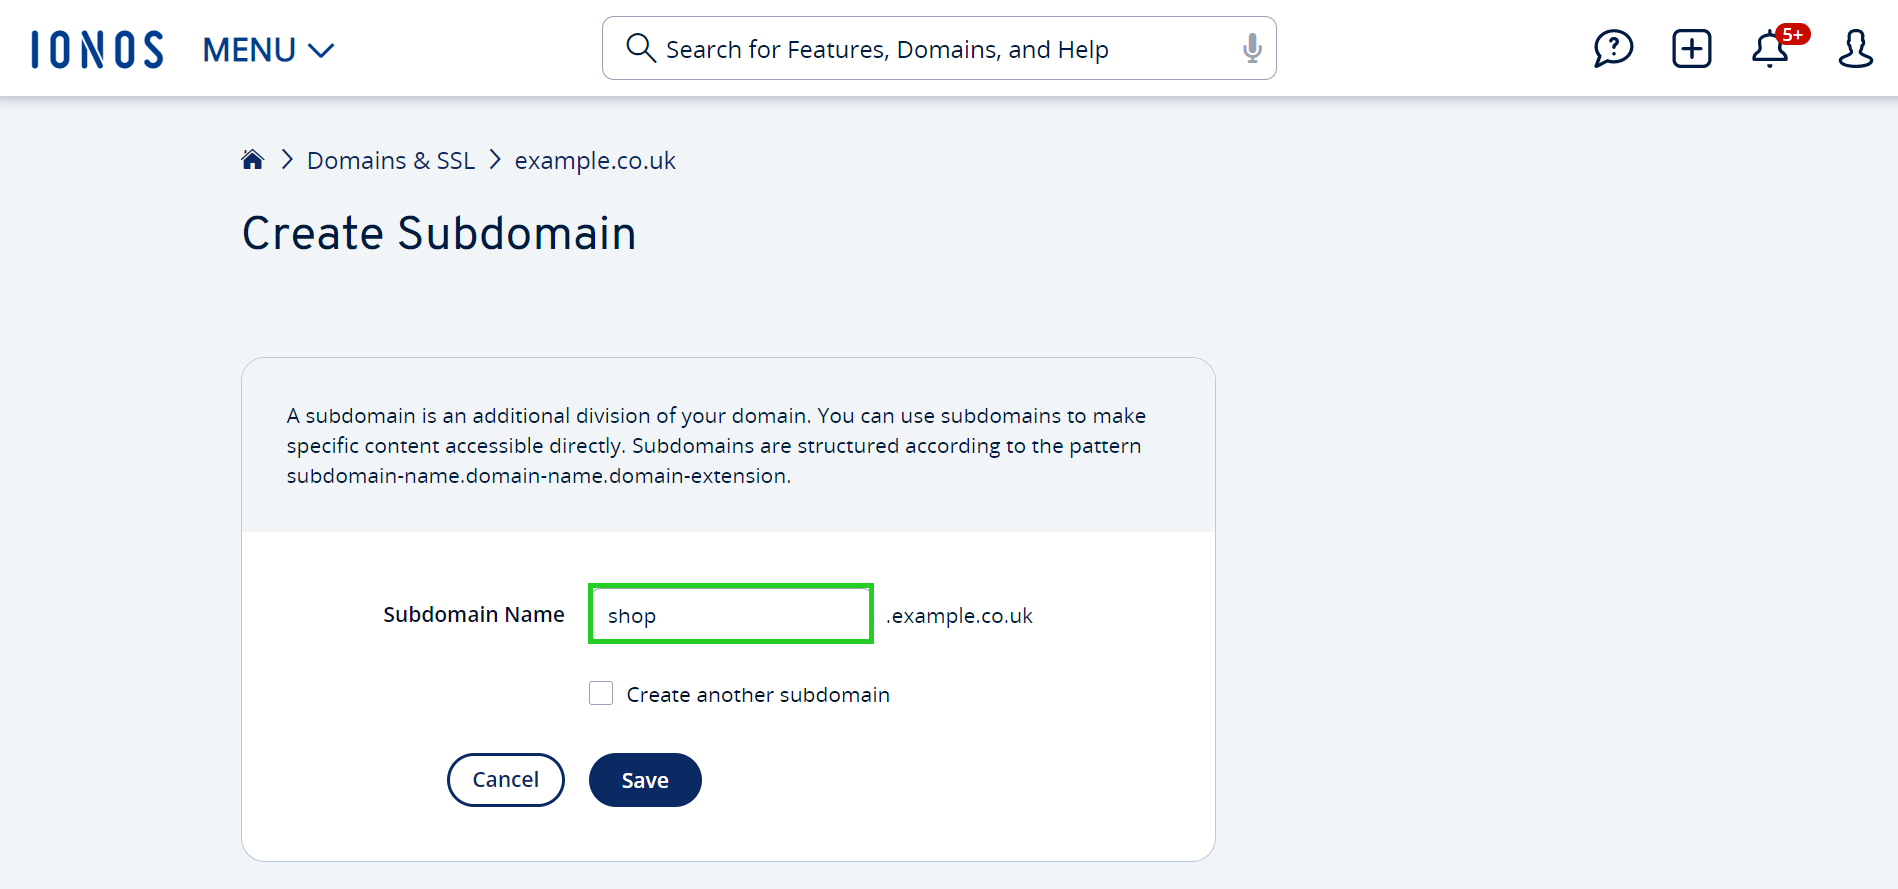
Creating Subdomain(s)
After the domain transfer, you can create the subdomains with your new provider and recover the DNS settings.
With IONOS: Create a Subdomain
- Follow this Link.
- Select your domain.
- Enter the subdomain name.
Use the subdomain name that you recorded from your old provider. For example: shop.your-domain.com. - Click Save.
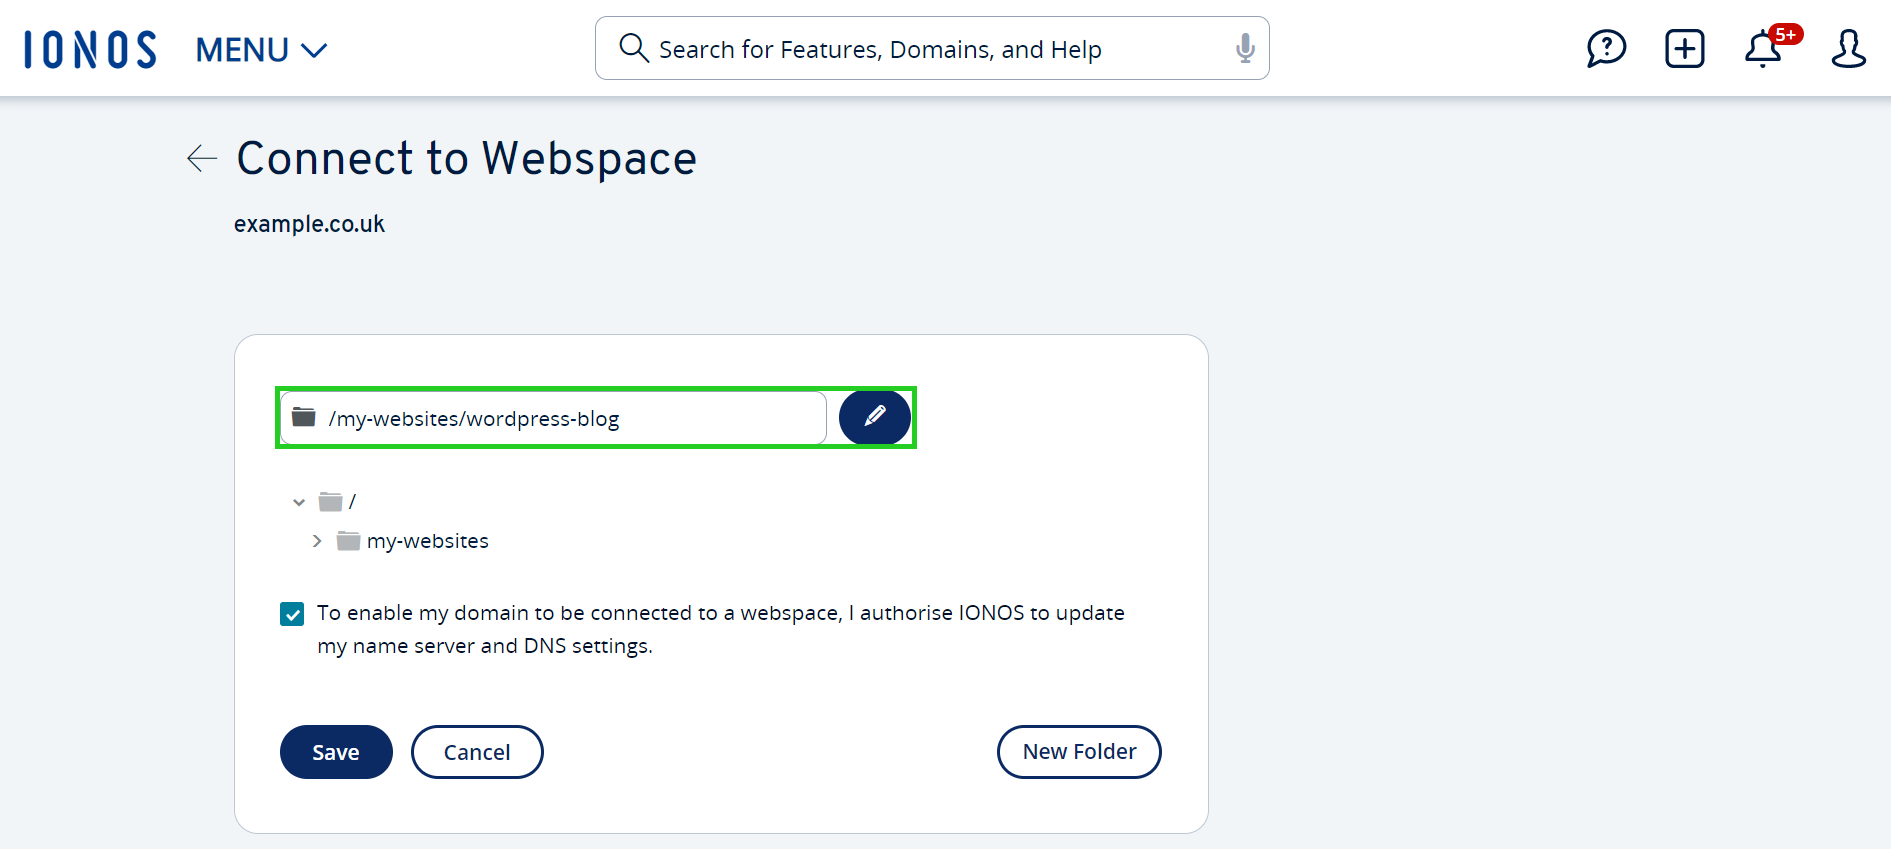
Connecting the Website to the Domain
Once you have copied your website to your webspace, you can connect your domain to the folder (directory) containing your website in your webspace.
With IONOS: Connect Website to Domain / Connect Webspace
- Follow this Link.
- Select your domain.
- Select the folder containing your website.
Tip: Click the pen icon to enter the path to your website directly. For example: /my-websites/wordpress-blog. - Click Save.
- Help from other providers:
Creating an E-mail Address
After the domain transfer, create an email address for your domain with your new provider. This email address should be the same one you used with your old provider. For example, if you used the email address contact@your-domain.com with your old provider, create exactly this same email address with your new provider.
With IONOS: Create an E-Mail Address
- Follow this Link.
- Select your domain.
- Click the box Set up Mail Basic.
If necessary, you can change to the more powerful Mail Business later. - Set up your mailbox with your previous email address.
- Click Save.

Recovering E-mails
Once you have set up your mailbox (contact@your-domain.com in our example) with your new provider, you can recover (export) your emails from the archive.
You can find information about recovering your emails in the documentation from MailStore Home.