How to install, host and configure an Avorion server
On your own Avorion dedicated server, you can define your personal play style for exciting space adventures in co-op or PvP mode. All you need is sufficient computing power, access to the firewall and the command line tool SteamCMD.
What are the requirements for an Avorion server?
You can run your own Avorion server on either a Windows or a Linux operating system since the dedicated server software is compatible with both systems. Regardless of your choice, hosting on external hardware is recommended for two reasons. Running a server requires additional computing power and bandwidth. If you also want to play the game on the same device, your computer may quickly reach its limits—unlike with external hosting. Renting hardware, on the other hand, ensures that the dedicated server remains online independently of your device.
To host an Avorion dedicated server for stable multiplayer sessions, your setup should fulfill the following minimum requirements:
- CPU/processor: Quad core CPU with min. 2.0 GHz
- RAM/working memory: min. 4-6 GB
- Hard disk storage: 5 GB
In addition to the computing power needed for the Avorion software, the requirements of the respective operating system must also be considered. For a Windows Server 2022, for example, an additional 1.4 GHz CPU, 2 GB RAM (for graphical user interface) and 32 GB storage space must be planned for.
Try out your VPS for 30 days. If you're not satisfied, we'll fully reimburse you.
IONOS offers these options for your own Avorion server
You can find suitable hardware for an Avorion dedicated server from a hosting provider that offers server solutions in its portfolio, such as IONOS. The vServer (also VPS) is a server variant in which the underlying hardware is completely virtualised. The various packages are available at a fixed monthly price. As an enterprise alternative, dedicated servers are an option based on dedicated hardware. These high-performance servers with optional virtualisation are suitable for even the most demanding application scenarios. With this model, the performance used is billed by the minute.
Regardless of the model and package selected, you can rely on an external broadband connection of up to 1 Gbit/s when choosing a server from IONOS. This makes the solutions ideal for a high-performance Avorion server, but also for various other gaming scenarios such as a DayZ server or a Terraria server.
For a simpler overview of the server packages on offer and their respective suitability for hosting your own Avorion server, we’ve summarised three possible use cases in the following table and assigned the most suitable IONOS packages to them.
| Avorion: Dedicated server scenario | Suitable IONOS server package |
|---|---|
| Simple PvE server for 2-4 players | VPS Windows L |
| PvE/PvP server for 4-8 players | VPS Windows XL |
| Server for any scenario and 8+ players | Dedicated Server AR6-32 SSD |
- Enterprise hardware
- Configurable hardware equipment
- ISO-certified data centres
Savings tip for server newbies
If you want to start off with a small co-op adventure in the world of Avorion, a low-cost package will suffice. As soon as you realise that you need more computing capacity, simply upgrade to a higher performance package.
The cheapest package with suitable computing power: Windows VPS M.
How to create an Avorion server (Windows server)
The following step-by-step guide will show you exactly how to install and configure the Avorion dedicated server software on the respective hardware using SteamCMD. The steps provided are based on the perspective of IONOS customers, with Windows Server 2022 as the operating system.
Step 1: Connect to the server remotely
To install and set up the Avorion application on the rented server hardware, the first step is to connect to the system via remote access. IONOS customers can set up this remote connection via their customer account. You’ll need to carry out the following steps:
- Log in with your personal login details.
- Go to the Server & Cloud section.
- Click on the rented server in the list.
- Press Actions and Open remote console in succession.
The remote console will automatically open in a new browser tab. You can find the login credentials for accessing the Windows server in the corresponding section of your customer account.
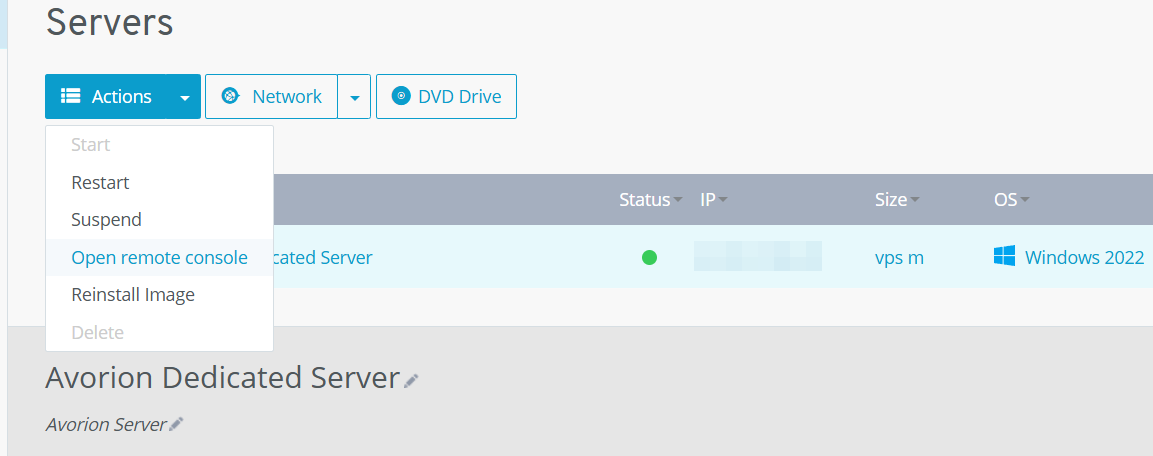
Instead of using the remote console, you can also initialise the remote connection using the Windows app Remote Desktop Connection. You can find out more about this topic in the article ‘Connecting to Windows server via remote desktop’ in the IONOS Help Centre.
Step 2: Install SteamCMD
Once you have established a connection, the second step is to install the SteamCMD software. This command line client enables fast and secure access to the public Steam servers and is therefore the best solution for obtaining the dedicated server application for Avorion. Click on the following SteamCMD download link to download the installer for Windows. Then unzip the package in a directory of your choice and double-click the unzipped file to install SteamCMD.
Step 3: Install the Steam app ‘Avorion dedicated server’
You can now use SteamCMD for Steam access at any time by executing the file steamcmd.exe. Once the service is ready for use, you’ll be presented with the command line Steam> in the command prompt window.
First, specify an installation directory for the Avorion server. With the following command, for example, you can ensure that SteamCMD downloads the server files to the directory C:\avorion-dedicated-server and installs them there:
force_install_dir C:\avorion-dedicated-serverIn the next step, you connect anonymously to the public Steam servers:
login anonymousAfter successfully logging in, you can download the server software. To do this, combine the command app_update with the Steam app ID (565060) of the required application ‘Avorion Dedicated Server’:
app_update 565060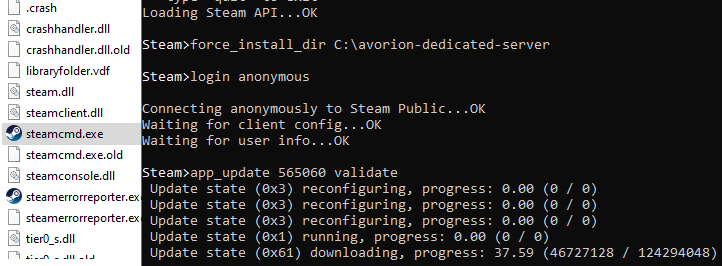
To log out of the Steam servers — and close the client — finally execute the quit command.
Step 4: Customise the start script
To start the server instance, there is a simple start script with the name server.bat in the unpacked directory. If you open this file with any editor, you can freely customise the start parameters. By default, you will only find the two parameters --server-name for the name of the Avorion server and --admin for the Steam ID of the administrator of the server.
You can append as many parameters as you like and then save the file to apply the changes. You’ll find the most important available options in the following table:
| Avorion start parameters | Description |
|---|---|
--port VALUE
|
Port on which the server is listening (Standard: 27000)
|
--save-interval VALUE
|
Automatic storage interval (Standard: 300)
|
--seed VALUE
|
Seed of the server |
--difficulty VALUE
|
Difficulty level; possible values -3, -2, -1, 0, 1, 2, 3 (Standard: 0)
|
--collision-damage VALUE
|
Settles the collision damage; (standard for full damage: 1)
|
--infinite-resources VALUE
|
Unlimited resources for all players if the value true is set
|
--same-start-sector VALUE
|
All players start in the same sector if the value true is set
|
--exit-on-last-admin-logout
|
Server is switched off as soon as the last admin disconnects |
--public VALUE
|
Set server public (true) or private (false)
|
--listed VALUE
|
Show server in the server listing (true) or not (false)
|
Step 5: Configure the Avorion server
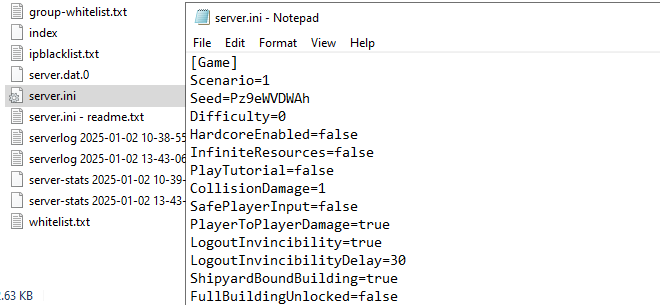
Apart from the simple parameters for the server start, you have even more versatile options for customising the game world and the gameplay in Avorion individually. However, the server.ini file required for this is only generated after the first execution of the Avorion dedicated server. To do this, double-click the server.bat script (adapted or unchanged) and close the prompt window after a few seconds.
You’ll then find the configuration file under the following path: C:\users\username\AppData\Roaming\Avorion\galaxies\.
Open the file with the editor of your choice. You can then adjust the values shown for the game world to suit your requirements. Detailed explanations of the individual setting options can be found in the Avorion Wiki on fandom.com.
Step 6: Enable server ports
To make your server publicly accessible, the next step is to enable the TCP/UDP ports 27000, 27003, 27020 and 27021. To do this, you must adjust the Firewall settings accordingly, which can also be done in the customer account or cloud panel for an IONOS server:
- Log in to your account via the login page.
- Go to the Server & Cloud section.
- Select the hardware on which you have previously set up the Avorion server.
- Press Network and Firewall policies in the menu on the left in succession.
- Add rules for the TCP and UDP ports 27000, 27003, 27020 and 27021 under Incoming.

Step 7: Start the Avorion server
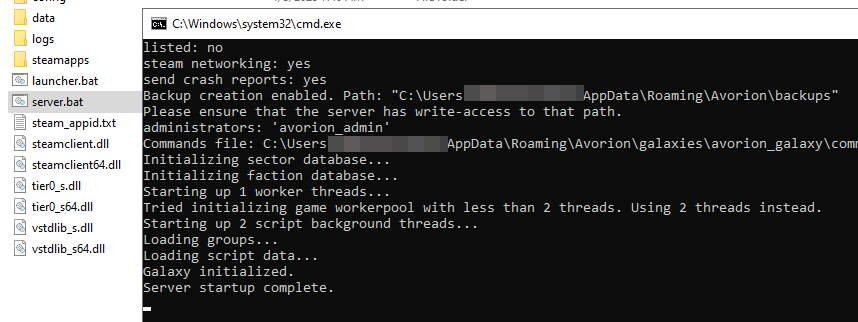
You can now start your Avorion dedicated server at any time using the server.bat macro with the desired parameters. To do this, double-click the batch file as described in step 5. You can follow the initialisation of the server instance live in the prompt window that opens. If the start was successful, you’ll see the line Server startup complete.
Step 8: Connect to your own server
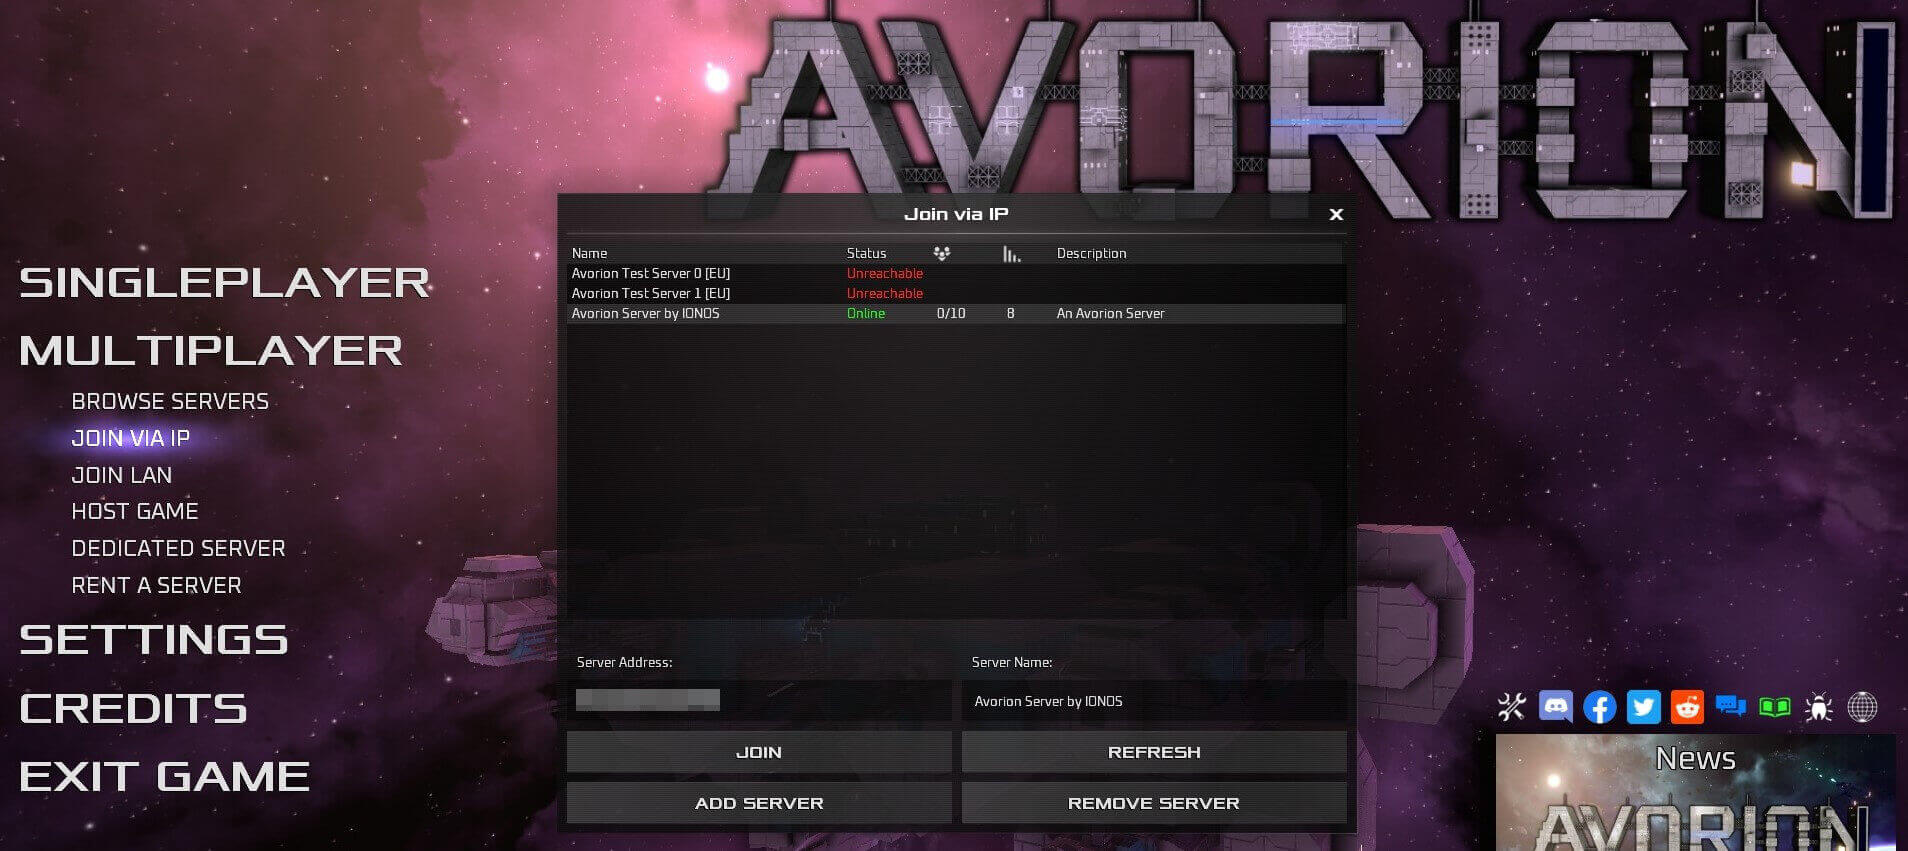
Once the server instance is running, you and your fellow players can join the created Avorion server as follows:
- Start Avorion.
- Press Multiplayer.
- Select the item Browse Servers and search for your server in the list.
- Alternatively, press Join via IP and enter the IP address of the rented server and any server name. Click Add server.
- Connect to the Avorion server by clicking Join.
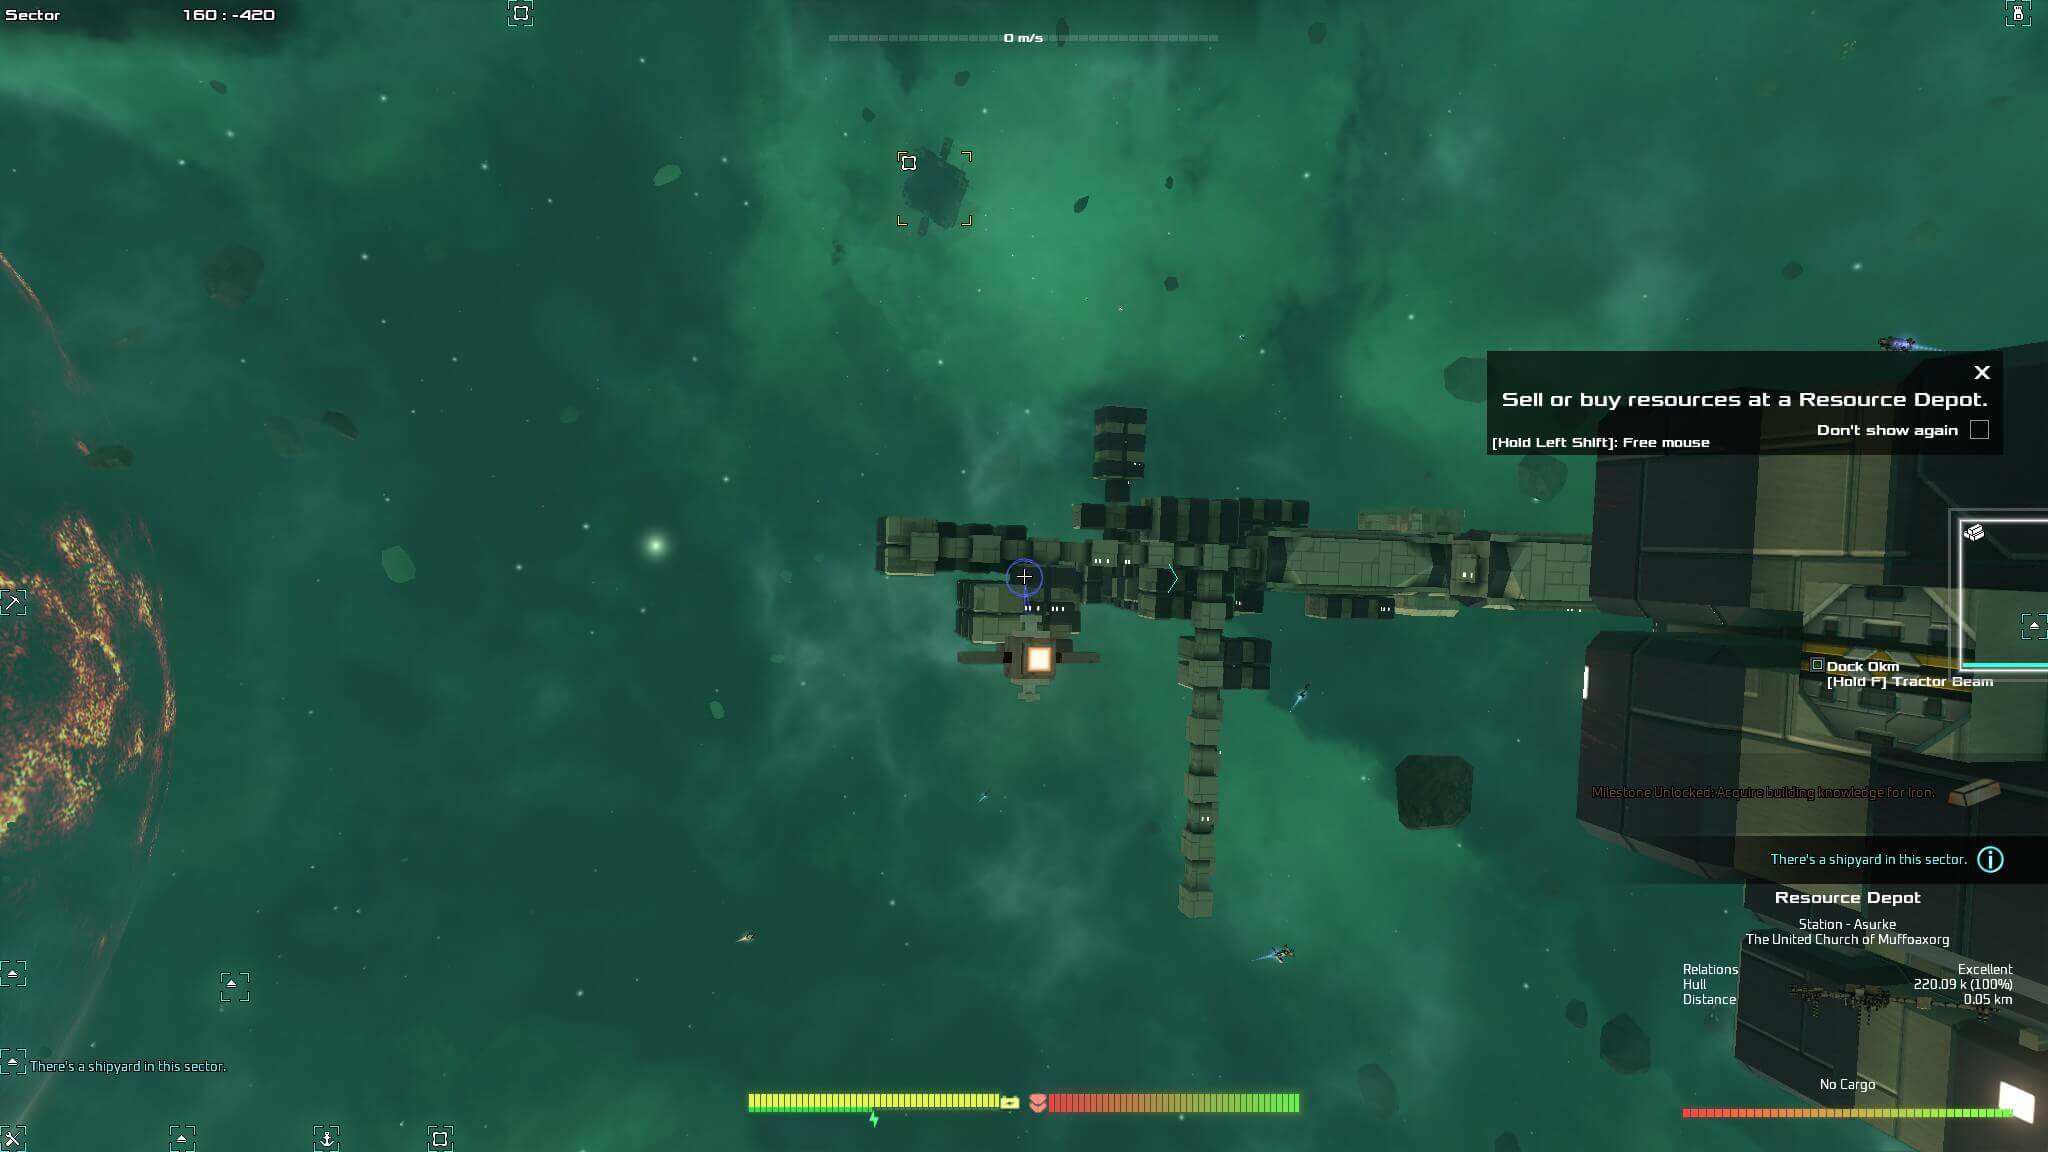
After a short loading time, you will find yourself in space — and the joint search for shipwrecks, asteroid fields and giant asteroids as well as fleet construction can finally begin!
Your server is clearly identifiable and accessible via the IP address. However, you can also link the Avorion server with your own domain and give it an individual name that is easier to remember and type in. Use the domain check from IONOS and find your dream address with suitable endings such as .space or .games.

