How to host a Counter-Strike 2 server on Linux
You want to play Counter-Strike 2 with friends and have maximum control over the game configuration and mods? Then a self-hosted, private Linux CS2 server is the best solution. We will show you how to conveniently install and set up the necessary software on your Ubuntu system.
What are the system requirements for a CS2 server on Linux?
A Counter-Strike 2 server can basically be self-hosted, even on your own computer. However, to ensure a smooth gaming experience for all players, there are some minimum requirements that a Linux host system must meet:
- CPU: 4 hardware threads (cores), i.e. Intel Core i5 750 or better
- RAM: 8 GB
- GPU: AMD or Nvidia GPU with GCN or Kepler architecture or better; current Vulkan drivers must be installed
- Storage space: 85 GB
If you want to future-proof your system or carry out additional modifications (e.g. use custom maps, increase the number of players, etc.), it is recommended to use higher-performance hardware, which you would receive if you choose to host with a provider.
Which CS2 server is right for you?
You can host your CS2 server on your own computer, but this is not recommended for several reasons. Firstly, home internet speed is usually not good enough to provide a smooth gaming experience for all players. Secondly, the server will only be online when the host computer is turned on. And thirdly, from a performance point of view, it is not recommended to host the server on the same device you want to play on.
This is why it makes sense to take advantage of a hosting provider so you can ensure that the gaming experience is smooth and consistent for all players. Servers hosted by a provider can often be scaled easily as well. If you want to increase the maximum number of game players, you can simply upgrade your package. IONOS offers three different server types to choose from:
- Cloud server: Virtualised server resources with billing by the minute
- vServer/VPS: Virtualised server resources at a fixed monthly price
- Dedicated server: Dedicated server hardware with billing by the minute
Cloud servers and vServers are virtualised server resources. This means that the server runs on a computer that is also used by other customers. Dedicated servers, as the name suggests, are dedicated server hardware that is reserved exclusively for you.
The main difference between the two virtualised server types is the billing. With a cloud server, you only pay for the time you actually used your server, but with a vServer, you pay a fixed monthly price.
For each server type you have the choice between several packages and operating systems, which means you can put together your game server according to your needs.
Try out your VPS for 30 days. If you're not satisfied, we'll fully reimburse you.
How to set up your CS2 server step by step
We provide you with step-by-step instructions on how to install a CS2 server on Linux.
This guide is for Ubuntu 22.04. For other Linux distributions some of the steps may differ.
It is also possible to host your CS2 server on Windows.
Step 1: Install Steam and SteamCMD
First, start the command line tool SteamCMD. If you don’t have it on your system yet, you need to install SteamCMD first. You will also need the Steam client. To do this, enter this command into your shell:
sudo apt install steamDon’t run SteamCMD as the root user, as this could cause serious damage. Instead, you should create a separate user account with sudo privileges, which you can then use to execute the following commands.
Step 2: Download CS2 game files
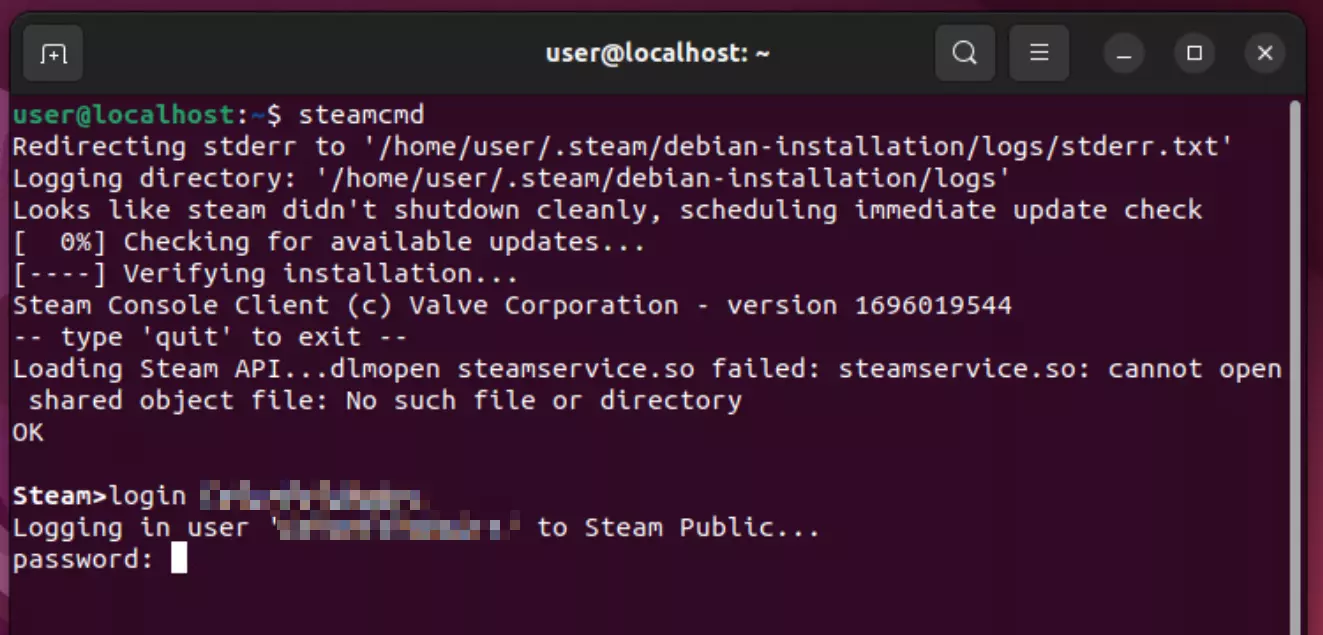
Enter steamcmd to start SteamCMD. To download the Counter-Strike 2 game files, first log in to your Steam account. To do this, enter the following command into SteamCMD (replace [username] with your Steam username):
login [username]
To create a CS2 server, you need to enable Steam Guard in your Steam account.
You then need to enter your password and a Steam Guard code. Before downloading the game files, you can specify a location where the files should be saved. This is done via the following command (replace /path with the path to the location you want to use):
force_install_dir /pathNow you can download the game files:
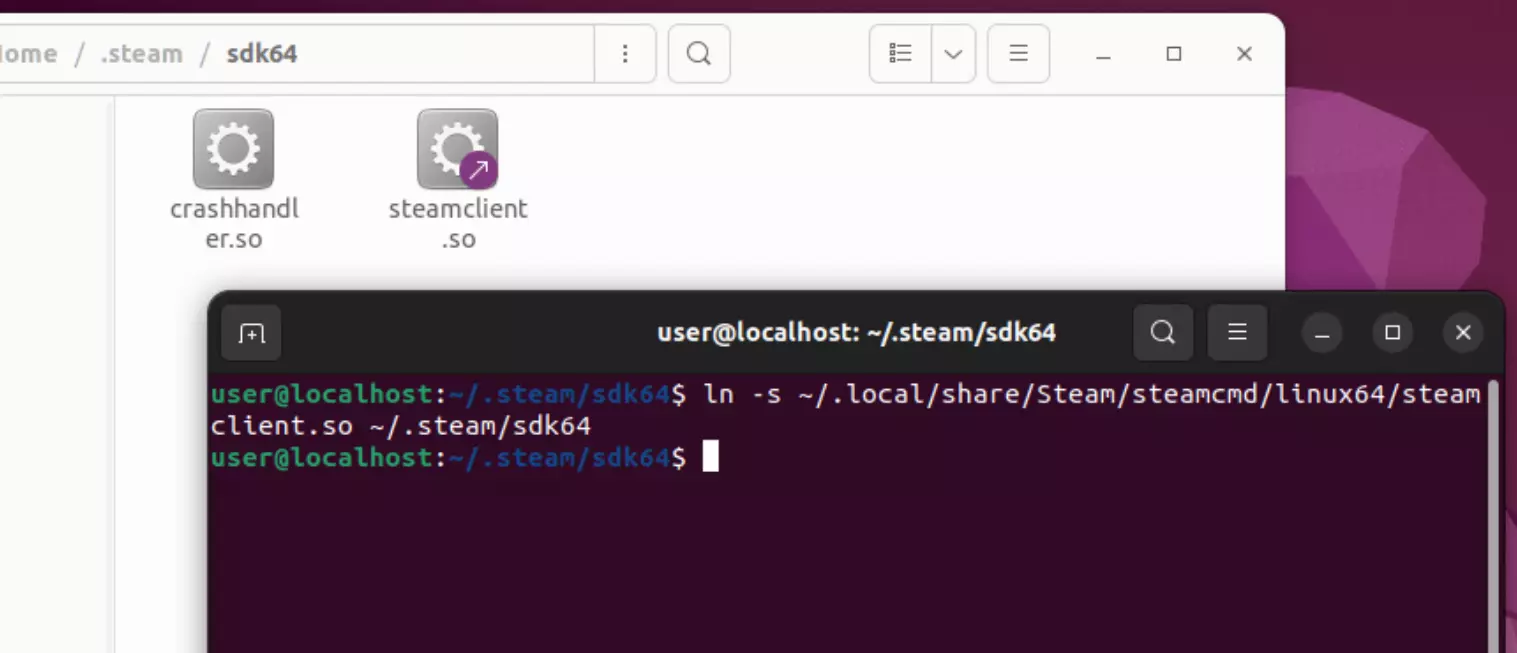
app_update 730 validateAfter the download has successfully completed and the downloaded files have been verified, you should check whether the steamclient.so file is in the ~/.steam/sdk64 directory. If it isn’t there, you will need to create a link to another directory. Check if steamclient.so exists in the ~/.local/share/Steam/steamcmd/linux64 directory. If so, enter the following command to create the link:
ln -s ~/.local/share/Steam/steamcmd/linux64/steamclient.so ~/.steam/sdk64/
If you do not see the folders .local and .steam, have a look in the hidden files section. You can enable this option in File Explorer by pressing [Ctrl] + [H]. If you only see the .local folder, you still need to install Steam. If you’ve already tried that, it could mean that something went wrong with the installation.
Step 3: Generate login token
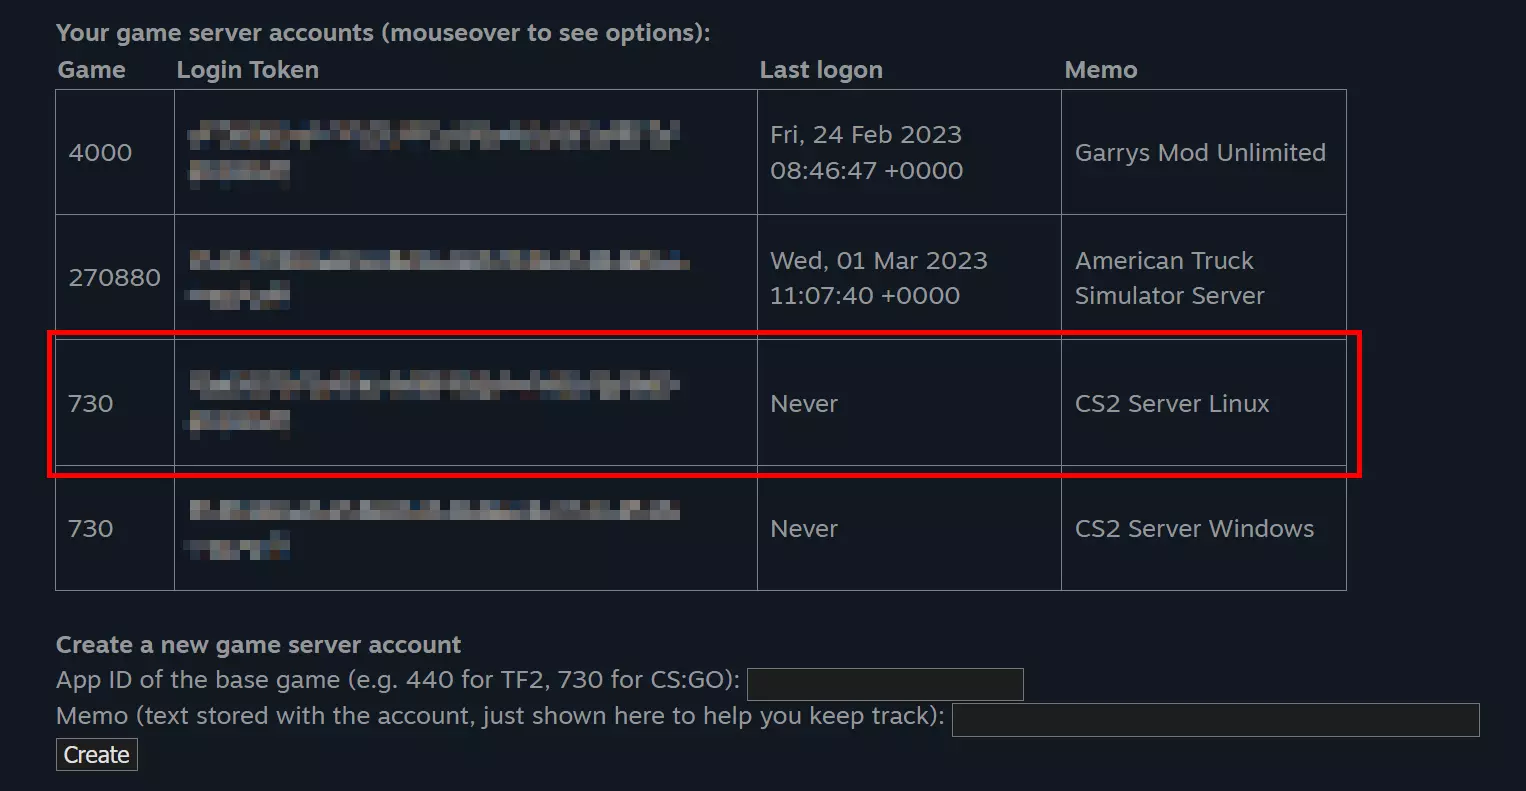
The next step is to generate a login token. This can be done on the Steam game server account management page. Go to where the downloaded game files are located and then to the configuration file Steam/steamapps/common/cs2/game/csgo/cfg/server.cfg. If you did not specify a location when downloading, you should be able to find this file at ~/Steam/steamapps/common/cs2/game/csgo/cfg/server.cfg. Open the file and copy the following text into it (replace [token] with the token you just generated):
sv_setsteamaccount "[token]"
Step 4: Start the CS2 server
Your server should now be ready to run. Go to the ~/Steam/steamapps/common/cs2/game/csgo/bin/linuxsteamrt64 directory and open a terminal window there. Execute the following command in it:
./cs2 -dedicated -usercon +game_type 0 +game_mode 1 +map de_overpass -port 27016
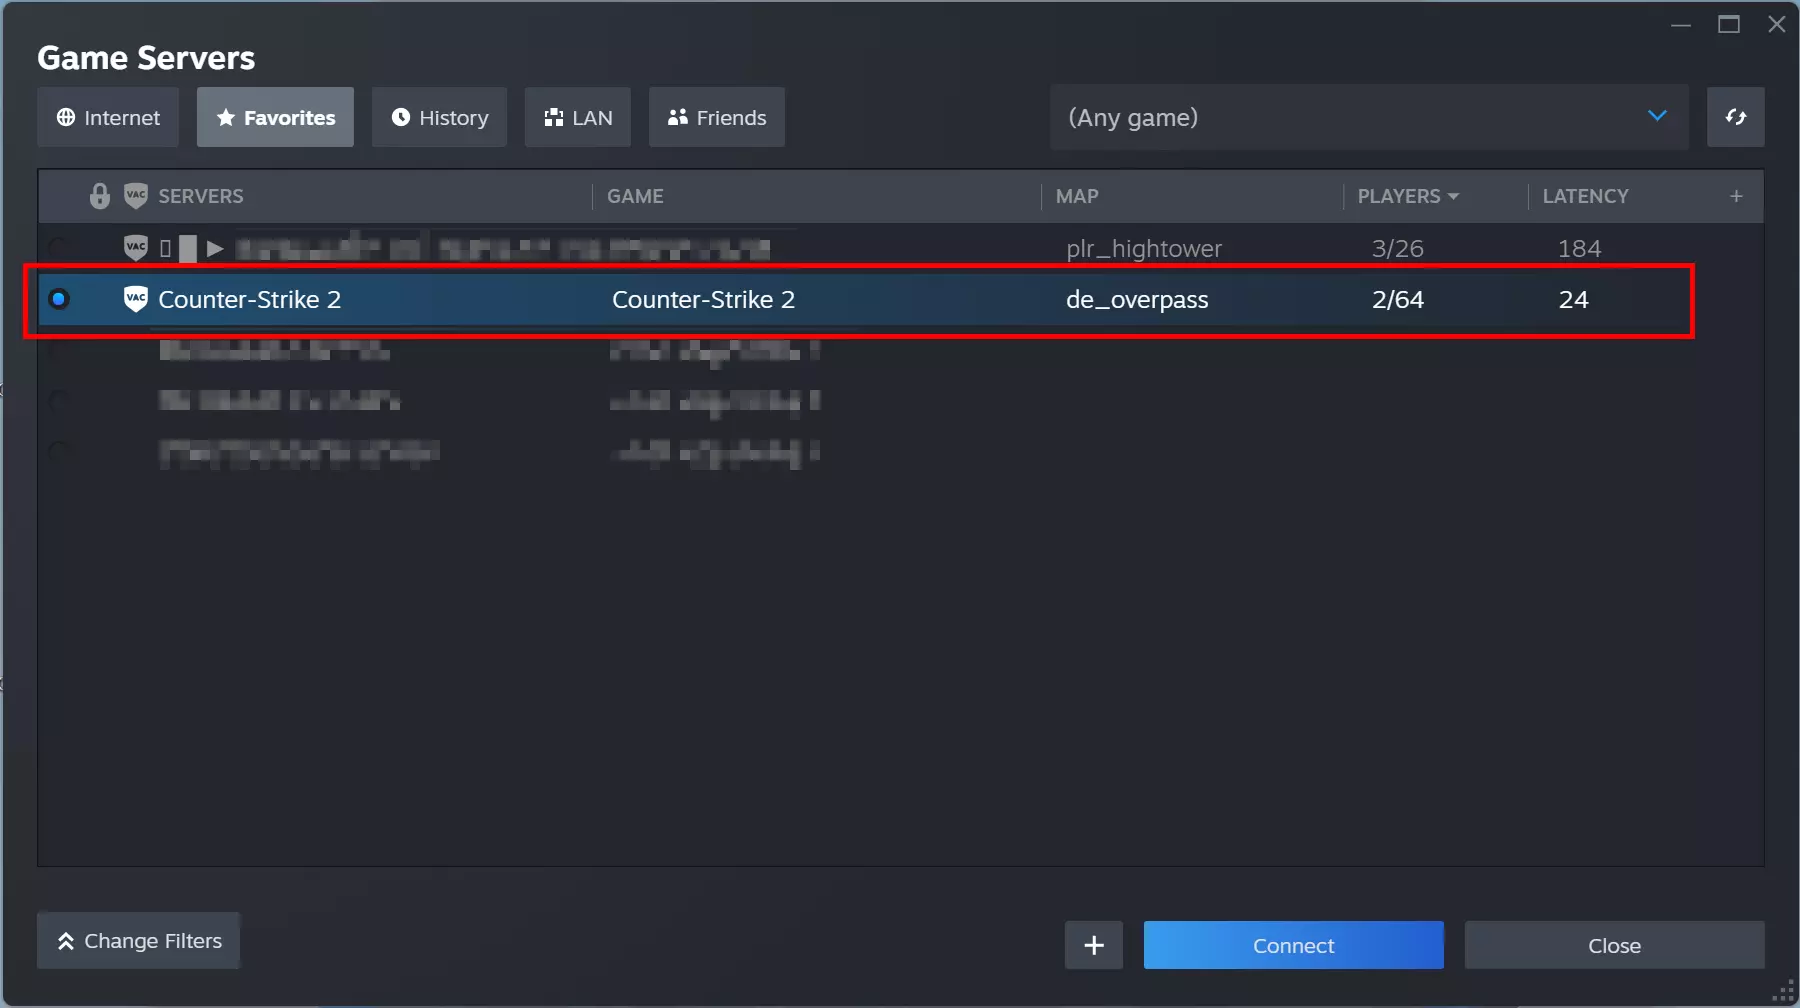
You can change the game_type, game_mode, map and port parameters to your liking to get a different game experience or to make the server accessible through a different port. However, when connecting to the server, you must specify the same port as when you started the server. To connect to the server, enter the command connect [IP]:[Port] in the CS2 console on another computer (with a different Steam account) (replace [IP] and [Port] with the IP of the host computer and the port you specified when you started the server). Alternatively, you can save this data in the Steam client under View > Game Server.
Want to play on a different map but you’re not sure what details to enter? You can find the different maps and their names in the ~/Steam/steamapps/common/cs2/game/csgo/maps folder.

If you want to share your server address with others, a classic IP address would work but they are a bit long-winded. Why not connect your CS2 server to a domain? By using a creative name and a suitable gaming domain like .gg, others will take notice of your server and manually setting up the connection to your server will be easy. Get started right away and check whether the domain you want is available with Domain Checker from IONOS!

