How to compress images using free tools
Compressed images have a particularly positive impact on website loading times. But how can you compress images in a way that’s as lossless as possible—without noticeable quality loss? And what options are available to achieve this? In this guide, we’ll give you a clear overview of image compression tools.
Why should I compress my images?
These days, high-resolution images and photos are common. In digital photography, pixel counts and file sizes are increasing. Whether you’re uploading images to your website or just sending them by email, it’s always important to keep file sizes to a minimum. Remember, the smaller the file, the less time it takes to transfer. This is beneficial for two reasons:
- A fast loading process increases visitor satisfaction (especially for users with mobile internet access)
- Fast loading times have a positive effect on the search engine ranking
The right data format for online images
Before putting your images online, you should check the image file format. Not every graphic format is suitable for internet use. Here are five format types that can be used:
- JPG/JPEG: JPG is one of the most commonly used image formats. It can display 16.7 million colours and boasts robust compression rates. JPGs are mostly used for saving photos or photo-like graphics, particularly those with lots of different colours and stark contrasts.
- PNG: This format can depict between 256 (PNG8) and 16.7 million (PNG24) different colours and be used online. Unlike JPGs, this format can be compressed without any sacrifices to quality. PNG files are well suited for saving graphics, logos, and texts. Images with few colours can be compressed into files only a fraction of the image’s original size.
- WebP: WebP is a modern image format developed by Google to provide better compression while maintaining high image quality. It supports both lossy and lossless compression, resulting in smaller file sizes compared to JPEG and PNG. Thanks to efficient algorithms like predictive coding, WebP can compress images up to 30% smaller than JPEG at similar quality. The format also supports transparency (alpha channel) and animations, making it a versatile alternative to PNG and GIF.
- SVG: SVG (Scalable Vector Graphics) is an XML-based image format used for vector graphics. Since it relies on mathematical descriptions of shapes and lines, image quality remains intact regardless of scaling. Unlike pixel-based formats, SVG files can be heavily reduced in size through simple code optimisations and gzip compression—without compromising visual quality. SVG is especially ideal for logos, icons, and illustrations on the web.
- GIF: GIF files are still fairly common on the web—even though they can only display 256 colours. This is mainly because the GIF format supports short animations made from a sequence of images, which are especially popular on social media and similar platforms.
Compressing photos and images is one of the most important steps to improve your website’s performance. However, there are additional ways to optimise visual content. It’s worth specifying the dimensions of an image directly in the source code, so the browser doesn’t have to calculate them. Removing metadata such as meta tags and EXIF information can also have a positive effect on loading speed. If your web application contains a large number of images, using a Content Delivery Network (CDN) is highly recommended to optimise delivery and performance.
Option 1: Compress images online
If you want to compress images without having to install special software, you can also easily optimise your images online. For this purpose, there are various offers on the web that enable you to compress them free of charge. The tools usually differ when it comes to the available file formats and possible degrees of compression, and they often have limitations regarding the number of compressions that can be carried out. Some of the best solutions can be found in the following paragraphs.
Optimizilla
The online tool Optimizilla from Mediafox Marketing allows you to upload and compress up to 20 images at once. The images must either be in JPEG or PNG format. The web application uses a combination of different compression algorithms, which are characterised by a good ratio of compression and image quality. You can use the slider to set the degree of compression before downloading the results individually or together as a ZIP file.
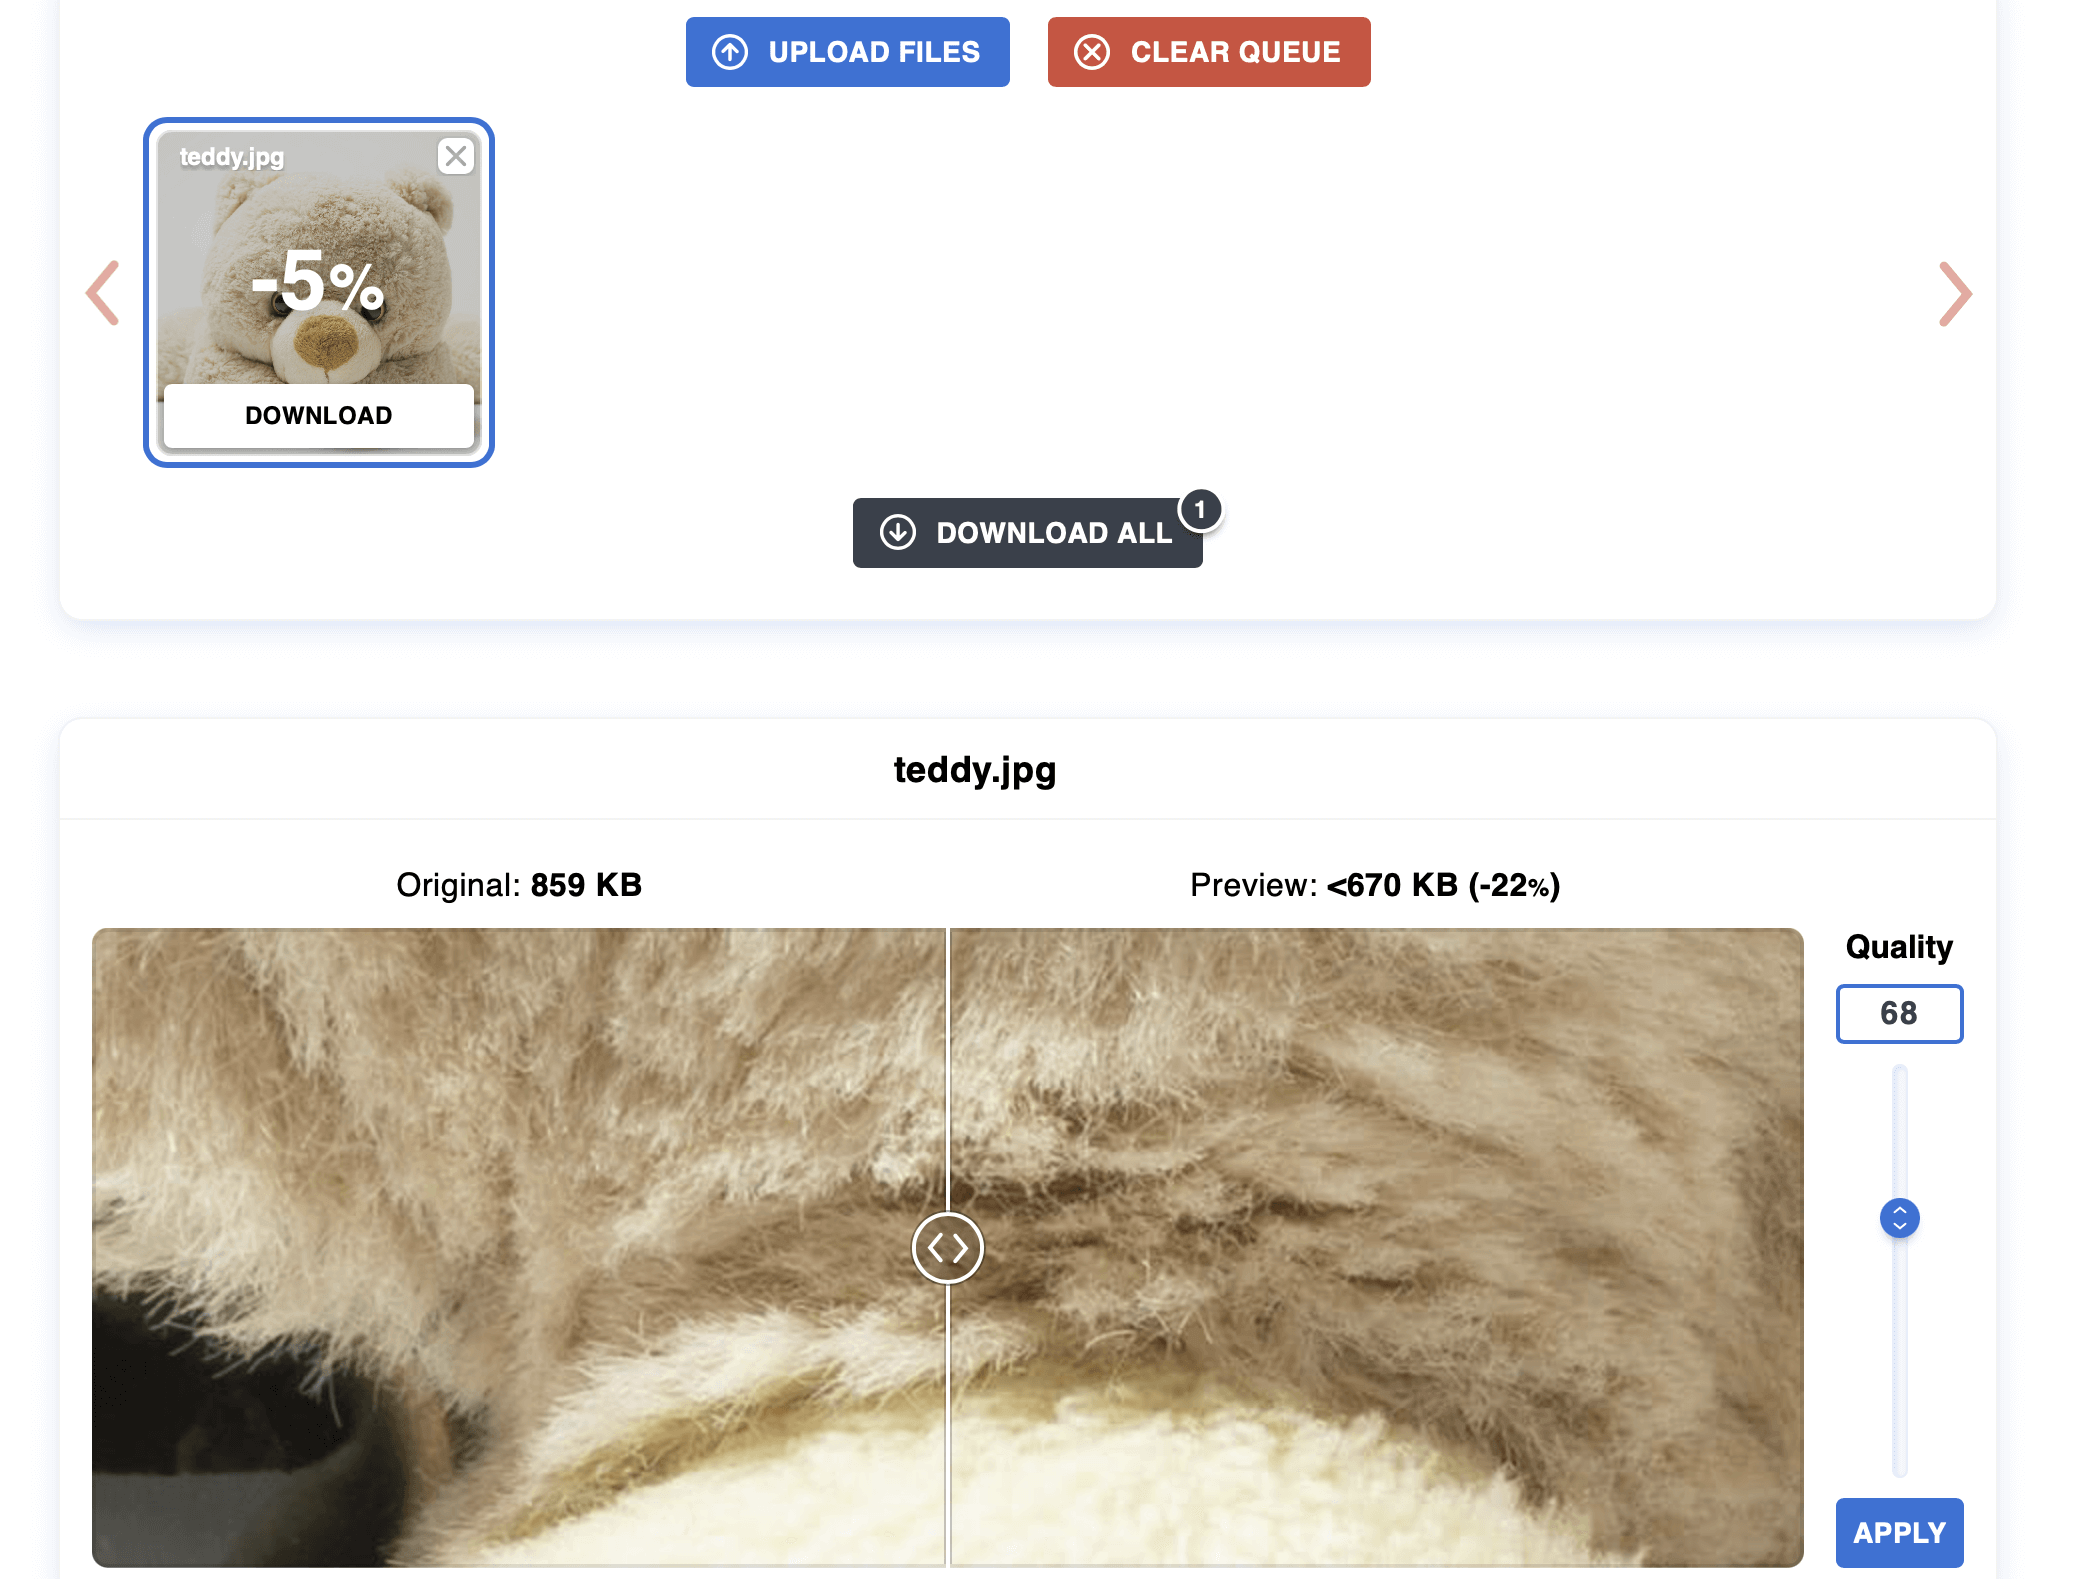
To help you find the best possible settings, Optimizilla provides you with thumbnails of the original and its compressed counterpart. In addition, the tool specifies the respective file size. All uploaded images are automatically deleted from the provider’s servers after one hour.
| Advantages | Disadvantages |
|---|---|
| Adjustable compression ratio | Limited to 20 compressions at once |
| Thumbnail preview of original and edited version |
TinyPNG
TinyPNG allows – contrary to its name – not only the compression of PNG files, but also JPEG and WebP files. In the free standard version, you can optimise up to 20 images of these three formats simultaneously, with the maximum file size per image limited to 5 megabytes.
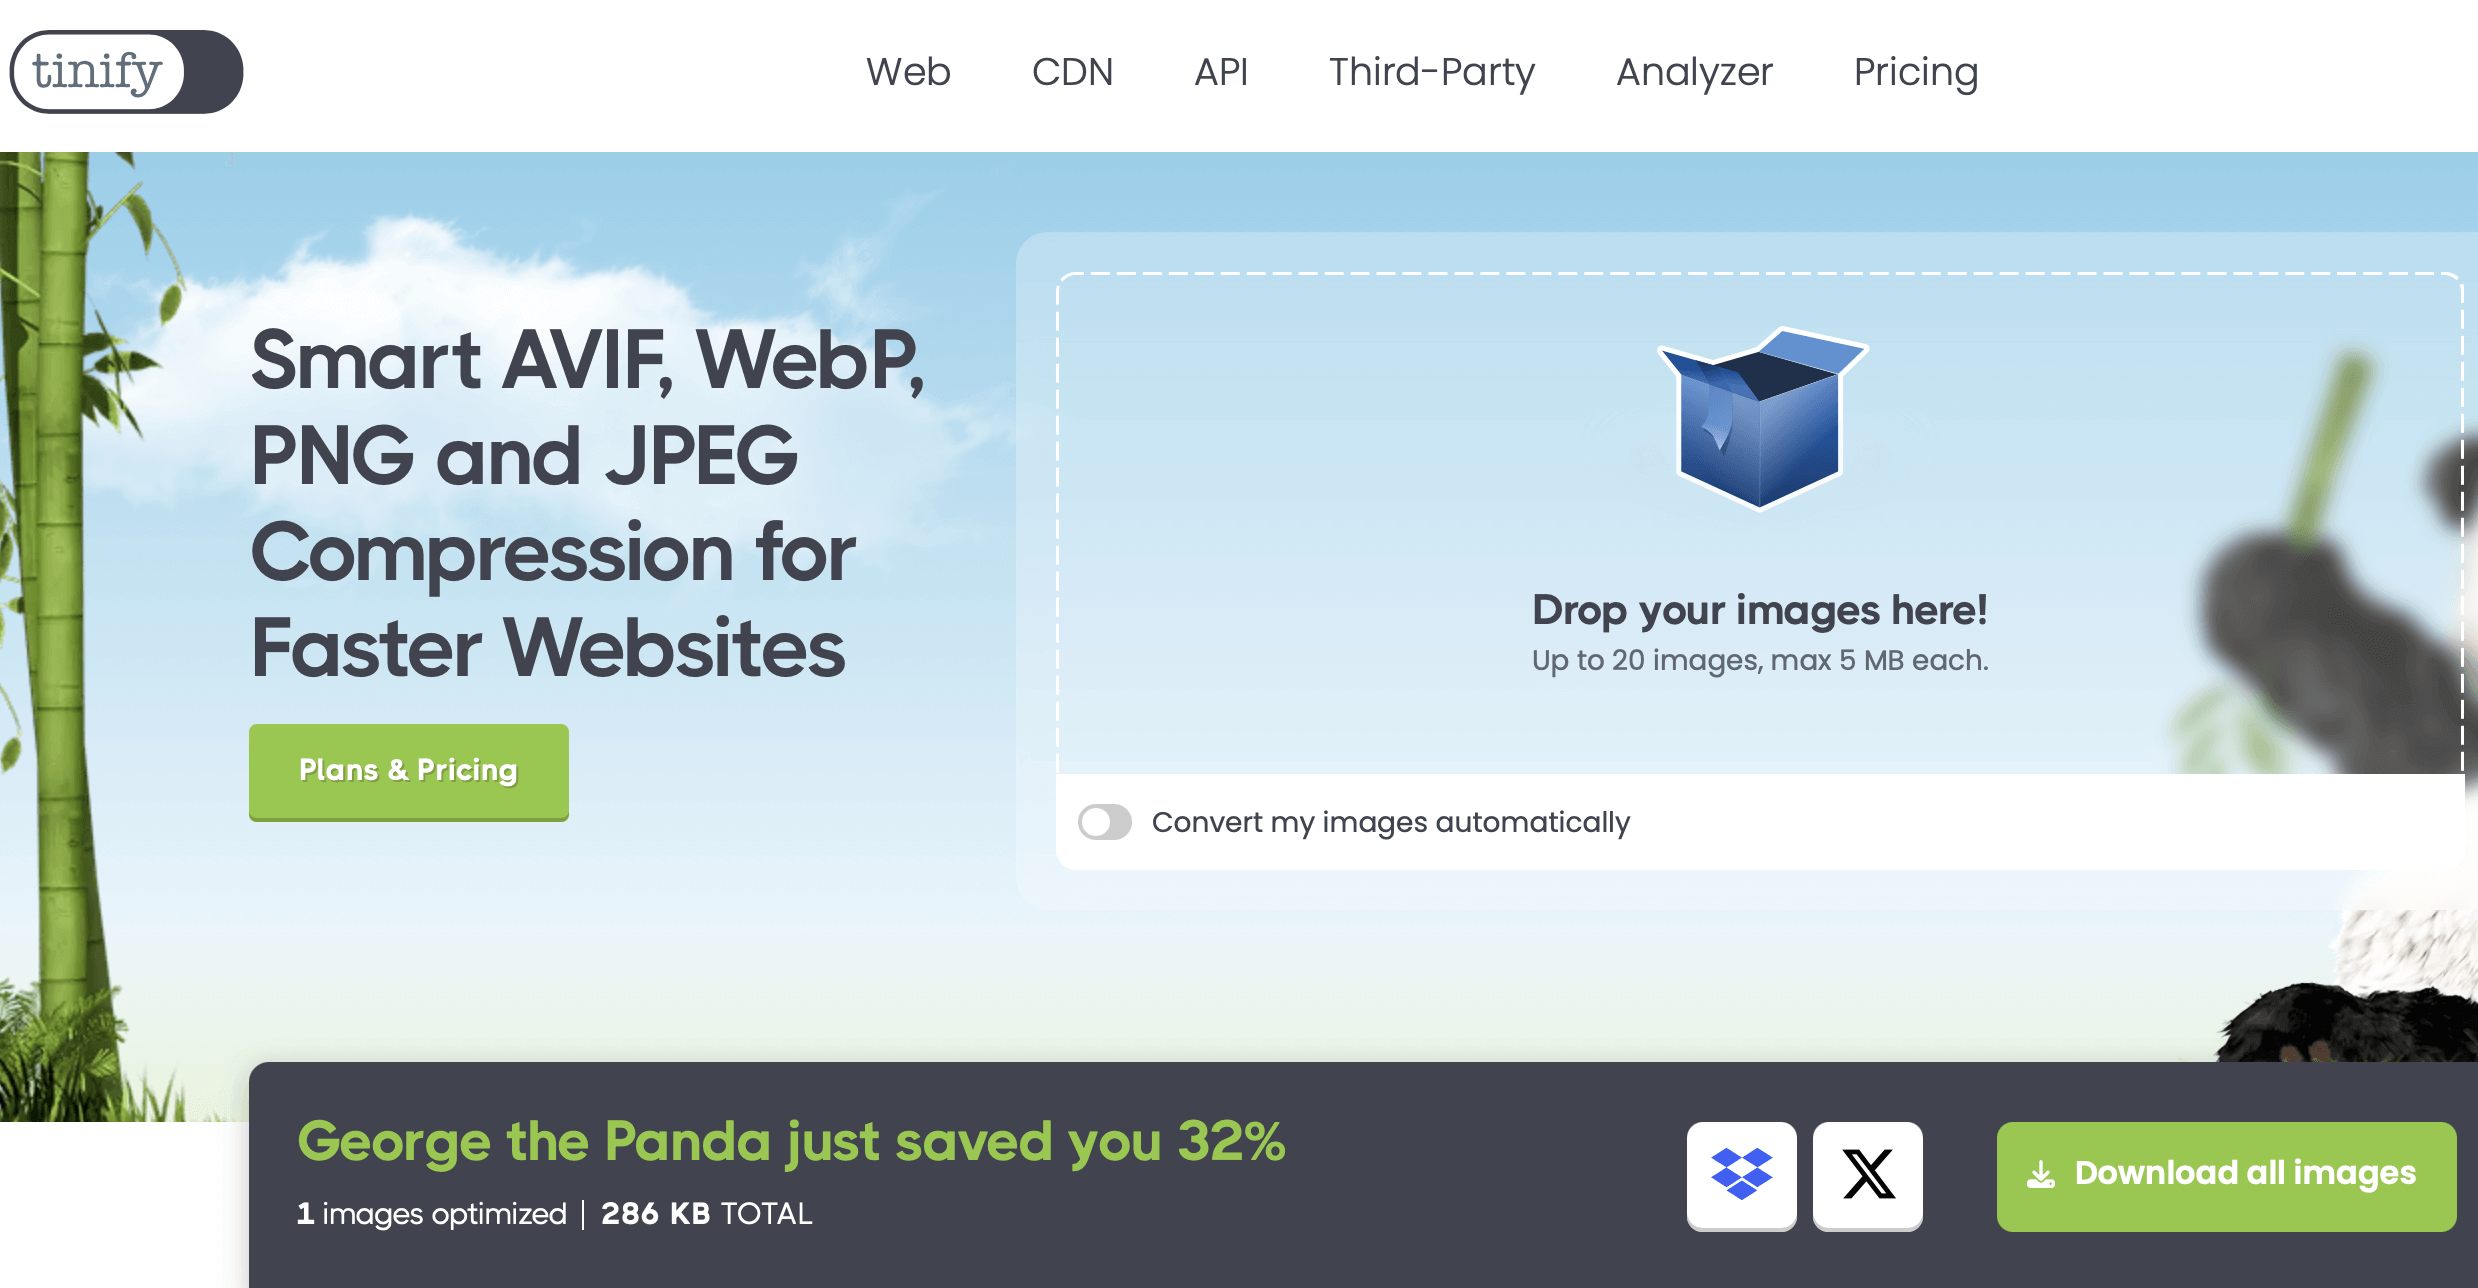
The voormedia tool has a predefined compression level that cannot be adjusted, but reduces the image size by up to 80%. Use the drag-and-drop feature to move the desired photos into the displayed area and then download the results in JPEG or PNG format or as a ZIP file. Alternatively, you can upload to the cloud storage service, Dropbox.
| Advantages | Disadvantages |
|---|---|
| Results can be uploaded to Dropbox | Limit of 20 simultaneous compressions and 5 megabyte file size (in the standard edition) |
| Compression level isn’t adjustable |
iLoveIMG
iLoveIMG is an entire online suite of useful image editing tools. The Barcelona-based development team provides applications that enable images to be cropped, scaled, converted, and even compressed. For the latter, select ‘Compress IMAGE’ and then insert the desired image material using the drag-and-drop feature or the file browser. Possible formats are JPEG, PNG, SVG and GIF.
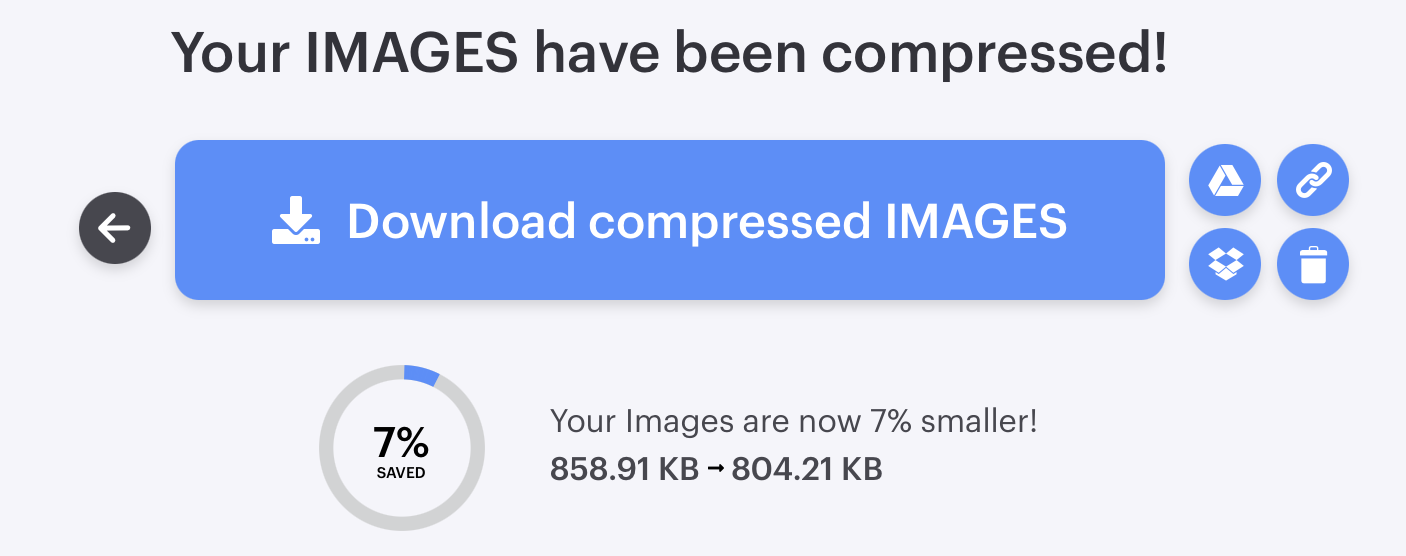
While iLoveIMG only has a single, default compression mode, the tool provides several different export options. It is not only possible to download the results to the local hard disk, but also to upload them to Google Drive and Dropbox and to forward a download link to the compressed images. If you are not satisfied with the compression result, you can simply delete it by clicking on the recycle bin icon.
| Advantages | Disadvantages |
|---|---|
| Results can be uploaded to Google Drive and Dropbox | Only one compression mode |
| Further tools for trimming, scaling, and converting are available | No preview function |
Option 2: Compress images with Photoshop
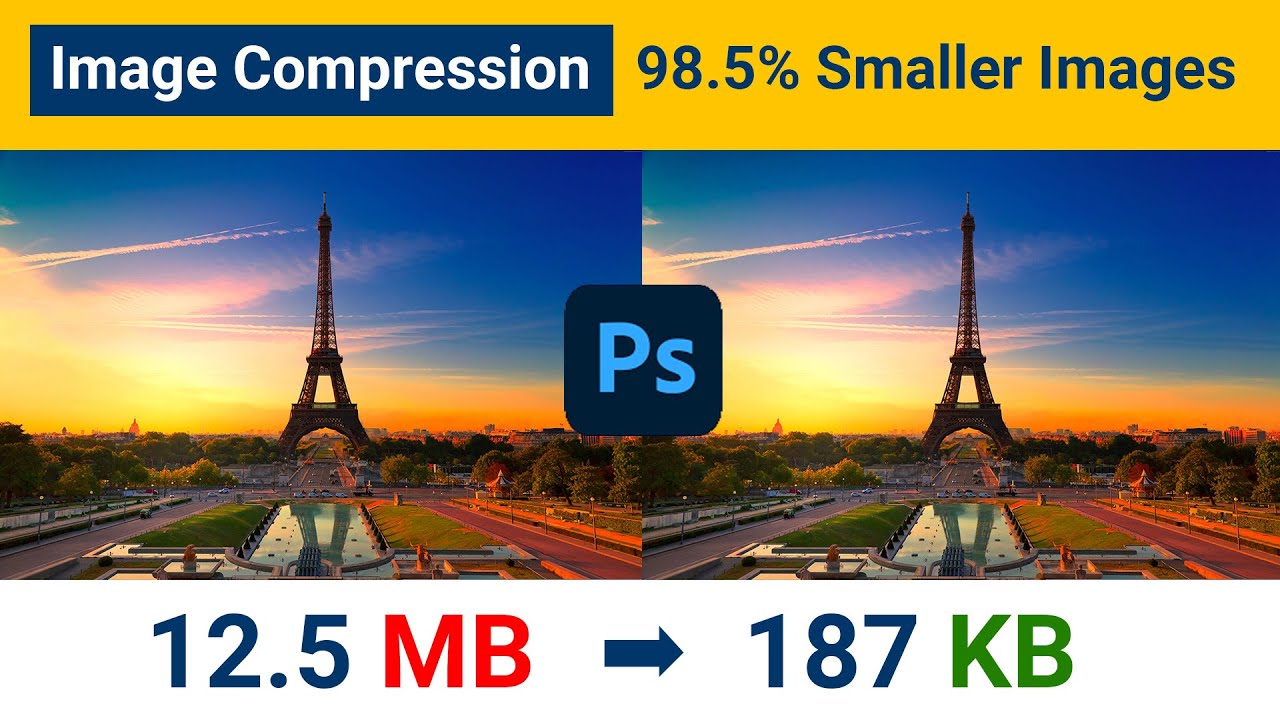
You can also compress your images with professional image processing programs. First and foremost, Photoshop, is undoubtedly the industry leader. In addition to its functions for creative design and optimisation of photographic material, the Adobe tool offers various options for changing the image format and adjusting the image size. The ‘Save for Web’ option, which Adobe has implemented specifically for optimising photos and images for websites, is particularly practical for website operators. In this mode, not only the important web formats GIF, PNG, WebP and JPEG can be compressed, but also the raster graphics format WBMP (Wireless Bitmap), which is designed for mobile devices.
 To display this video, third-party cookies are required. You can access and change your cookie settings here.
 As soon as you edit an image in Photoshop web optimization mode, a new window will open in which you can not only set the specified target formats, but also optimise the desired image for your website in terms of colour depth and size. In the preview window, the Adobe tool compares the original and the target image (including absolute file size information), so you can easily see the difference each time you compress the image.
| Advantages | Disadvantages |
|---|---|
| Live preview for up to three compression results | Requires high amount of computing power |
| Various image editing features available | High costs |
Option 3: Compress images with freeware and open-source programs
With Photoshop, it’s so convenient to compress images with desktop applications. These not only offer considerably more functions by default, but also have an advantage over web tools since they can be used without an existing internet connection. If you want to reduce the size of your website images, however, you don’t necessarily have to use a premium solution such as an Adobe’s product or another fee-based alternative. If you’re on a tight budget or not interested in more complex editing features, a freeware or open-source program can help you achieve first-class optimisation results when it comes to photos, images, etc. But which of the many free tools are actually recommendable?
IrfanView
Since 1996, the image viewer IrfanView has been one of the most popular freeware solutions for Windows PCs. According to the developer, the tool averages around one million downloads per month! This impressive number is likely driven by its appealing licensing model: it’s completely free for personal use, while commercial use requires a license that costs just a two-digit amount.
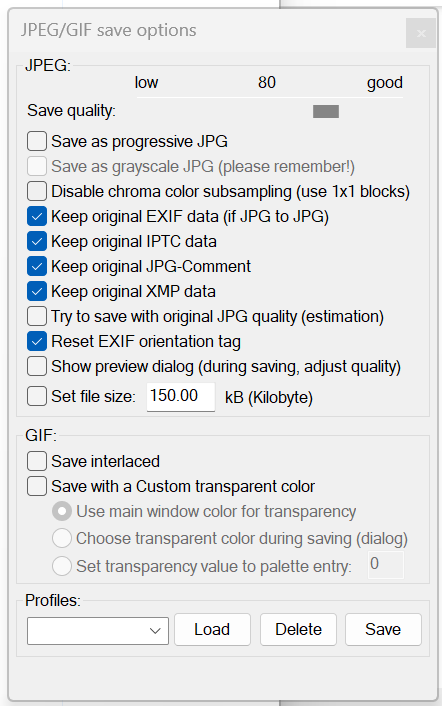
By default, the image viewer supports numerous image formats such as PNG, JPEG, GIF, BMP, WebP and many more. Once an image is inserted, it can be converted to these formats at any time. When it comes to compressing images specifically for the web, however, the ‘Save for Web’ function, which can be added via a plugin, is recommended. This extension allows you to optimise stacks of images and photos, while using the slider to adjust how much the original image quality should be maintained. A preview image and the compressed file size give you an insight into what you can expect the final result to look like.
| Advantages | Disadvantages |
|---|---|
| Stack processing possible | Compression plugin only available in English |
| Preview function and adjustable compression level |
GIMP
When searching for Photoshop alternatives from the open-source sector, you will inevitably come across GIMP (GNU Image Manipulation Program). The graphics program for Linux, macOS, and Windows, which was released in 1998, has been impressing people for years due to its variety of functions, which are very similar to those of Adobe’s commercial model. It now supports more than thirty file formats, including GIF, WebP, JPEG, and PNG, which are crucial formats for the web. This means that you can convert your image files to one of these web formats at any time using the GIMP software.
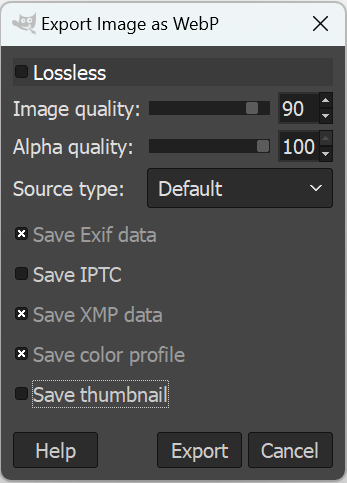
In addition to converting images to a smaller file format, GIMP also provides advanced export options that allow you to easily compress images. Use the slider to set the degree of compression. The extended options are also practical: for example, if you activate the ‘Progressive’ property, the result is slightly larger, but the individual areas are loaded in a certain order, so that even after a short loading time, a rough view of the entire image is displayed.
| Advantages | Disadvantages |
|---|---|
| Open source | Preview only shows the file size of the result |
| Degree of compression is adjustable |
PNGGauntlet
The freeware program PNGGauntlet, provides a graphical user interface for the three open-source tools PNGOUT, OptiPNG, and DeflOpt, which were all developed for optimising and compressing images in PNG format. The application, which is only available for Windows, is therefore the perfect solution for creating very small logos, graphics, and lettering in PNG format for your web project. Besides PNG itself, JPEG, GIF, TIFF, and BMP are also possible output formats for the compression or conversion process.
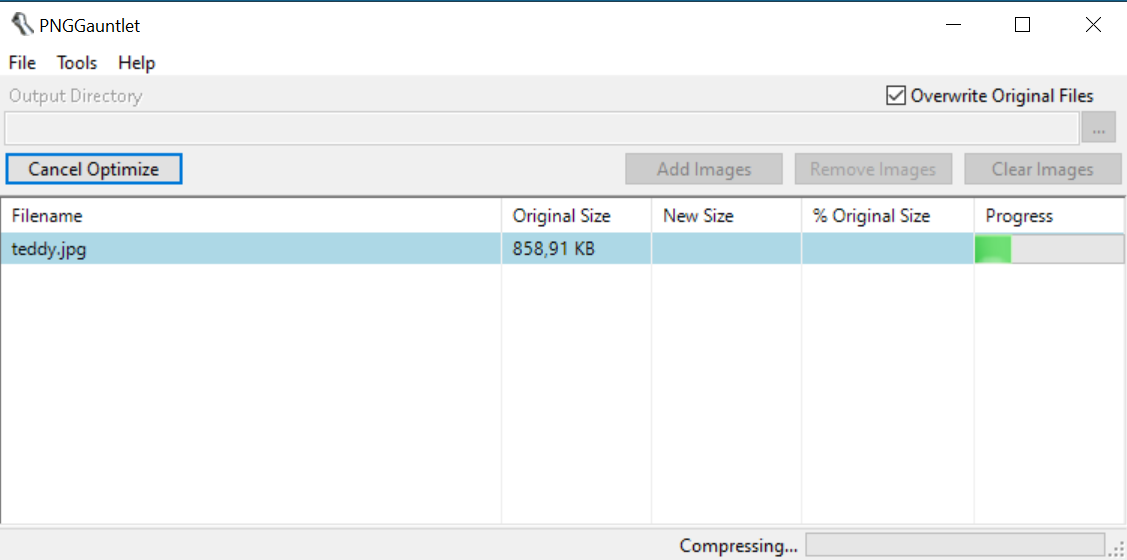
There are two ways to compress your images with PNGGauntlet. You can access the standard setup by inserting one or more images and then pressing ‘Optimize!’, or you can first select an individual setup by adjusting the settings of the three implemented tools by clicking on the button with the same name. Regardless of which way you choose, the freeware tool will show you the new size of the image file(s) (compared to the original) as a percentage after compression was successful.
| Advantages | Disadvantages |
|---|---|
| Straightforward stack processing | No preview mode |
| Individualisation of compression level is possible | Restricted to PNG as output format |
| Latest version is from 2012 |
ImageOptim
If you want to compress the images and photos of your web project and need an open-source tool for macOS, we recommend ImageOptim by Kornel Lesinski. This GPL-licensed program combines several image optimisation tools such as MozJPEG, pngquant, and SVGO, allowing you not only to remove unnecessary EXIF metadata, but also to compress various image formats like JPEG, SVG, GIF, and PNG.
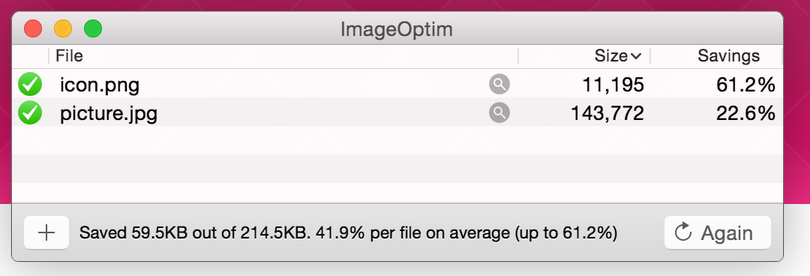
Using the drag-and-drop feature, you can place the desired image files into ImageOptim where the program will start compressing them immediately. However, you can make changes to the settings at any time and adjust the compression level and add or remove options. Simply click on the three dots to proceed. Afterwards, simply click on ‘Again’ to perform the conversion once more.
| Advantages | Disdvantages |
|---|---|
| Various compression functions | No preview mode |
| Open source |

