How to export Internet Explorer bookmarks: Saving your favourites from Microsoft’s browser
For whatever reason, if you’re still using Internet Explorer to go online, the Microsoft browser gives you numerous features and options that are standard for modern Internet browsers. Like Chrome, Firefox and other browsers, Microsoft Internet Explorer has a built-in bookmarks manager for saving and managing frequently visited websites.
Internet Explorer is not recommended as a web browser for personal use because it is no longer being developed. Use the new Edge browser instead, or try other alternatives like Firefox, Chrome or Safari.
The manager also includes a handy export function. If you’re about to switch to a different browser or if you want to use Internet Explorer on another device, you don’t have to lose all your favourites: You can easily export your Internet Explorer bookmarks to save them to a local HTML file. This guide will show you exactly how it’s done.
How to export Internet Explorer bookmarks: A quick guide (including shortcut)
To export your Internet Explorer bookmarks, you don’t need an add-on or any knowledge of where your bookmarks are stored. Thanks to a built-in feature, you can do the import directly in your browser. Here’s the fastest way:
- Open Internet Explorer.
- Open your bookmarks by clicking the star icon (at the top right of the search bar) or by pressing [Alt] + [C].
- Click the small down arrow next to “Add to Favourites” and select Import and Export from the dropdown menu.
- Choose the Export from a file option and click “Next”.
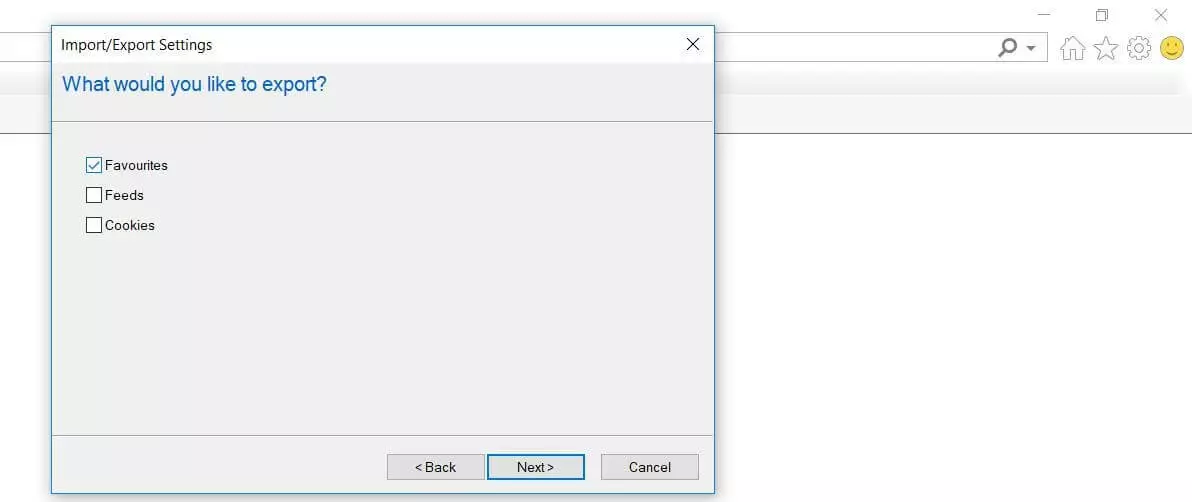
- Select the Favourites checkbox and then choose “Next” again.
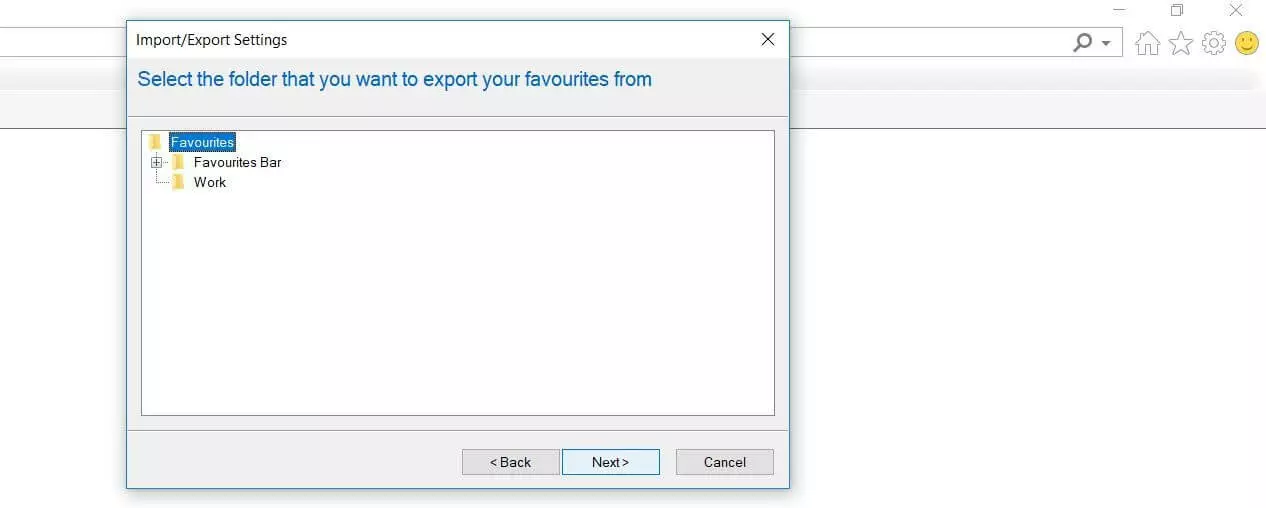
- Select the entire bookmarks library (Favourites folder) or an individual bookmark folder for export and continue by choosing “Next”.
- Enter the location where you want to save the bookmarks HTML file and choose Export.
To learn how to add exported favourites or bookmarks from another browser to Internet Explorer, see our separate article on importing bookmarks into Internet Explorer.
Export Internet Explorer bookmarks with ease: A step-by-step guide
Compared to other browsers, Internet Explorer requires more steps to back up your bookmarks, but the process isn’t very complicated, as you can see from the quick guide above. Nevertheless, we’ll explain the steps of the export process in more detail in the following sections.
Once you’ve opened Internet Explorer, the first step in the export process is to open the bookmarks manager. To do this, click the star icon next to the search bar in your browser’s menu bar:
The browser then opens another window listing your favourites. You can switch between tabs to display all the feeds you’re following as well as your search history. To continue the export process, open the drop-down menu next to “Add to Favourites” by clicking the small down arrow and choosing the Import and Export option:
In the window that appears, choose the Export from a file option and confirm your selection by clicking “Next”. Now you must select the data you want to export. Along with your favourites, you can also back up feeds you subscribe to and current cookies. To do this, simply select the appropriate checkboxes and then choose Next:
Next, you must specify the bookmarks folder that you want to define for the backup. Simply select the “Favourites” folder at the top if you want to export all your Internet Explorer favourites (including the various subfolders):
The final step is to choose where you want to save the bookmarks file. You can save it locally on your device or to an external storage device. Simply click the “Browse” button and then search for a suitable location using the File Explorer. Finally, click Save and then Export:
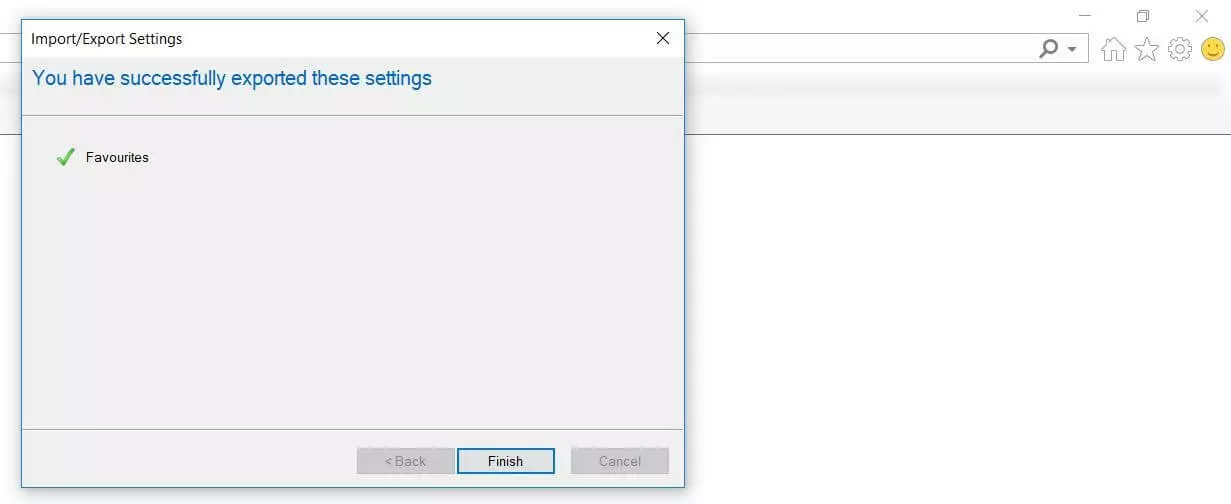
If the export was successful, Internet Explorer will display a success message, which you can close by choosing Finish.
 To display this video, third-party cookies are required. You can access and change your cookie settings here.


