Fixing SSH Errors
Learn how to resolve some of the most common errors you may receive when connecting to a server with SSH.
- Unlimited traffic and up to 1 Gbit/s bandwidth
- Fast SSD NVMe storage
- Free Plesk Web Host Edition
WARNING: REMOTE HOST IDENTIFICATION HAS CHANGED
This error is triggered when the SSL certificate for a server changes. The error is designed to flag a potential "man in the middle" attack. However, most people only encounter the error after rebuilding a server.
If your server is new, or has had its image reinstalled since the last time you connected, simply click to accept the new SSL certificate and continue.
Access Denied or Authentication Refused
The most common cause of the "Access Denied" or "Authentication Refused" error is that the SSH username or password has been misspelled or is incorrect.
- Verify that you have typed the username correctly.
- Make sure you are using the right username.
- Double-check the password. To be sure you are entering it correctly, copy and paste it into the field. Note: You can paste to the command prompt using Shift+Enter.
Finding the Initial Root Password for a Linux Cloud Server
If you have a Linux Cloud Server, the initial default root password is listed on the Control Panel.
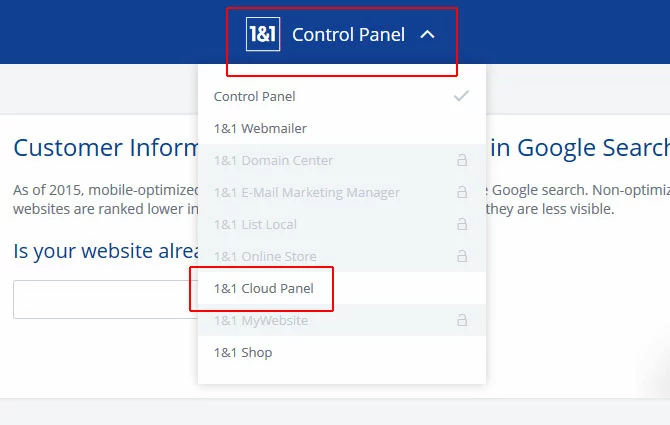
Log in to your IONOS account, click Control Panel to open up the drop-down menu, then click Cloud Panel.
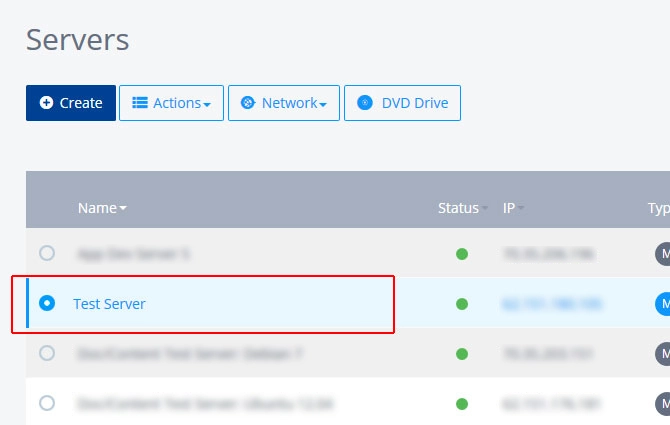
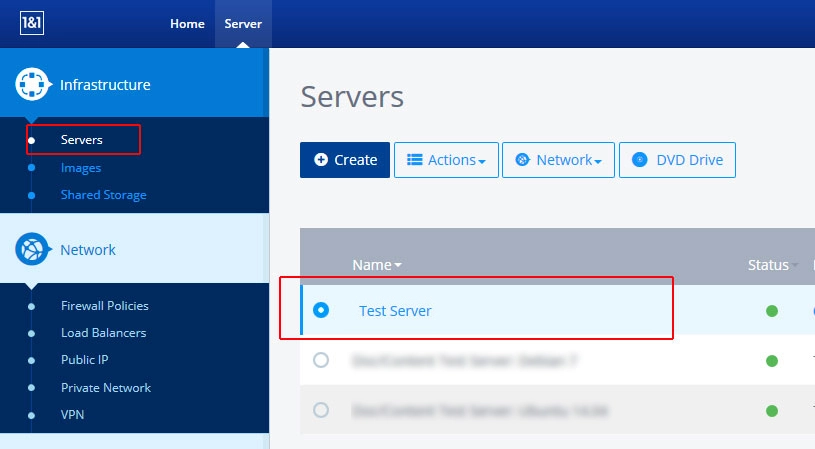
On the Servers page, click to select your server.
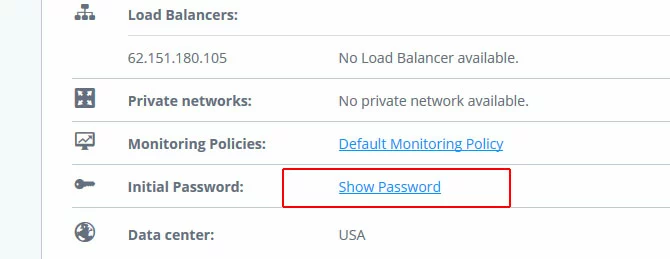
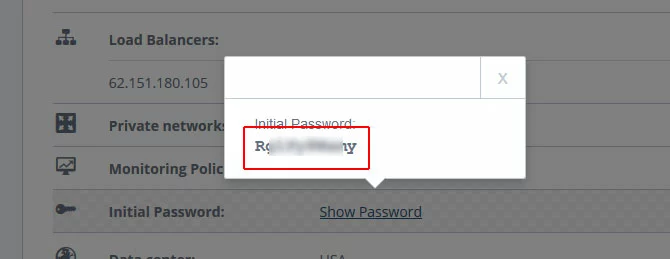
Scroll down to the Initial Password line and click Show Password to display the default root password.
You can copy and paste the password from the pop-up message.
If you have changed the password for root, the new password will not be shown here.
Port 22: Connection refused
There are several possible reasons why you might receive the "Port 22: Connection refused" error when you try to connect via SSH to your server.
Is the Server Accessible
The first thing you should do is find out if the server is allowing connections to port 22 from elsewhere on the Internet. Use the tool at http://www.infobyip.com/sshservertest.php, to check your server.
If this site is able to connect to your server, then the problem is on your end. You may be behind a firewall that blocks traffic on port 22. Many offices and schools block this port for security reasons.
If the site is not able to connect to your server, then the problem is either on the server, or between the server and the internet.
Is SSH Installed
If this is a new installation, the SSH server (sshd) may not be installed. You can check to see if it is on your system with the command:
which sshdIf the system responds with a path like /usr/sbin/sshd then the SSH server has been installed. If instead it responds with an error like /usr/bin/which: no sshd in (/usr/local/bin:/usr/bin:/usr/local/sbin:/usr/sbin) then you will need to install both the SSH client and the SSH server.
On Ubuntu and Debian, install these programs with the command:
sudo apt-get install openssh-server openssh-clientsOn CentOS, install these programs with the command:
sudo yum -y install openssh-server openssh-clientsStart or Restart SSH
Check to make sure that the SSH service is running with the command:
sudo ps -aux | grep sshdIn addition to your grep command, you should see the SSHD process running.
If the SSHD process is not running, start it.
- On Ubuntu and Debian: sudo service ssh start
- On CentOS: sudo systemctl start sshd
If the SSHD process is running, it may need to be restarted.
- On Ubuntu and Debian: sudo service ssh restart
- On CentOS: sudo systemctl restart sshd
Is SSH Listening on Port 22
Port 22 is the default port for SSH connections. If your server's SSH daemon has been configured to listen to a port other than port 22, it will refuse SSH connections to port 22.
To check which port SSH is listening to, use the command:
sudo netstat -apn | grep sshdThe output of this command will show you which port SSH is listening to.
If SSH is listening to a port other than port 22, you will need to adjust your connection settings accordingly.
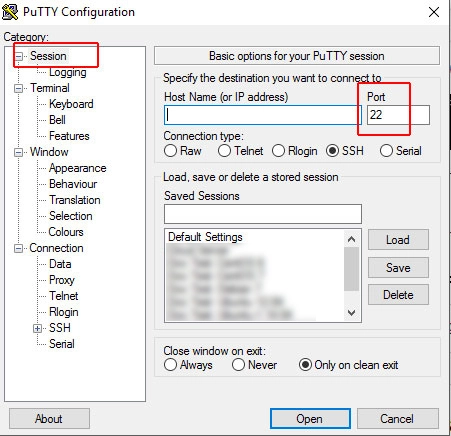
In PuTTY for Windows, you can set the port in the main Settings screen.
Check the SSH configuration file for typos
If you recently edited your SSH configurations, check the syntax of the file with:
sudo sshd –TExamine your firewall rules
There are several possible firewall scenarios which could result in this SSH error, including:
-
If you recently installed or updated a firewall on your server, you may have blocked SSH access to port 22 (or failed to allow it) by accident.
- If your server has recently been rebooted, your firewall rules may not have been loaded on boot to allow traffic to port 22.
Check UFW rules
If you are using ufw as a firewall on your server, you can list all of your ufw rules with the command:
sudo ufw verboseYou can allow SSH with the command:
sudo ufw allow sshCheck Iptables rules
To see if you have an iptables rule which is blocking SSH traffic, use the command:
sudo iptables -L | grep sshYou can also list all of your iptables rules with the command:
sudo iptables -LTo delete an iptables rule, edit the /etc/sysconfig/iptables file, then reload the iptables configuration with the command:
sudo iptables -FCheck your cloud panel firewall policy
Log in to your IONOS Control Panel and go to your Cloud Panel. Go to Infrastructure -> Servers and click to select your server.
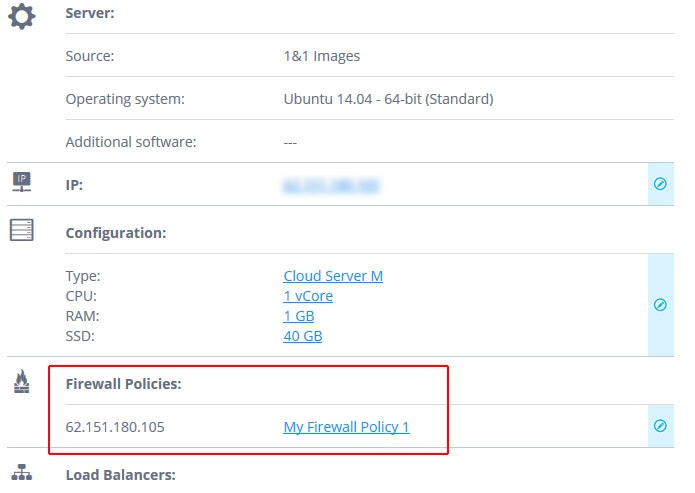
Scroll down to see if it has a Firewall Policy listed.
If a Firewall Policy is listed, edit this policy to allow SSH connections.
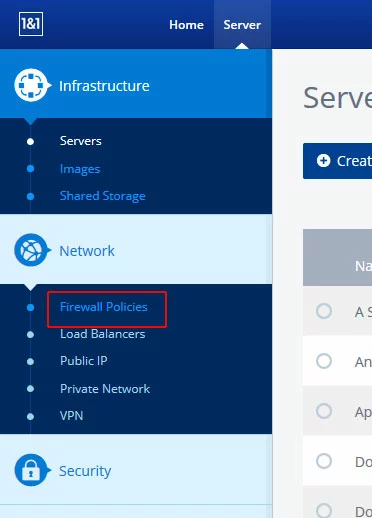
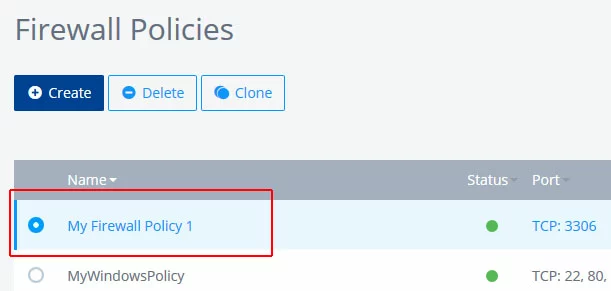
To do this, click Network -> Firewall Policies.
Click to select the Firewall Policy that is assigned to your server.
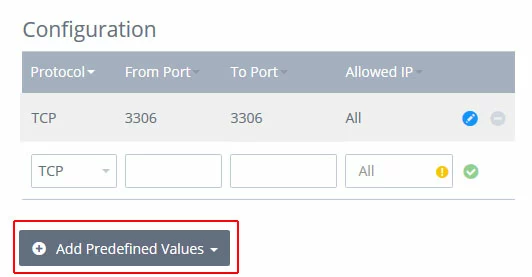
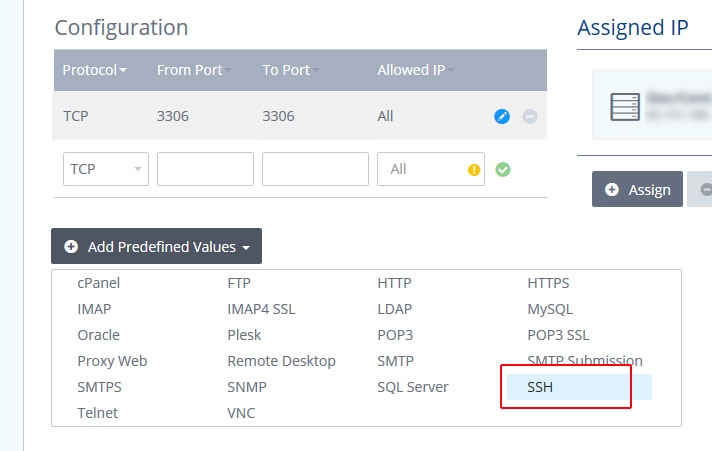
If your Firewall Policy does not have a rule to allow SSH, scroll down and click Add Predefined Values.
Click SSH.
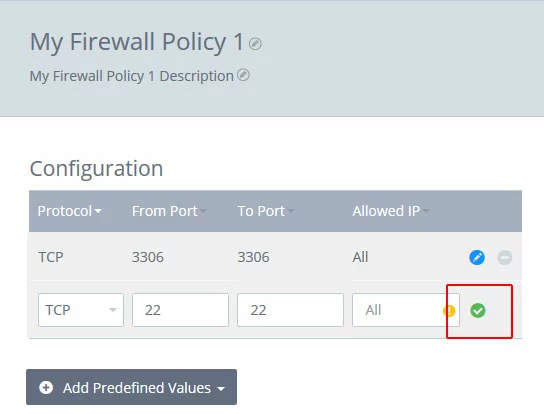
Click the green check mark to add this new rule to your Firewall Policy.
Network error: Software caused connection abort
The "Network error: Software caused connection abort" error happens when your desktop machine closes the connection unexpectedly. This may happen if you experience an internet problem, including a brief hiccup in the connection.
It can also happen when the server stops listening. Your desktop sends several packets to the server before it gives up on the connection and closes the session.
- Automatic backup and easy recovery
- Intuitive scheduling and management
- AI-based threat protection
Write failed: broken pipe Network error: Connection reset by peer
When an SSH session closes with either "Write failed: broken pipe" or "Network error: Connection reset by peer," it means the session has timed out.
The timeout can occur on your computer, on the server, or on a firewall between them. The SSH session will automatically be closed if it sits idle for too long.
The solution is to set your SSH client to send "keepalive packets." These are small packets of data which are automatically sent at regular intervals. This tells the network that your connection is still active.
Setting Keepalive
PuTTY on Windows
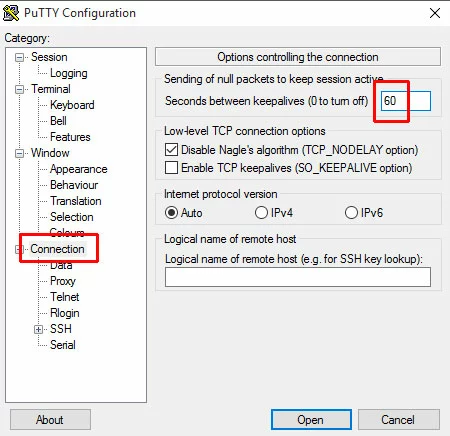
If you are using PuTTY on Windows to connect to your server, you can set the timeout under Connection. Set “Seconds between keepalives (0 to turn off)” to 60.
Linux or Unix
If you are using a Linux or Unix desktop to connect to your server, edit /etc/ssh/sshd_config and add:
ServerAliveInterval 60Save and exit the file, then restart SSH for the changes to take effect.
Network error: Connection timed out
The "Network error: Connection timed out" error means that your SSH client did not receive any response from the server. There are several possible reasons for this error:
An internet outage at your location
Wait a few moments, then try again. If you still get the error message, check your internet connection by visiting a website like Google in your browser.
A serious network problem somewhere between your location and the server
You can check the health of the connection between your location and the server by running a traceroute. This will send a few packets of data to your server, and report back on the number of hops the data had to make, and how long it took for each hop.
- Windows 10
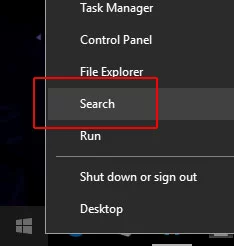
To run a traceroute on Windows 10, right click the Start button.
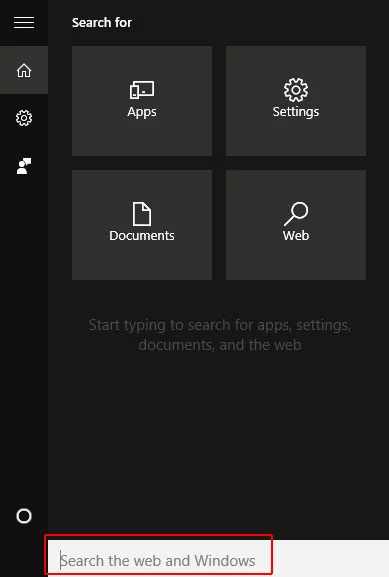
Click Search.
Type "cmd" in the search field.
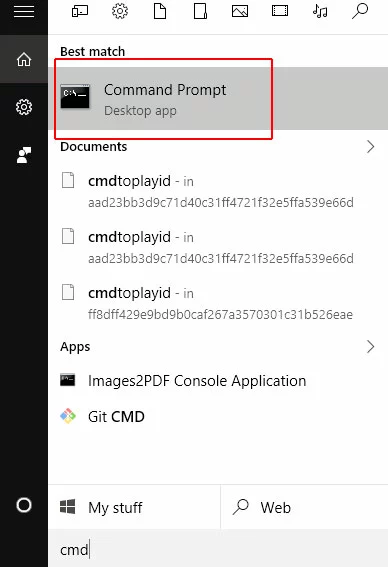
Click Command Prompt when it appears.
Run a traceroute to your server with the command:
tracert [IP address or domain name]For example, if your server is http://example.com the command would be:
tracert example.comThe output will look something like this:
If you see extremely high ping times (anything greater than 300ms is considered "high") or excessive dropped packets (which are indicated with an asterisk), this could be the source of your problem.
Note: The final "hop" to the end server often shows dropped packets and "Request timed out" even when the server is up and running without any problems. For security reasons, most servers do not respond to ping commands.
Firewall rules prevent the connection
If you are behind a firewall at home or at work, this can cause the issue. You will also want to be sure that your server's firewall is configured to allow SSH connections.
The server may be offline or shut down
Give it a few moments and try to reconnect. If your server has been rebooted, it should be back online shortly.
If the server still does not respond, you can check the server's status from your IONOS Control Panel.
Log in to your IONOS account, click Control Panel to open up the drop-down menu, then click Cloud Panel.
On the Servers page, click to select your server. The Status light will be green for a server which is up and running. It will change to yellow or red if there are problems.
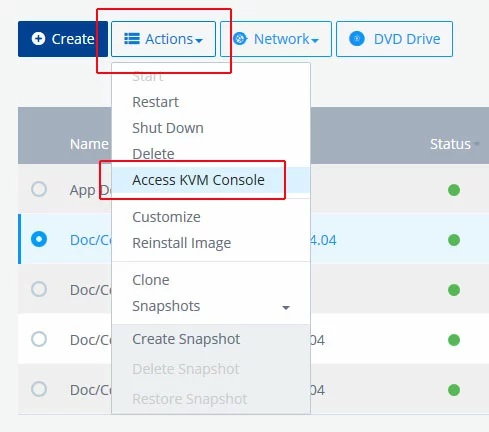
To check on the server, click the Actions button, then select Access KVM Console from the drop-down menu.
This will open the KVM console, which allows you to access your server as if you were sitting at a keyboard attached to the physical machine.
If you want to restart the server, you can do so from the KVM console with the command:
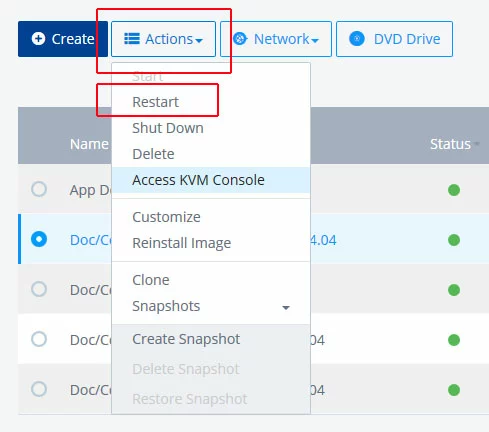
sudo shutdown -r nowYou can also restart your server from the Actions menu by clicking Restart.


