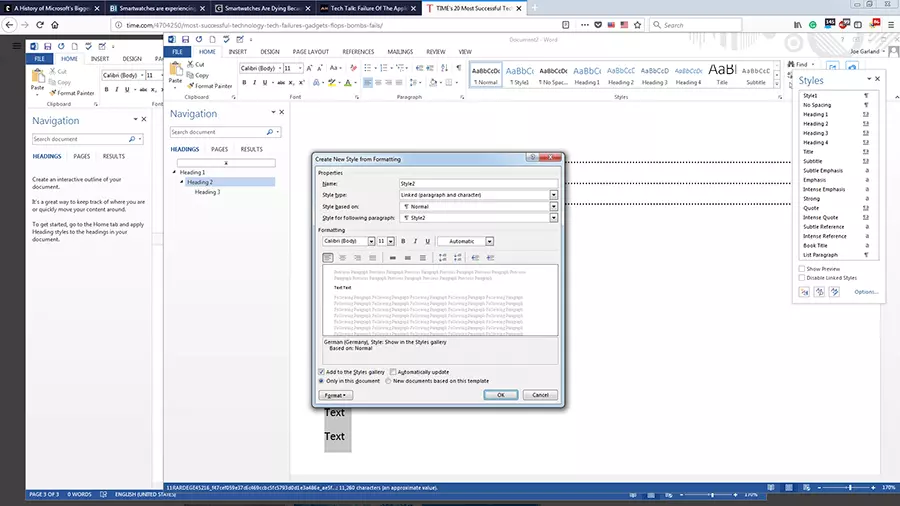
Using, creating and customising Word styles
Although there are several free alternatives to Word, Microsoft's word processing program continues to be the most widely used in the world. One of the most important features of Word is the styles feature. By using styles, you can set text formatting uniformly across a document, ensuring a document’s fonts, font colour, and line spacing are all the same.
Many styles are already preset in Microsoft Word. But how can they be optimally used and adapted when necessary? And how to create new styles? These questions will be answered in the following sections.
The various types of Word styles
To ensure that a document looks uniform and professional, Microsoft offers four types of styles in Word:
- Paragraph styles
- Character styles
- Table styles
- List styles
Paragraph styles
These styles determine the appearance of a text in terms of whole paragraph sections, and allow you to format large sections of text. A paragraph style may contain format settings for character style, however it also determines the overall design of a paragraph. In a new Word document, the paragraph style Standard is usually preset for the entire text. Paragraph styles format the following attributes:
- Indents and spacings
- Line and page breaks
- Borders and shading
- Lists
- Tabs
- All character attributes
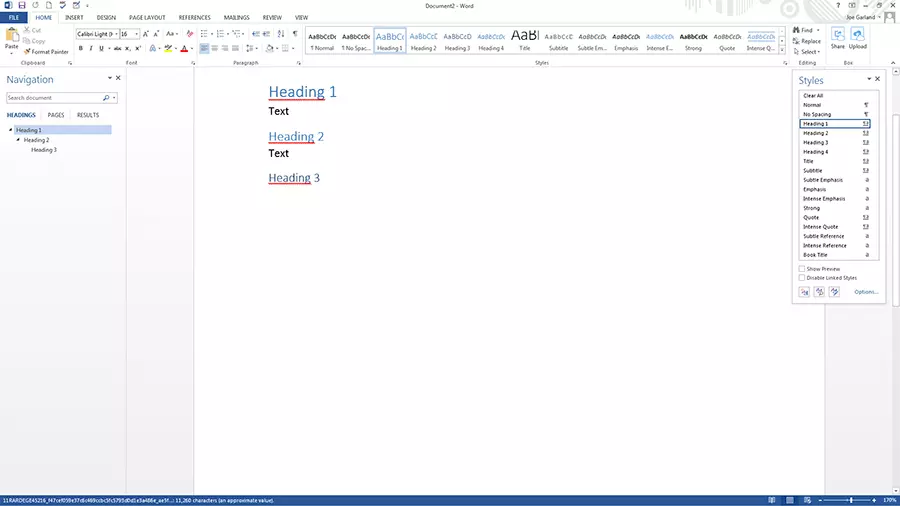
In Word, paragraph styles are marked by the ¶ sign in the styles menu (This can be found by clicking the lower most right arrow in the styles gallery on the start tab.)
Character styles
Character styles determine the appearance of text in terms of individual characters, and are mainly used to format smaller sections of text, e. g. highlighting words. Character styles do not format the features of the entire paragraph, but rather format the following attributes:
- Font
- Font size
- Font colour
- Bold, italic, or underlined markings
Character styles are marked by the a-sign in the styles menu.
Table styles
Table styles in Word format the following attributes for tables:
- Header row
- Grid lines
- Accent colour
List styles
List styles in Word format the following attributes for lists:
- The format of bulleted lists
- The format of numbered lists
- Indents
What are the advantages of Word styles when formatting a text?
Preset as well as custom styles make it easier to work on a text document. This is particularly noticeable when editing complex documents, such as final papers or manuscripts. Initially, manual formatting may seem to be easier and quicker, but for longer texts it’s more efficient to use Word styles instead of repeatedly formatting sections of text separately. The following six reasons outline the advantages of using styles in Word:
- Continuity: Format results in a consistent document layout.
- Efficiency: Once the style has been created, it can be applied to any section of the document without having to be changed.
- Adaptability: If only one style is used consistently within a document, then only this style needs to be adjusted when necessary to edit the whole document.
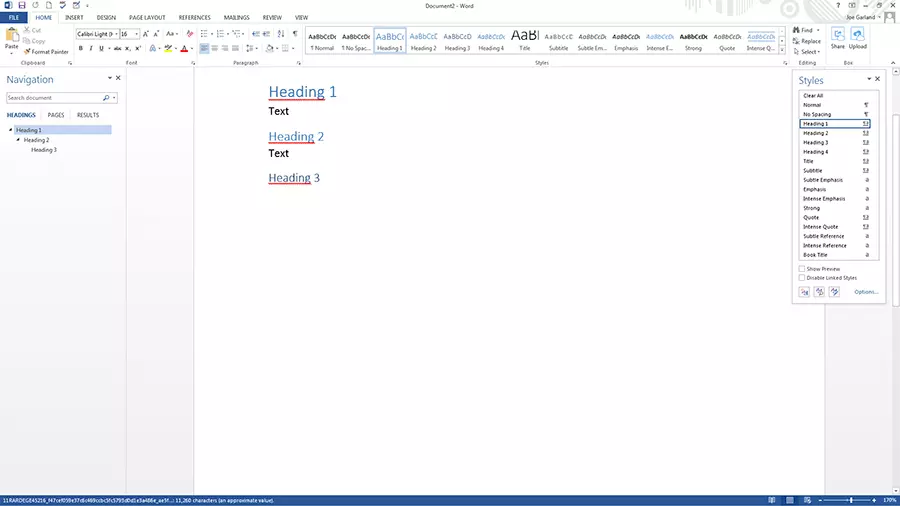
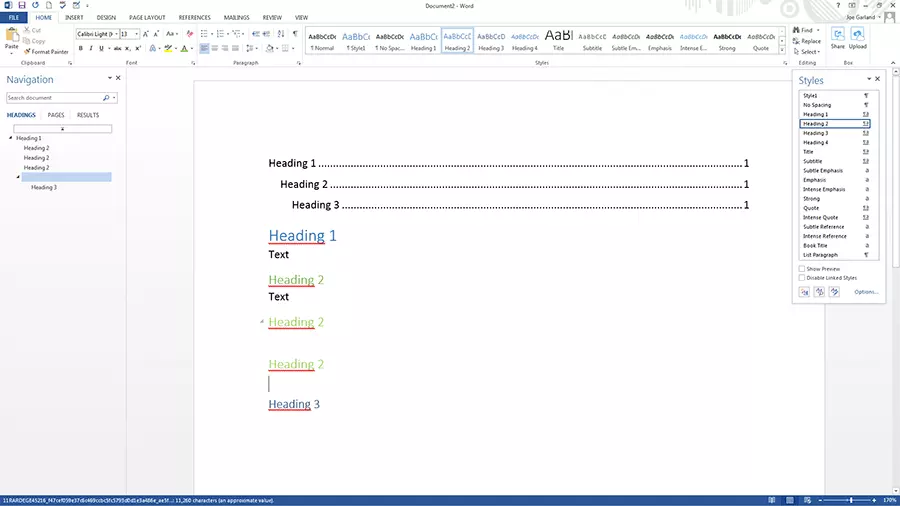
- Navigation: The navigation function makes it possible to switch quickly between sections of the document. To use this function, go to the view tab and select navigation pane. The section of the document which you are looking at will be highlighted here.
- Automatic table of contents: When using Word styles for headings consistently within one document, it’s possible to automatically create a table of contents which you can customise in just a few clicks.
- Outline: It’s possible to gain an overview of the document using the outline view function in Microsoft Word, which can be found in the view tab. In the outline view it’s possible to move individual sections of a document clearly and with full control. In this view, the headings are arranged hierarchically – if there’s a plus sign on the left side of a heading, it means that it has another text level below it, while a minus sign is followed by continuous text only.
The default outline view displays all levels of the document. For a better overview, it’s possible to display only two levels, for example. This view is also suitable for making corrections to the structure of a text and moving text sections around within the document swiftly and with ease. If the corresponding levels are marked with a style, they can be quickly and conveniently moved to the desired position using the outline view tools.
In the outline view, text selection is important. If only the heading is selected, but the entire body text is displayed, Word assumes that only the heading is to be moved. If the text is hidden, however, the entire section will be moved.
Where can I find preset Word styles?
Preset styles in Word can be found under the style gallery, on the start tab. To apply a style to a section of text from the style gallery, highlight the relevant text and then click on the style you wish to select. The style in use will be marked by a light blue border.
Alternatively, you can also assign the styles for headings using a shortcut. To do this, use the key combination "alt" and the respective level of the heading, for example:
Heading 1:"Alt" + "1".
Heading 2:"Alt" + "2".
When assigning paragraph styles, the cursor must either be in the paragraph with no characters highlighted, or you must highlight the entire paragraph. If you highlight one section, only that section will be formatted, and not the entire paragraph. This is different when assigning character styles: you must select all relevant characters, as just hovering the cursor over a relevant word will not be enough.
How can I create new Word styles?
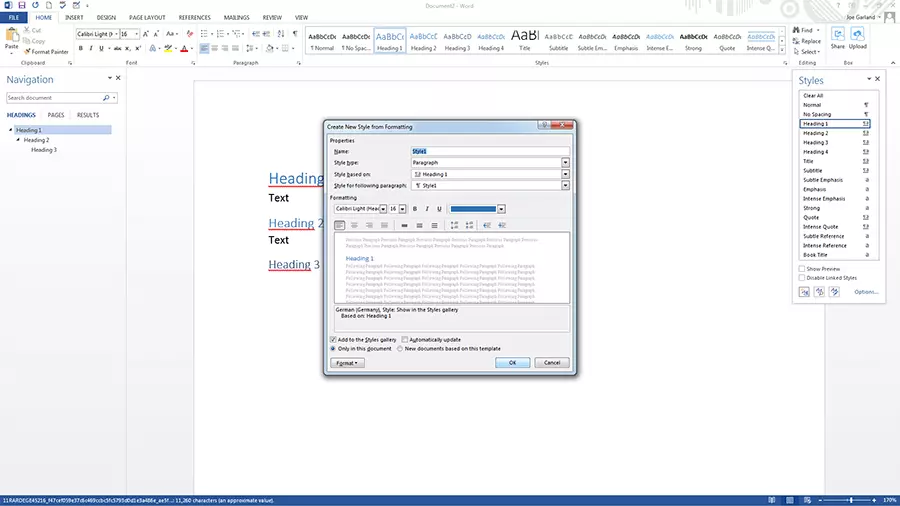
If you want formatting options that are not available in the preset Word styles, you can easily create them yourself and add them to the style gallery:
- Under the start tab, click on the arrow in the lower right corner of the styles gallery.
- Select the create a style icon in the style side menu – at the bottom on the left.
- Name the style
- Specify the style type: either paragraph, character, linked (paragraph and character), table and list. If you want the style to be based on an existing one, you can specify this under style based on.
- Should you want to set a style for the following paragraph, you can specify an appropriate one for it.
- Set the font, font size, and other possible formatting options.
- As soon as you confirm the style by clicking “OK”, you’ll be able to find your new creation in the style gallery.
Alternatively, it’s possible to create a style by highlighting text:
- Right click on the highlighted text
- Select styles on the right-hand side in the mini-menu
- Select create a style from the style menu that appears
- Select modify.
Creating a table of contents through a style in Word
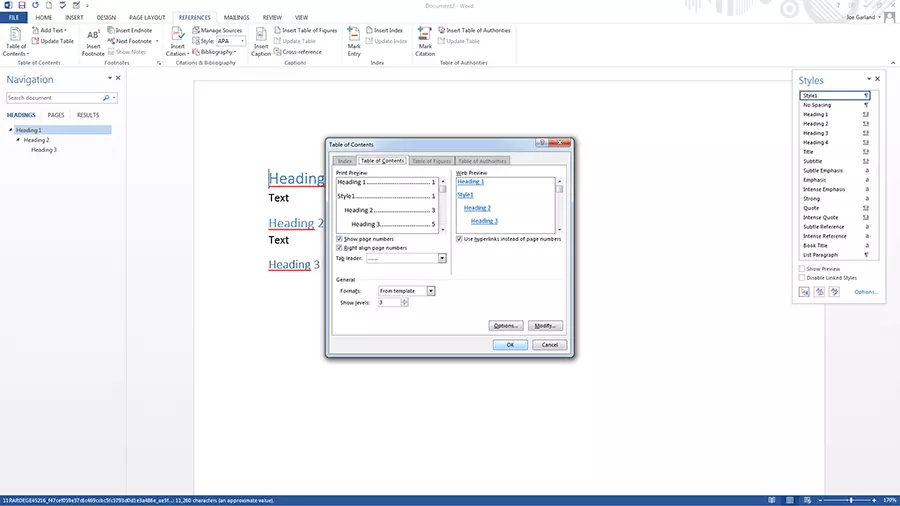
A key advantage in using styles in Word is that it allows you to automatically create a table of contents. To create a table of contents using a style, go to the references tab, and select a style for the table in the table of contents menu. If you change the text structure later, you can update the table of contents by clicking the update table of contents option.
Adapting the layout for a table of contents
You can also customise the layout and text formatting of a Word style for tables of contents:
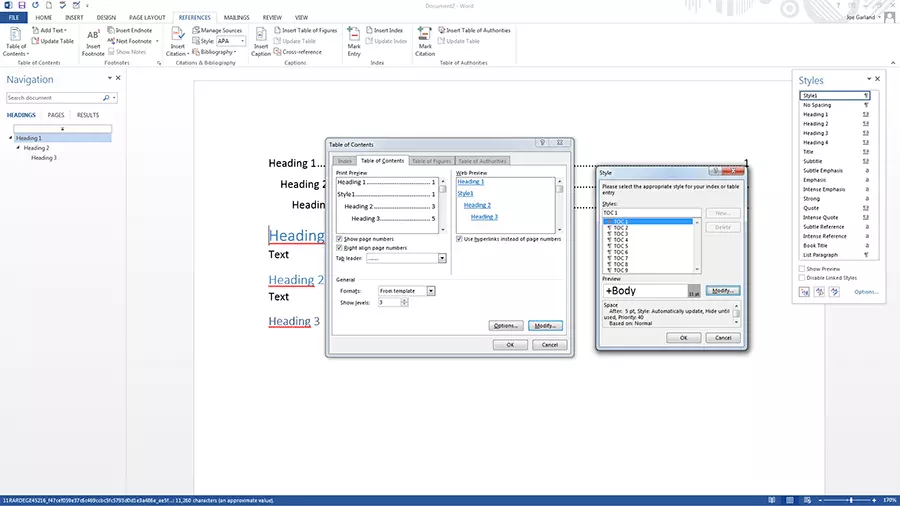
- On the references tab, open the table of contents menu and click the custom table of contents option.
- In the table of contents dialog box, make any changes you want to the display of page numbers and fillers.
- To adjust the overall appearance, select format under general and click on the desired format
- If you want to change the number of levels displayed in the table of contents, click on show levels
- Check the result in the print preview and web preview panes
- Confirm with "OK"
Customise text in a table of contents
The presentation of the text in the table of contents can also be adapted using a Word template:
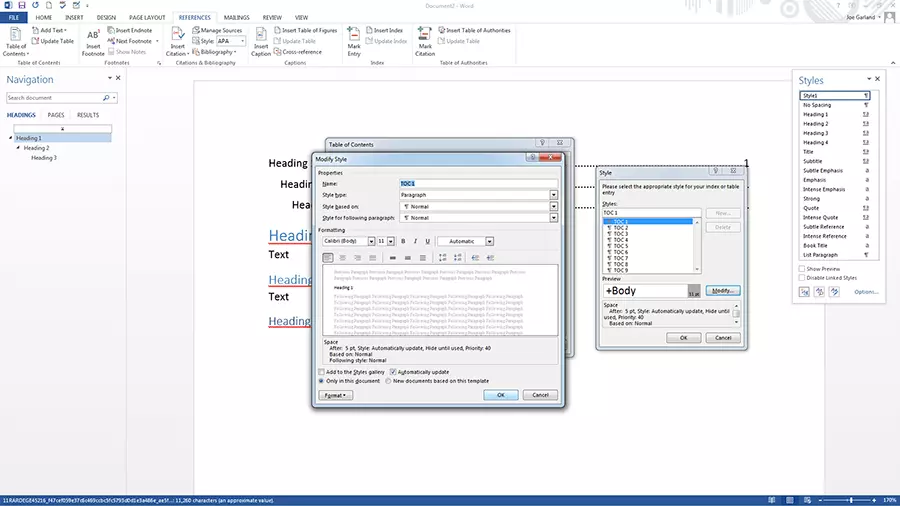
- Open the table of contents dialog box as described above
- Click on modify and change the formats to from template
- Make the formatting changes as described above
- If you select add to quick styles gallery, you’ll find the created style in the gallery
- Confirm with "OK"
How can I customise existing Word styles?
In Word, you can also change existing styles from the quick style gallery. The adjustment is possible in two ways:
- Update a style by customising it to match the current formatting in a document
- Manual customisation in the dialog box
Matching the current formatting
If a Word style has already been applied to the text, you can customise it and include it in the quick Styles gallery:
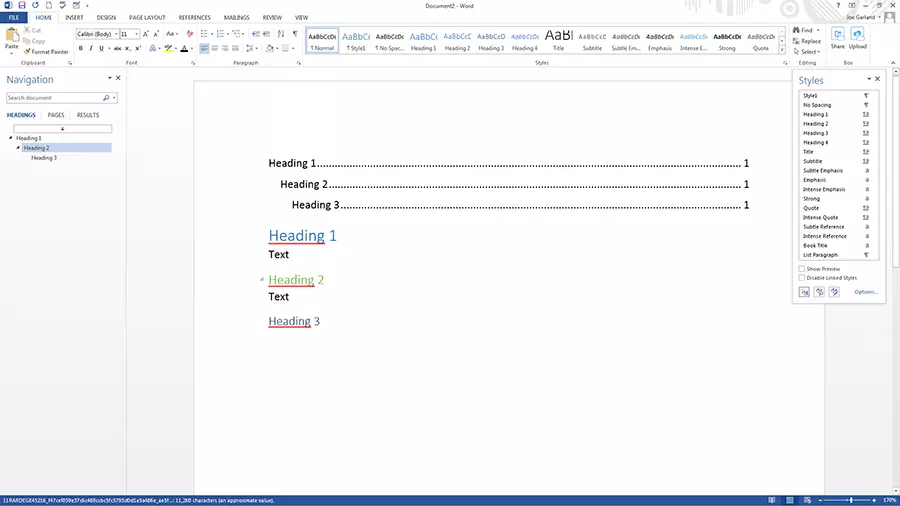
- Select the text, e. g. with "heading 2", to which you have applied the Word style. You can see which style was used in the quick styles gallery – the corresponding style will be marked with a light blue border.
- Format the text and adjust features such as font, font size, and colour.
Adapting the styles automatically adapts all text parts which are assigned to this style.
Manually customising existing styles
A Word style from the styles gallery can also be changed manually. This process is possible regardless of the text in the document:
- Right-click on a Word style in the styles gallery and select modify
- Make the desired adjustments, such as font size or colour, in the modify style menu
- Select add to styles gallery at the bottom of the menu to access the style later.
- Store, share and edit data easily
- ISO-certified European data centres
- Highly secure and GDPR compliant


