

How to fix parameter error 0x80070057

Windows is one of the most widely used operating systems, both for PCs and for server systems. This is partly due to the outstanding marketing by its manufacturer, Microsoft, and partly due to its excellent user-friendliness, which has been continuously improved over the years. However, Windows systems are known for their relatively high susceptibility to errors – and the error messages displayed are often very cryptic, providing inexperienced users with little clue as to what exactly the problem is. One example is error “0x80070057”, which can occur both in the latest edition, Windows 10, and in previous versions, such as Windows 7. The following sections explain what causes this error and how it can be fixed.
Windows error “x80070057”: Meaning and causes
The Windows message “0x80070057” represents an error caused by invalid arguments or invalid parameters. This is why, in some cases, you will also find the additional information “E_INVALIDARG” or “ERROR_INVALID_PARAMETER”, which explicitly refers to these problems. Depending on the action during which the error occurs, very different arguments or properties can be involved. In addition, the message sometimes also appears if access to the system operation executed is prevented for other reasons (particularly due to filter drivers). The most common scenarios that lead to the error code “0x80070057” are an automatic Windows update (in Windows 10), backing up files using the Windows Backup function (primarily in Windows 7) and when formatting the hard disk.
Errors such as 0x80070057 can also always be the result of major damage to the operating system and may even be the precursor of entire system crashes. If your Windows system no longer starts as a result, the linked article explains how you can fix this problem.
Fixing the 0x80070057 error: The best solution strategies
If a Windows function does not work and instead the system displays a message with the error code “0x80070057”, the problem cannot be fixed simply by restarting. Instead, it is necessary to identify and fix the parameter or argument with the error, so that Windows can execute the operation normally again. As the error message does not normally include any indication of which specific entries or settings led to the error, you have no other option than to try out different possible solutions. The crucial factor is whether the error occurred during a Windows update, when formatting the hard disk or when backing up files. Therefore, the following solutions are tailored to these different scenarios.
How to fix the “0x80070057” error during a Windows 10 update
There is no doubt that the Update Center is one of the most important Windows components for all systems that are connected to the Internet or other networks. Microsoft uses it to automatically supply you with the latest security updates, bug fixes and features to ensure that your system is as stable and secure as possible in the long term. If the 0x80070057 error occurs during installation of a new update, you should give it your immediate attention. In the following sections, you will find some of the most promising solutions.
Solution 1: Switch to the old Windows Update applet using a registry entry
In Windows 10, Microsoft has implemented a new update service, which acquires updates exclusively from specific Windows Update servers. But if this does not work properly, problems such as the 0x80070057 error are a possible outcome. However, in such cases you can fix the error in just a few steps by reactivating the old Windows 7, 8 or 8.1 update applet by making a minor change to the registry database.
To do this, create a plain text file (e. g. with Notepad) and add the following content to it:
[HKEY_LOCAL_MACHINE\SOFTWARE\Microsoft\WindowsUpdate\UX] “IsConvergedUpdateStackEnabled”=dword:00000000
[HKEY_LOCAL_MACHINE\SOFTWARE\Microsoft\WindowsUpdate\UX\Settings] “UxOption”=dword:00000000
To save the file you have created as a registry entry, select the name of your choice and add the file extension .reg – for example “ErrorUpdate.reg”. Import the entry into the registry by double-clicking the file and then selecting “Yes” in the dialogue box:
![Image: Windows 10: Import dialogue box for the Registry Editor]](https://www.ionos.co.uk/digitalguide/fileadmin/DigitalGuide/Screenshots_2020/0x80070057-error-solution1.jpg "Windows 10: Import dialogue box for the Registry Editor]")
![Image: Windows 10: Import dialogue box for the Registry Editor]](https://www.ionos.co.uk/digitalguide/fileadmin/_processed_/e/f/csm_0x80070057-error-solution1_5825855c0b.webp "Windows 10: Import dialogue box for the Registry Editor]")
Now restart the update search to check whether the 0x80070057 problem has been successfully fixed.
Solution 2: Delete incorrect registry entries
As well as inserting new entries, deleting old entries in the Windows registry can also help with update errors such as “0x80070057”. It is often the case that the “WUServer” and “WUStatusServer” entries have incorrect values if Windows previously had contact with a Windows Update Services Server (WSUS). This is common in server environments, where there is a choice of using individual update servers or group policies. To delete this data, first open the registry database using the Registry Editor as follows:
- Press [Windows key] + [R].
- Enter “regedit” in the search box and confirm with “OK”.
- Enter your password if you are prompted to do so.
In the editor, now open the following key:
HKEY_LOCAL_MACHINE\SOFTWARE\Policies\Microsoft\Windows\WindowsUpdateWhen you have found the two entries mentioned, select them by right-clicking, click “Delete”, and confirm the action by clicking “Yes”:


Now restart the update search to check whether the 0x80070057 problem has been successfully fixed.
Solution 3: Search for damaged system files
The parameter error “0x80070057” can also be the result of damaged system files, which is why it is recommended that you perform a thorough check on the system files. Windows provides a dedicated tool called System File Checker (SFC) for this purpose, which you can execute using the command prompt, provided you have administrator rights. The application checks all system files and then immediately starts attempting to repair incorrect files found. In any case, SFC displays all the results, which allows you to replace the damaged files yourself if you prefer.
To use the checker, first open the command prompt as an administrator:
- Open the Windows search using the Start menu (Windows icon).
- Type “cmd” and then right-click “Command Prompt”.
- Select “Run as administrator”.
Now enter the following command in the command line:
sfc /scannowConfirm your entry by pressing the Enter key to start the checking process. Leave the command prompt window open until the check has been completed and SFC has notified you of the results.
 in Windows 10")
 in Windows 10")
Solution 4: Disable or delete third-party tools
In rare cases, third-party applications – particularly antivirus software, backup programs, and performance tools – can prevent the Update Center from accessing the required files. This situation can also result in the 0x80070057 error, which is why you should temporarily disable these kinds of applications if you encounter the error message during a Windows update. If you have identified the program causing the problem, you should consider deleting it and replacing it with an alternative.
Many third-party programs in the areas mentioned (antivirus, backup and performance software) use what are known as filter drivers, which supplement the default drivers and are designed to allow additional functions without the need to develop an entirely new driver. However, these filter drivers are well known for causing problems such as the 0x80070057 error, and are therefore a good starting point for finding the problematic tool. You can view a list of all running filter drivers using the command line command “fltmc” (requires administrator rights).
Error code “0x80070057” when backing up files using the Windows backup tool
With the backup and restore tool, Windows provides a dedicated cross-version solution for creating backups of entire drives (including all user files) and loading them when required. If you want to use this feature and then see the 0x80070057 message, this can normally be attributed to one of two causes: incorrect settings in the Windows locale or a general problem with the “CopyFile” function. The latter is required to copy files from one directory to another. As a result, you have two possibilities for solving the file backup problem for yourself.
Solution 1: Adapt the decimal separator settings
The locale specifies which settings and formats are applicable for the system in terms of the time, language and region. One of the settings is the applicable decimal separator. For example, in the USA, the United Kingdom and China, the period is defined as the decimal separator, while Germany uses a comma. If the setting for the separator does not match the country and language setting for the system, Windows classifies this as an incorrect parameter, which prevents the backup and displays the 0x80070057 message.
All you need to do to solve the problem in this situation is to set the correct option for the decimal separator, which is done as follows:
- Open the Control Panel using the Start menu.
- Select the “Region” category (requires icon view).
- On the “Formats” tab, click “Additional settings”.
- Under “Decimal symbol”, enter a period as the preferred option.
- Click “Apply” and then click “OK” to save the change.
- Restart the computer.


It is possible for third-party applications to make changes to the locale settings and thus to disable the settings made in the Control Panel. In this case, you must disable the relevant software to perform the planned backup.
Solution 2: Increase the data transfer rate for the “CopyFile” function using a registry entry
Although it is not really an error and in most cases does not represent a problem, a data transfer rate that is too slow can cause a 0x80070057 error during a Windows data backup. If you have administrator rights, you can try to increase the rate by adjusting the buffering settings for the “CopyFile” function using a corresponding entry in the registry database.
To do this, first launch the Registry Editor by selecting “Run” in the Start menu, entering “regedit” and then clicking “OK”. Then click the following key in the editor:
HKEY_LOCAL_MACHINE\SOFTWARE\Policies\Microsoft\SystemRight-click in the right section of the Registry Editor and select the DWORD (32 bit) Value” option:


Before you press the Enter key to add the entry to the database, enter the following name for this new registry entry:
CopyFileBufferedSynchronousIoYou should then see the entry in the Editor and be able to select it by right-clicking. In the menu that opens, click “Modify” and then enter the value “1” in the “Value” field. Finally, click “OK” and exit the Registry Editor. After a system restart you can attempt a new backup.
Improper interventions in the registry can cause system problems or necessitate reinstallation of the operating system. Therefore, only make the changes if you can perform the steps as outlined.
How to fix the 0x80070057 error when formatting a hard disk
If you want to or must reinstall your Windows system, one of the first actions in the Installation Wizard is to format the hard disk partitions required for the installation in order to prepare them for the subsequent steps. Incorrect parameters or arguments in the partition with the “System Reserved” attribute can lead to the error “0x80070057”, which makes reinstalling Windows impossible. However, the wizard provides you with two different solutions, which are described in the following two sections.
Windows uses the “System Reserved” partition to store various system-related data. The components saved here include the Boot Manager, which provides information about where the operating system is installed and stores signed drivers for the most important system applications.
Solution 1: Format partitions using the Installation Wizard
If you are in the process of reinstalling Windows using an installation medium (CD, DVD, USB stick, etc.) and see the error code “0x80070057”, you can attempt to fix the error directly using the Installation Wizard. This enables you to manually delete existing partitions with parameter errors and then create new partitions that – unlike the previous partition of the hard disk – can be formatted as intended. To do this, restart the computer using the Windows boot medium and then carry out the following actions:
- Make the default settings for language, time format, and keyboard or input method, and then start the installation.
- Accept the Microsoft license terms and select Custom (advanced) installation.
- Select the listed partitions in turn and delete them using the relevant button, in each case confirming the delete operation with “OK”.
- Click “New”, define the required size of the new partition (the default value is the maximum size of the data medium), and create it by clicking “Apply”. To guarantee the functionality of all features, Windows automatically creates a second partition (“System Reserved”), which you should confirm using the “OK” button.
- Select Partition 2 and click the “Format” button.
- Click "OK” to start formatting and, once the formatting process has been completed successfully, continue the Windows installation by clicking “Next”.
 To display this video, third-party cookies are required. You can access and change your cookie settings here.
Solution 2: Format partitions using the command prompt using DiskPart
The Installation Wizard on the boot medium also provides you with the option of removing problematic media including partitions using the command prompt and replacing them with new, undamaged partitions in order to fix the 0x80070057 error. The following step-by-step instructions illustrate how to do this:
- Start the computer using the installation medium and select “Computer repair options” instead of the “Install now” option.
- In the next window, click “Command Prompt” to open the command line.
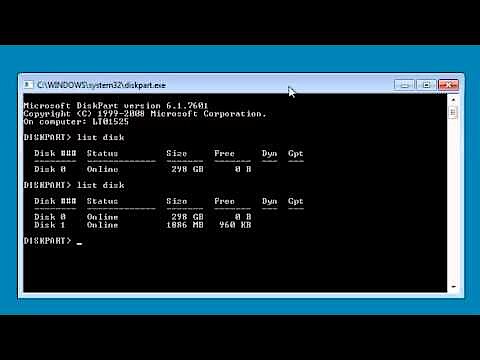
- Enter the command “diskpart” to launch DiskPart, the program for managing partitions.
- Enter the command “list disk” to display all available media and then enter “select disk n” to select the relevant candidate – where “n” represents the medium number (e.g. “select disk 0”).
- Enter “clean” to delete the partitions on the selected medium.
- Enter “create partition primary” to create a new primary partition and then select it using “select partition 1”.
- Enable the new partition on the medium using the command “active” and then perform a complete formatting with “format fs=ntfs”.
- When the process is complete, exit DiskPart and the command prompt by typing the command “exit” twice.
- Try to perform the Windows reinstallation again.
 To display this video, third-party cookies are required. You can access and change your cookie settings here.
If you do not launch the command prompt using the Installation Wizard but during system operation, you can only use DiskPart to format the media that do not contain any system-relevant files.
Click here for important legal disclaimers.