How to format hard drives in Windows
Today Windows users only need to worry about formatting a hard drive in exceptional cases. Internal and external hard drives are already formatted and equipped with a special file system, such as NTFS, in the factory. Nevertheless, in practice there are situations in which formatting a hard drive is useful and necessary.
Formatting a hard drive – when is it necessary?
Formatting is necessary to operate a hard drive that doesn’t have a file system. There is also no getting around the formatting of a hard drive if you are planning to change file systems. If you plan on switching from the file system FAT32 to NTFS, you will be able to save large files over 4GB on a hard drive and benefit from increased data security, amongst other things.
You may consider switching from NFTS to FAT32 if you want greater mobility and the best possible cross-platform compatibility during data exchange. FAT32 hard drives can be read by most hardware in the home, such as media receivers or smart TVs. A smooth cross-platform data exchange is guaranteed as Apple’s Mac computers can handle the FAT32 formatting of external hard drives without any additional tools.
A freshly formatted hard drive is also a good basis for a new installation of an operating system that is guaranteed to be virus-free and run smoothly. You can also opt for a completely new installation, including the formatting of the system hard drive, during an upgrade, e. g., from Windows 7 to Windows 10.
With regards to data security, formatting is only recommended to a limited extent. Special software can, under certain circumstances, restore data that normal users can no longer see or find due to the formatting. If you want to sell a used hard drive that still contains sensitive data (e.g., confidential customer and online banking data), you should use special deletion tools. They overwrite data multiple times and comply with generally binding security standards.
You can use standard Windows tools to format internal and external hard drives. The individual steps are explained using Windows 10 as an example but are very similar in Windows 7 and 8. If you want to find out about the most common file systems for formatting disks, look at our file systems overview which contains all the information you need to know.
Formatting in Windows Explorer
If all your data is lost during formatting, it will no longer be possible for you to access your data normally!
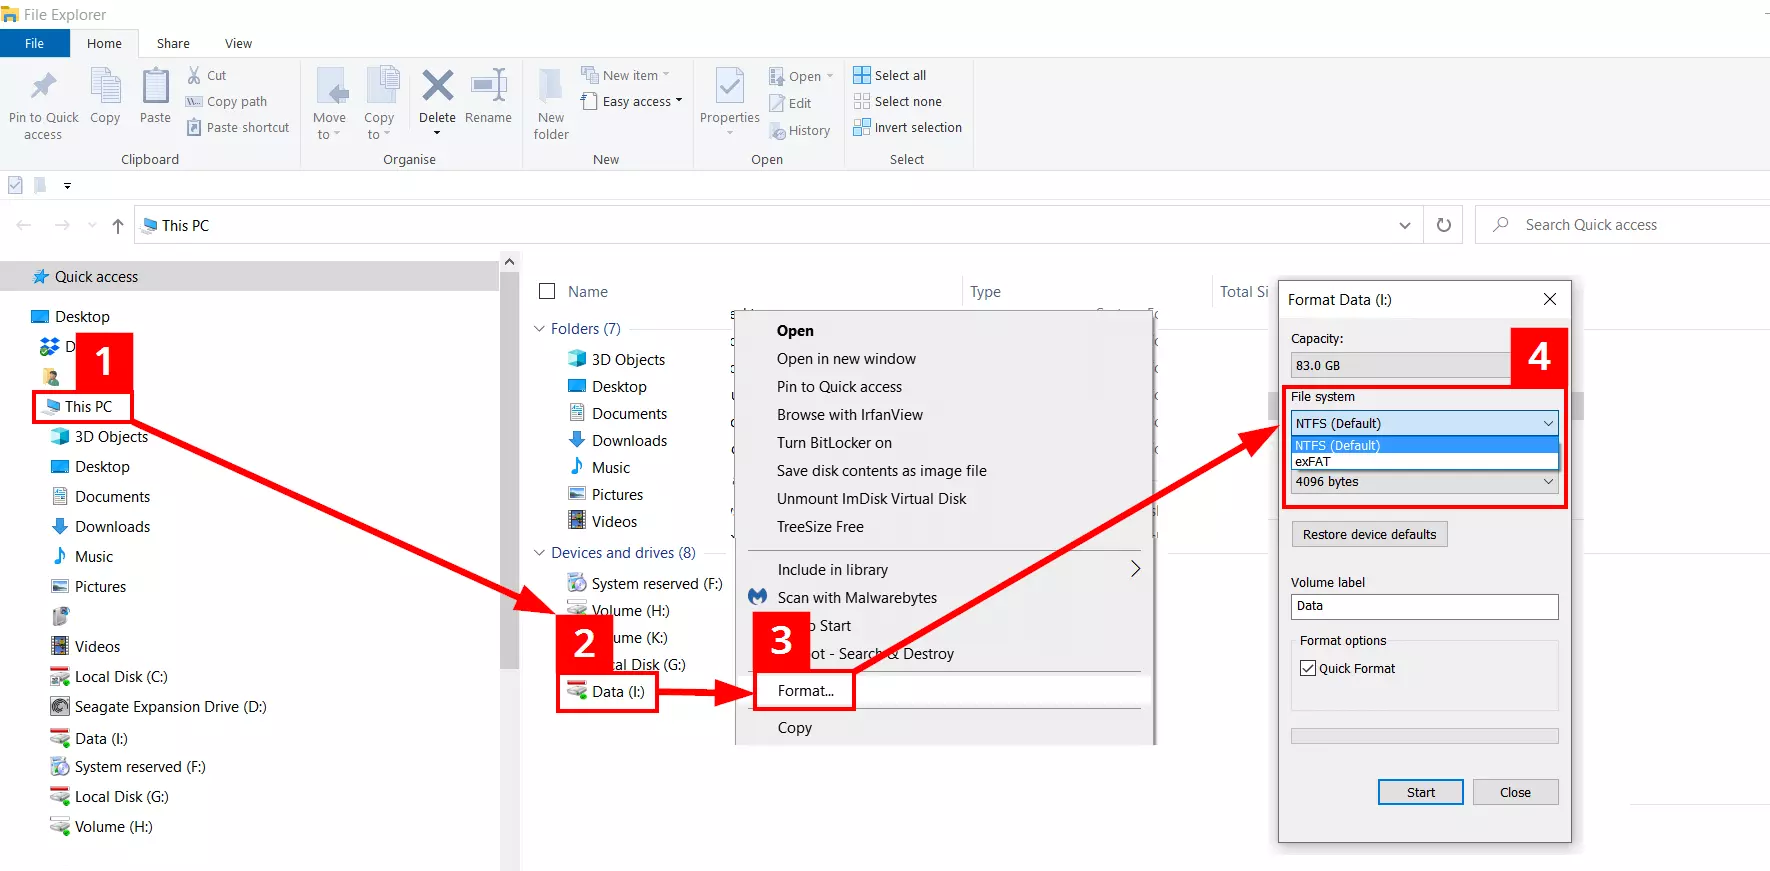
After opening Windows Explorer with the key combination [Windows] + [E], you must complete the following steps:
- In the navigation area on the left in Explorer: click on ‘This PC’.
- A list of the available hard drives will appear: right-click on the icon of the data medium that you want to format.
- After the context menu opens: right-click on ‘Format’.
- Select the file system and then click on ‘Start’ to start the formatting.
As standard, Windows activates ‘Quick Format’ which creates the new file system. If you uncheck the box, more complex formatting will be carried out. The hard drive will also be searched for faulty sectors. This is particularly recommended for old hardware or hardware that hasn’t been used for a long time. In addition, with the Normal Format the partitions will be overwritten with zeroes which makes restoring data even more difficult.
Formatting in Disk Management
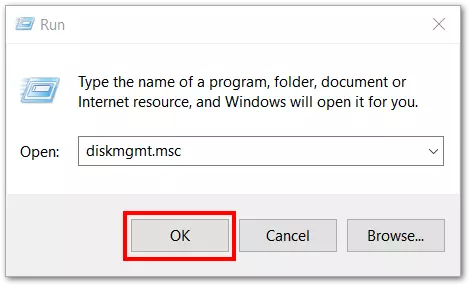
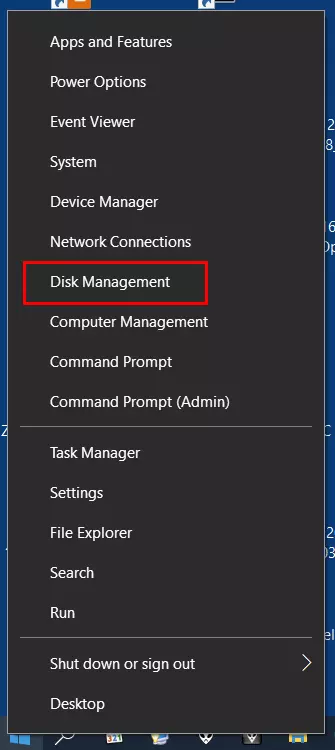
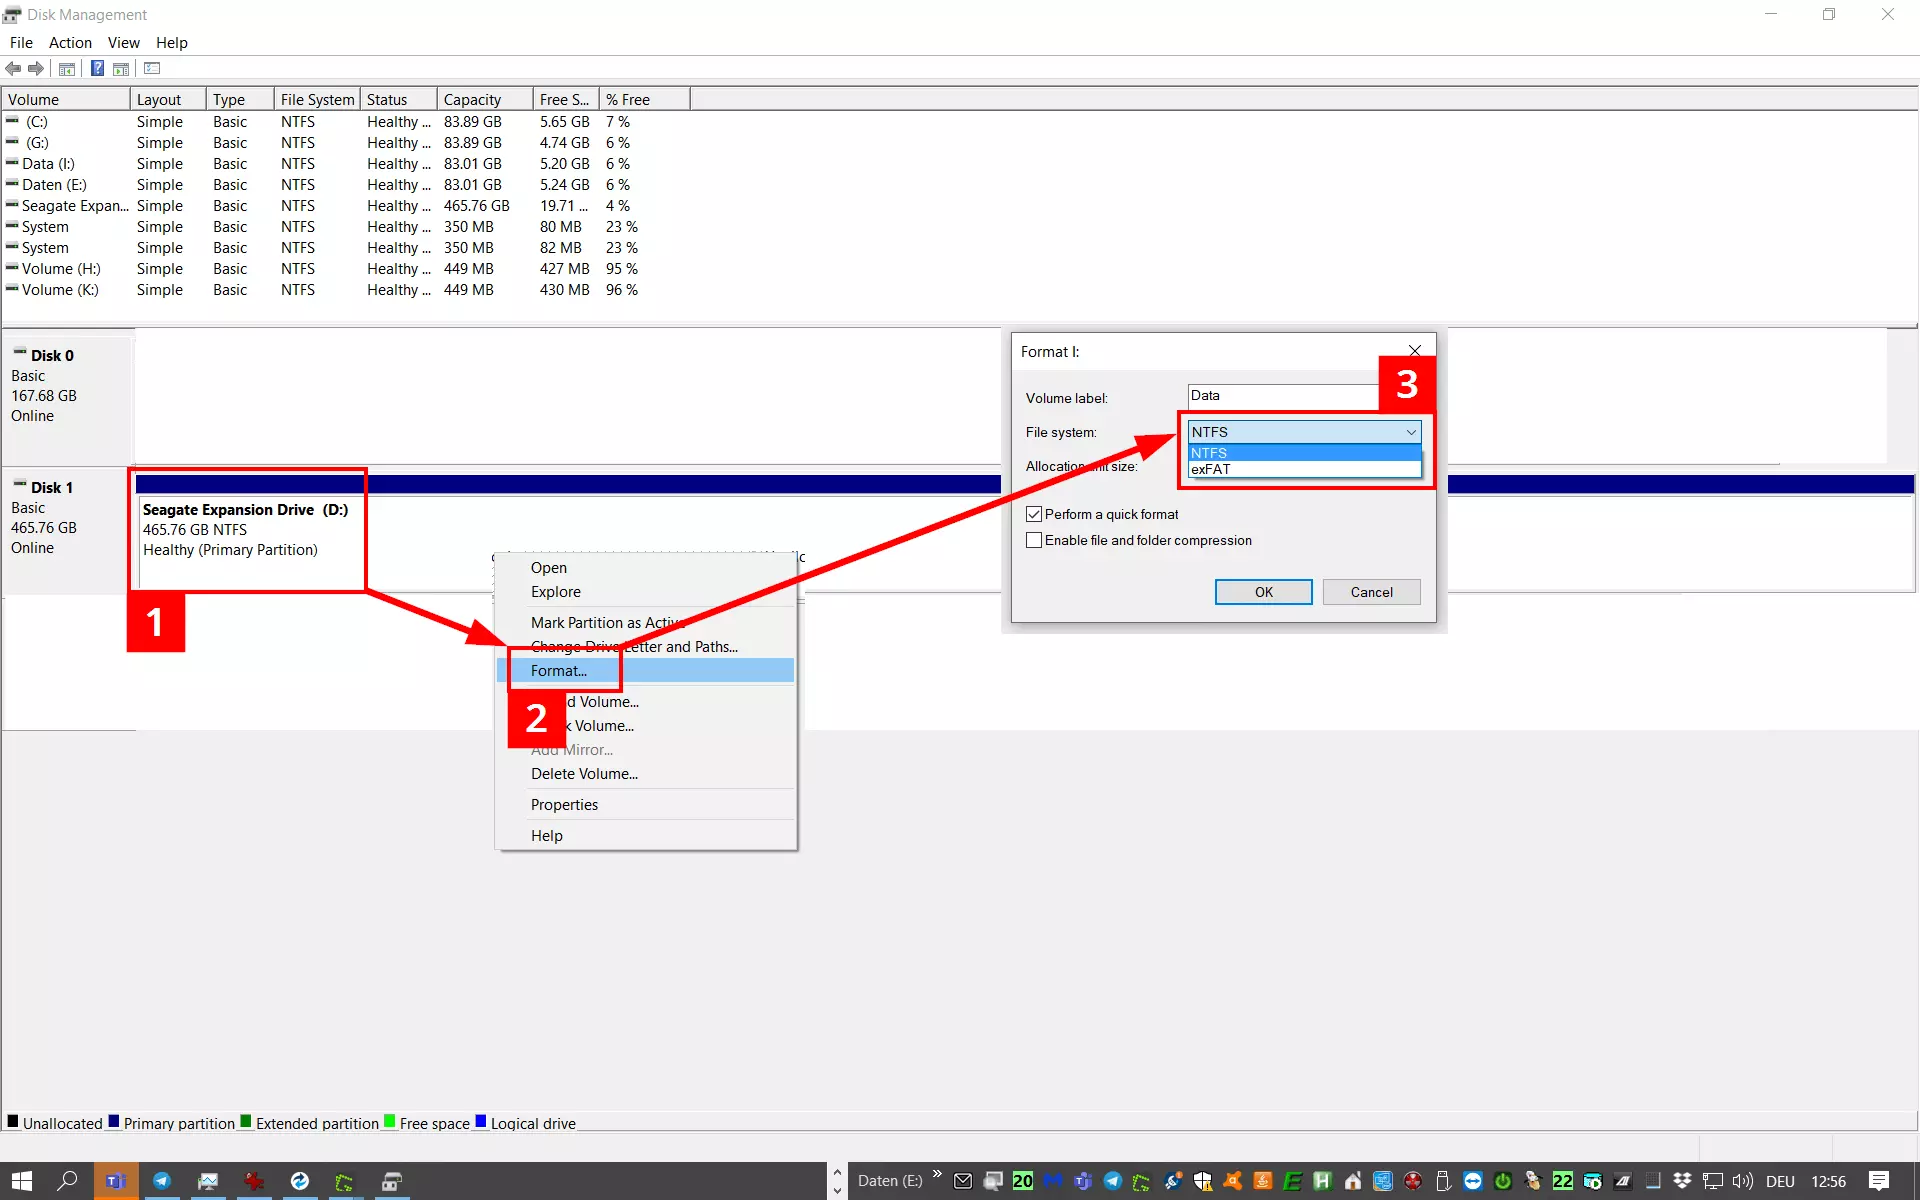
You can format a hard drive in Disk Management as follows:
- Select the disk and then right-click.
- Click on ‘Format’.
- Select the file system and click on ‘OK’.
In Step 3 you can also decide whether you want to carry out a Quick Format (box checked) or a Normal Format with the deleting and overwriting of data (box unchecked).
Formatting a system hard drive
The formatting of a permanently installed internal system hard drive is a special case that differs from the processes already described. With this process, you can make unformatted or already formatted hard drives bootable, assign a new file system and install the desired operating system.
To do this, you will need a special installation medium, such as a bootable Windows DVD or a bootable USB stick with Windows. The formatting also works with the Windows Media Creation Tool which can create an installation medium for Windows 10. The actual formatting is done in a similar way with all installation media.
Formatting a system hard drive with Windows (7, 8 and 10)
System hard drives are formatted during the boot phase. The boot order in BIOS must be configured so that the installation medium is first identified during the booting and so that the PC starts from there. If all the requirements have been met, the formatting is done in several steps:
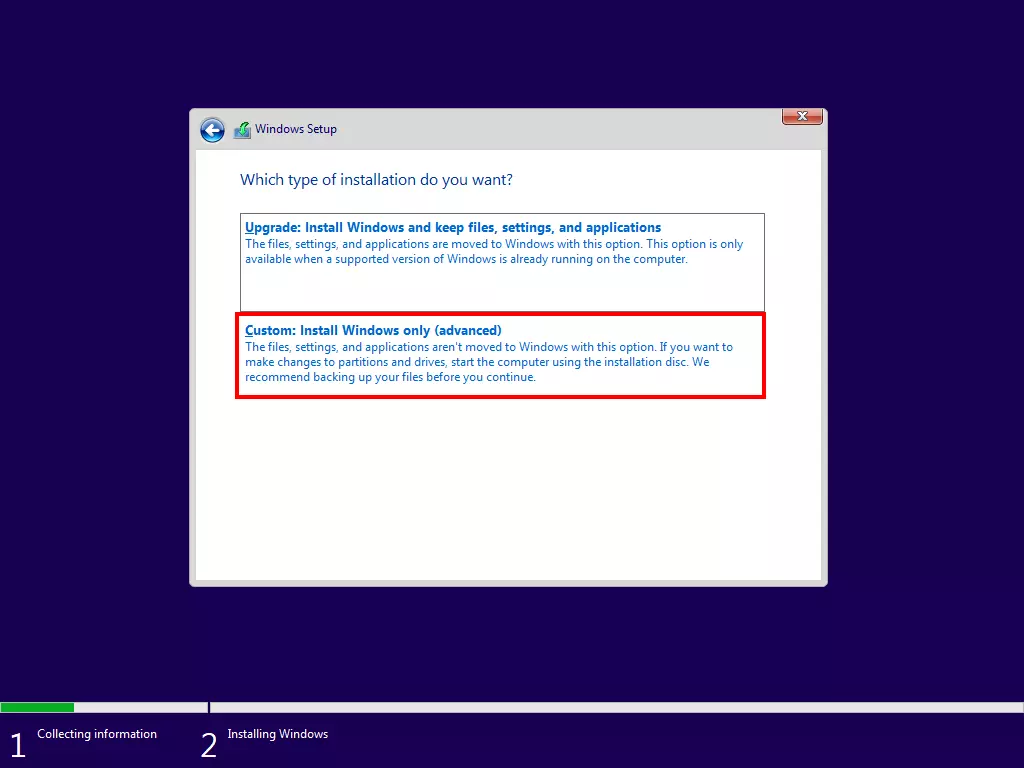
If the installation medium is active, it will first guide you through a few intermediate steps (e.g., input of the Windows license key, agreement to the license terms). Afterward, the Windows Setup starts an installation and formatting wizard. In the ‘Which type of installation do you want?’ menu, you must select the option ‘Custom: Install Windows only’:
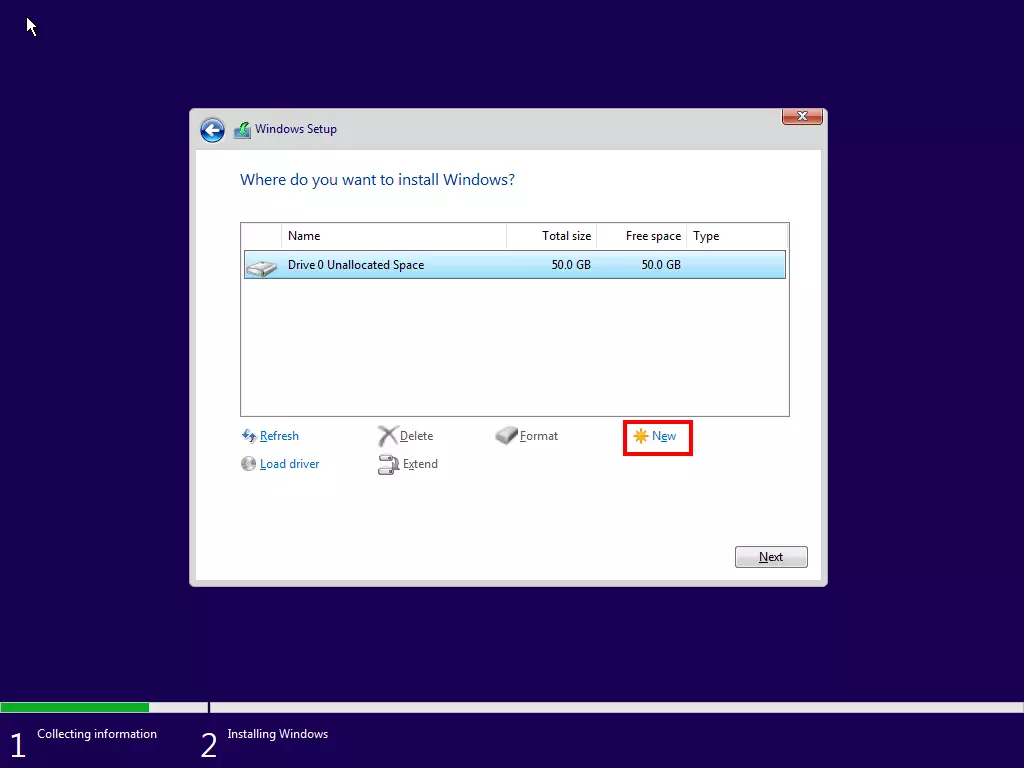
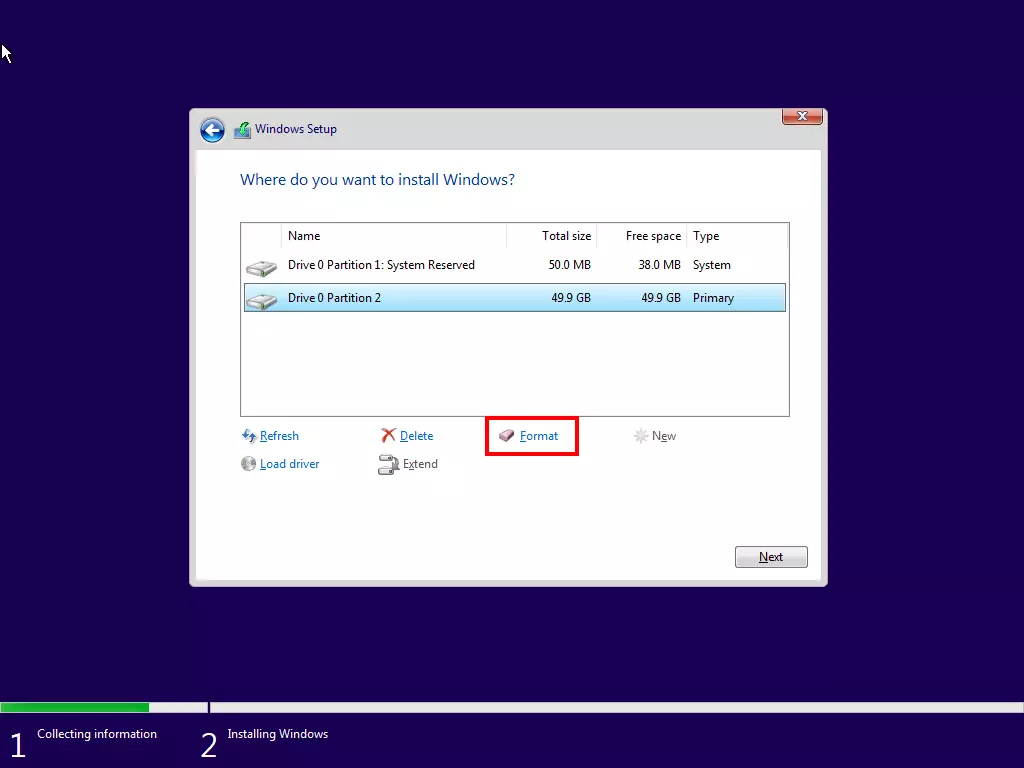
Windows always reserves a storage area when creating a system hard drive (‘Drive 0 Partition 1, Type: System’) that cannot be accessed by the user. The custom formatting is done in the area marked in blue (‘Drive 0 Partition 2, Type: Primary’).
If the system has several hard drives, you must select one. The system hard drive is usually ‘Disk 0’ or ‘Drive 0’. After the final confirmation prompt has been confirmed the formatting starts. Once the process has been completed, the computer can either been turned off or restarted (e.g., by pressing the reset button).


