How to partition a hard drive in Windows 10
It’s not absolutely essential to partition hard drives anymore. Storage devices are now made so that they can be used straight out of the box. However, once you know how it works, partitioning can make it easier to manage your data and increase data security. You’ll need several partitions if you want to install various operating systems on a hard drive. Partitioning is relatively easy with Windows 10. Even less experienced PC users can complete the necessary steps and then enjoy the advantages of an individually configured drive. Follow our step-by-step instructions to partition your hard drive in a few easy clicks.
- Free website protection with SSL Wildcard included
- Free private registration for greater privacy
- Free 2 GB email account
Partitioning a hard drive – What does it mean?
Partitioning a hard drive shouldn’t be confused with formatting a hard drive. Whereas formatting a storage device involves equipping it with a file system like FAT 32 or NTFS, partitioning a hard drive involves dividing it into different sections. Each of these sections then contains related and consecutive data blocks. Modern hard drives can be partitioned one or more times.
Partitions can take on various roles in a desktop system. A so-called primary partition is the logical part of a hard drive which an operating system can be booted from. Partitions can also be used to install several operating systems for a multi-boot system. With a so-called ‘extended partition’, you can exceed the limit of a storage device with Master Boot Record, which normally only allows four primary partitions.
It’s possible to accommodate an operating system and all files with a single partition. This is not uncommon for new notebooks in factory condition. But in terms of data security, it’s better to use multiple partitions. One partition can then be used for the operating system (system partition) and another for larger sets of data (data partition).
It’s beneficial to your system’s data security that partitions operate as autonomous units. If, for example, the file system of a system partition is damaged (by a virus or bad sectors in the hard drive), there’s a good chance that the data on a separate partition can be saved. Additionally, backups can take on a clearer structure when well thought out partitioning is used. The search for a specific file can happen more efficiently if you’ve, for example, set up partitions for certain file types. Word files then end up in the partition for text files, images from your smartphone camera are sorted into the partition for photos, and video files are stored in the partition for videos. You can also structure your hard drive into sections for work, free time, and family.
You can create partitions with special software (sometimes for a fee), which will give you access to a large range of features. But simple partitioning works just as well with the built-in tools of Windows 10. We’ll show you how to do it.
Since Windows 7, hard drives can be partitioned while the system is in operation. Generally, this process doesn’t result in any data loss. However, partitioning a hard drive in Windows 10 requires far-reaching interference. If an already-existing volume is deleted, it might result in a loss of data. Thus, if there’s already data on your hard drive, it’s a good idea to back it up before partitioning.
How to partition your hard drive in Windows 10 – A step-by-step guide
In this tutorial, we assume that you’re using a brand new external hard drive. There shouldn’t be any data on the drive, and there should already be a basic partition labelled ‘External’. This storage area of about 465 GB will be further divided with a partition.
If the hard drive is already filled with data, your freedom in partitioning will be limited by the storage space that is already occupied. If you need more memory capacity for new partitions, you should clean up the storage devices that you’re using. When it comes to system hard drives that host Windows, you can empty the trash, delete unnecessary files, and uninstall unused programs.
Opening Disk Management in Windows 10
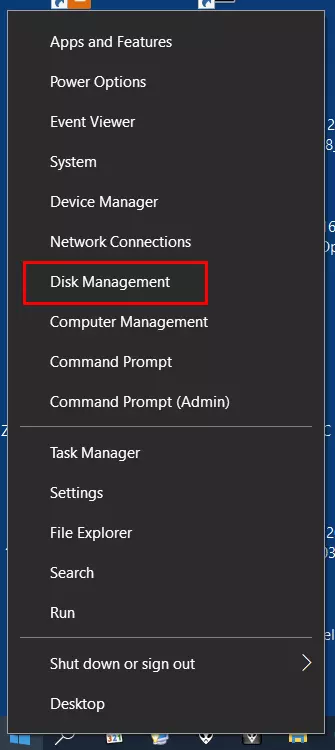
Partitioning a hard drive isn’t particularly difficult. You can easily do it yourself in just a few steps. To start, you’ll need to open Disk Management in Windows 10:
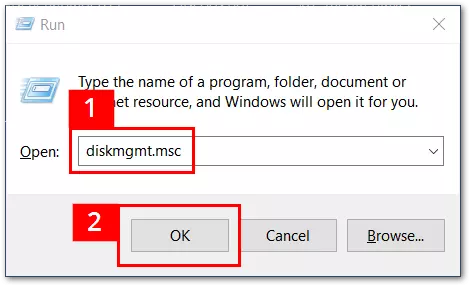
- Press [Win] + [R] simultaneously
- Type ‘diskmgmt.msc’ into the window (Marked 1 on graphic)
- Press [Enter] or click ‘OK’ (Marked 2 on graphic)
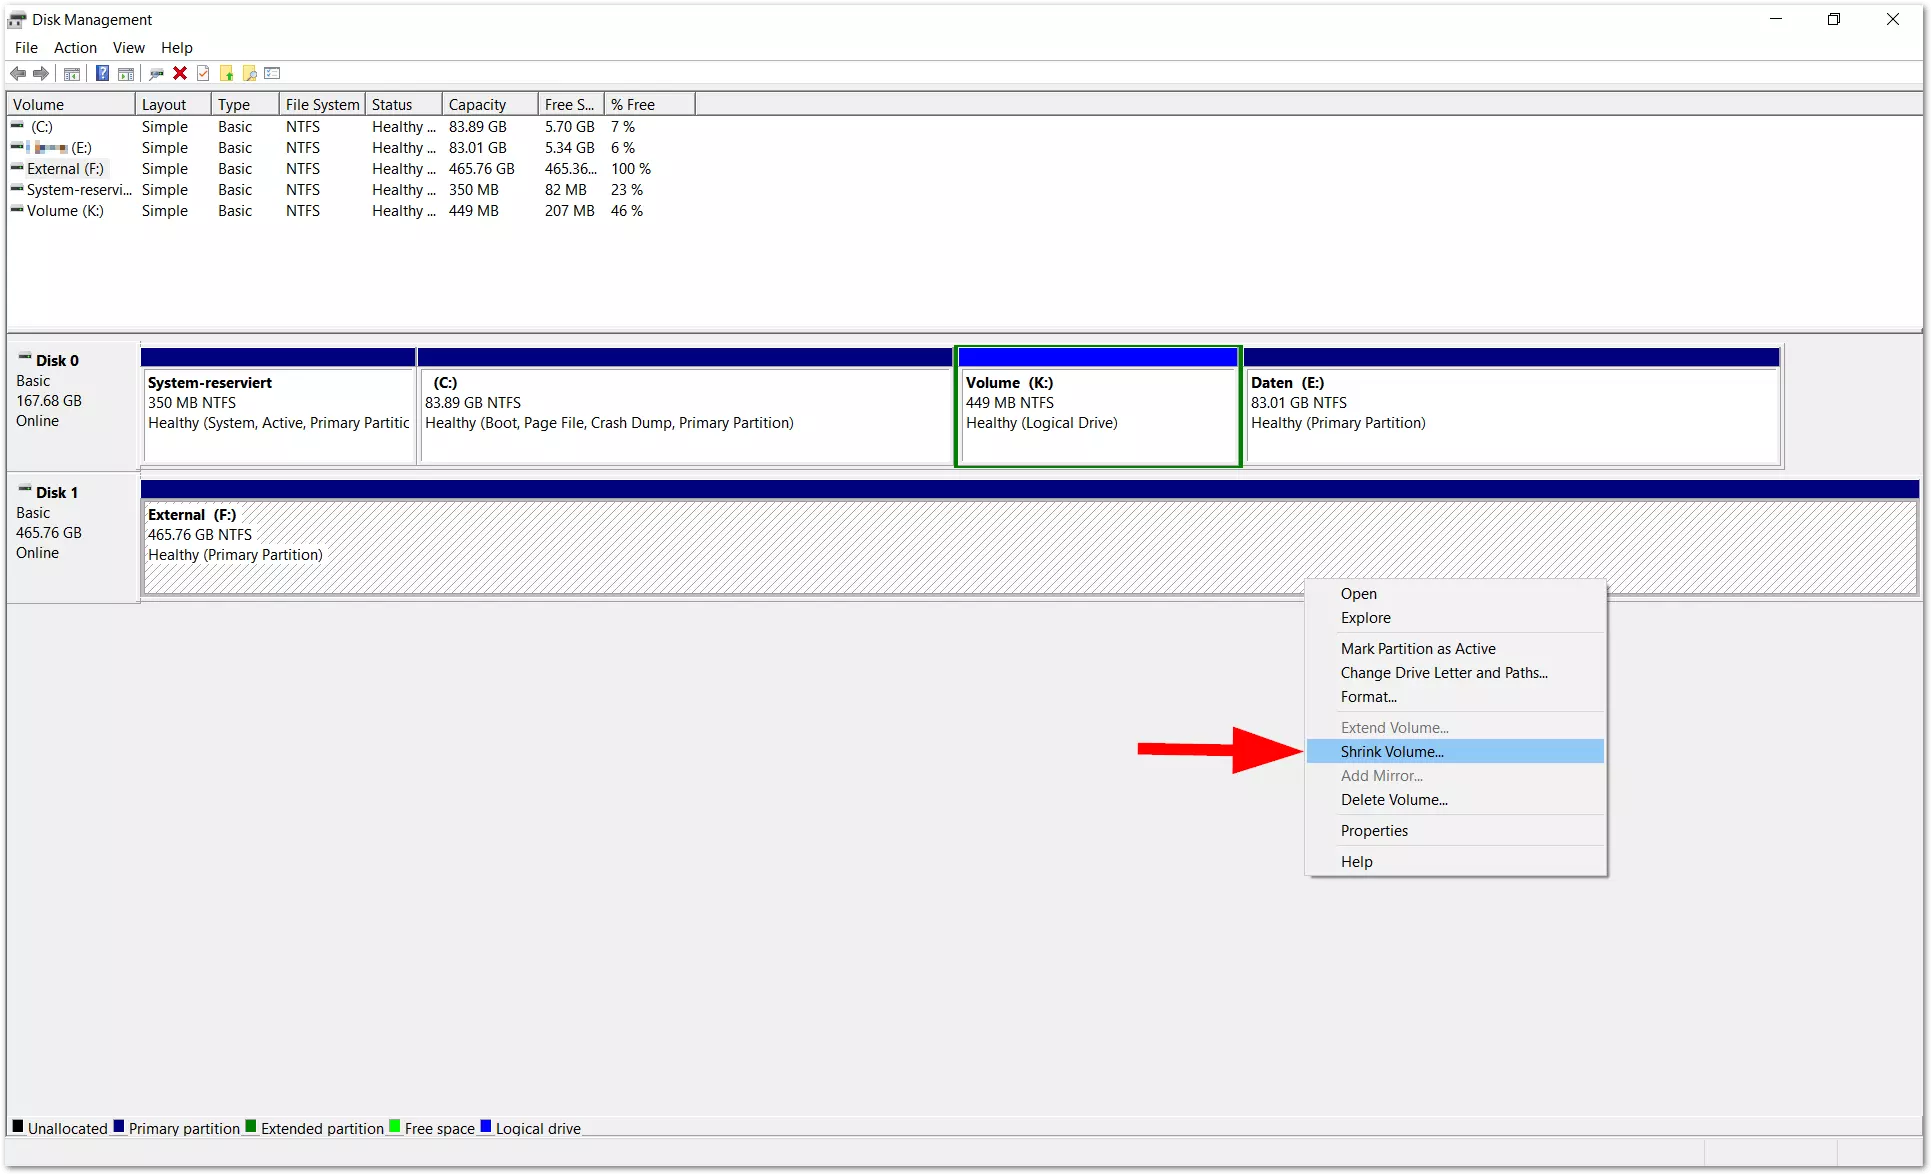
Disk Management will then open, in which all currently connected storage devices are listed. The Windows 10 partition shows up in the internal hierarchy as the first drive (Disk 0), which is typically labelled with ‘C:’. In addition to the system partition, there are may also be other partitions on the hard drive. Windows will automatically assign a drive letter to them, which can be changed at any time if necessary.
The Disk Management window will become a lot easier to manage if you disconnect unnecessary external storage devices before partitioning and/or cut off the USB connection between external storage devices and your computer before turning the computer on. This will help you avoid accidentally deleting data.
Shrink volume
We want to give the new external hard drive (Disk 1/External) an additional partition for data, which should be around 240 GB (=around 240,000 MB). To make space for the new partition, you’ll want to split the total volume of the disk (in this case around 465 GB) using the menu item ‘Shrink Volume’. You can get to this menu by right-clicking on Drive 1 (external).
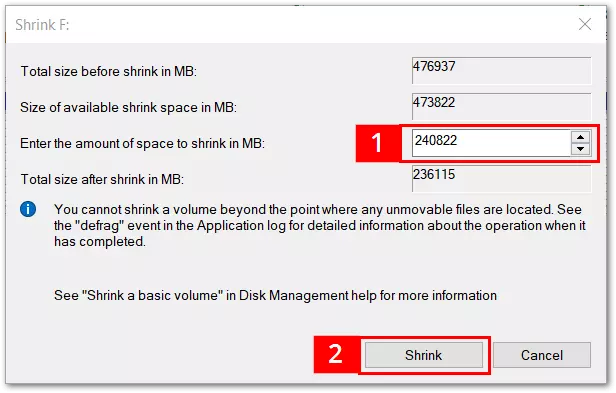
Windows usually shows the maximum amount of available disk space here. If the partition is smaller, this can be defined manually. If the new partition is smaller than suggested by Windows, it will result in unassigned disk space. This can later be assigned (=partitioned).
After you’ve entered your preferred amount of space (see 1), click on the button ‘Shrink’ (see 2). Then the window will close, and Disk Management will show the partition. The final size of the new partition will differ slightly from what you entered in the Shrink window (in this case being around 235,000 MB instead of 236,000).
Create a new simple volume
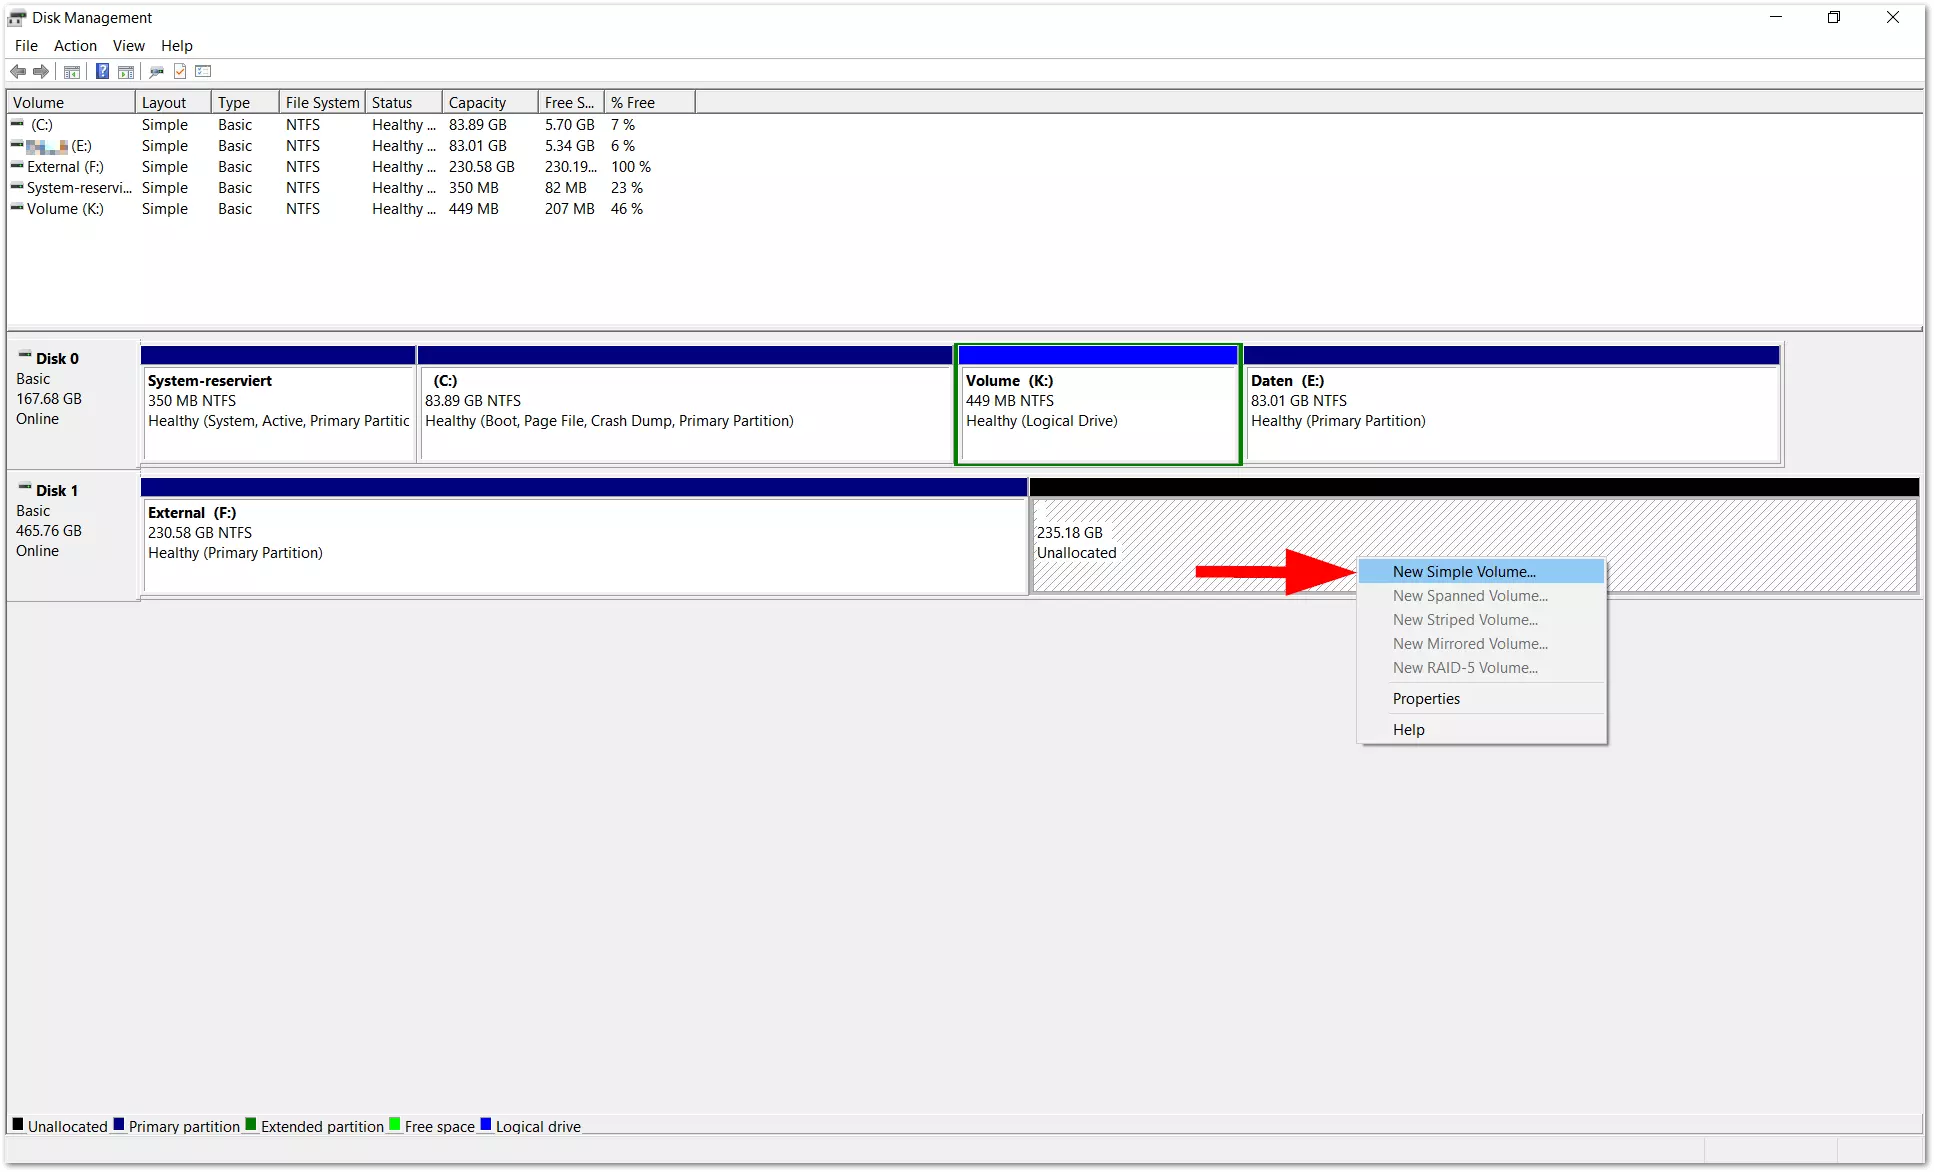
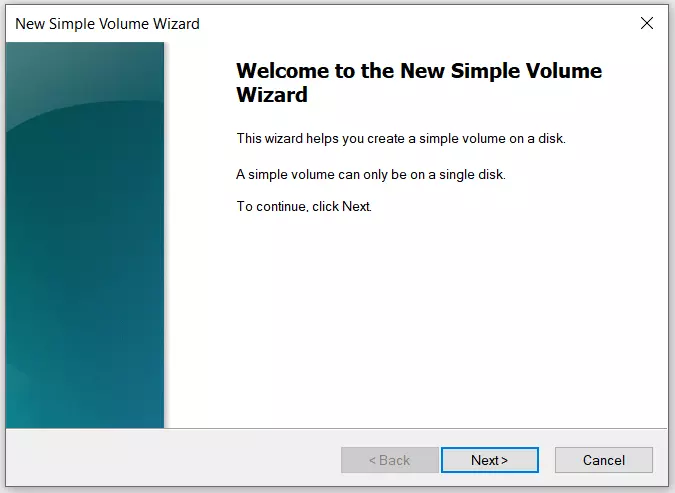
The partitioning process isn’t over yet. To use the partition with Windows Explorer, you’ll have to assign the new storage area another volume with its own drive letter. To do this, right-click on the shaded (unassigned) area and choose the entry ‘New Simple Volume’ from the menu.
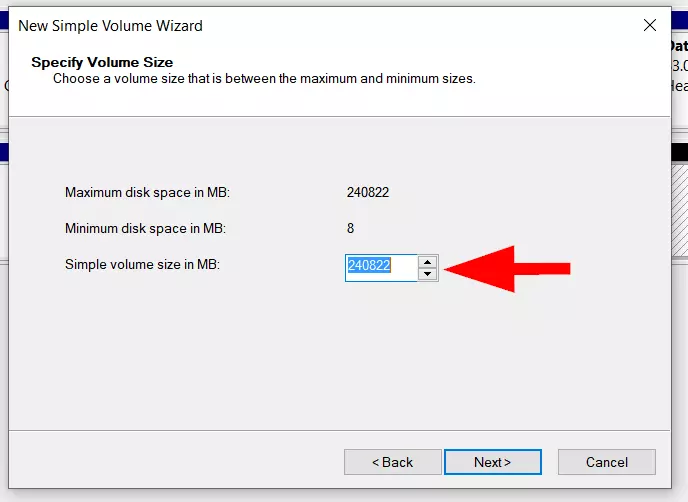
In the next step, you can specify the size of the volume. If you want to assign the volume all the available disk space, you don’t have to change anything. But you can also set up several volumes/partitions; if you want to do this, enter a smaller value here (e.g., 120,000).
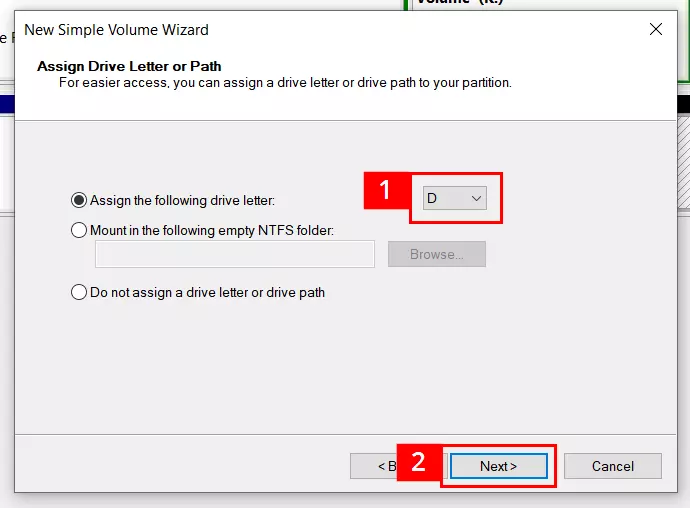
Now it’s time to assign a drive letter. In this example, we chose the letter D from the list of suggestions (see 1). Letters that are already being used by other drives don’t appear in the list. (If necessary, though, you can switch out most letters in Disk Management.) If you don’t change anything, Windows will use the pre-suggested letter. Once you’re done, click ‘Next’ (see 2).
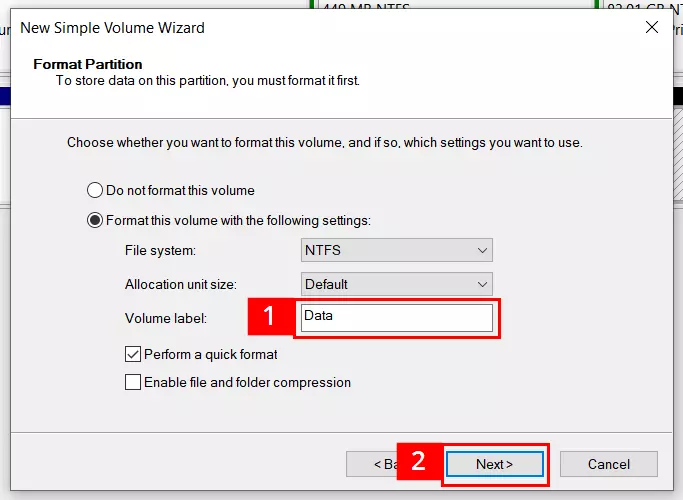
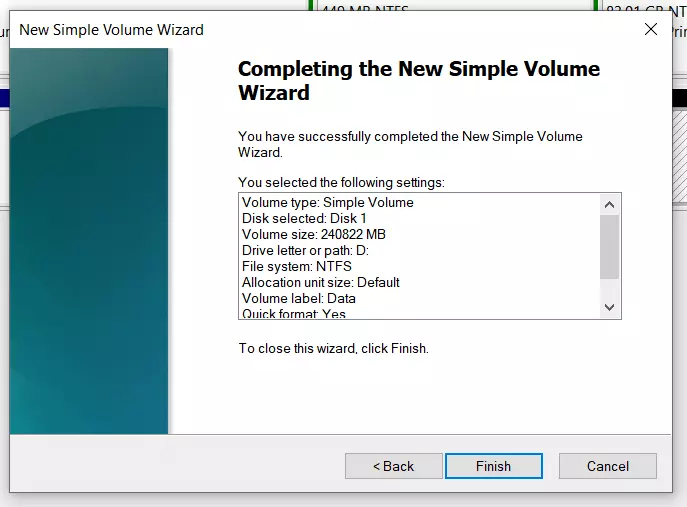
The next step is to name the volume. We delete the default entry ‘Volume’ and replace it with the name ‘Data’ (see 1). It’s also possible to specify a different file system here. If you’re working with an internal hard drive or external storage device that primarily works with Windows PCs, you can stick with the pre-set NTFS file system. When you’re finished, click ‘Next’.
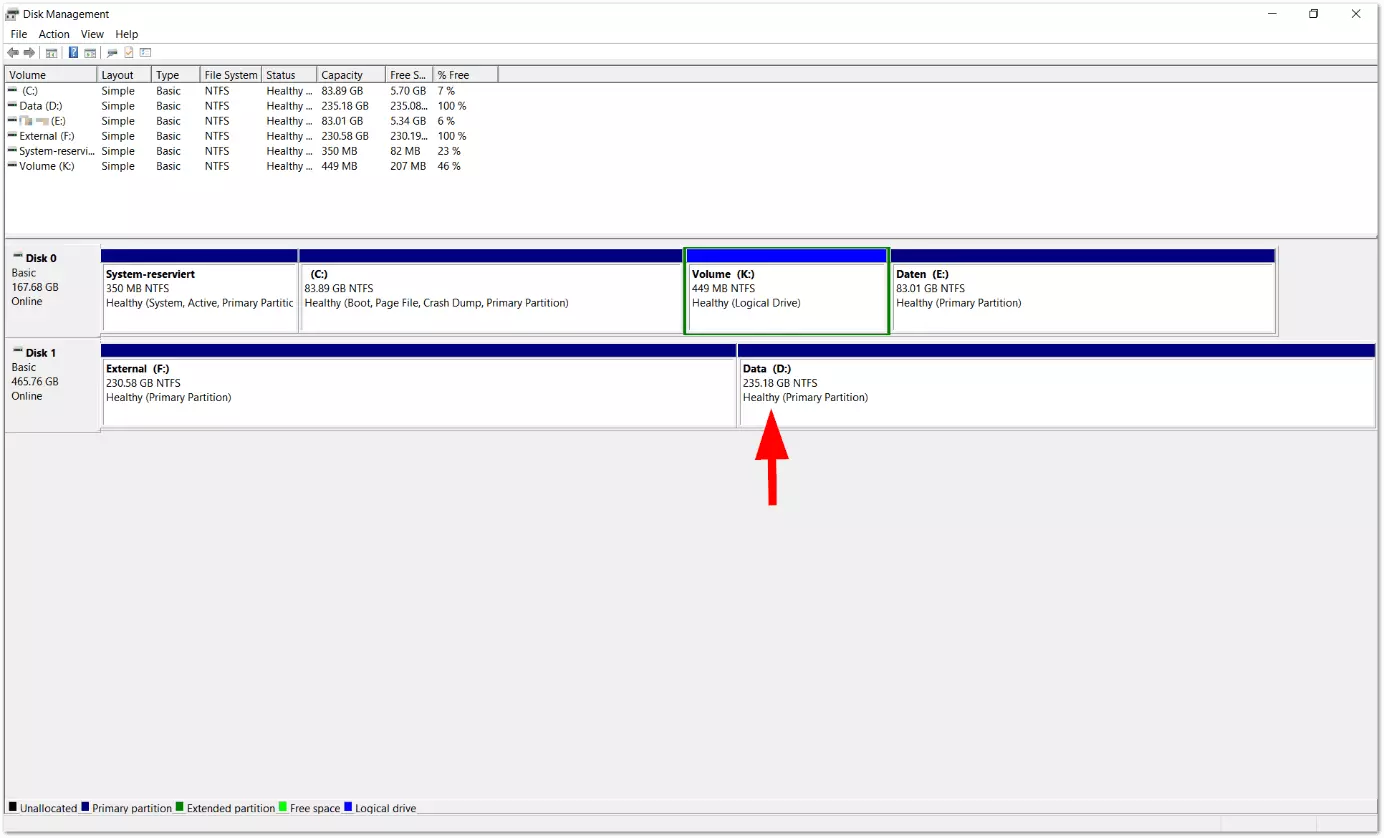
The wizard then closes, and you’ll end up back in the default Disk Management window. You should see the result of the configuration: The volume labelled ‘Data’ was successfully set up. If necessary, you can further divide any of the volumes shown here.
Hard drive without partitioning
In this case, you can go directly to the section ‘Create a new simple volume’ above and start the tutorial from there.
Due to technical factors, problems or limitations can come up when partitioning a hard drive. Some problems can be solved with special tools for partitioning. But sometimes you’ll have to undergo a complicated reformatting of the storage device to tackle the problem.


