How to use the Windows 11 SSH client
After the 1809 update, Windows has been offering its users native SSH tools such as a pre-installed SSH client and an optional SSH server. This mean that in Windows 11, you do not need any third-party software to access your computer or server remotely.
Quick guide to activate Windows 11 SSH
Enable SSH client:
- Open ‘Settings’ > ‘Apps’ > ‘Optional Features’ and check if the OpenSSH client is installed - if needed, install it via ‘Add optional feature’
- Open command prompt as administrator with Windows search > ‘cmd.exe’ > ‘Run as administrator’
- Enter CMD command:
ssh - Connect to the desired server with
ssh name@server - Possibly consider the port: default = port 22 - change port with ‘-pPortnumber’ behind the server name
- First connection: Confirm Host Key Fingerprint with ‘Yes’ and enter password.
Set up SSH server in Windows 11:
- Open ‘Settings’ > ‘Apps’ > ‘Optional Features’
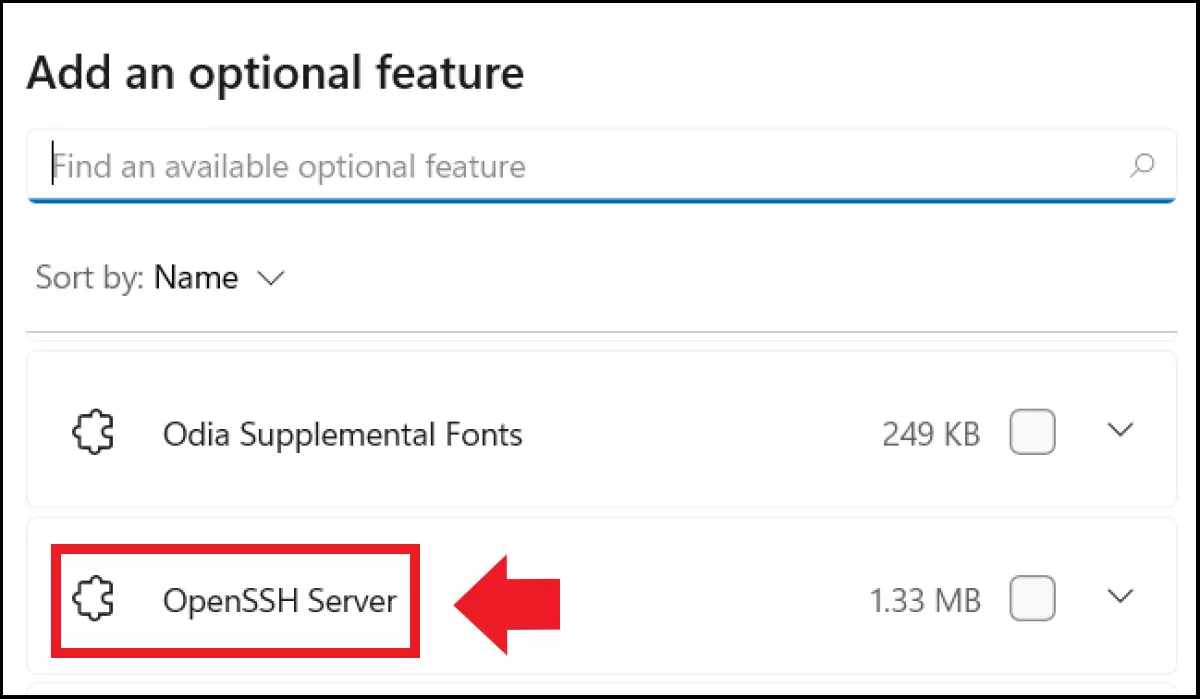
- Click ‘Add optional features’ and select ‘OpenSSH Server’, then ‘Install’ (only possible with admin rights)
- Open the ‘Services’ app in Windows and set the start-up type for ‘OpenSSH Authentication Agent’ and ‘OpenSSH Server’ to ‘Automatic’
- Check firewall rules in the Run dialogue with
Get-NetFirewallRule -Name *SSH*. - Connect to the SSH server by typing
ssh <server_name>.
What is Windows 11 SSH (Secure Shell)?
What has long been standard in Linux and Ubuntu has been available in the native Windows tools since Windows 10 (1809). Using a pre-installed Windows 11 SSH client, you can make use of Secure Shell (SSH) and gain remote access via remote desktop and CMD commands to your own computer or server on the network. You can also get remote access with administrator rights securely and entirely encrypted via SCP and SFTP. Just like with Ubuntu SSH you don’t even need special third-party software to do it. From a security perspective in particular, remote access using the SSH protocol offers the following advantages:
- Client-server authentication
- Encrypted data transfer
- Data integrity
To use SSH in Windows 10, see our guide to Windows 10 SSH.
How to use the Windows 11 SSH client
This is what you need to use the SSH client in Windows 11:
- At least PowerShell 5.1
- Administrator rights
Follow these steps to enable the Windows 11 OpenSSH client:
Step 1: Check under ‘Settings’ > ‘Apps’ > ‘Optional Features’ whether the SSH client is already installed. If the SSH client tool is not in the feature list, click Add Feature. Now search for ‘OpenSS Client’ and select ‘Install’.

Step 2: After installation, start the command prompt as administrator. This works in several ways, for example, by typing ‘cmd.exe’ in the Windows search and then selecting the ‘Run as administrator’ option.
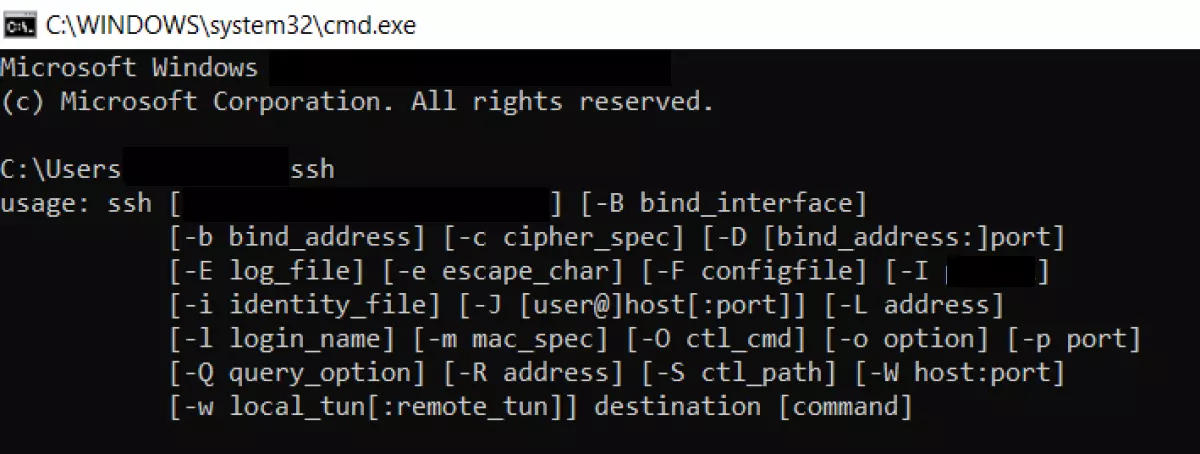
Step 3: Now open the ‘User Guide’ of the OpenSSH tool with the following CMD command:
sshYou will now see the syntax and parameters provided by the SSH client.

Step 4: For example, to access Raspberry Pi remotely, connect to the Raspberry computer’s remote server with the following command:
ssh pi@raspberrypiHere, ‘pi’ represents the user you are targeting on a remote server, while ‘raspberrypi’ identifies the remote server you are targeting. To access a specific IP address in the target network or an external remote server, use the following command:
ssh name@mywebsite.mydomainname.comStep 5: The Windows 11 SSH client connects through port 22 by default. If the SSH server being accessed uses a different port, use the following command to connect:
ssh pi@raspberrypi -p (Portnumber)Step 6: If connecting to the server for the first time, you’ll need to confirm the Host Key Fingerprint by entering ‘Yes’. After entering the user password, you will be able to control the computer remotely and terminal.
Both Windows and Linux are suitable for using a private web server. Read about the advantages each of the systems has to offer in our comparison of Linux and Windows web server solutions.
How to set up a Windows 11 SSH server
In order to also set up an SSH server in Windows 11, you’ll need to install the OpenSSH server of Windows 11. Unlike the SSH client, this is not pre-installed.
Follow these steps:
Step 1: Open the ‘Optional Features’ menu via ‘Settings’ and ‘Apps’.
Step 2: Click on ‘Add Features’, select ‘OpenSSH Server’ in the list and confirm with ‘Install’. You need administrator rights to do this.

Step 3: Windows will now install the services ‘OpenSSH Authentication Agent’ (if this is not already installed) and ‘OpenSSH Server’. If using SSH regularly, it is a good idea to change the start-up type of the services to ‘Automatic’. To do this, go to ‘Services’ via the Windows search. Open the Services app and right-click on each of the two services. In the menu, open the ‘Properties’ item and set the start-up type to ‘Automatic’.
Step 4: Now check with the following command in the ‘Run’ dialogue if the SSH firewall rules are active:
Get-NetFirewallRule -Name *SSH*Step 5: Connect to the SSH server with this command:
ssh <server-name>If you encounter connection problems or other errors, follow our guide on how to fix SSH errors.

