Why is spell check not working in Outlook? Possible causes
If your Microsoft Outlook spell checker is not working, it could mean that your spelling mistakes are not being found or that correctly spelled words are being marked as incorrect. With this guide, you can find out why Outlook is not spell checking and how to fix the problem.
What are possible reasons why Outlook spell check isn’t working?
When the Microsoft Outlook spell checker stops working, in most cases, one of the following reasons is the culprit:
- AutoCorrect and the spell checker aren’t activated.
- The language settings are incorrect, and Outlook is spell checking your text in the wrong language.
- Outlook hasn’t been installed properly, and this may be causing errors.
The following sections will guide you through different troubleshooting approaches to identify and solve common spell-checking errors in Outlook.
Remote work has never been more comfortable. Thanks to Hosted Microsoft Exchange from IONOS, you can securely access your favourite Microsoft email and calendar applications anywhere, anytime!
How to repair Outlook’s spell checker step by step
If Microsoft Outlook spell check isn’t working, you can identify and repair the error in a few simple steps. The following troubleshooting instructions are suitable for Outlook 2019, Outlook 2016 and Outlook for Microsoft 365.
Solution 1: Restart Outlook
If you’ve recently made some changes to your Outlook settings, they might not take effect until you restart the application. Before restarting, make sure you first save all open drafts and documents.
Restarting Outlook is a good idea whenever you make changes to your Outlook settings. For example, if you go with solution 2 or 4 below, it’s best to restart Outlook after you’ve made the changes.
- Write perfect emails with optional AI features
- Includes domain, spam filter and email forwarding
- Best of all, it's ad-free
Solution 2: Check if the spell checker is enabled
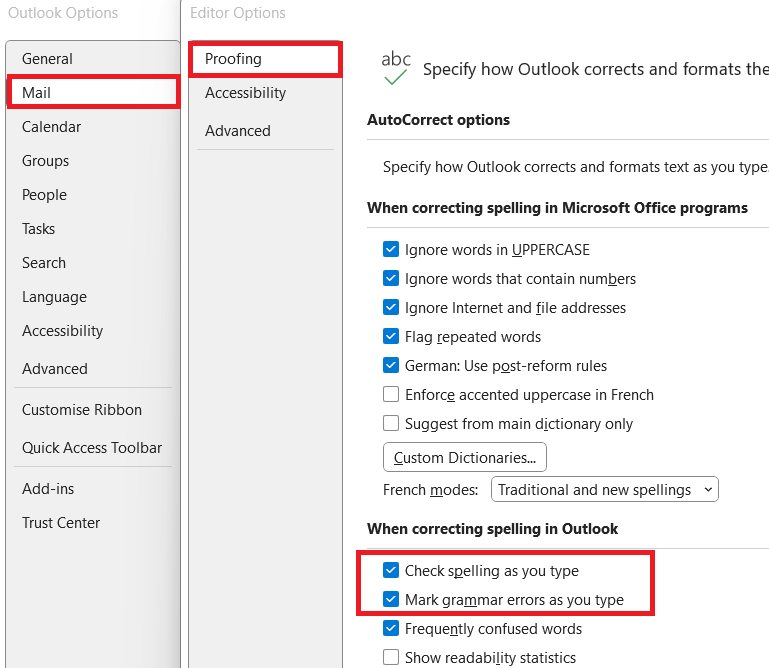
Once you’ve restarted Outlook, it’s a good idea to check the settings for Outlook AutoCorrect. You can open the menu by following the steps below:
- Go to the File tab.
- Click on Options in the left-hand menu.
- Switch to Mail in the pop-up window.
- Select Proofing.
From the options listed in the When correcting spelling in Outlook section, tick the box next to Check spelling as you type and Mark grammar errors as you type.
Check out our article ‘Outlook: How to turn spell check on and off’ to find out more about Outlook AutoCorrect, including detailed instructions on how to use the practical feature.
Solution 3: Verify that automatic checking of outgoing emails is activated
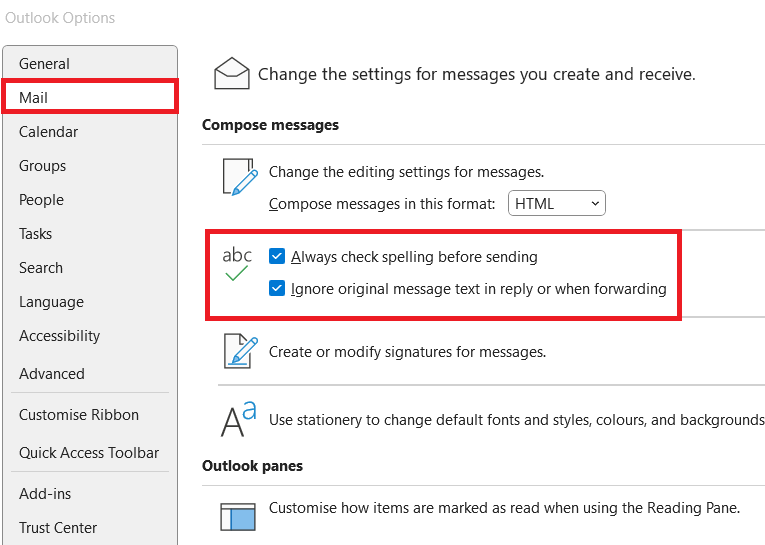
If you prefer working with auto-check for outgoing emails instead of the standard spelling and grammar checker, it makes sense to check the current settings for this feature. To do so, you need to open the menu. Here’s how:
- Click on the File tab.
- Launch the Options menu.
- Select the Mail tab.
Now, tick the box Always check spelling before sending (below Compose messages). You should also deselect the Ignore original message text in reply or when forwarding option, if there is a tick here. If it is not deselected, the program may ignore parts of your message during the check.
Solution 4: Change language for spell check
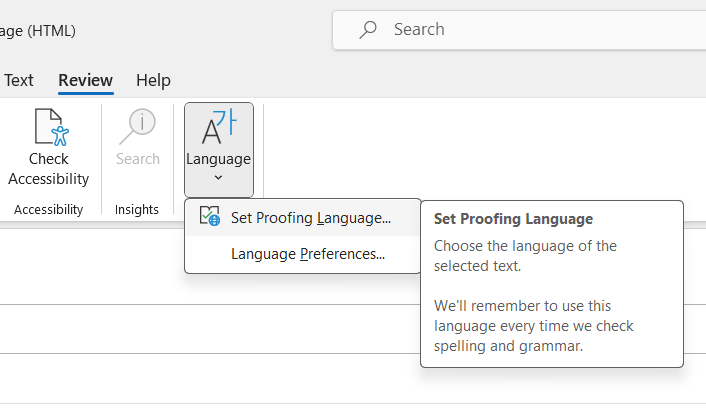
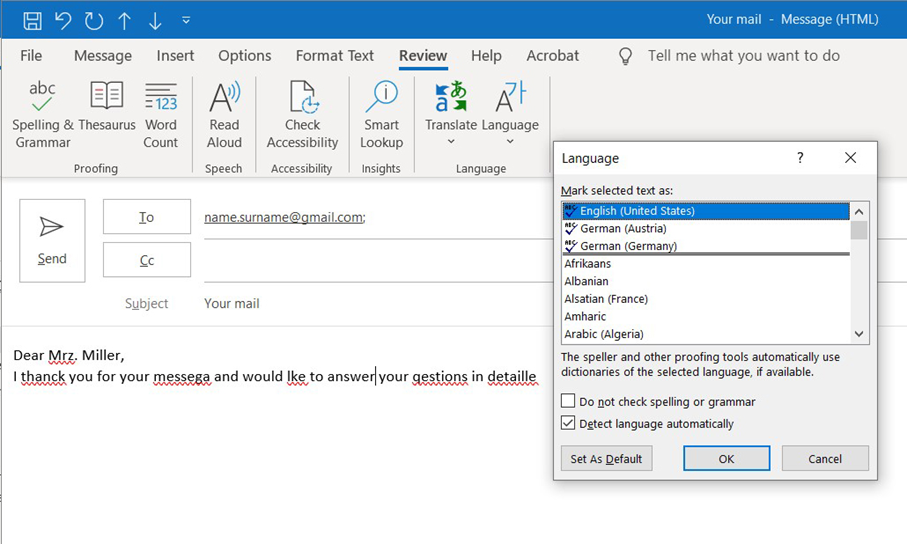
Start writing a new email the way you normally would. Open the Review tab and click the Language button. Select Set Proofing Language to view current language settings for spell and grammar checks.
Once you’ve set the desired language, test the spell check manually by pressing the Spelling & Grammar button in the Review tab. The spell checker will launch a small dialog window that should display the correct language. If there is a tick next to Detect language automatically, you should remove it. Having a tick next to this option can lead to issues, especially if you tend to use words from different languages in your emails.
Since Outlook relies on Microsoft Word when composing texts, you should also make sure that spell check is turned on in Word and that there aren’t any issues causing spell check not to work in Word.
Solution 5: Check installation and update status
Make sure your operating system is up to date and all the latest updates are installed. Also check to see if your Microsoft Office package, including Outlook, is installed correctly and up to date. If these are all up to date and steps 1 to 4 didn’t work, it may be time to reinstall Outlook.
- Up to 50 GB Exchange email account
- Outlook Web App and collaboration tools
- Expert support & setup service
How to set up and repair spell check in Outlook on the web
Are you using the browser version of Outlook for your email communications? By default, Outlook’s web version doesn’t have automatic spell and grammar checking activated. You can either activate the spell checker in your browser or enable your operating system’s spell checker for all applications.
Activate Outlook spell check in the browser (using Google Chrome)
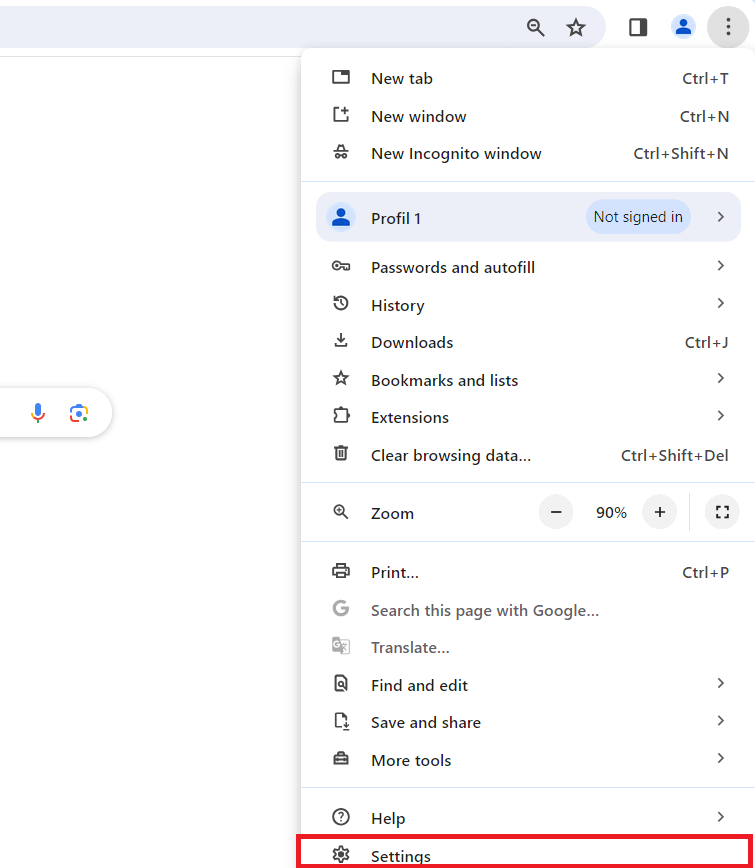
Spell checking can be activated in most browsers, including Microsoft Edge, Chrome, Firefox and Safari. This takes just a few minutes. In Google Chrome, you can turn on this practical feature by following the steps below:
- Click on the three-dot icon next to your profile picture in the upper right corner. Select Settings from the drop-down menu.
- Click on Languages in the settings menu.
- Activate Basic spell check.
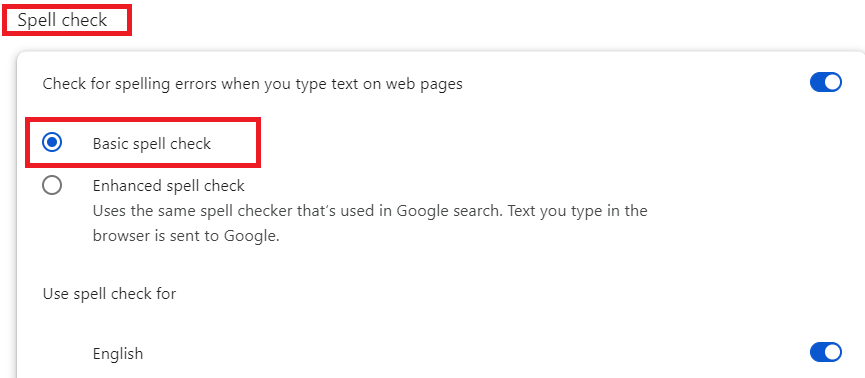
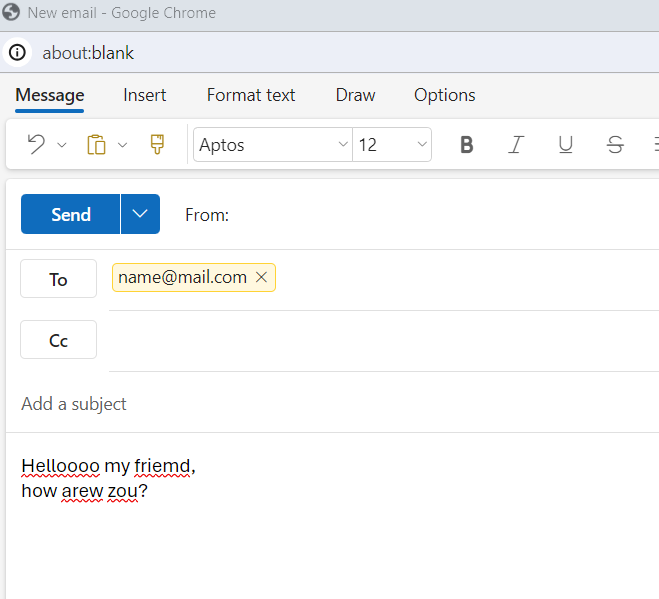
Errors will now be automatically highlighted in red when you compose emails in Chrome.
Allow the operating system to check spelling for all applications
Alternatively, you can use your operating system’s spell checker in your browser. In Windows 11, you’ll need to enable spell checking for all applications. This can be done as follows:
- Launch the start menu from the Windows icon.
- Open Settings in the same menu.
- Select Time and language.
- In the Typing section, tick the box Highlight misspelled words. If you also want to enable automatic error correction, tick the option Autocorrect misspelled words.
- Fast drag and drop editing
- AI-powered text generation
- Seamless syncing with IONOS eCommerce