

How to install Podman on Ubuntu 24.04 step by step

Podman can usually be installed on Ubuntu 24.04 directly from the official package repositories using just a few commands. This makes setting up Podman on Ubuntu particularly straightforward, even for beginners.
- NEW: Flexible scaling with VM-cloning, load balancing, new storage options and more
- Unlimited traffic and >99.99% availability
- 24/7 expert support and your own personal consultant
Step 1: Check the prerequisites for installation
Before beginning the installation, make sure Ubuntu 24.04 LTS is installed and configured on your system. You will also need terminal access and a user account with sudo privileges to install and update system packages. An active internet connection is required to download the Docker alternative Podman and its dependencies from the Ubuntu package repositories.
For initial tests and smaller container projects, a VPS is usually sufficient for running Podman on Ubuntu. A dedicated server may be the better option if you plan to run several containers at the same time, use resource-intensive applications or create a predictable environment for production workloads.
Podman itself has relatively modest system requirements. However, your server should have enough free storage space, at least 2 GB of RAM and a properly maintained Ubuntu installation.
Step 2: Update the package lists
Installing Podman on Ubuntu only takes a few steps. Start by updating your system’s package lists so Ubuntu can retrieve the latest available package information from the configured repositories.
sudo apt updateYou can then optionally update all installed packages to their latest versions:
sudo apt upgrade -yThis step is particularly useful on freshly set-up systems, as it updates existing packages and libraries. This reduces the likelihood of unnecessary version conflicts occurring later during the installation.
Step 3: Enable the Universe repository
On Ubuntu 24.04, software sources are typically configured using files in /etc/apt/sources.list.d/. Podman is available through the Universe repository, which may not be enabled in some installations. If necessary, activate it with the following command:
sudo add-apt-repository universe
sudo apt updateOn many systems, Universe is already active. In that case, the command does no harm; it simply confirms the existing configuration.
Step 4: Install Podman
You can now install Podman directly using the package manager:
sudo apt install podman -yUbuntu 24.04 includes Podman in its standard package repositories, so there is no need to add a third-party source or use a separate installation script. The APT package manager downloads Podman and its required dependencies automatically and installs them on your system.


Step 5: Verify the installation
After installation, verify that Podman has been set up correctly by checking the installed version:
podman --versionIf the installation was successful, the output will display the installed Podman version.


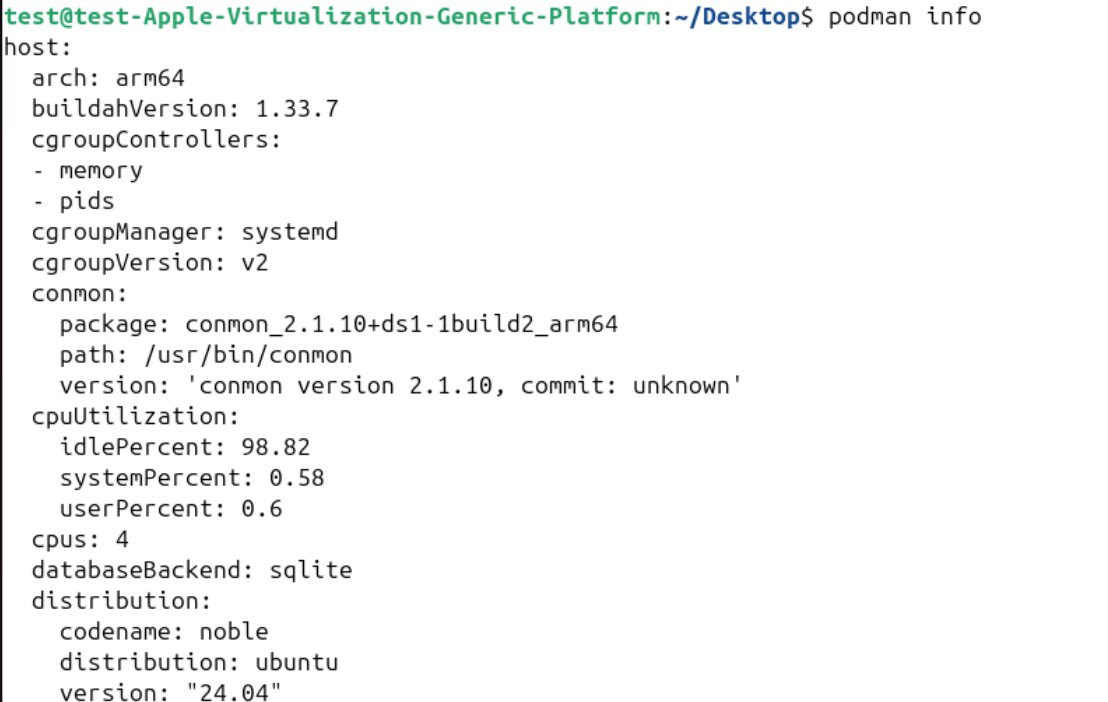
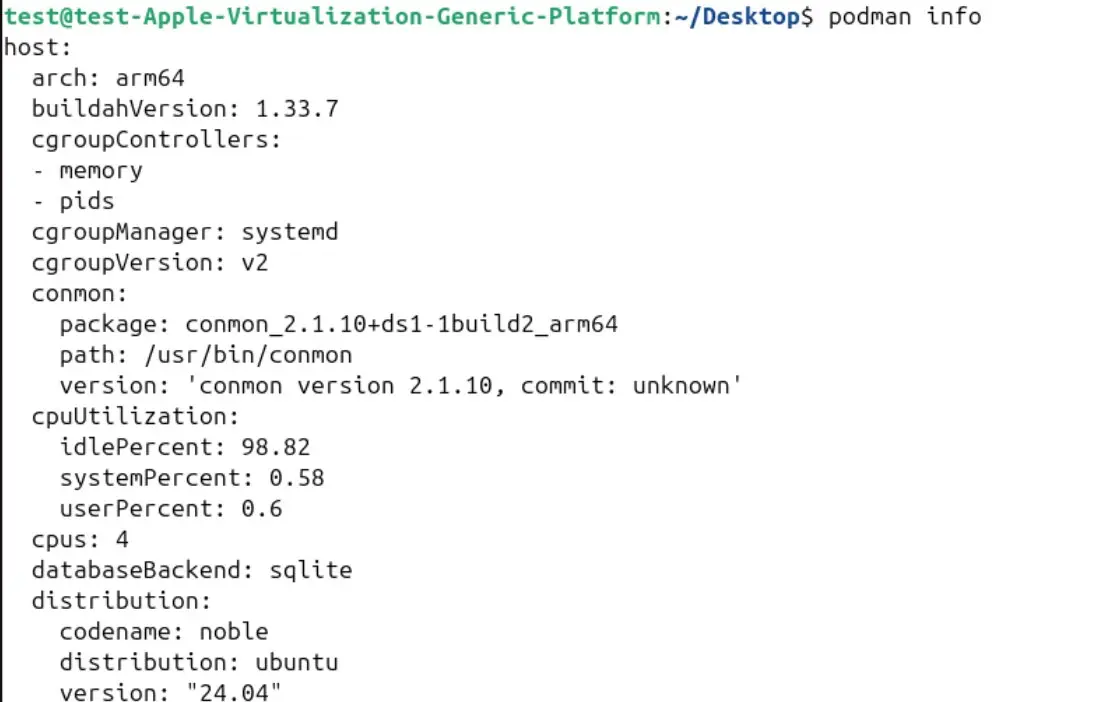
You can also use the following command to display more detailed information about the Podman environment:
podman infoThis command shows, among other things, information about the host environment, storage and runtime configurations, as well as the container registries in use. Especially if problems occur later on, podman info is often one of the first useful diagnostic commands.
Step 6: Verify the installation with a test container
The simplest way to check that Podman is not only installed but also working correctly is to run a small test container. You can use the hello-world container for this purpose and start it with the following command:
podman run --rm hello-worldIf the image is not already available locally, Podman downloads it automatically from a container registry such as Docker Hub before starting the container. The --rm option removes the test container as soon as it finishes running. If the test is successful, a short message confirms that Podman can run containers correctly.
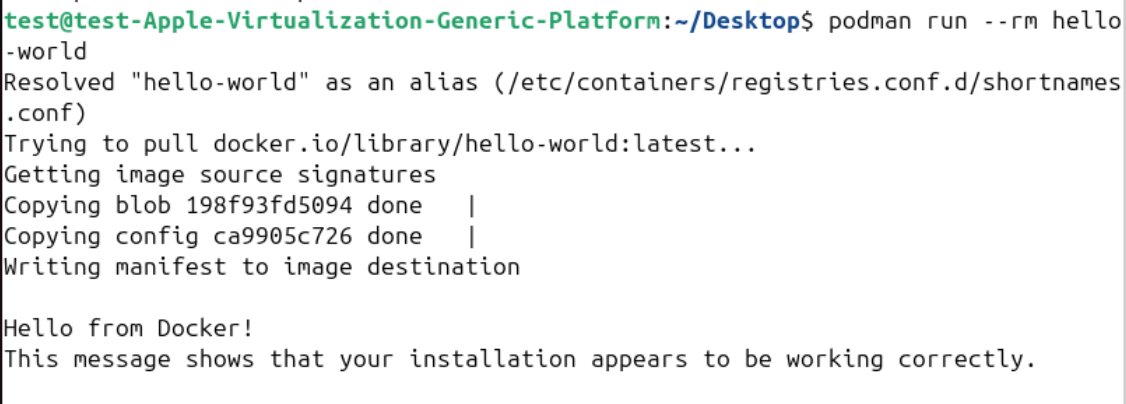
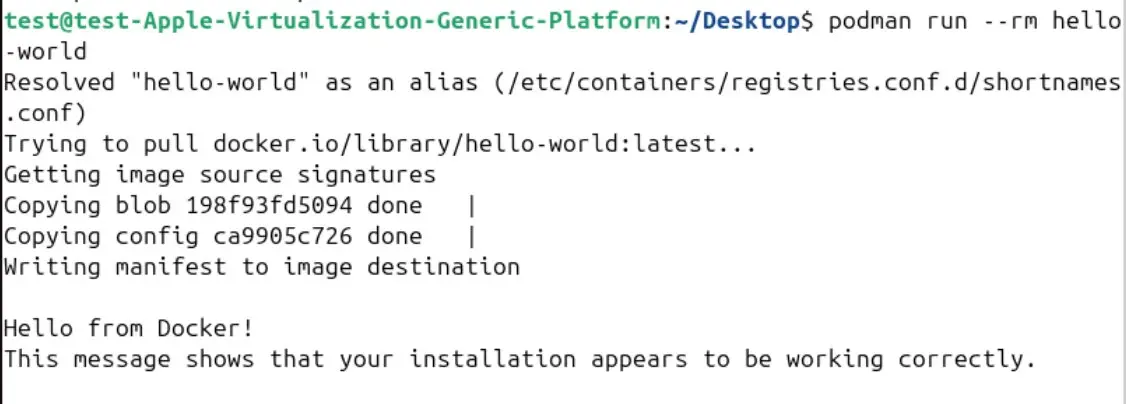
The first run may take a little longer if Podman needs to download the image from a registry. This is normal. Once the image is stored locally, subsequent runs are usually much faster.
Reviewer

Christian Heldmaier
Christian Heldmaier is an experienced online marketing and SEO specialist from Karlsruhe. He has been working as an SEO Manager at IONOS since July 2020.