How to create a Risk of Rain 2 dedicated server in just a few steps
Risk of Rain 2 is the sequel to the popular rogue-like multiplayer game in which players fight together against increasingly difficult opponents. A dedicated Risk of Rain 2 server can take the gaming experience to a whole new level for you and your friends!
What are the requirements for a Risk of Rain 2 server?
In principle, you can host a Risk of Rain 2 dedicated server on your own computer. However, outsourcing the hosting can be a better choice for several reasons. Professional hosting providers offer much higher internet speeds and greater connection stability than a typical home network. Additionally, outsourcing reduces the strain on your own hardware and allows the server to run continuously without requiring your personal computer to stay powered on.
The hardware requirements for a Risk of Rain 2 server depend primarily on the number of players who want to access the server at the same time. To ensure a smooth start, you should plan for at least the following specifications:
- Processor: 2.8 GHz or faster (4 cores recommended)
- RAM: At least 4 GB RAM (8 GB recommended, depending on the number of players)
- Hard disk space: 2 GB free space for the server itself
- Network connection: Stable connection with at least 10 Mbps upload speed
The Risk of Rain 2 dedicated server software is available for both Windows and Linux. In any case, you should plan additional resources for the operating system when selecting the server; for Windows Server 2022, for example, this would be at least 1.4 GHz processor power, 2 GB RAM and 36 GB hard disk space.
Try out your VPS for 30 days. If you're not satisfied, we'll fully reimburse you.
The different options for hosting a Risk of Rain 2 server
You can find high-performance hardware to host your own game server from various providers. Among other things, IONOS offers various server types with a guaranteed broadband connection of up to 1 Gbit/s, which is ideal for hosting a Risk of Rain 2 server:
- vServer/VPS: The vServers are based on the principle of virtualisation. You share hardware resources with other users without you as the end user noticing. The monthly costs for a VPS are fixed and don’t depend on how often you use the server.
- Dedicated server: A dedicated server offers you exclusive enterprise hardware that is reserved just for you and your individual use case. Thanks to minute-based billing, you only pay for the service you actually use.
Risk of Rain 2 scenarios and the corresponding IONOS packages
Do you need more help choosing the right package for your Risk of Rain 2 dedicated server? In the following table you’ll find five possible scenarios and the most suitable server packages from IONOS (for Windows, as an example):
The standard version of Risk of Rain 2 supports up to four players at the same time. However, the number of players can be increased with mods.
| Risk of Rain 2 server scenario | Recommended IONOS server |
|---|---|
| 2-4 players; server occasionally online | VPS Windows M |
| 2-4 players; server permanently online | VPS Windows L |
| 5-12 players; server occasionally online | VPS Windows L |
| 5-12 players; server permanently online | AR6-32 HDD |
| Up to 16 players; server permanently online | AR6-32 HDD |
IONOS savings tip to get you started
Are you still unsure about which setup you’d like to start with your own Risk of Rain 2 server? Windows VPS M from IONOS is an ideal choice for getting started. It allows you to try out your server cost effectively and stress-free. If you expect more players later on, the package can easily be adjusted and scaled.
How to set up the Risk of Rain 2 server step by step
As soon as you have decided on a provider and a suitable server package, you can start setting up your Risk of Rain 2 server. The following instructions show how the setup works step by step. As an example, we’ll use a IONOS server with the Windows Server 2022 operating system.
Step 1: Establish a remote connection to the server
The first step is to establish a connection to your server. This is done via a remote desktop connection, which can be set up easily via the cloud panel for IONOS servers. The first step is to log in to the login page with your individual access data.
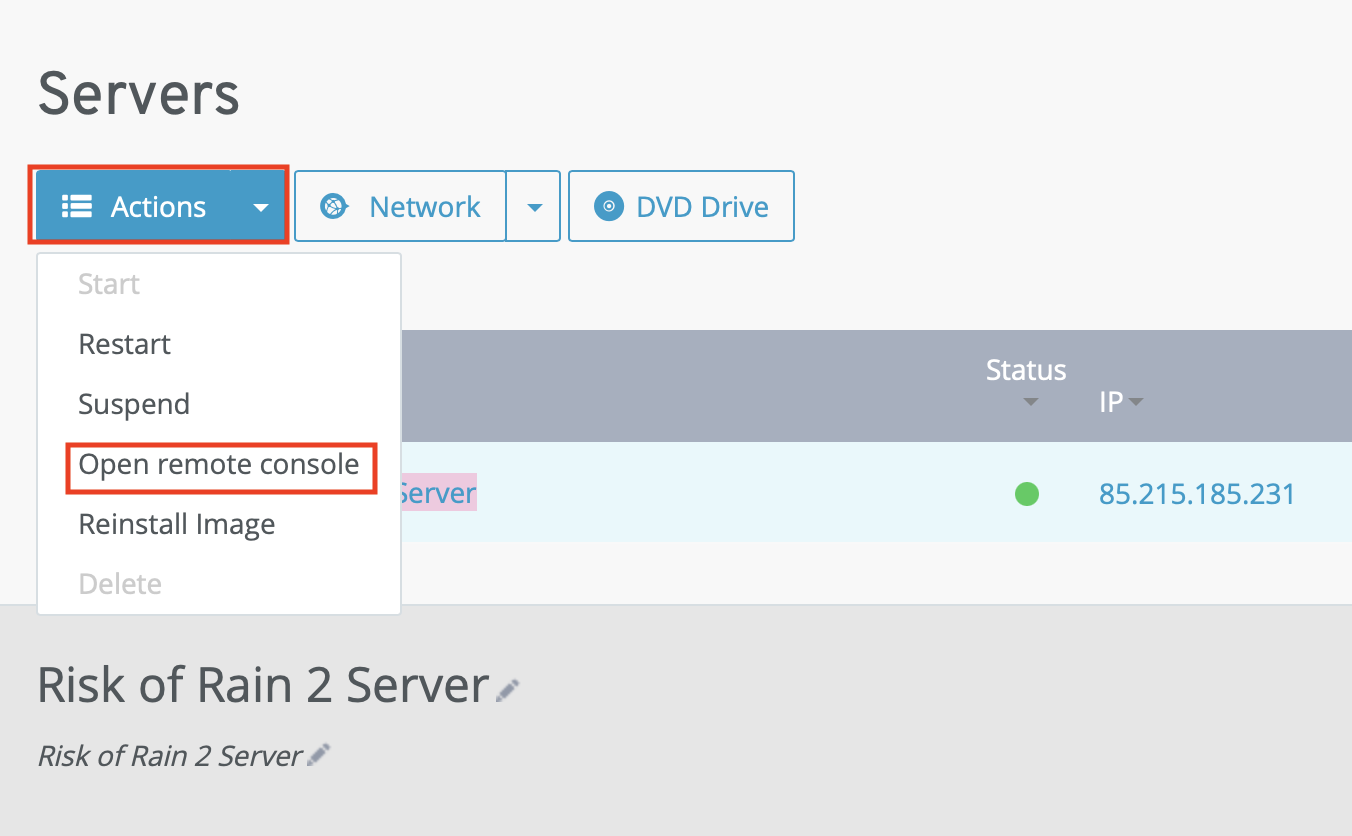
After logging in, you’ll be taken to the Server & Cloud area, where an overview of all server packages booked with IONOS is displayed. Select the server you’d like to use for your Risk of Rain 2 server and click on the ‘Options’ tab. In the drop-down menu that then opens, you have the option of starting the remote console. From there, you can easily access your server and continue with the setup.
Step 2: Enable ports
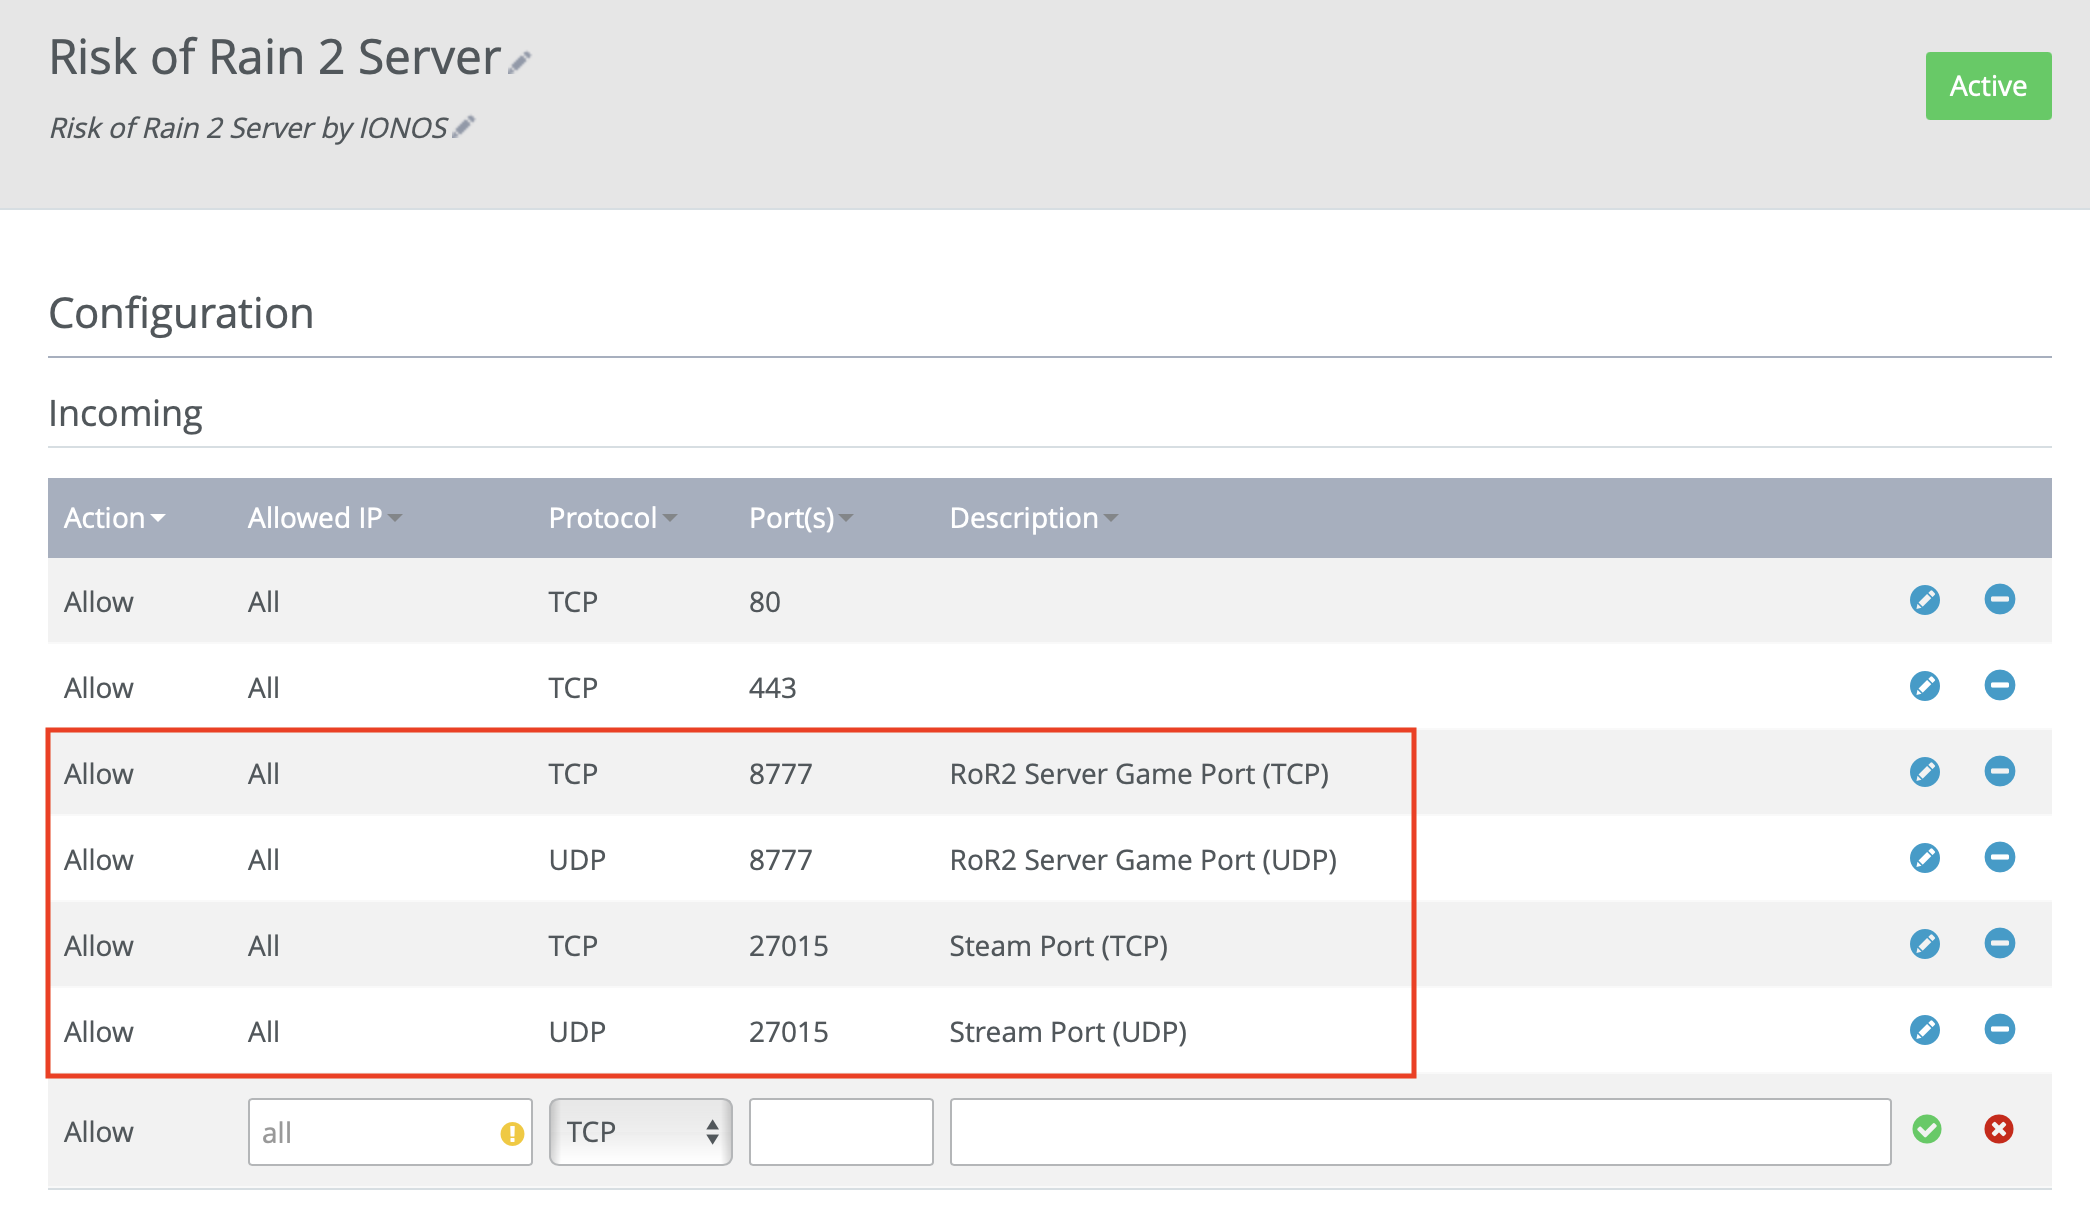
In order for you and other players to be able to connect to your server without any problems, the required ports must be enabled. Risk of Rain 2 uses the following ports by default:
- TCP/UDP 8777 (for game communication)
- TCP/UDP 27015 (for the connection via Steam)
With IONOS servers, port sharing can be carried out directly in the Cloud panel. To do this, open the ‘Network’ section of the left side menu and then click on the ‘Firewall policies’ button to edit the corresponding settings. Enter the required port numbers, protocols and IP addresses to configure the release. Once the changes have been saved, the server is ready for external connections.
Step 3: Download and install SteamCMD
In the third step, install SteamCMD. To do this, download the required installation files from the official SteamCMD website. You can then unzip them with a tool of your choice into a folder such as C:\SteamCMD.
Step 4: Run SteamCMD
In the next step, open the terminal of your server as an administrator. Use the following command to navigate to the folder in which you have just installed SteamCMD (in our example, we have named the folder ‘SteamCMD’):
cd C:\SteamCMDYou can now run SteamCMD. Enter the command below in your command prompt to start SteamCMD.
steamcmd
Step 5: Download the Risk of Rain 2 dedicated server
To download the required files for your Risk of Rain 2 server, use SteamCMD. Log in to the command line and place the server files in a desired folder, for example in a folder called ‘RoR2Server’ (the folder name can be customised). Use the following commands to do this:
force_install_dir C:\RoR2Server
login anonymous
app_update 1180760 validate
quit
These commands instruct SteamCMD to use the specified destination folder, log in anonymously and download the files for App ID 1180760 (Risk of Rain 2 dedicated server).
Step 6: Configure the Risk of Rain 2 server
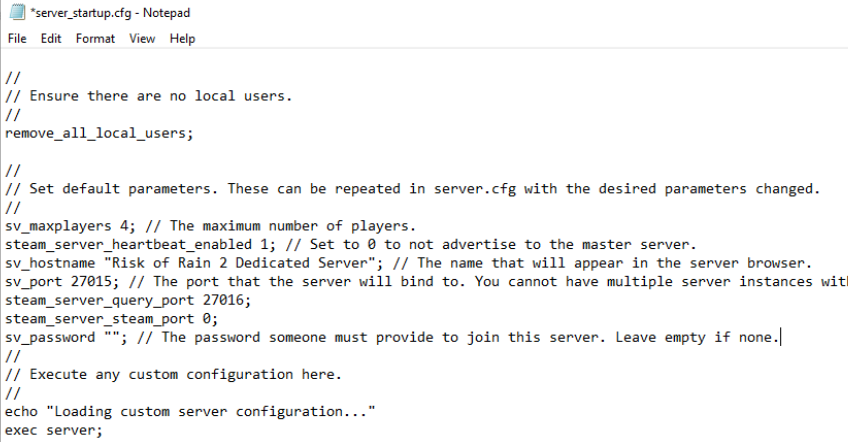
Now open the folder in which you downloaded the Risk of Rain 2 server files and look for the configuration file ‘server_startup.cfg’ under the path ‘Risk of Rain 2_Data/Config’. Open the configuration file with any text editing software and add your configuration as required. For example, you can create a name or password for your Risk of Rain 2 dedicated server after the respective parameters.
Step 7: Start the Risk of Rain 2 dedicated server
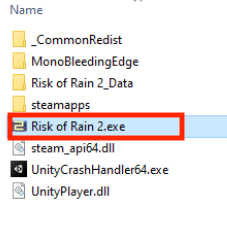
Once you have configured your server, it’s time to start it. This is easily done by clicking on the start script start_headless_server.bat. Like the configuration file, the script is located in the folder where you downloaded the Risk of Rain 2 server files.
Step 8: Connect to the server
Your fellow players can now easily connect to the newly created Risk of Rain 2 server using your server’s IP address. To join, all players launch the game and enter your game server’s IP address in the search field. Now, nothing stands in the way of shared co-op fun!
If you wish, you can also link your Risk of Rain 2 server to your own domain. To do this, register a suitable domain and configure it so that it points to the IP address of your server. Endings such as .team, .games, .fun or .zone are particularly suitable for making your gaming environment even more personal.
