Creating Hyperlinks
Hyperlinks are a key part of the World Wide Web. Hyperlinks are unidirectional references that connect websites and enable website operators to bring internet users to their online content, link to sources or recommend subpages with further information.
However, hyperlinks are not just limited to the internet. In principle, hyperlinks can be inserted into any electronic document – including texts, presentations, tables or email messages that you’ve created with Microsoft Office.
Read on to find out where you can find the function for inserting hyperlinks in the Office suite and what options are available for integrating links.
Formatting URLs as Hyperlinks
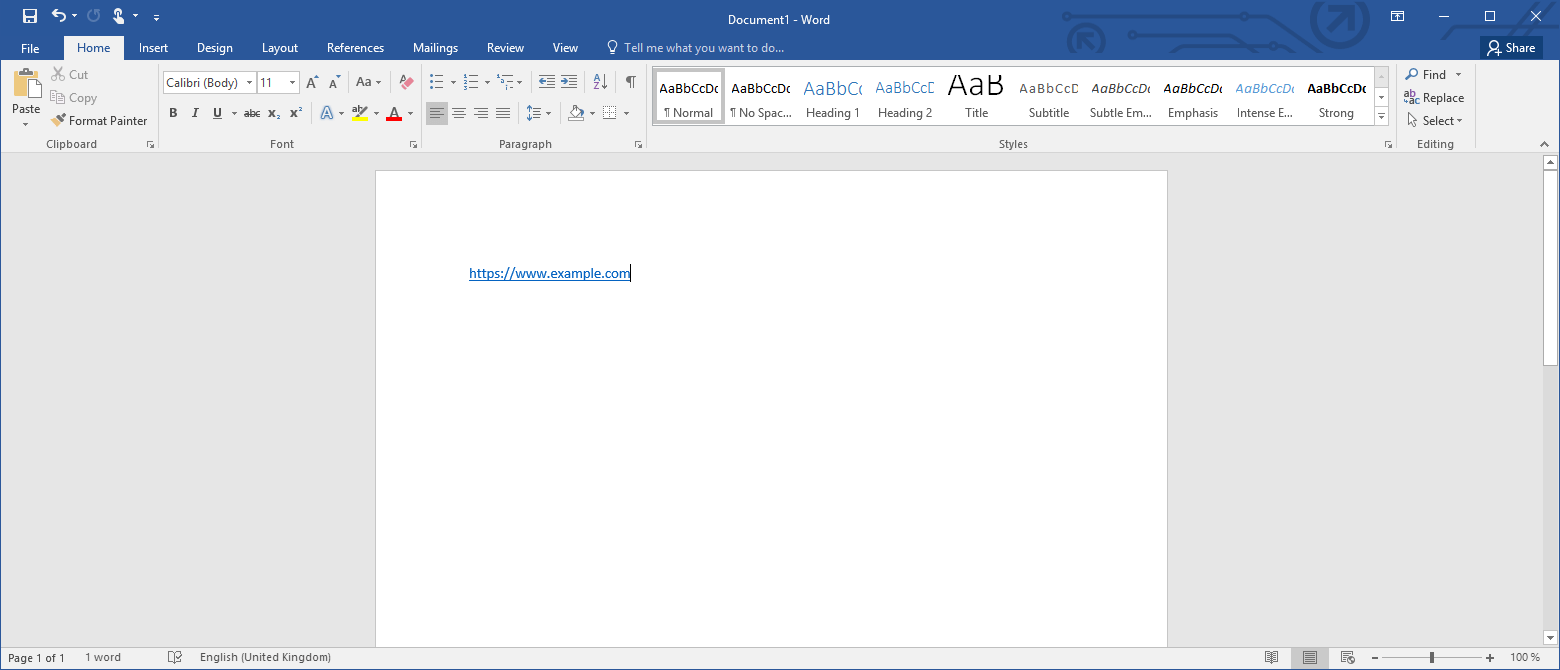
Microsoft Office programs like Word, Excel, Outlook or PowerPoint automatically convert URLs (Uniform Resource Locators) into hyperlinks – just follow the steps below:
Step 1: Enter the URL or copy it into a text document, Excel table or Outlook message.
Step 2: Make sure that the cursor is located directly after the address you’ve entered and either press “Enter” or the space bar.
The program will then automatically insert a hyperlink for the URL as you want it.
All Microsoft Office products use underlined text in blue colour as the standard format for hyperlinks.
Creating Hyperlinks with an Anchor Text
Take the following steps to create a user-defined link.
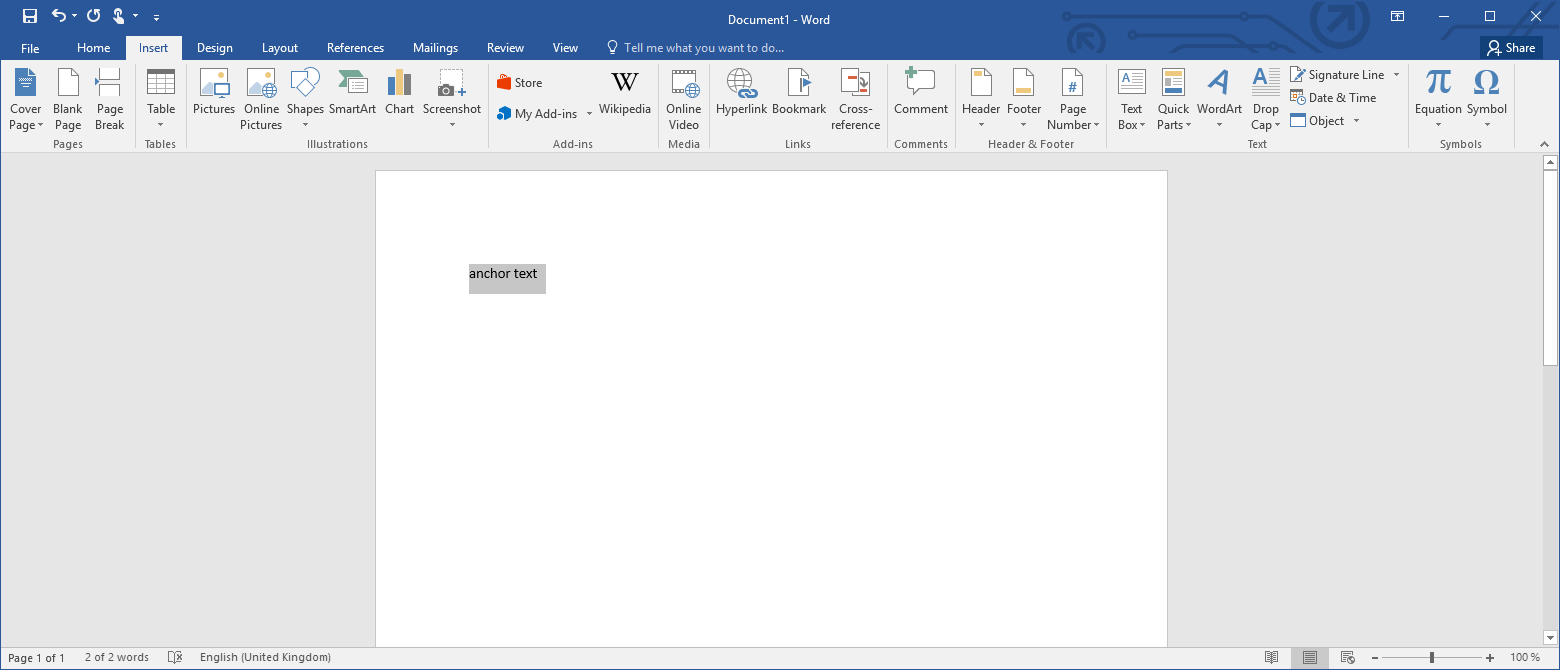
Step 1: Select the text that you’d like to use as the anchor text for your hyperlink. Alternatively, you can also use an image as an anchor.
Step 2: Select the “Insert” tab in the menu bar and click on “Link” or use the “Link...” button in the context menu. The shortcut for this action is CTRL + K.
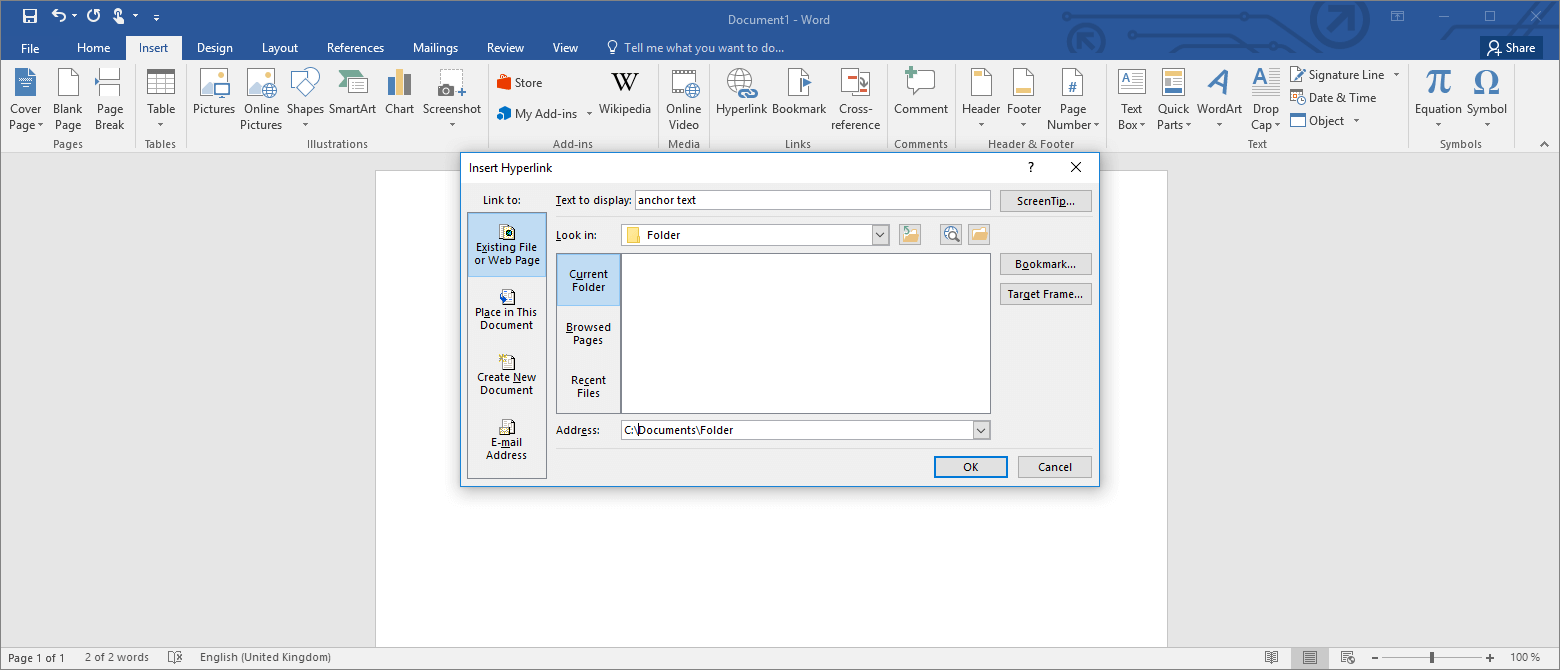
The anchor text you select will be presented to you as the “Text to display” – and it can be changed if necessary.
Step 3: Define the link’s destination. These are some potential options:
- Website on the internet: Click on the “Existing File or Web Page” button under “Link to:” and enter the URL of the website you wish to link to under “Address:”
- File on your computer: Click on the “Existing File or Web Page” button under “Link to:” and select the path to the file on your computer.
- Text in the current document: Click on the “Place in This Document” button under “Link to:” and select the bookmark, slide or cell you’d like to link to.
- Text in a different document: Click on the “Existing File or Web Page” button under “Link to:” and search for the file whose content you’d like to reference. Next, click on “Bookmark...” and select the desired bookmark, slide or cell.
- Link to a new email message: Click on the “Email Address” button under “Link to:” and enter the desired email address into the field provided. You can define a subject if necessary.
Step 4: Click on “ScreenTip...” to define the mouseover text that is displayed when the cursor hovers over the link. If you don’t set the ScreenTip, the destination of the hyperlink will be shown as the mouseover text by default.
Step 5: Confirm your settings by clicking on “OK”.
Our step-by-step guide shows you how to create a hyperlink in Microsoft Word as an example, but the click path for this function is the same with all Microsoft Office products.
Editing Hyperlinks
You can edit hyperlinks you’ve created like this:
Step 1: Click on the hyperlink using the right mouse button.
Step 2: Select “Edit Hyperlink...” in the context menu.
The Microsoft Office program will then open the “Edit Hyperlink” window that offers you the same options as the “Insert Hyperlink” window discussed earlier.
The appearance of hyperlinks in Outlook, Word, Excel or PowerPoint can also be modified if necessary. To do this, you can use the format functions available in the “Home” and “Design” tabs.
Read our in-depth article on the topic to find out how to remove links created in Word, Excel, PowerPoint or Outlook.


