How to perform a Dell BIOS update
Updating the BIOS on your Dell motherboard can help prevent hardware problems and improve the performance of your system. A Dell BIOS update can be completed in just a few simple steps, even if you don’t have any previous knowledge.
- Free website protection with SSL Wildcard included
- Free private registration for greater privacy
- Free Domain Connect for easy DNS setup
Step 1: Prepare for the update
Before you start your Dell BIOS update, there are a few things to take care of. Your computer should be connected to a reliable power source. And while BIOS updates are overall safe, you should back up all your important data beforehand, in case something goes wrong.
The first step is to find out which BIOS version is currently installed on your Dell system, so you can determine whether an update is necessary. To do that, go to Windows system information by pressing [Windows] + [R] and then entering msinfo32. In the system information, you’ll find the currently installed version under ‘BIOS Version/Date’. Make note of what’s listed there.
Step 2: Download the Dell BIOS update from the official website
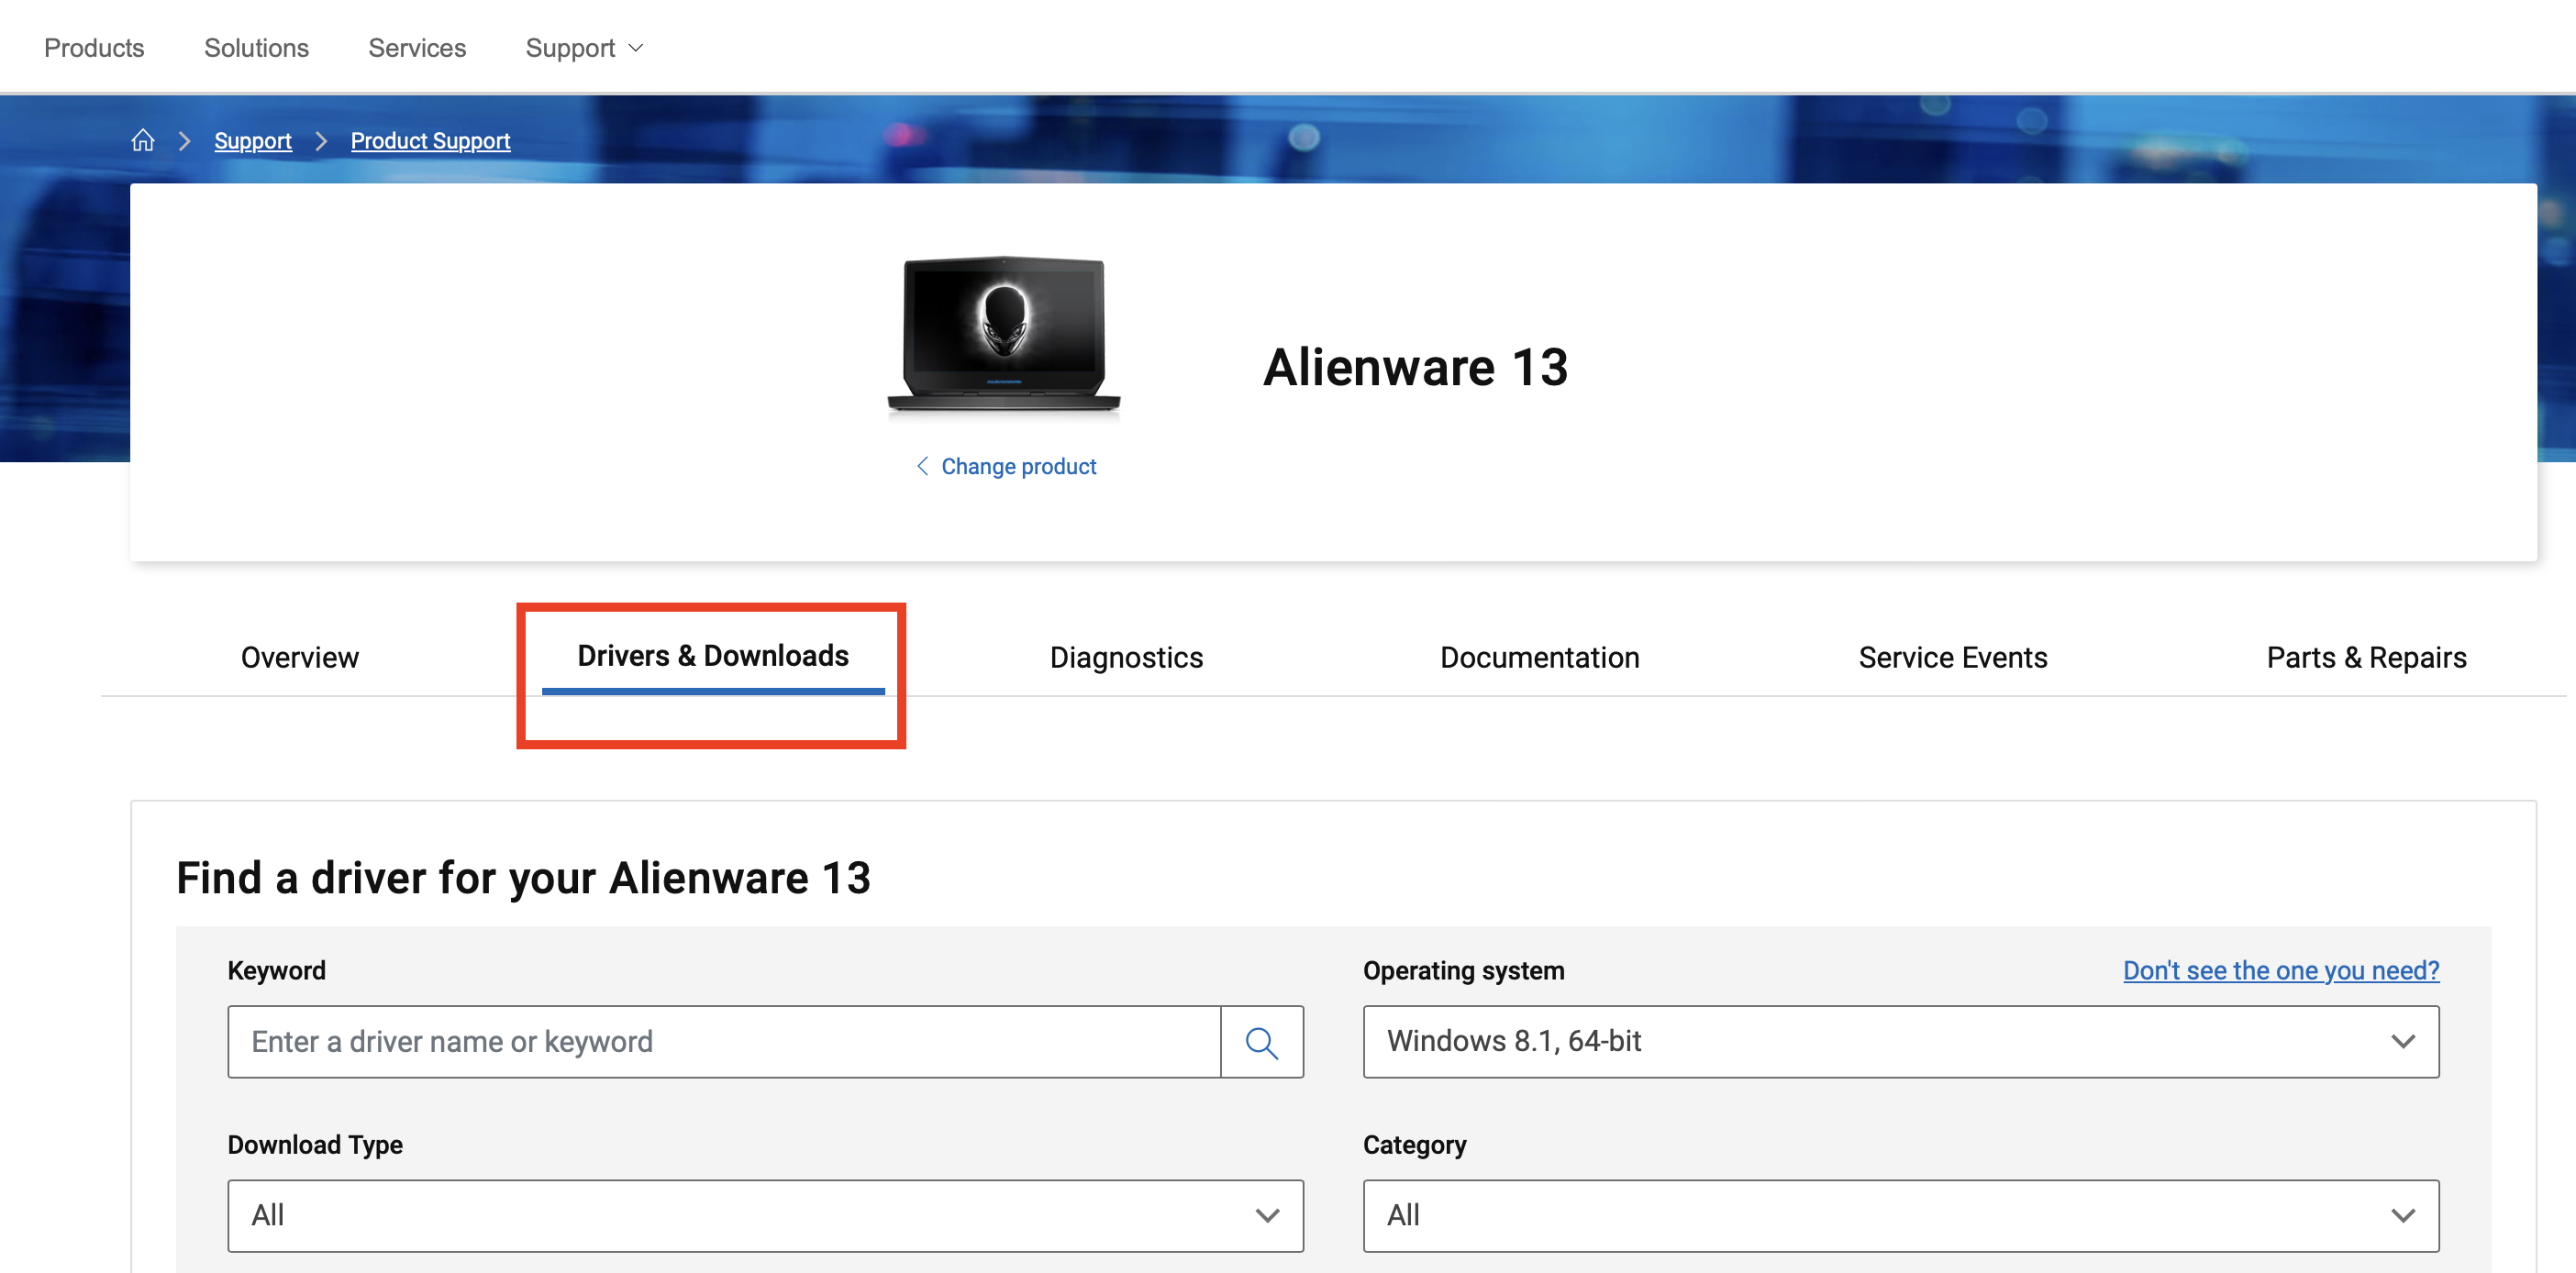
Next, download the most recent BIOS version from the Dell website. To do that, open your browser and go to the Dell support page. Enter the service tag number or the model of your Dell computer into the search bar. You can find the service tag number on the backside of your laptop or in the system information.
After you’ve found your device, click on ‘Drivers & Downloads’.

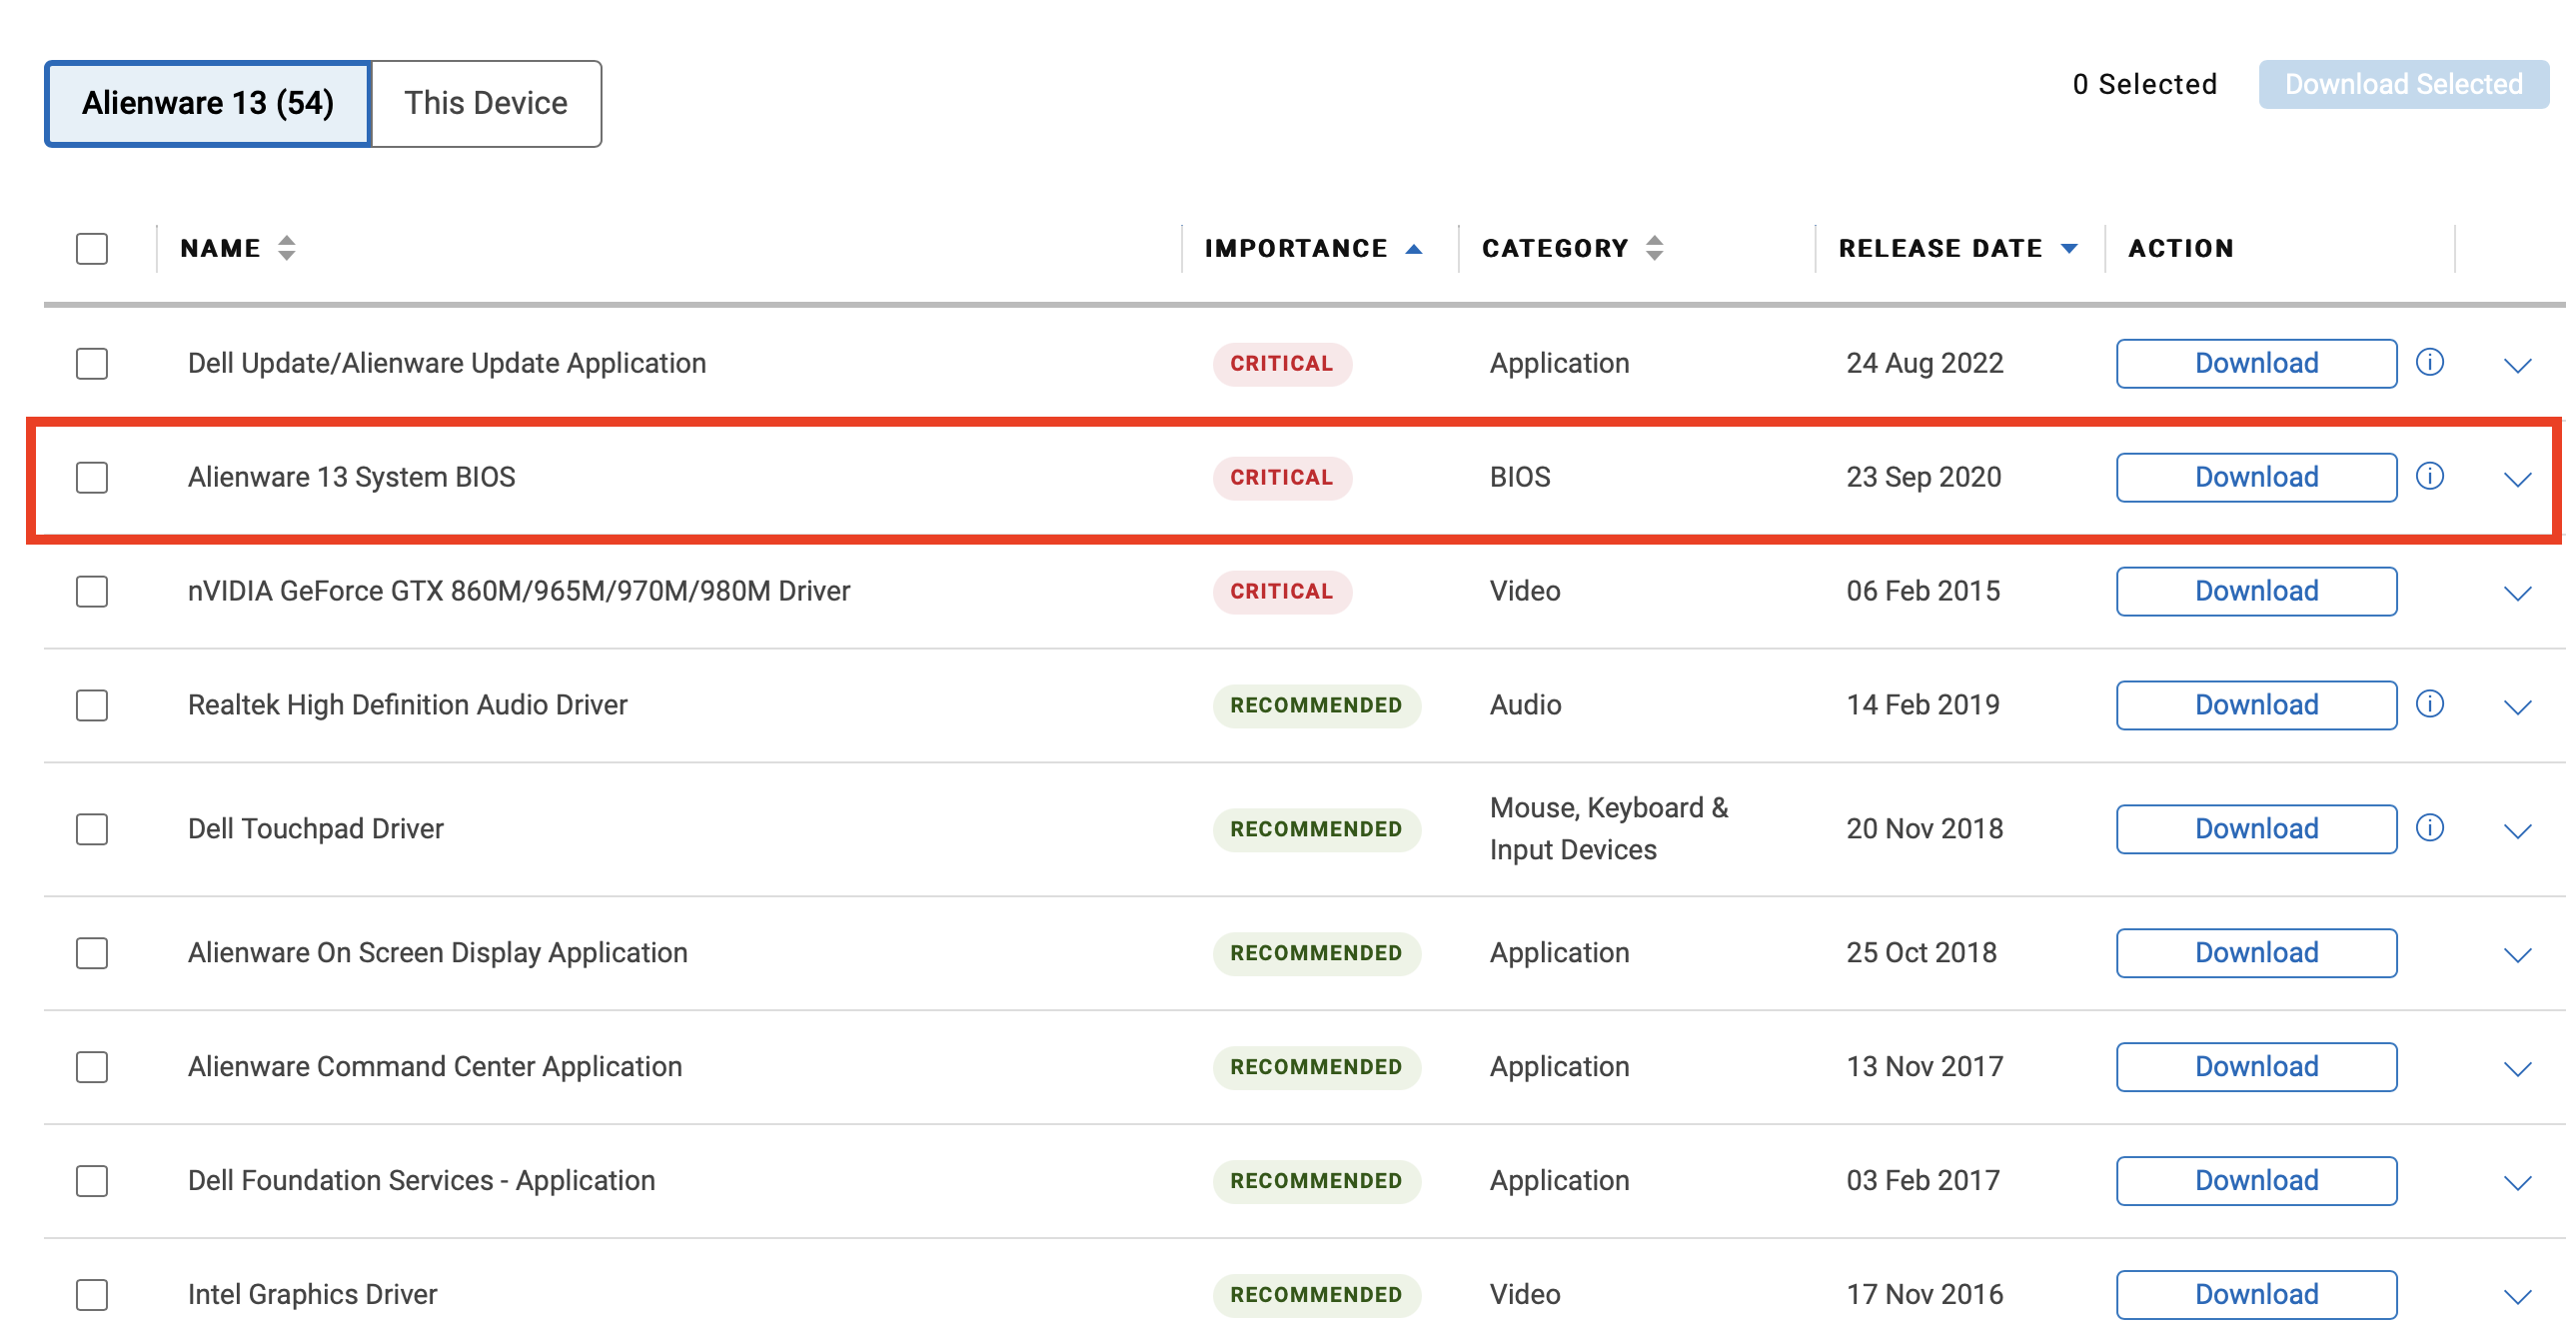
Choose the BIOS update from the list of available updates and download the most recent version by clicking ‘Download’. If the update list is too cluttered for you, you can click on ‘Category’ at the top and select ‘BIOS’ to narrow down the search.

Step 3: Prepare your computer
Before you start the Dell BIOS update, prepare your computer for the process. Close all running programs and save any open files. Make sure that your computer is connected to a continuous power supply, especially if you’re updating a desktop computer. For laptops, make sure the charger is plugged in, and the battery is full. Disconnect any USB devices you don’t need, to further prevent any disruptions during the update.
Step 4: Start the BIOS update
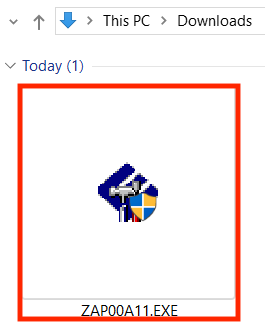
Now you can start the Dell BIOS update itself. The process can vary slightly from model to model but will on the whole be similar for all motherboards. First go to the folder that you saved the BIOS file to and double click on Update file. (Usually it will be an EXE file.)

A window will open that will guide you through the update process. Confirm when prompted and follow the instructions on the screen. The computer will automatically restart and then the update will begin. Do not under any circumstances turn off or unplug the computer during the update. Your screen might go black during the update and will restart multiple times. That’s normal. Your computer will automatically finish the update and restart after a few minutes.
Step 5: Confirm that the update was successful
After the computer has restarted, confirm that your Dell BIOS update was successful. To do that, check which BIOS version is now installed on your computer using the instructions from Step 1. If you see the version that you just downloaded from the Dell website, the update was a success.
No matter what kind of motherboard you have, you should regularly update your BIOS. Take a look at our step-by-step guides for updating the BIOS for other manufacturers:

