How to back up your Nextcloud files
The Backup App is an internal Nextcloud application that creates backup copies to reliably safeguard instances, data, databases, and applications. It can be installed directly via the built-in app store in the cloud software. Once activated, you can easily set up a schedule for Nextcloud backups through the web interface. [TOC]
Why is a Nextcloud backup important?
In today’s digital world, data is at the heart of many businesses. Data integrity and availability often serve as the foundation for smooth operations and the successful execution of projects. As a result, it’s essential to protect against events such as hardware failures, software issues, or human errors that could lead to data loss. This applies not only to the cloud software Nextcloud, but also to Nextcloud alternatives like ownCloud.
Without regular backups of your Nextcloud instance, you risk losing important files or settings permanently—whether due to accidental deletion or technical malfunctions. Cyberattacks on cloud servers also pose an increasing threat. Companies handling sensitive customer data or financial information are particularly at risk of not only losing data but also facing reputational damage and legal consequences without proper backups. Having a backup copy allows you to restore the system in case of a misconfiguration. It’s essential to back up before a Nextcloud update or a Nextcloud migration.
- Keep your data safe with industry-leading security
- Save time on updates and maintenance
- Easily add apps and online office tools
How to install the Nextcloud Backup App
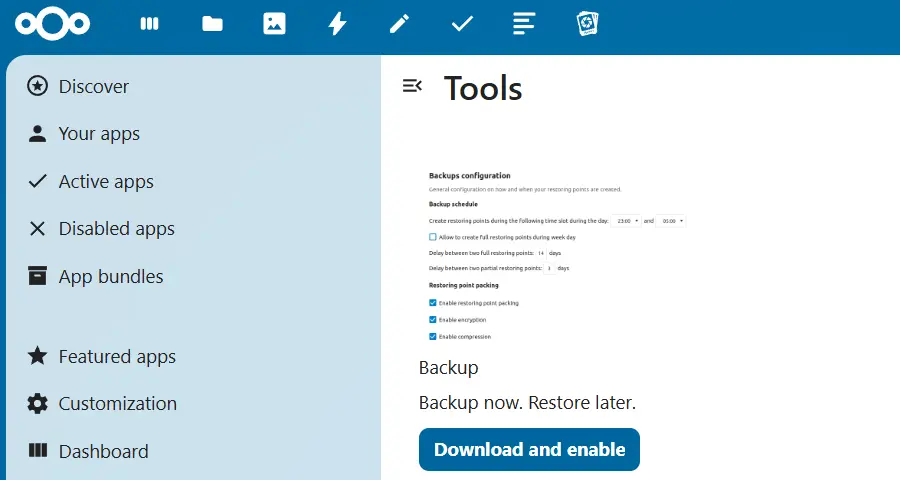
Installing the Nextcloud Backup App is simple and can be done directly through the web interface. However, you will need at least version 23 of the cloud software to use it. To activate the app, follow these steps:
-
Sign in to Nextcloud: Log in to your Nextcloud instance with administrative rights.
-
Go to the App Store: Like all Nextcloud apps, the Backup App is installed via the built-in App Store. You can access it by clicking your profile icon and selecting the Apps section from the dropdown menu.
-
Search for Nextcloud Backup: Enter the app’s name in the search field to quickly locate it.
-
Install and activate the Backup App: First click on the app, then on the Download and Activate button. The app will then automatically integrate into your instance and be ready to use.

It’s also a good idea to activate the Nextcloud External Storage app to store backups on external storage. While this app is included with Nextcloud by default, it needs to be activated manually.
How to create a Nextcloud backup
Since the Backup App is integrated into the Nextcloud ecosystem, backups can be created directly through web interface. To create a Nextcloud backup, follow these steps:
- Go to the Nextcloud Backup App: Click on your profile icon and go to Administration Settings in the dropdown menu. Then, click on the Backups section in the left-hand menu.
- Enable Background Tasks: Tick the box in the Enable Background Tasks section to allow automatic backups.
- Backup scheduling: Set the backup frequency under Backup Scheduling. If you tick the option Allow creation of full restore points on weekdays, data will be fully backed up during the week. Otherwise, the app will always create an incremental backup, which has the advantage of not requiring Nextcloud to be put into maintenance mode. You can also adjust the interval between backups here.

- Define backup properties: In the Packaging Running section, specify whether backups should be compressed. If you wish to encrypt the backup, also tick Encrypt Restore Points.
- Set backup retention period: Under Restore Point History, you can specify how long Nextcloud backups should remain in local app data and on external storage before they are deleted.
- Export backup setup: Save the configuration as a file to secure the settings. The associated key - which should be kept safe - allows the backup to be restored on new hardware in case of total data loss.

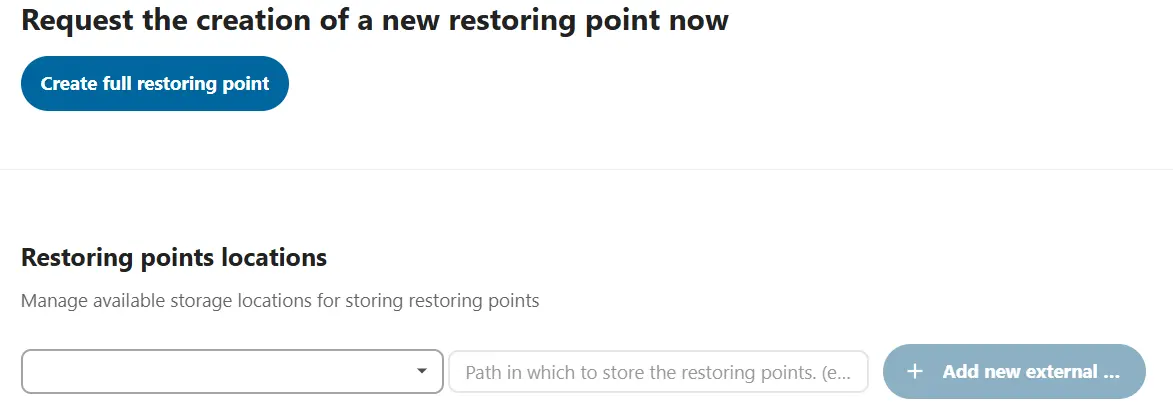
- Define storage location for backups: Under Location of Restore Points, specify where backups will be stored. You can set both local and external storage. Choosing an external drive or another server as the storage location is recommended for added security.
- Create Nextcloud backup: Finally, click the Create Full Restore Point button to initiate the backup.

- Automatic backup and easy recovery
- Intuitive scheduling and management
- AI-based threat protection
How to restore a Nextcloud backup
Restoration is not done through the Nextcloud Backup App but via SSH and need to be performed manually. First, put Nextcloud into maintenance mode. The following guide simplifies how to restore a Nextcloud backup.
First, display all available backups:
sudo -u www-data php occ backup:point:listNext, download the desired Nextcloud backup:
sudo -u www-data php occ backup:point:download <Backup-ID> --external <Number of external storage>Then, extract the files from the backup:
sudo -u www-data php occ backup:point:unpack <Backup-ID> --external <Number of external storage>Finally, restore your data from the extracted files:
sudo -u www-data php occ backup:point:restore <Backup-ID> --external <Number of external storage>With Managed Nextcloud, IONOS provides secure and hassle-free cloud storage with full data control. IONOS takes care of the installation, maintenance and updates for your Nextcloud server, so you don’t have to worry about any administrative tasks. What’s more, dedicated support is available whenever you need it.

