What is Nextcloud versioning and how do I use it?
Nextcloud versioning is a function for managing file versions. Changes are automatically documented in detail, allowing you to access older versions of your files whenever needed. Via Nextcloud’s web interface, you can view and restore previous file versions with just a few clicks.
What is Nextcloud versioning?
Versioning is an integrated feature in Nextcloud that automatically saves previous file versions without overwriting the existing content. Each time a file is changed, Nextcloud versioning creates a new version or backup, which is stored on your server. This is what allows you to easily restore earlier versions of a file, providing an effective way of preventing data loss.
Nextcloud versioning is especially useful for undoing unwanted or accidental changes as well as restoring deleted content. Thanks to versioning, you can also transparently track all changes made to a file, which is especially beneficial for teamwork. You can view which changes have been made and when in the Nextcloud version history whenever you need to.
How does versioning work with Nextcloud?
Nextcloud automatically saves and manages older file versions. To help users avoid exceeding their storage quota, Nextcloud versioning uses no more than 50% of the available free storage for backups. Once this limit is reached, the oldest versions are deleted automatically to make room for new ones. So that important changes remain available for a reasonable period, Nextcloud versioning keeps file versions on a staggered schedule. This means the cloud software gradually removes older versions. The deletion pattern follows this sequence:
-
In the first second: Nextcloud saves a version.
-
Within the first ten seconds: Nextcloud saves a version every two seconds.
-
During the first minute: A version is saved every ten seconds.
-
Within the first hour: A version is saved every minute.
-
Within the first 24 hours: A version is saved every hour.
-
For the first 30 days: Nextcloud keeps one version per day.
-
After 30 days: Nextcloud retains one version per week.
Every time a new file version is created, Nextcloud adjusts the versions according to this pattern. Adjusting versions automatically allows for an optimal balance between storage space and the availability of older versions. Administrators can adjust the behaviour of Nextcloud versioning, allowing for custom storage durations or even disabling versioning entirely.
With Managed Nextcloud, IONOS offers you a secure and convenient cloud solution. Our managed service requires no administrative effort on your part, as IONOS handles the server setup, maintenance and updates for you. Expand your cloud storage flexibly with Nextcloud apps, online office, and other useful AI functions.
How to view, restore and name file versions
The Nextcloud version history lets you easily access earlier file versions, restore them and eve assign a custom label to them. The following guide shows you exactly how to use this feature:
The way version control is shown and the buttons displayed may vary slightly depending on the version of Nextcloud you’re using.
How to view file versions
-
Log in to your Nextcloud instance.
-
Click on the file whose version history you wish to view, then open the context menu (three-dot icon) and click on Open Details.
-
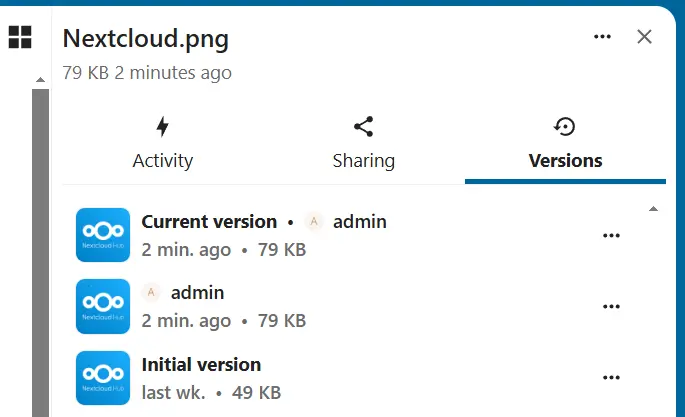
Switch to the Versions tab, where the file’s version history is displayed.
-
Hover over the timestamp to see the exact date and time of each version. To download a specific version, simply double-click on the entry.

How to restore previous file versions
-
Log in to your Nextcloud instance.
-
Click on the file you want to restore, then open the context menu (three-dot icon) and select Open Details.
-
Go to the Versions tab.
-
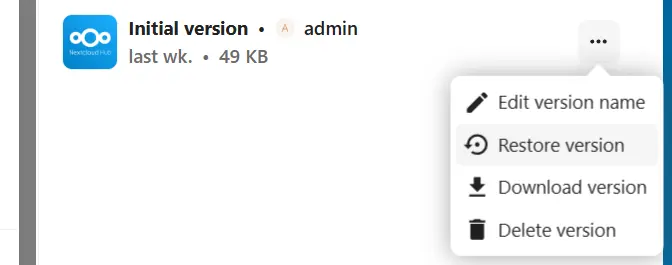
Click on the three-dot icon next to the version you want to restore and select Restore File to restore that version.

How to rename file versions
-
Log in to your Nextcloud instance.
-
Click on the file whose version you want to rename, then open the context menu (three-dot icon) and select Details.
-
Go to the Versions tab.
-
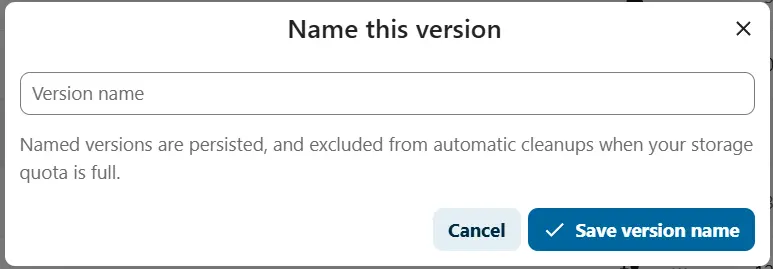
Depending on the Nextcloud version, either tap select “Edit version name” from the context menu or click the pencil icon next to the version you want to name. Versions that are labelled are excluded from the automatic deletion process.

- Keep your data safe with industry-leading security
- Save time on updates and maintenance
- Easily add apps and online office tools

