Apache Kafka Tutorial
The Apache Kafka open source software is one of the best solutions for storing and processing data streams. This messaging and streaming platform, which is licensed under Apache 2.0, features fault tolerance, excellent scalability, and a high read and write speed. These factors, which are highly appealing for Big Data applications, are based on a cluster which allows distributed data storage and replication. There are four different interfaces for communicating with the cluster with a simple TCP protocol serving as the basis for communication.
This Kafka tutorial explains how to get started with the Scala-based application, beginning with installing Kafka and the Apache ZooKeeper software required to use it.
Requirements for using Apache Kafka
To run a powerful Kafka cluster, you will need the right hardware. The development team recommends using quad-core Intel Xeon machines with 24 gigabytes of memory. It is essential that you have enough memory to always cache the read and write accesses for all applications that actively access the cluster. Since Apache Kafka’s high data throughput is one of its draws, it is crucial to choose a suitable hard drive. The Apache Software Foundation recommends a SATA hard drive (8 x 7200 RPM). When it comes to avoiding performance bottlenecks, the following principle applies: the more hard drives, the better.
In terms of software, there are also some requirements that must be met in order to use Apache Kafka for managing incoming and outgoing data streams. When choosing your operating system, you should opt for a Unix operating system, such as Solaris, or a Linux distribution. This is because Windows platforms receive limited support. Apache Kafka is written in Scala, which compiles to Java bytecode, so you will need the latest version of the Java SE Development Kits (JDK) installed on your system. This also includes the Java Runtime Environment, which is required for running Java applications. You will also need the Apache ZooKeeper service, which synchronises distributed processes.
Apache Kafka tutorial: how to install Kafka, ZooKeeper, and Java
For an explanation of what software is required, see the previous part of this Kafka tutorial. If it is not already installed on your system, we recommend installing the Java Runtime Environment first. Many newer versions of Linux distributions, such as Ubuntu, which is used as an example operating system in this Apache Kafka tutorial (Version 17.10), already have OpenJDK, a free implementation of JDK, in their official package repository. This means that you can easily install the Java Development Kit via this repository by typing the following command into the terminal:
sudo apt-get install openjdk-8-jdkImmediately after installing Java, install the Apache ZooKeeper process synchronisation service. The Ubuntu package repository also provides a ready-to-use package for this service, which can be executed using the following command line:
sudo apt-get install zookeeperdYou can then use an additional command to check whether the ZooKeeper service is active:
sudo systemctl status zookeeperIf the synchronisation service is not running, you can start it at any time using this command:
sudo systemctl start zookeeperTo ensure that ZooKeeper will always launch automatically at startup, add an autostart entry at the end:
sudo systemctl enable zookeeperFinally, create a user profile for Kafka, which you will need to use the server later. To do so, open the terminal again and enter the following command:
sudo useradd kafka -mUsing the passwd password manager, you can then add a password to the user by typing the following command followed by the desired password:
sudo passwd kafkaNext, grant the user “kafka” sudo rights:
sudo adduser kafka sudoYou can now log in at any time with the newly-created user profile:
su – kafkaWe have arrived at the point in this tutorial where it is time to download and install Kafka. There are a number of trusted sources where you can download both older and current versions of the data stream processing software. For example, you can obtain the installation files directly from the Apache Software Foundation’s download directory. It is highly recommended that you work with a current version of Kafka, so you may need to adjust the following download command before entering it into the terminal:
wget http://www.apache.org/dist/kafka/2.1.0/kafka_2.12-2.1.0.tgzSince the downloaded file will be compressed, you will then need to unpack it:
sudo tar xvzf kafka_2.12-2.1.0.tgz --strip 1Use the --strip 1 flag to ensure that the extracted files are saved directly to the ~/kafka directory. Otherwise, based on the version used in this Kafka tutorial, Ubuntu would store all files in the ~/kafka/kafka_2.12-2.1.0 directory. To do this, you must have previously created a directory named “kafka” using mkdir and switched to it (via “cd kafka”).
Kafka: how to set up the streaming and messaging system
Now that you have installed Apache Kafka, the Java Runtime Environment and ZooKeeper, you can run the Kafka service at any time. Before you do this, however, you should make a few small adjustments to its configurations so that the software is optimally configured for its upcoming tasks.
Enable deleting topics
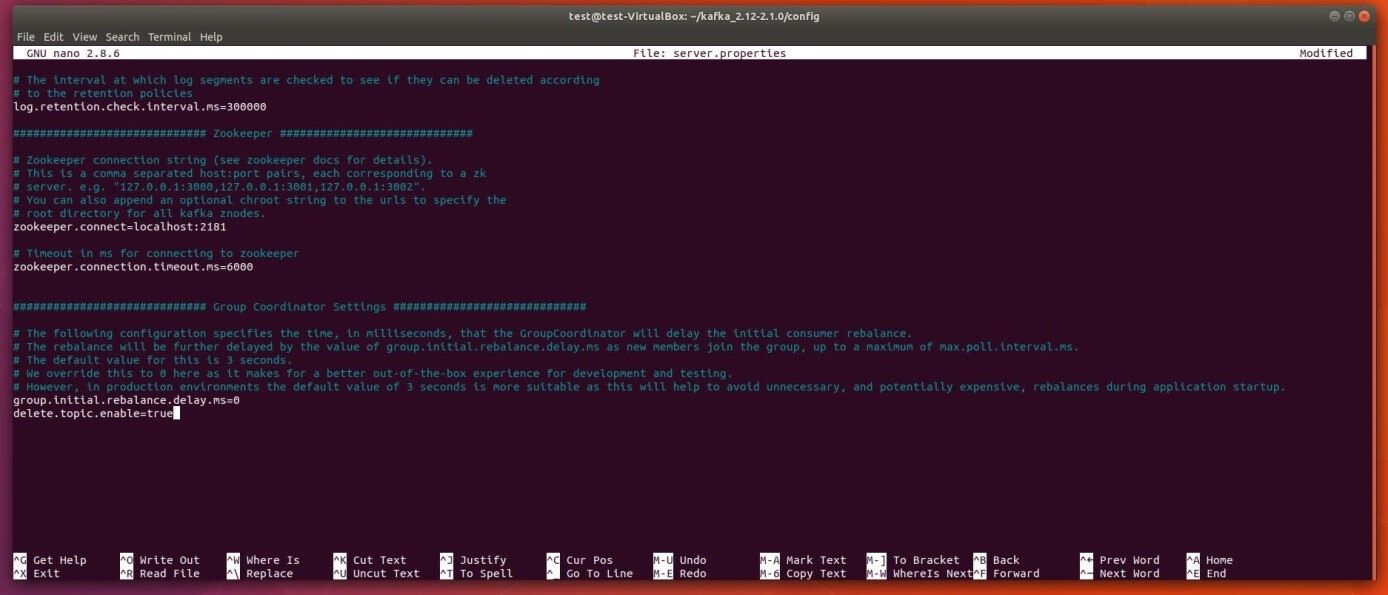
Kafka does not allow you to delete topics (i.e. the storage and categorisation components in a Kafka cluster) in its default set-up. However, you can easily change this by using the server.properties Kafka configuration file. To open this file, which is located in the config directory, use the following terminal command in the default text editor nano:
sudo nano ~/kafka/config/server.propertiesAt the end of this configuration file, add a new entry, which enables you to delete topics:
delete.topic.enable=trueRemember to save the new entry in the Kafka configuration file before closing the nano text editor again
Creating .service files for ZooKeeper and Kafka
The next step in the Kafka tutorial is to create unit files for ZooKeeper and Kafka that allow you to perform common actions such as starting, stopping and restarting the two services in a manner consistent with other Linux services. To do so, you need to create and set up .service files for the systemd session manager for both applications.
How to create the appropriate ZooKeeper file for the Ubuntu systemd session manager
First, create the file for the ZooKeeper synchronisation service by entering the following command in the terminal:
sudo nano /etc/systemd/system/zookeeper.serviceThis will not only create the file but also open it in the nano text editor. Now, enter the following lines and then save the file.
[Unit]
Requires=network.target remote-fs.target
After=network.target remote-fs.target
[Service]
Type=simple
User=kafka
ExecStart=/home/kafka/kafka/bin/zookeeper-server-start.sh /home/kafka/kafka/config/zookeeper.properties
ExecStop=/home/kafka/kafka/bin/zookeeper-server-stop.sh
Restart=on-abnormal
[Install]
WantedBy=multi-user.target
As a result, systemd will understand that ZooKeeper requires the network and the file system to be ready before it can start. This is defined in the [Unit] section. The [Service] section specifies that the session manager should use the files zookeeper-server-start.sh and zookeeper-server-stop.sh to start and stop ZooKeeper. It also specifies that ZooKeeper should be restarted automatically if it stops unexpectedly. The [Install] entry controls when the file is started using ".multi-user.target” as the default value for a multi-user system (e.g. a server).
How creating a Kafka file for the Ubuntu systemd session manager works
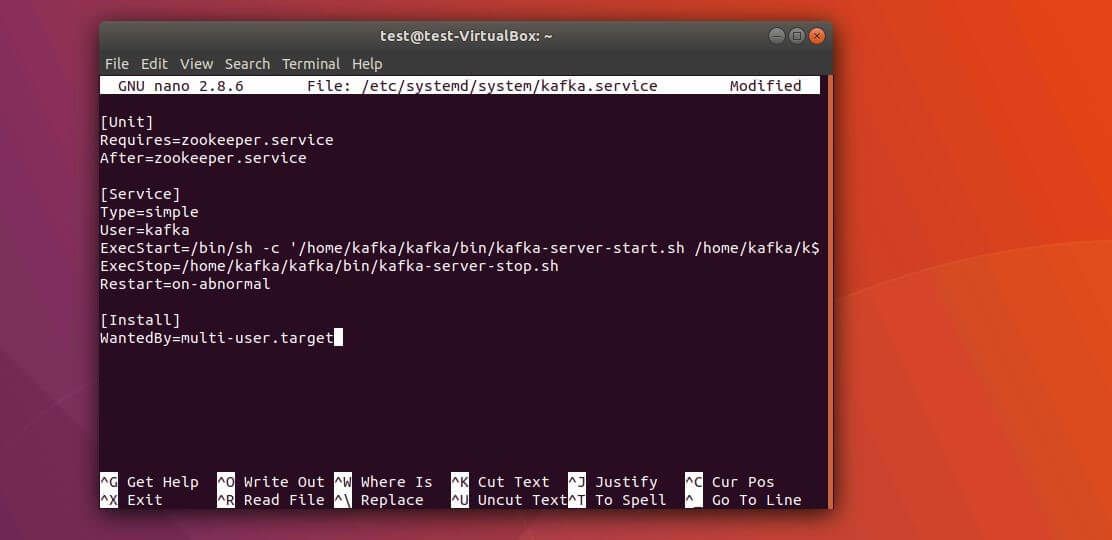
To create the .service file for Apache Kafka, use the following terminal command:
sudo nano /etc/systemd/system/kafka.serviceThen, copy the following content into the new file that has already been opened in the nano text editor:
[Unit]
Requires=zookeeper.service
After=zookeeper.service
[Service]
Type=simple
User=kafka
ExecStart=/bin/sh -c '/home/kafka/kafka/bin/kafka-server-start.sh /home/kafka/kafka/config/server.properties > /home/kafka/kafka/kafka.log 2>&1'
ExecStop=/home/kafka/kafka/bin/kafka-server-stop.sh
Restart=on-abnormal
[Install]
WantedBy=multi-user.target
The [Unit] section in this file specifies that the Kafka service depends on ZooKeeper. This ensures that the synchronisation service is automatically started whenever the kafka.service file is run. The [Service] section specifies that the kafka-server-start.sh and kafka-server-stop.sh shell files should be used for starting and stopping the Kafka server. You can also find the specification for an automatic restart after an unexpected disconnection as well as the multi-user entry in this file.
Kafka: launching for the first time and creating an autostart entry
Once you have successfully created the session manager entries for Kafka and ZooKeeper, you can start Kafka with the following command:
sudo systemctl start kafkaBy default, the systemd program uses a central protocol or journal in which all log messages are automatically written. As a result, you can easily check whether the Kafka server has been started as desired:
sudo journalctl -u kafkaIf you have successfully started Apache Kafka manually, enable finish by activating automatic start during system boot:
sudo systemctl enable kafkaApache Kafka tutorial: getting started with Apache Kafka
This part of the Kafka tutorial involves testing Apache Kafka by processing an initial message using the messaging platform. To do so, you need a producer and a consumer (i.e. an instance which enables you to write and publish data to topics and an instance which can read data from a topic). First of all, you need to create a topic, which in this case should be called TutorialTopic. Since this is a simple test topic, it should only contain a single partition and a single replica:
> bin/kafka-topics.sh --create --zookeeper localhost:2181 --replication-factor 1 --partitions 1 --topic TutorialTopicNext, you need to create a producer that adds the first example message "Hello, World!" to the newly created topic. To do so, use the kafka-console-producer.sh shell script, which needs the Kafka server’s host name and port (in this example, Kafka’s default path) as well as the topic name as arguments:
echo "Hello, World!" | ~/kafka/bin/kafka-console-producer.sh --broker-list localhost:9092 --topic TutorialTopic > /dev/nullNext, using the kafka-console-consumer.sh script, create a Kafka consumer that processes and displays messages from TutorialTopic. You will need the Kafka server’s host name and port as well as the topic name as arguments. In addition, the “--from-beginning” argument is attached so that the consumer can actually process the “Hello, World!” message, which was published before the consumer was created:
> bin/kafka-console-consumer.sh --bootstrap-server localhost:9092 --topic TutorialTopic --from-beginningAs a result, the terminal presents the “Hello, World!" message with the script running continuously and waiting for more messages to be published to the test topic. So, if the producer is used in another terminal window for additional data input, you should also see this reflected in the window in which the consumer script is running.


