How can Nextcloud Mail improve how you manage your emails?
Nextcloud Mail is an email application that allows you to manage your digital communication centrally within the Nextcloud environment. The app comes pre-installed as part of Nextcloud Hub – but if you don’t have this edition, you can easily download it from the integrated app store.
What is Nextcloud Mail?
Nextcloud Mail is an email application integrated into the Nextcloud platform. Designed specifically for the cloud ecosystem, it forms part of the Groupware bundle. Alongside Nextcloud Mail, the suit includes Nextcloud Calendar, Nextcloud Deck, and Nextcloud Contacts, all aimed at boosting productivity and team collaboration.
Supporting both IMAP and SMTP protocols, the Nextcloud Mail app allows you to integrate email accounts from various services. Due to its seamless integration with the Nextcloud system, the app works well with the Groupware components as well as with other Nextcloud apps, such as Nextcloud Files. According to the development team, additional integrations with other Nextcloud apps will follow.
What features does Nextcloud Mail offer?
Nextcloud Mail goes beyond simply allowing you to send and receive emails. With its numerous practical features, the app streamlines email communication and integrates seamlessly into your existing Nextcloud environment. Here’s an overview of its main features:
-
Sending and receiving emails - the core functions: The primary function of the app is managing your email traffic. You can easily send, receive and organise your Nextcloud email without the need for additional software.
-
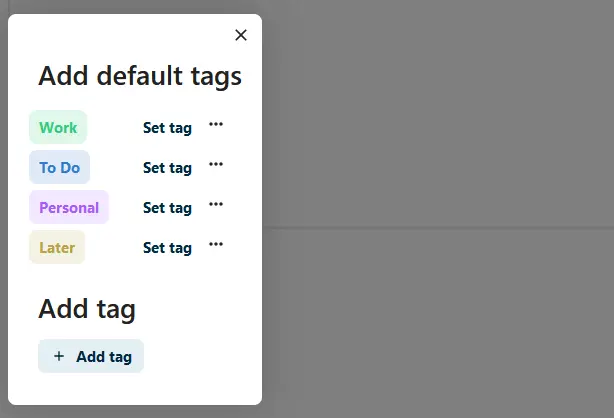
Tagging: Tags help you organise emails and make them easy to search. You can create custom filters to automatically sort messages, for instance, by priority. This feature is especially useful when managing a large volume of emails, and keep your inbox organised.
-
Setting tasks and deadlines: The app allows you to define tasks and deadlines, which can be synchronised with other Nextcloud apps such as Calendar.
-
Managing multiple accounts: Nextcloud Mail supports setting up and managing multiple email accounts, making it easier to separate work and personal emails without needing to switch between different apps.
-
Encrypted emails: With the integration of the Mailvelope browser extension, you can securely encrypt emails, ensuring confidential communication.
With Managed Nextcloud from IONOS, you benefit from a professional, hassle-free Nextcloud solution. IONOS takes care of the installation, maintenance and security updates of your server, allowing you to fully focus on all Nextcloud’s benefits. Your data is stored on secure servers in Germany and is subject to the highest data protection standards.
How to install Nextcloud Mail
The Nextcloud Mail app is typically installed along with Nextcloud Hub. The app is usually activated by default once the cloud software is set up. However, if you’re not using a Hub edition of Nextcloud, you can easily install and activate the app via the integrated App Store:
-
Log in with administrative rights: Log in as an administrator to your Nextcloud instance.
-
Open the App Store: Click your profile picture in the top right and select the Apps section from the dropdown menu.
-
Search for Mail App: Use the search function to find Nextcloud Mail. It will appear under the Communication category.
-
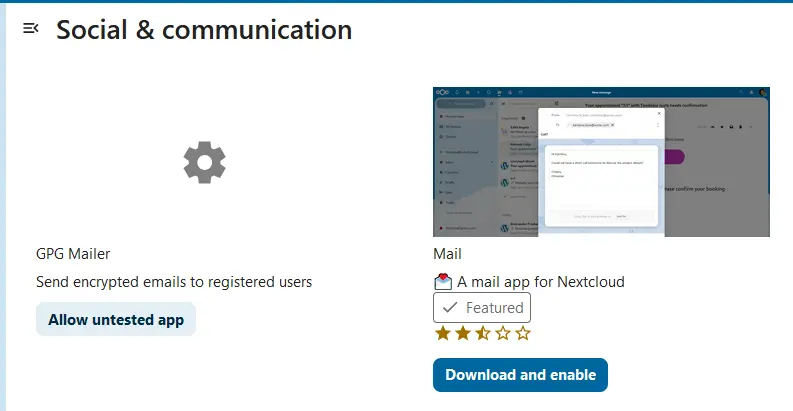
Install Nextcloud Mail: To install the app, click the Download and enable button next to the Mail app listing. If the app is already active, you’ll see a button labelled ‘Disable’ instead, which allows you to turn off the app.
How to get started with the Nextcloud Mail App
After installing or activating Nextcloud or the Nextcloud Mail App, you can start setting up and managing your emails right away. This tutorial will guide you through some basic functions to help you get started.
How to set up a new email account
-
Open the Nextcloud Mail app via the Nextcloud dashboard.
-
Click on the email icon in the header.
-
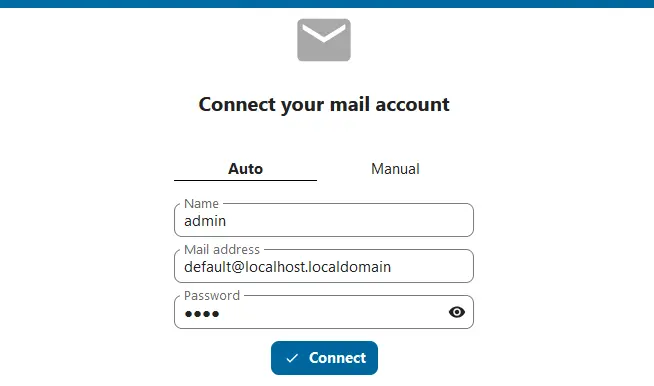
Complete the login form. The app will typically configuree the IMAP or SMTP settings automatically. If needed, you can choose the ‘Manual’ option to enter the details yourself.
How to create an event
-
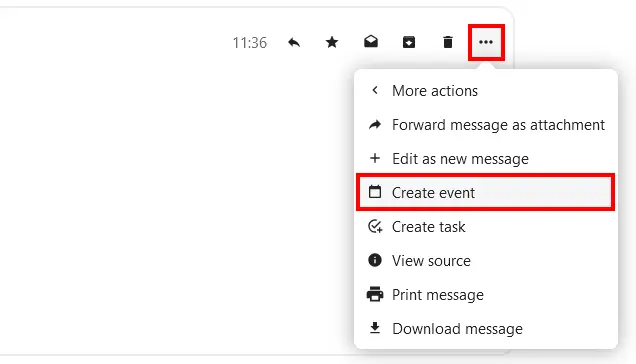
Open the action menu of a message (three-dot icon).
-
Click on the More actions button.
-
Select Create event.
-
Enter the desired times and add an optional description. Then click Create to create the event.
How to create a task
-
Open the action menu of a message.
-
Click on the More actions button.
-
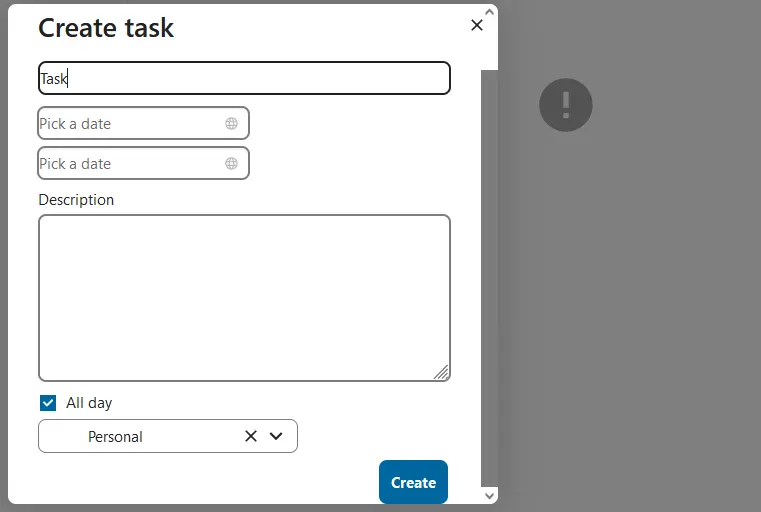
Select Create task.
-
Set the title and time for the task and add a description if needed. Click Create to set up the task.
How to use tags for organising
-
Open the action menu of a message.
-
Click on Edit Tags.
-
Choose from the standard tags presented, or add your own.
- Keep your data safe with industry-leading security
- Save time on updates and maintenance
- Easily add apps and online office tools

