

How to connect n8n to Discord step by step

Connecting n8n to Discord lets you send messages, notifications, and approvals straight from your workflows. In this guide, you’ll learn how to set up the connection step by step, what you need before you start, and how to configure everything properly.
Why should you connect n8n to Discord?
Connecting n8n to Discord means updates from all your other tools flow straight into your Discord server. With its built-in Discord node, n8n can send and retrieve messages, react with emojis, manage channels, and even add or remove roles for members.
- Flexible setup: If you’re just getting started, n8n gives you several ways to connect Discord, including webhooks, bots, and OAuth2. A webhook is the quickest option, since you can send messages to a channel right away without creating a bot. An n8n Discord bot gives you more control and works better for interactive or more complex workflows, like waiting for feedback or updating roles.
- Less manual work: In your day-to-day work, connecting n8n to Discord can save you a lot of manual effort. You can automatically post system alerts, order updates, form submissions, error messages, or project updates to Discord. This means you don’t have to keep switching between tools and can still stay on top of everything.
- More control over your data: Since you can self-host n8n, you stay in control of your automations and your data instead of relying on a fully hosted SaaS tool.
- Works well with other tools: You can connect Discord to tools like Jira through n8n, so updates like new tickets or status changes show up automatically in your Discord channels.
You can also start small. To get set up, a simple workflow with a manual trigger and a Discord node is enough. From there, you can build things out with webhooks, databases, forms, APIs, or AI steps. If you run into a feature that isn’t available in the Discord node, you can use the HTTP Request node in n8n to send requests directly to the Discord API.
- Automates manual routines for tech teams
- Over 500 integrations and tools with open source
- Automation on your own server with no task limits and full cost control
What do you need to connect n8n to Discord?
Before you get started, it’s worth checking a few basics. This prevents setup issues and gets your n8n workflow up and running without unnecessary friction. Make sure the following are in place:
- You have a working self-hosted n8n instance
- You have access to a Discord server where you can create webhooks or bots, or you can create your own Discord server
- Your n8n instance is reachable if you plan to use incoming webhooks or interactive responses later on
- You have a Discord account
With all this in place, you’re ready to connect n8n to Discord.
How to connect n8n to Discord using a webhook
In this guide, we’ll use the webhook method because it’s the fastest way to get set up. It’s also the simplest way to connect Discord, according to n8n.
Step 1: Check if your n8n instance is accessible
If your n8n instance is running behind a reverse proxy, make sure the public address is set correctly. By default, n8n generates webhook URLs using the N8N_PROTOCOL, N8N_HOST, and N8N_PORT variables. In a proxy setup, these URLs might not be correct or may not be reachable from outside your network.
To fix this, set the WEBHOOK_URL variable to your public domain and define N8N_PROXY_HOPS=1. This ensures external services like Discord can reach your n8n instance as expected.
If you’re running n8n in Docker, you usually set these values directly in your docker-compose.yml. For example:
services:
    n8n:
        image: n8nio/n8n:latest
        restart: unless-stopped
        environment:
            - N8N_HOST=n8n.example.com
            - N8N_PROTOCOL=https
            - N8N_PORT=5678
            - WEBHOOK_URL=https://n8n.example.com/
            - N8N_PROXY_HOPS=1
        ports:
- "5678:5678"How you set this up depends on your installation. For example, with a Kubernetes installation, these values are typically configured using ConfigMaps or environment variables in your deployment. Check your setup to see where to update them
Step 2: Create a Discord webhook in your channel
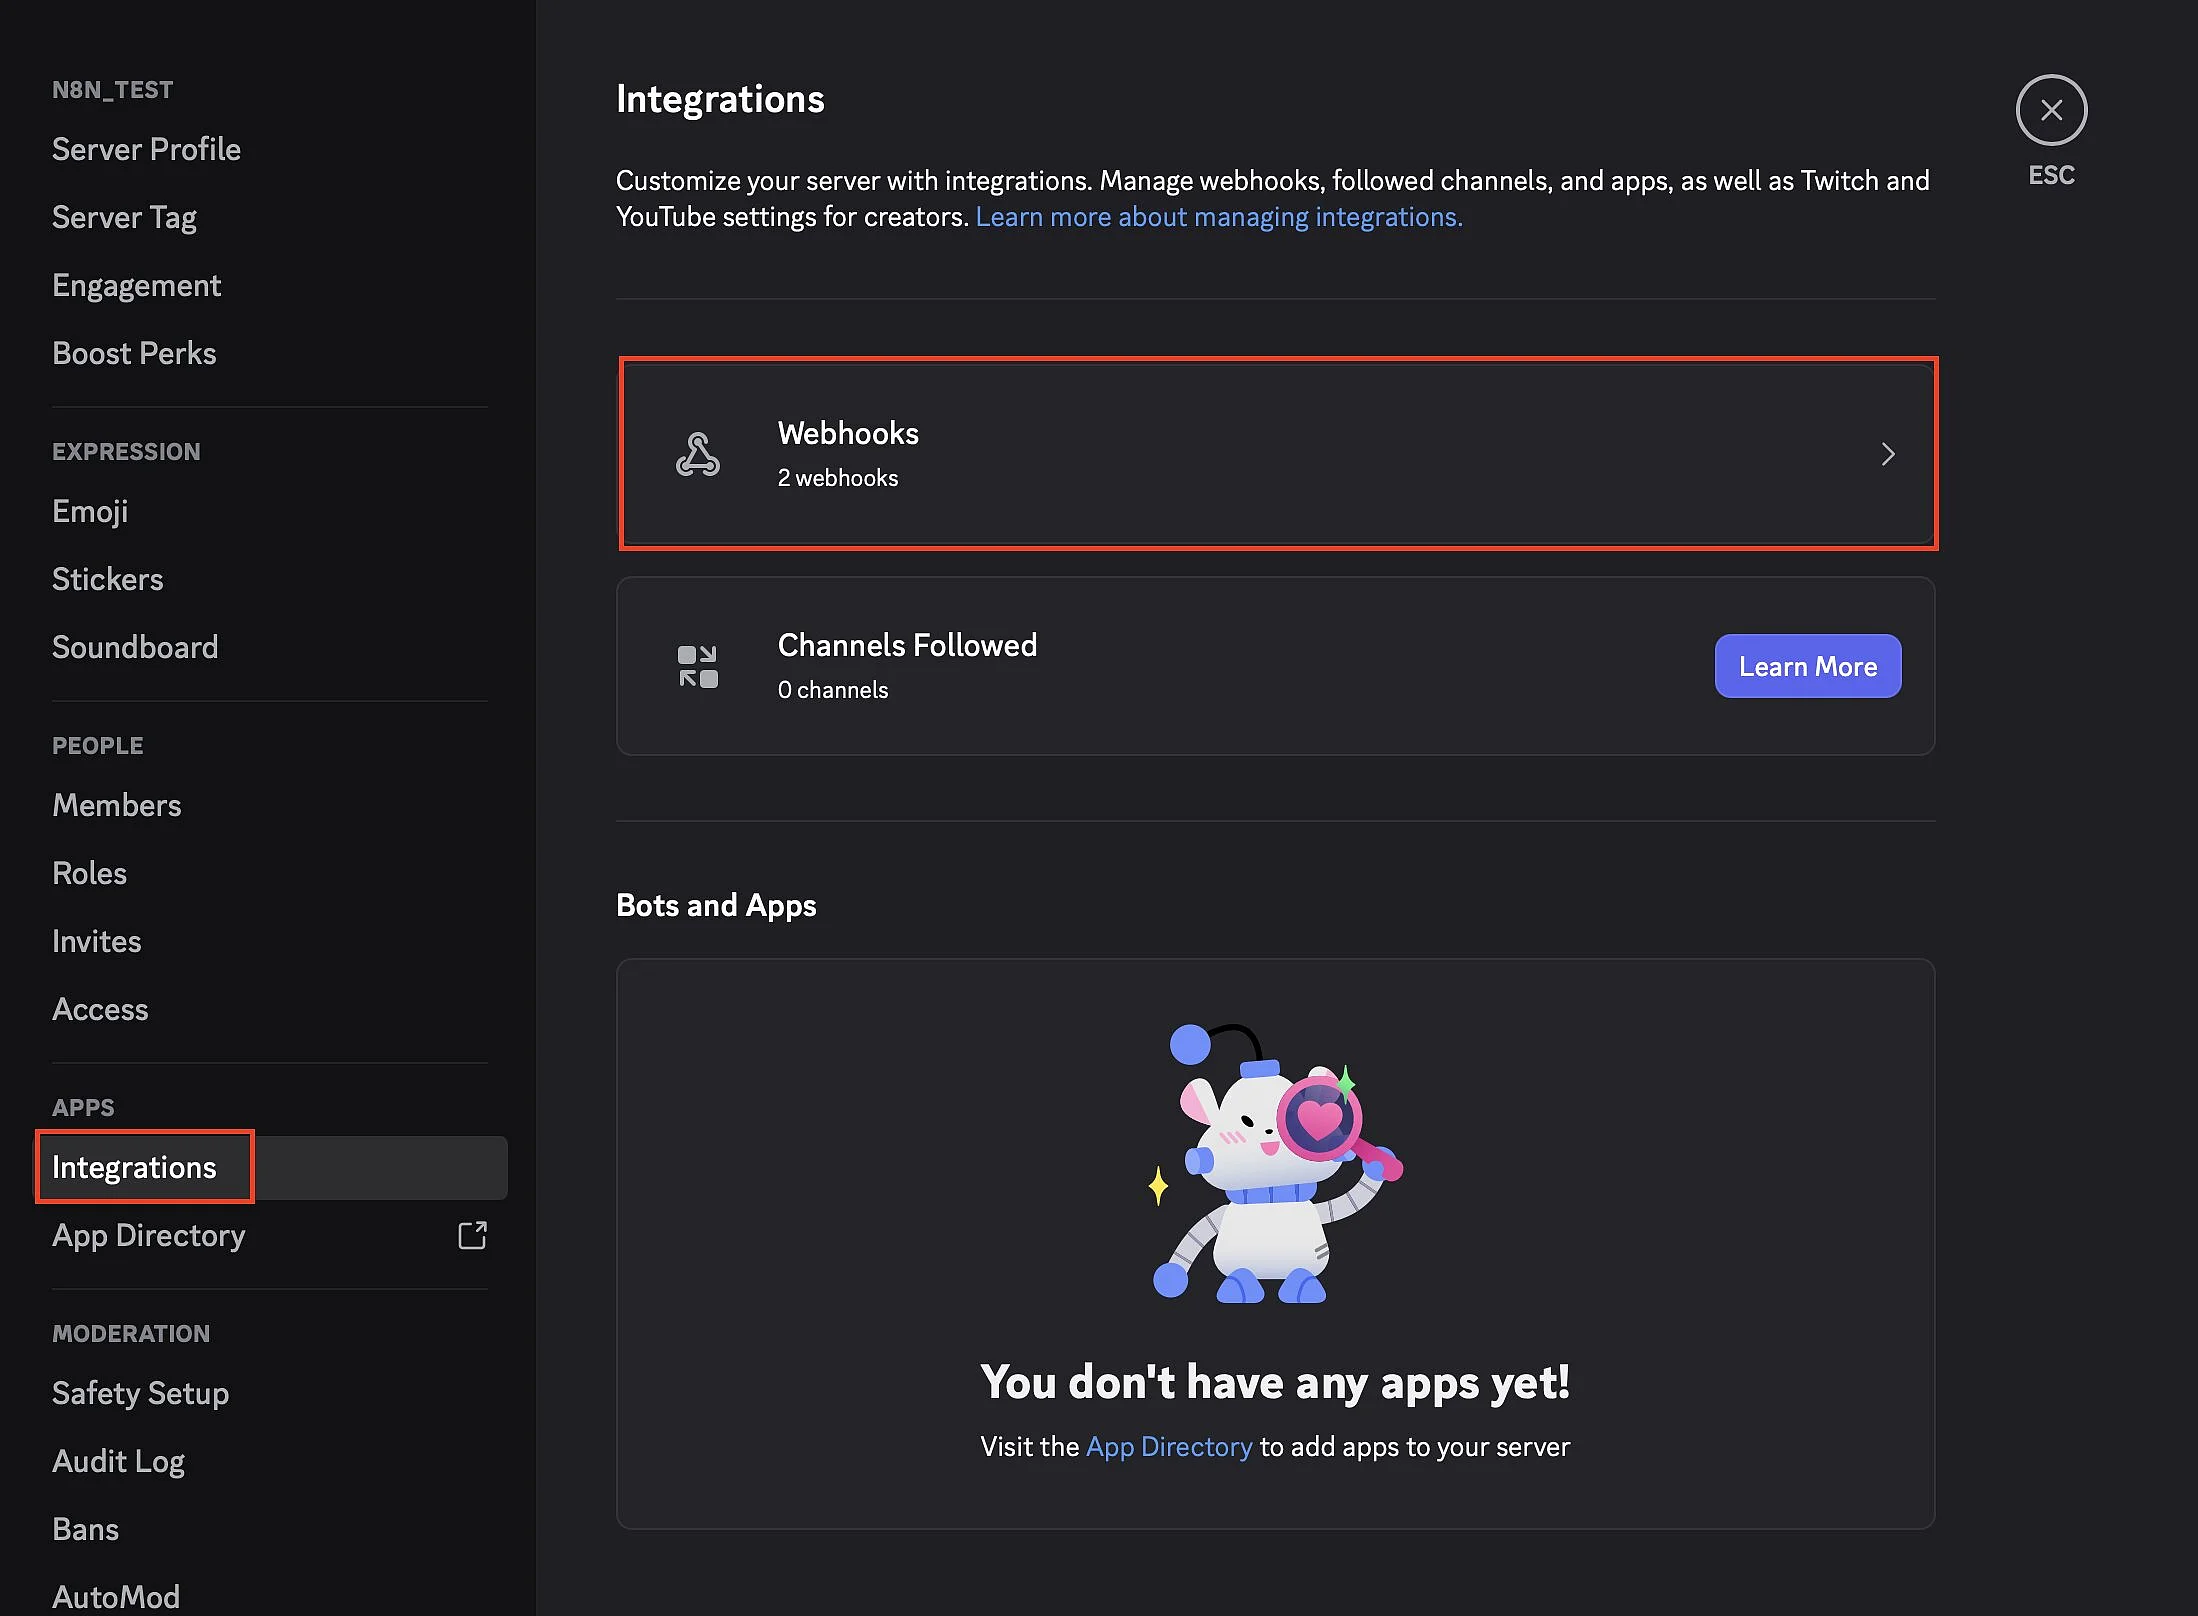
To keep things simple, start by creating a webhook in Discord. This can be done in just a few steps. Open your Discord server, click the server name, and go to Server Settings. From there, go to Integrations > Webhooks.
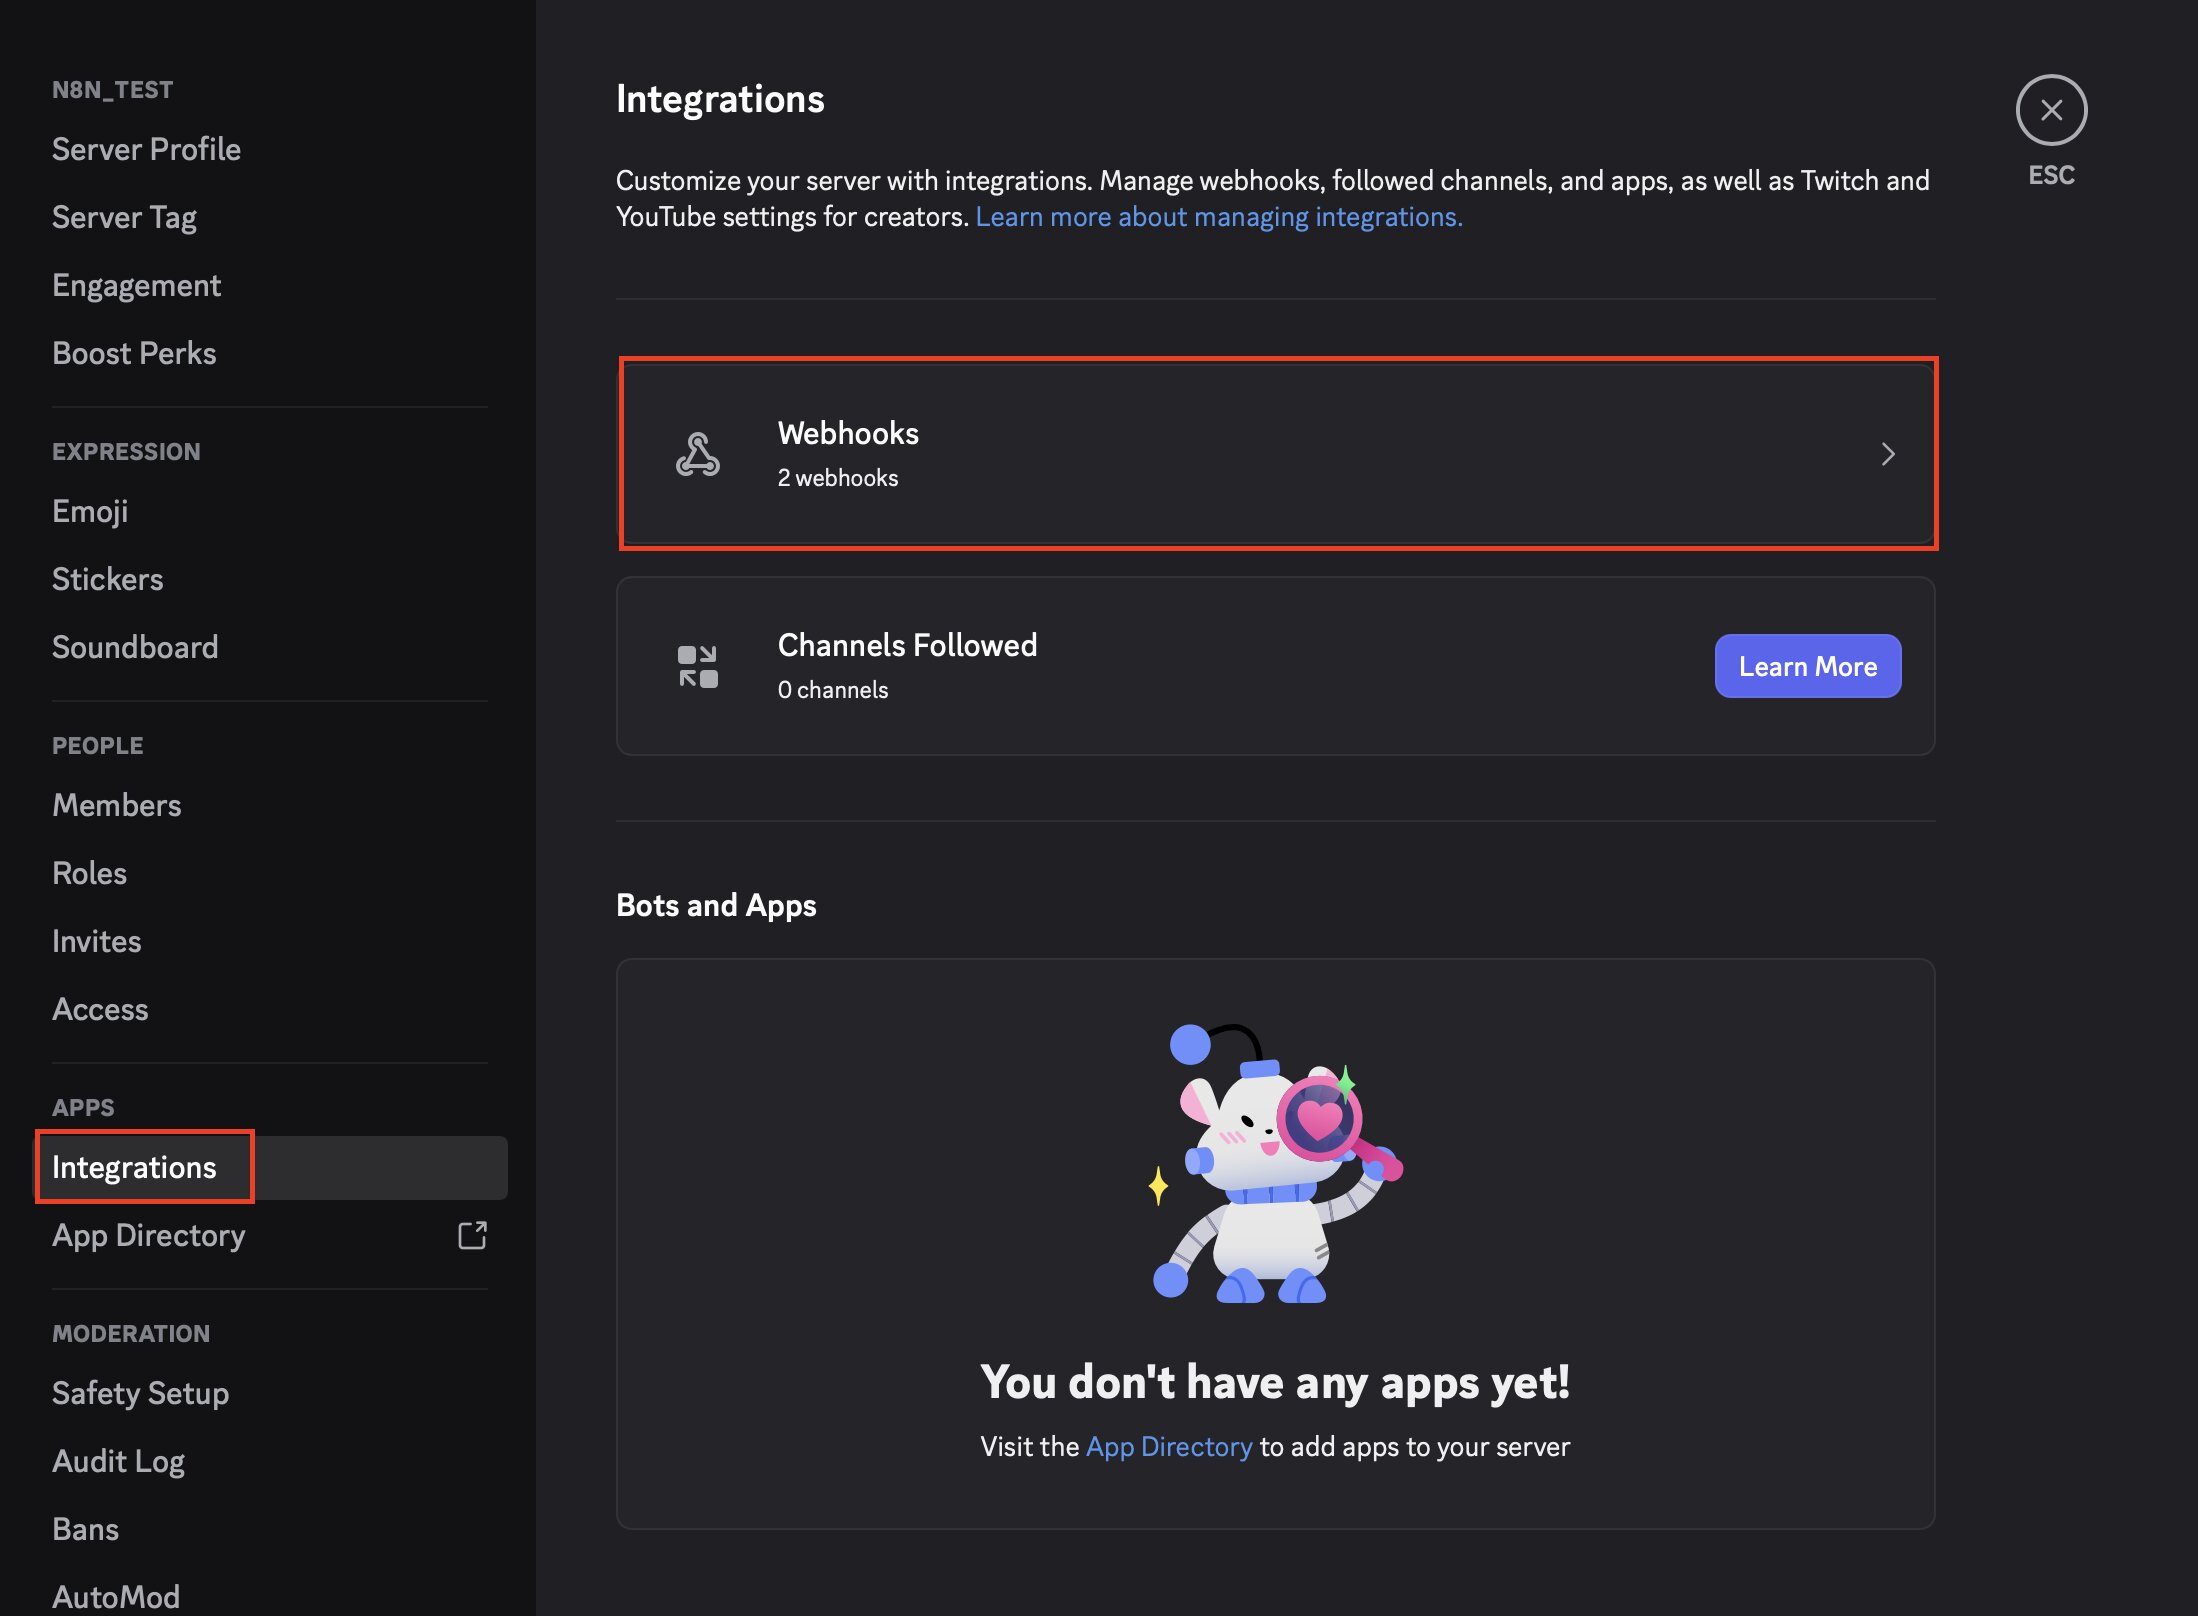
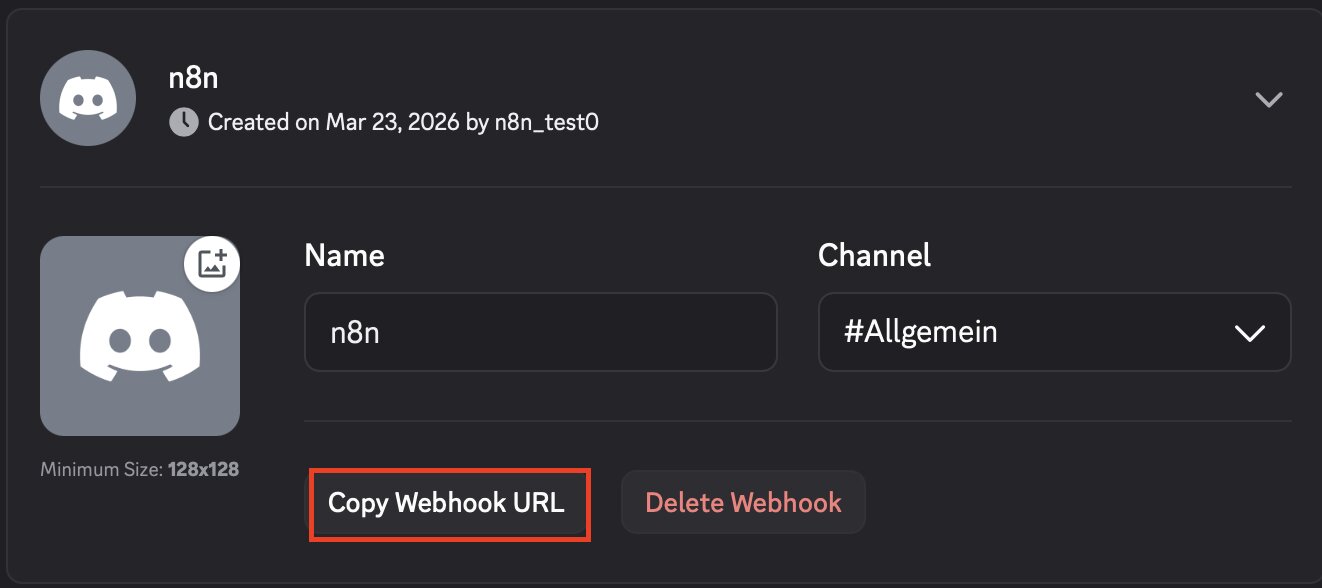
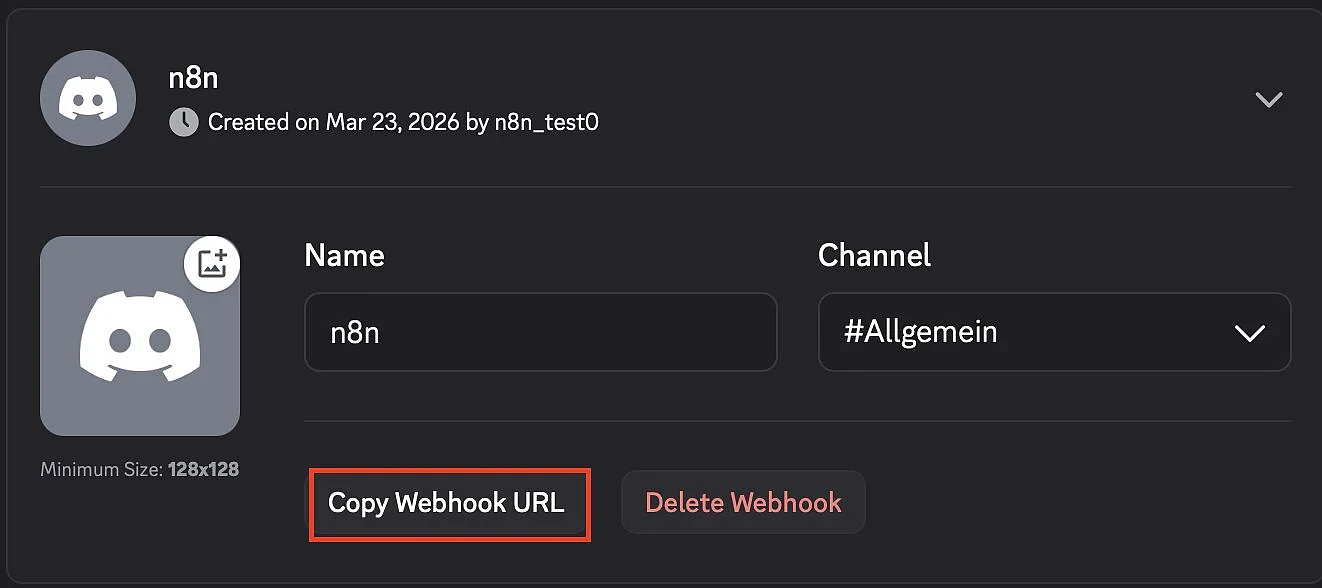
Click Create Webhook and give it a name like ‘n8n’ and select the channel where n8n should send messages. Then copy the webhook URL, you’ll need it in the next step.
Step 3: Create a new workflow in n8n
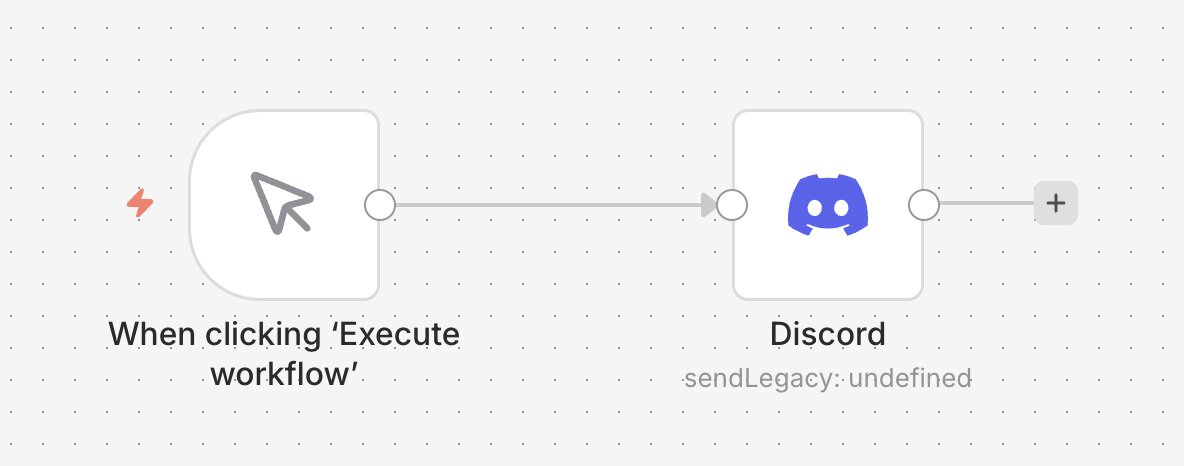
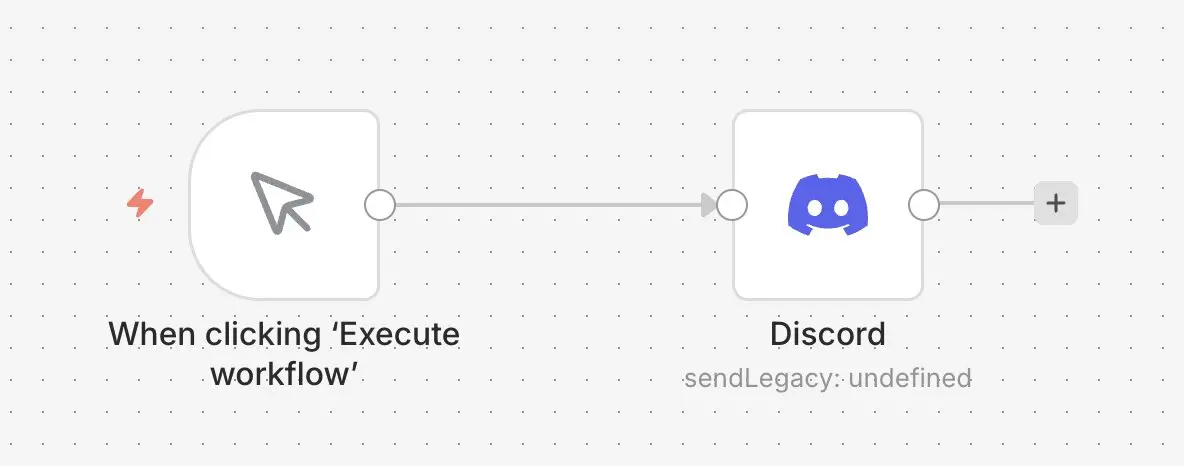
Open your n8n interface and create a new workflow. For your first test, keep it simple with a manual trigger and a Discord node. The manual trigger lets you run the workflow yourself, so you can test the connection safely. The Discord node then sends the message to the channel you select.
Step 4: Set up the Discord node
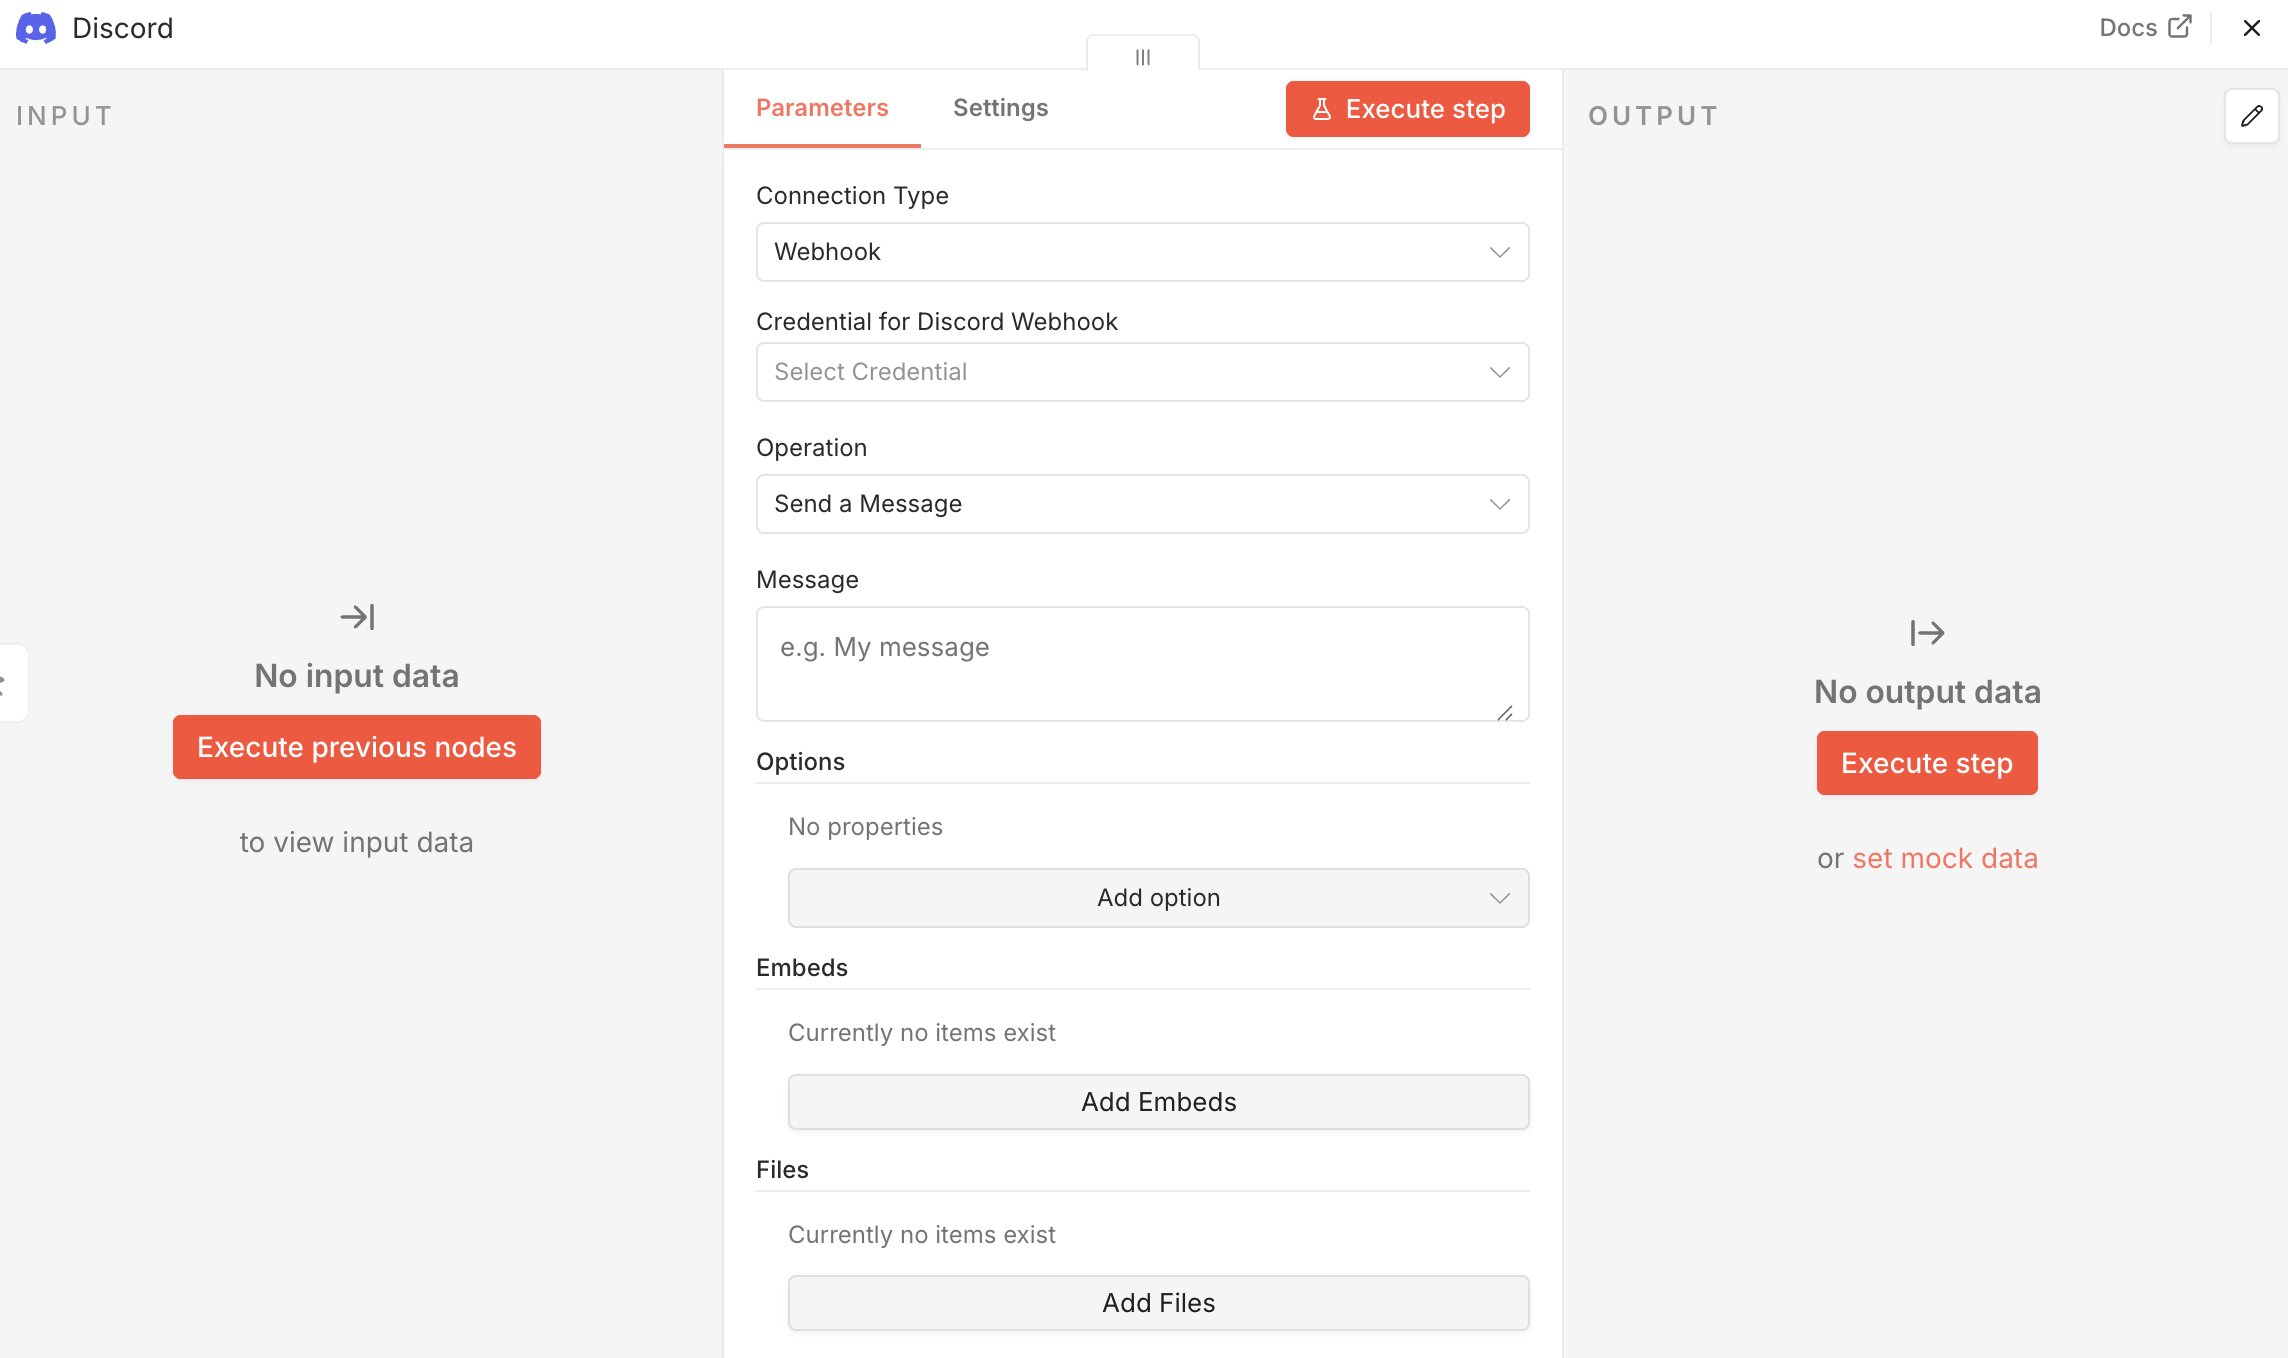
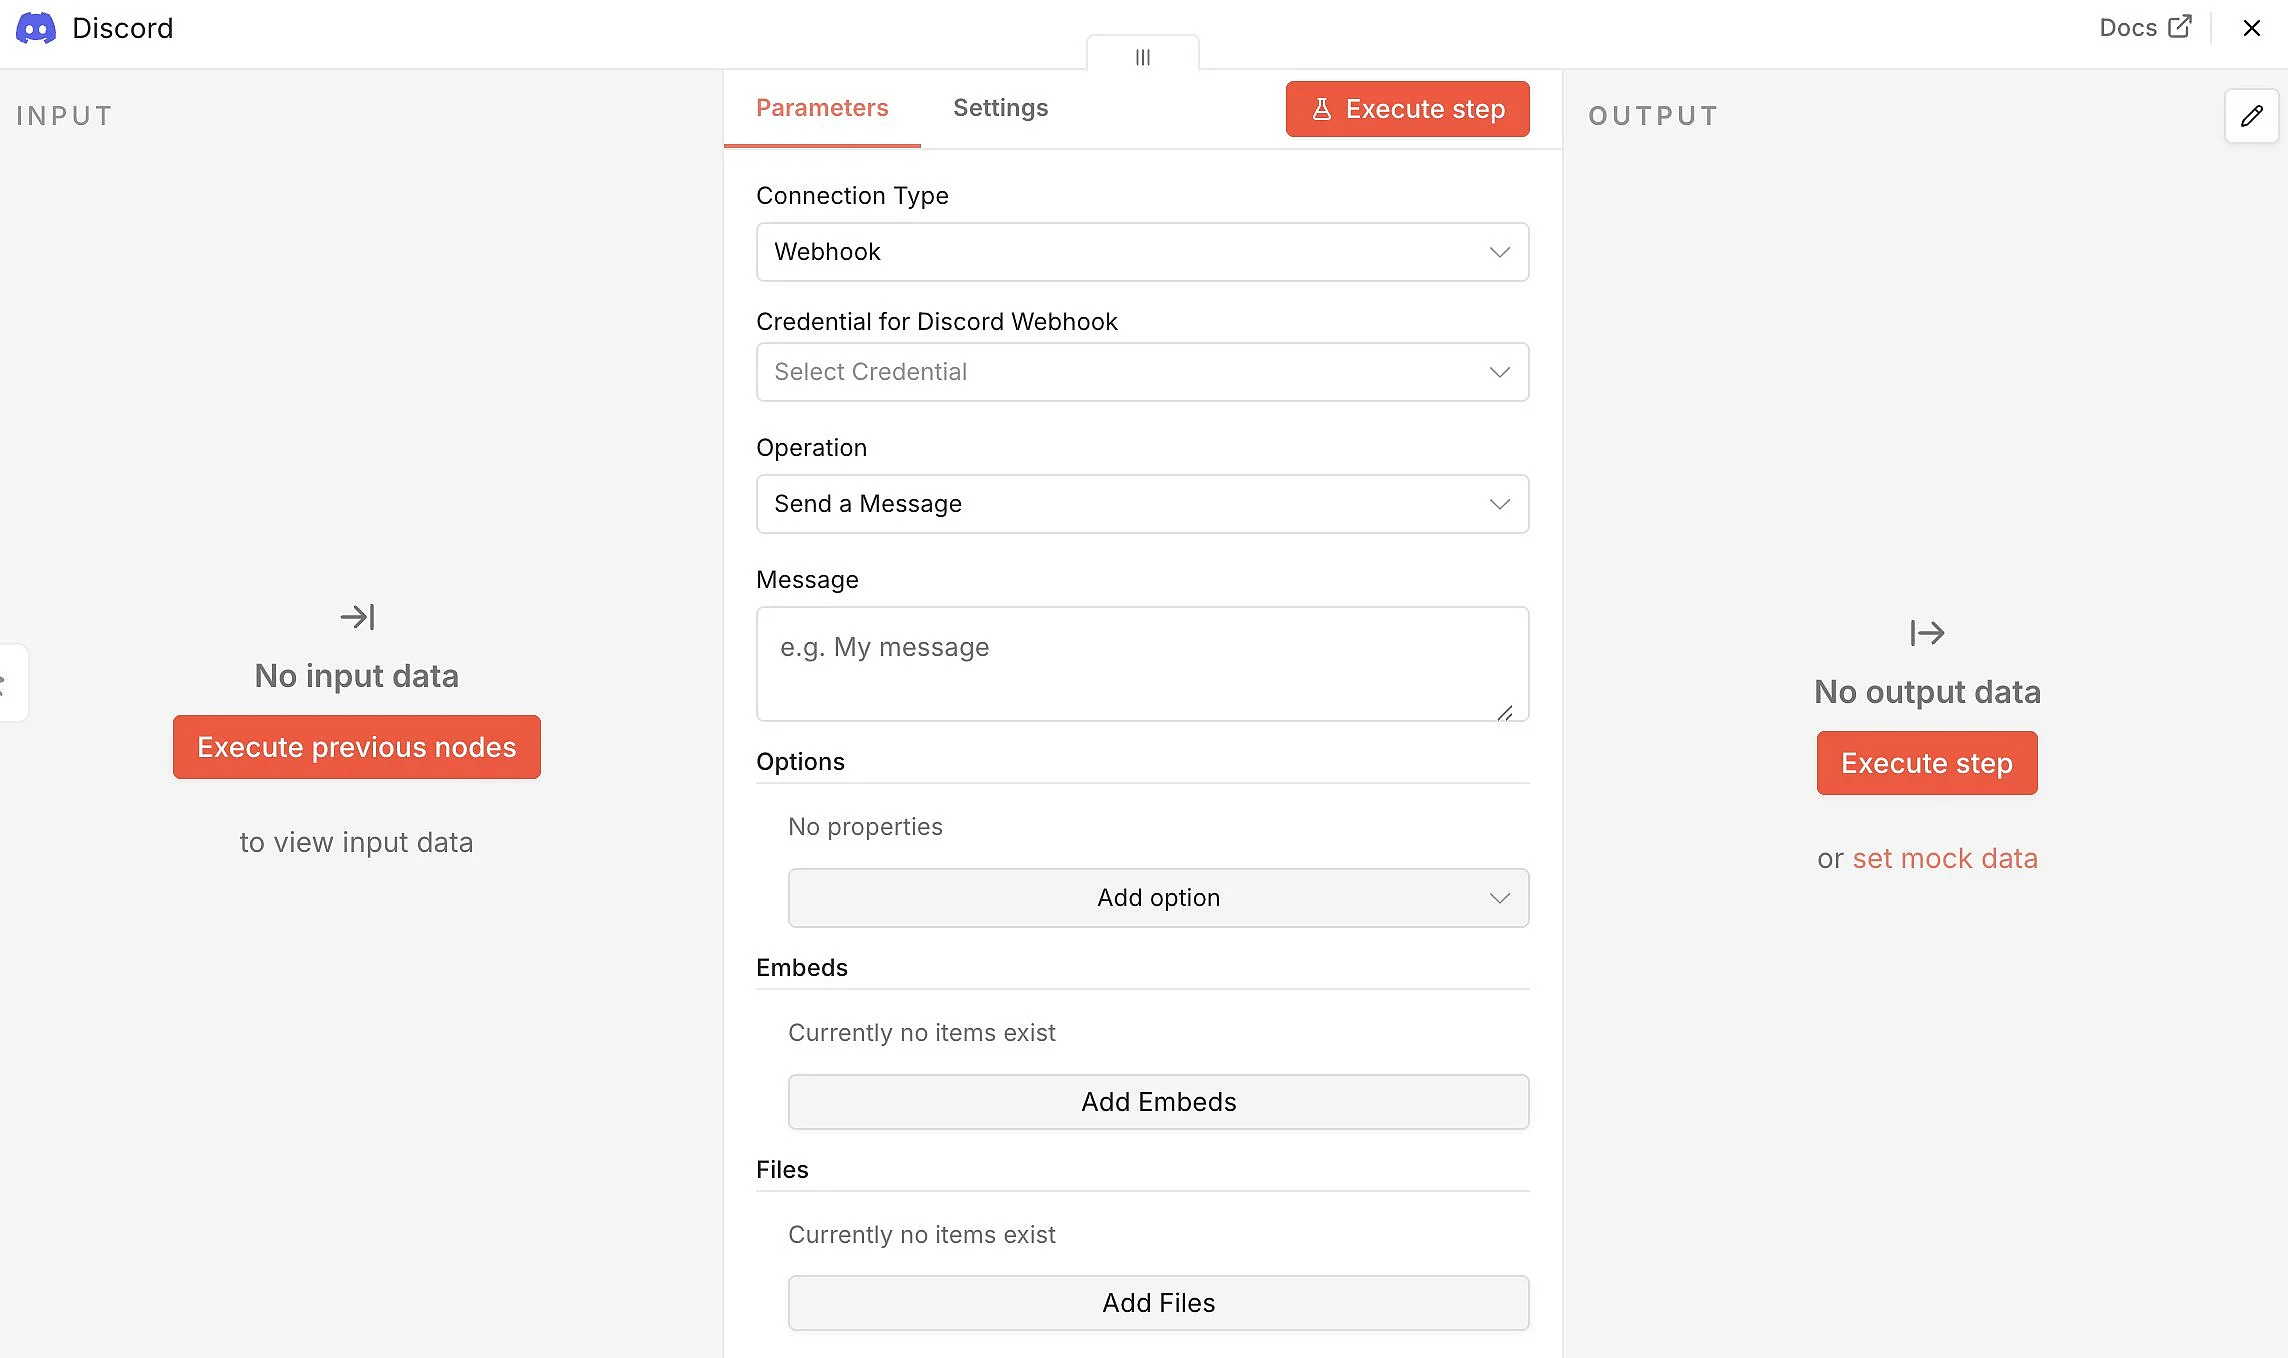
Next, set up the Discord node so it can send messages. In the node settings, select the Send a Message operation. The Discord node also supports other actions like fetching or deleting messages, reacting with emojis and managing roles. For now, sending a message is enough to begin with.
Step 5: Add a Discord webhook credential in n8n
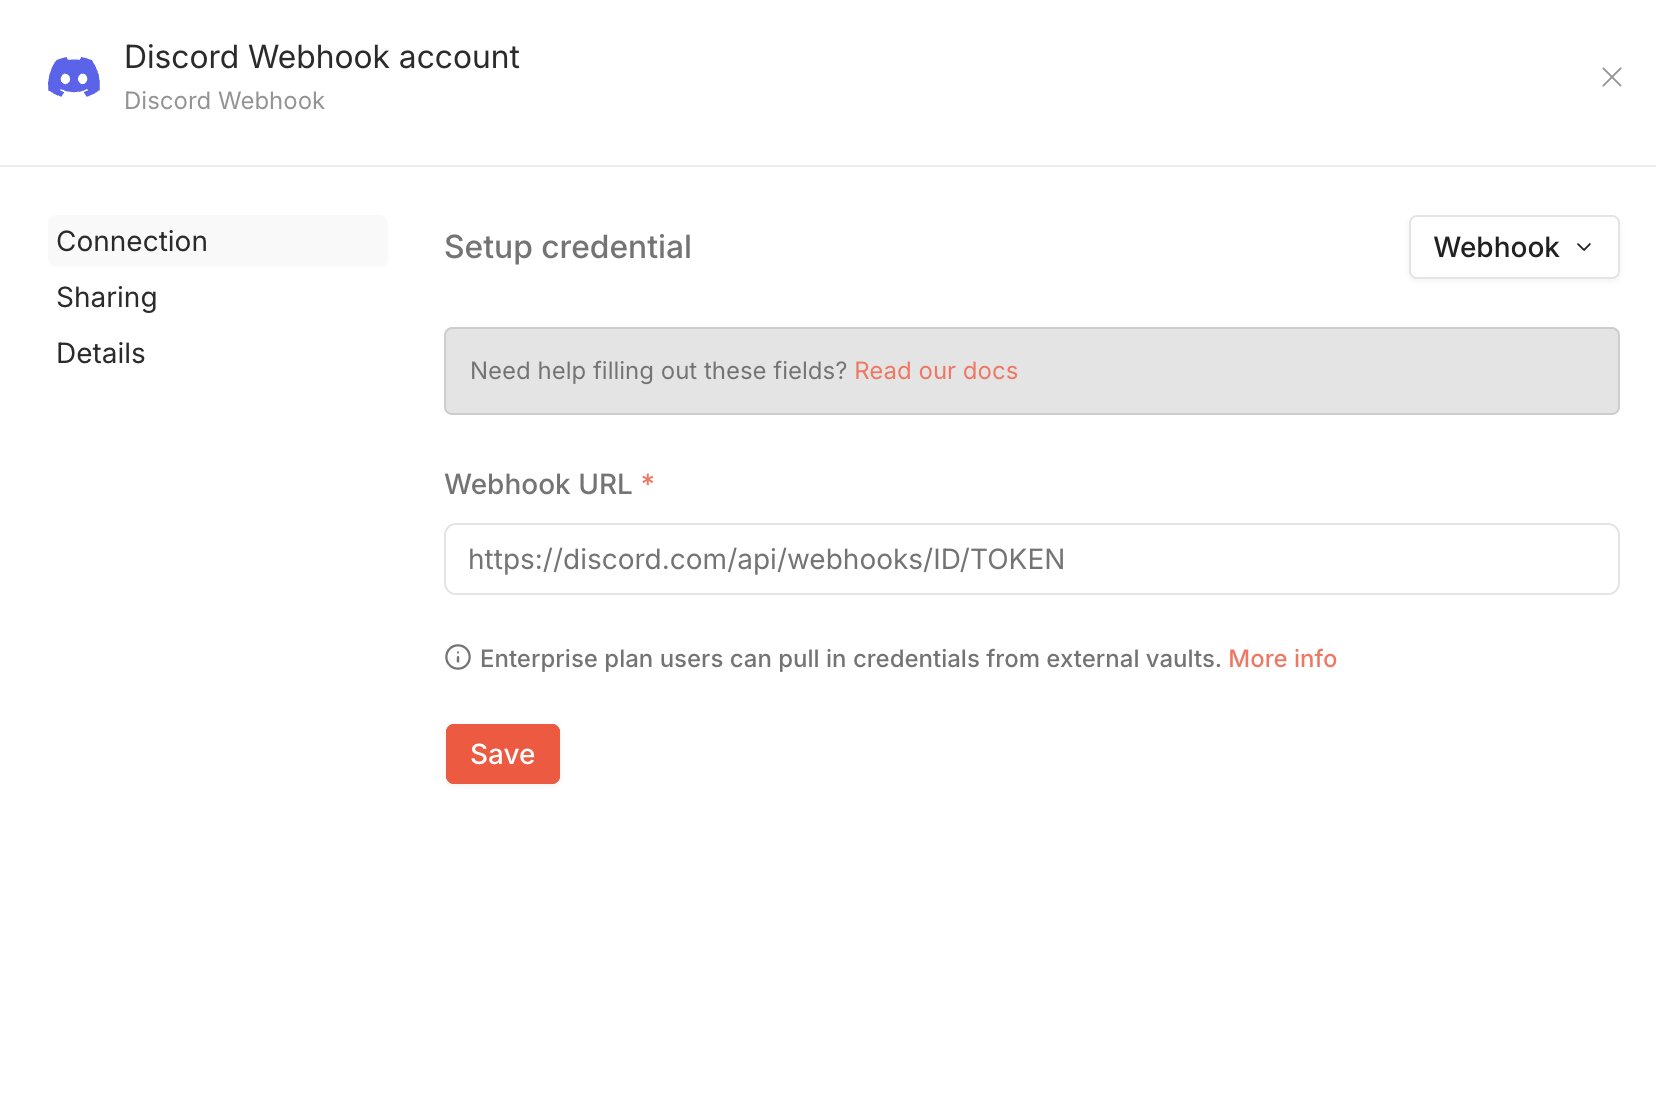
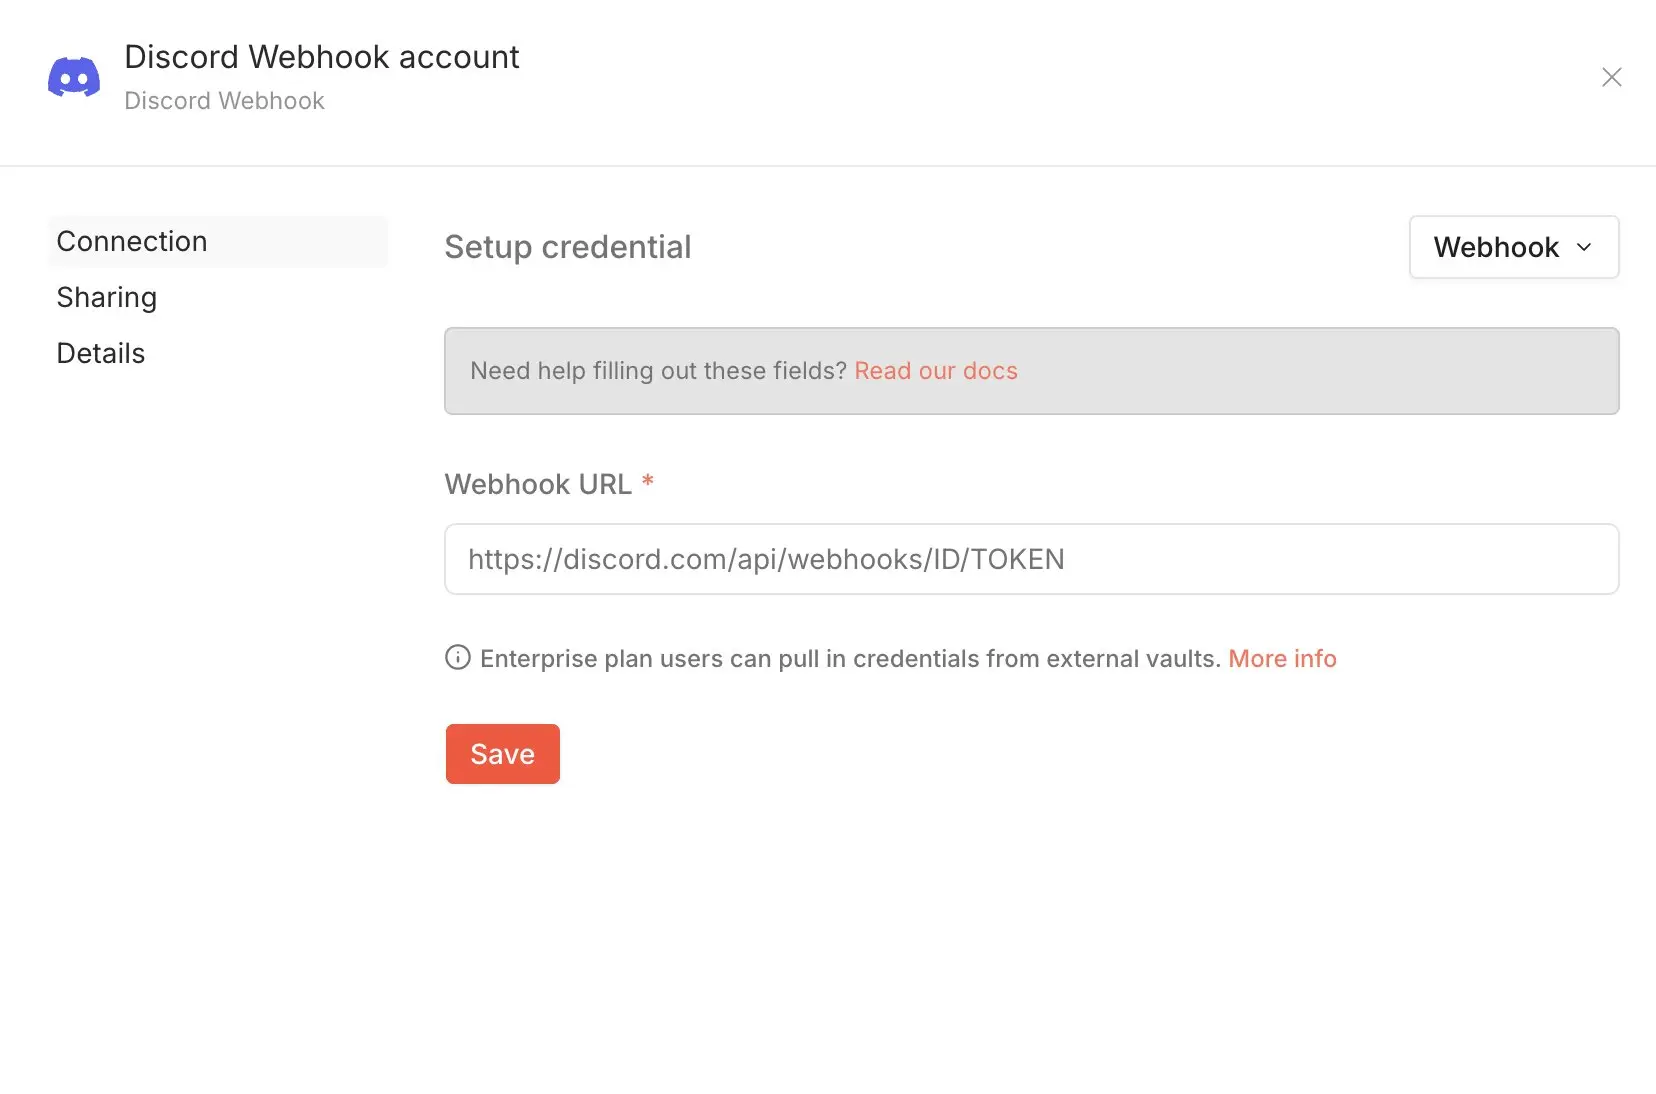
Next, in the credentials field, click Create New Credential and select Webhook as the authentication method. Paste the Discord webhook URL you copied earlier and save it.
Then enter a message like ‘Hello from n8n! This message was sent automatically.’ in the Discord node.
Step 6: Send a test message
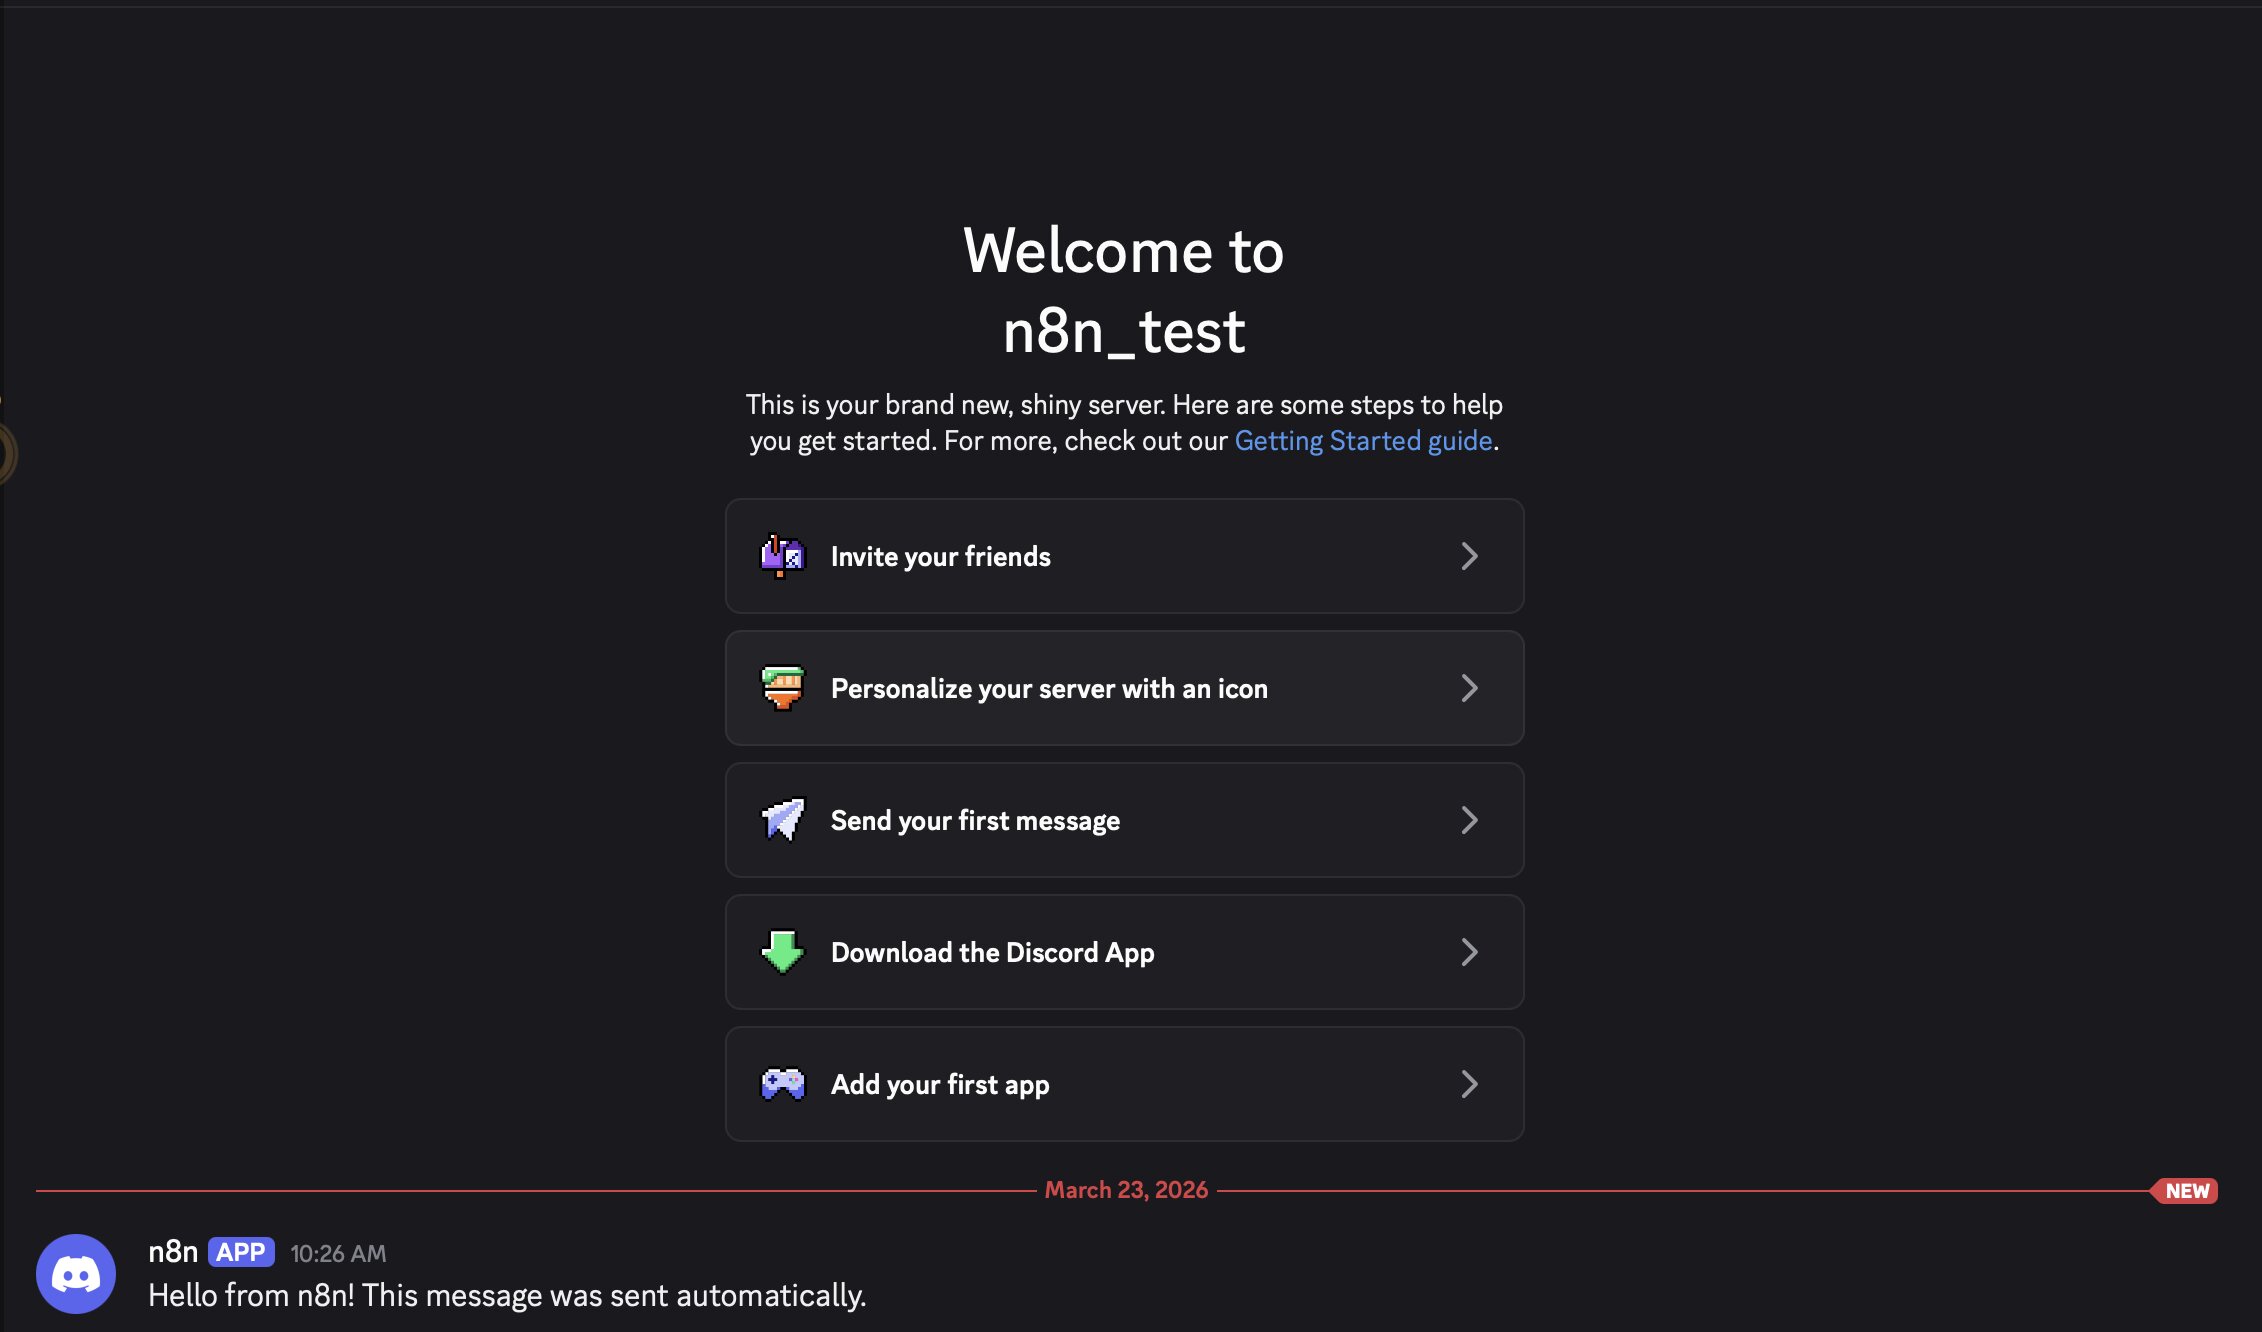
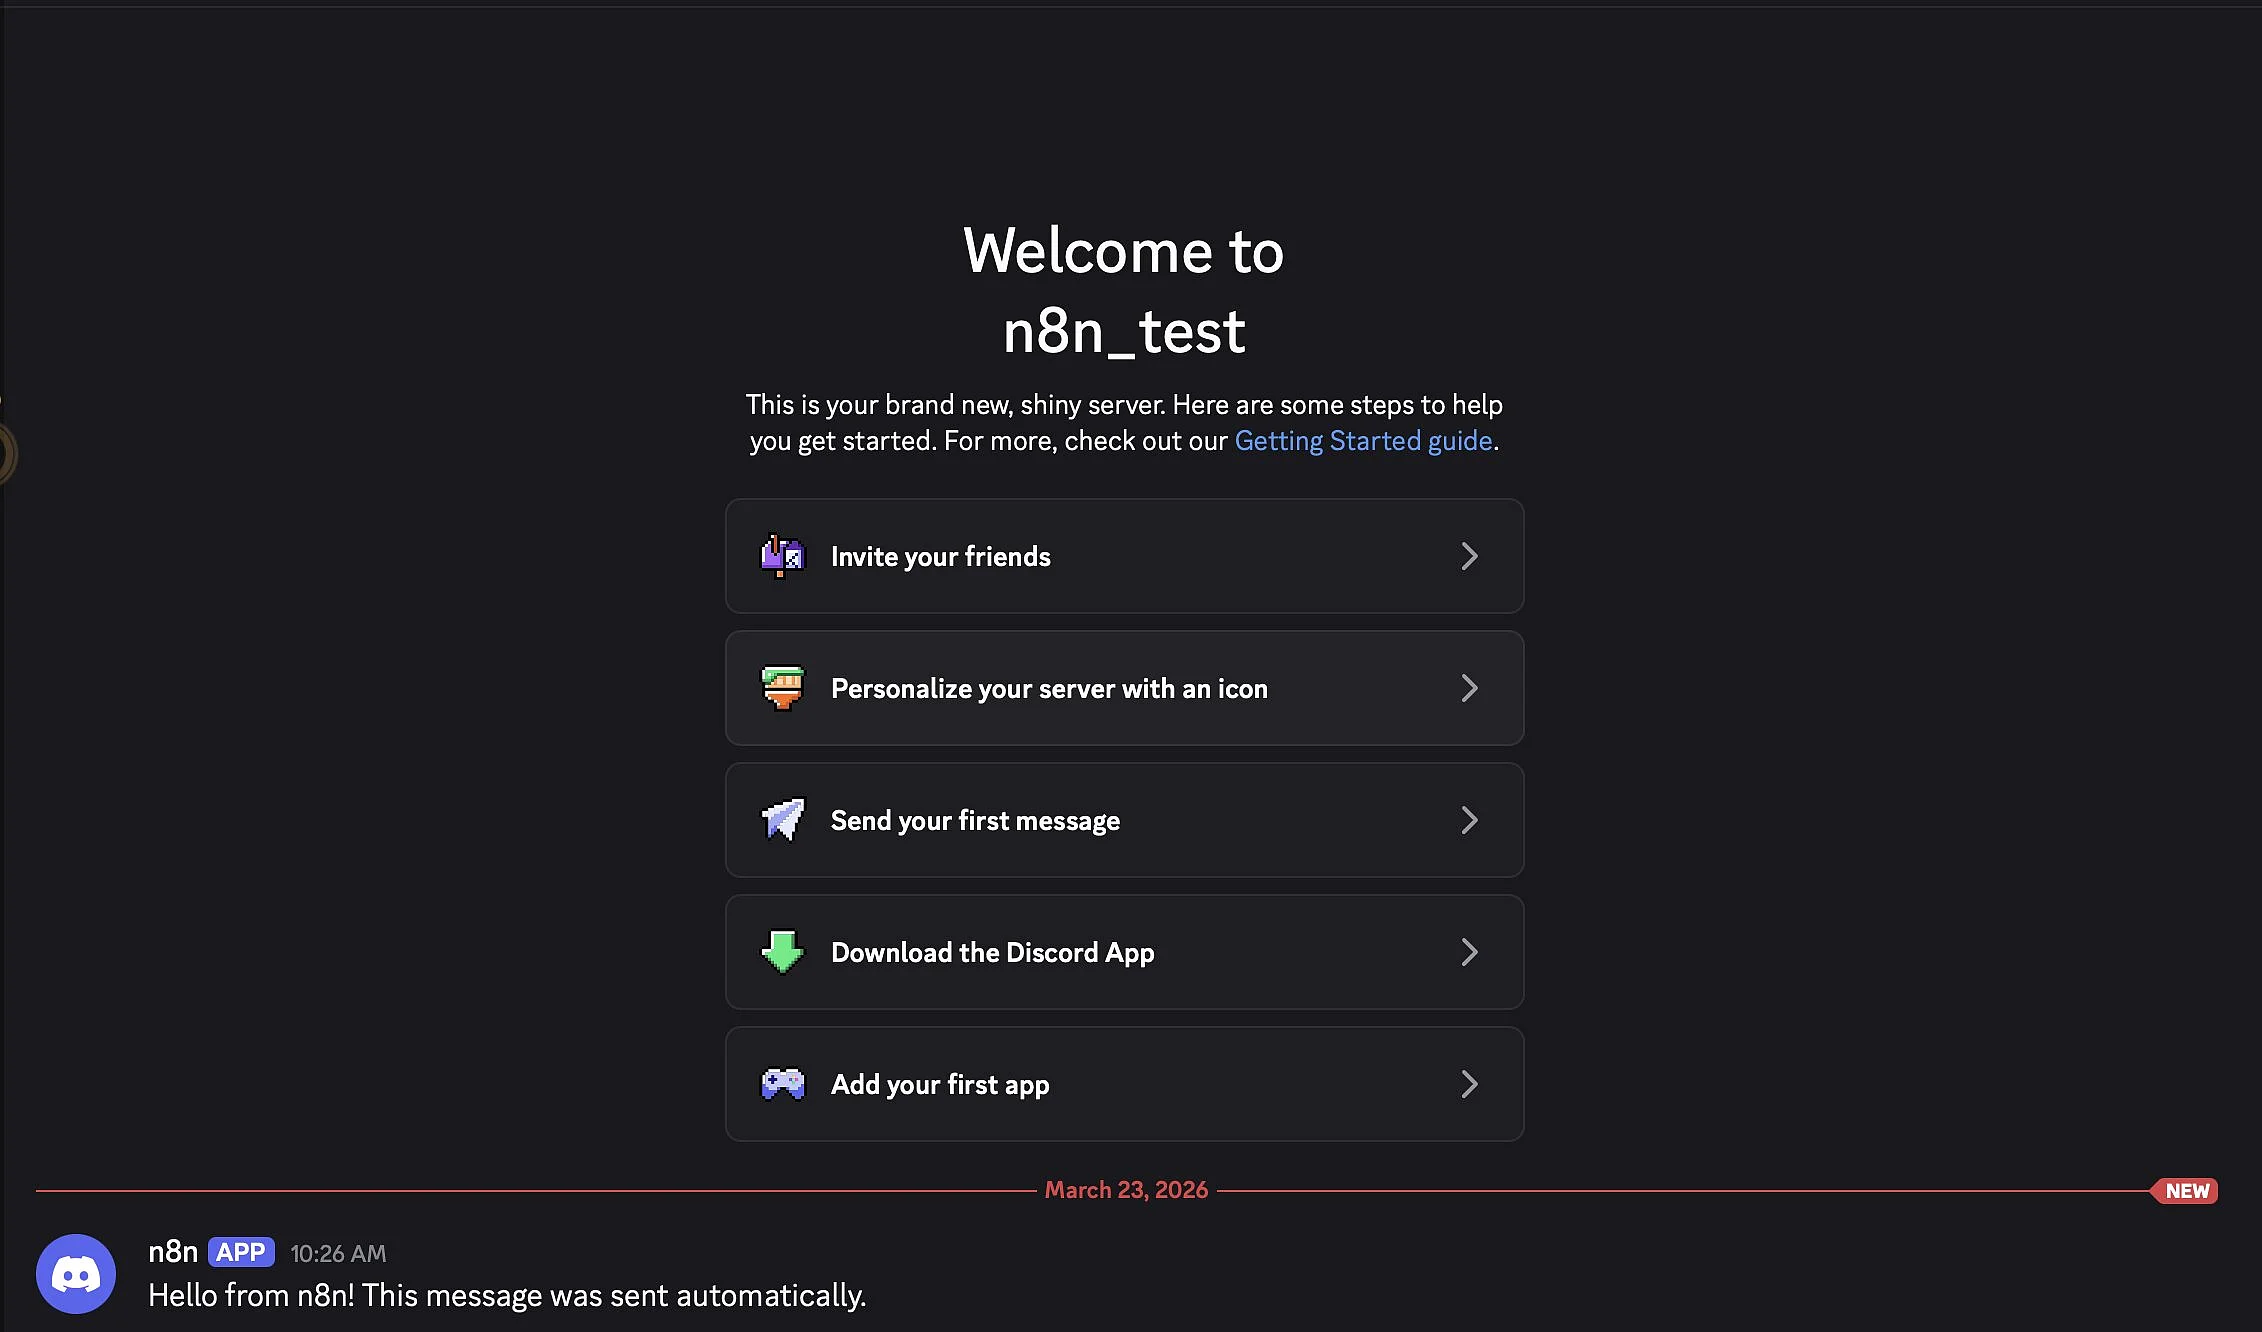
Run the workflow manually. If everything is set up correctly, your message should appear in your Discord channel.
Step 7: Use data from other nodes in your messages
Once the basic setup is working, you can include data from other nodes in your messages. In n8n, you do this using expressions, which let you insert values from earlier steps. For example, you can include things like a form submitter’s name, an API error message, or an order number in your Discord messages. Here’s what that could look like:
New message from {{$json["name"]}}:
{{$json["message"]}}This works especially well if you’re using Discord as a notification channel for data from forms, eCommerce platforms or APIs.

How to use n8n with Discord
Discord becomes much more useful once you move beyond test messages and start automating real workflows. Even with just a few nodes, you can set up notifications, approvals or monitoring alerts. Here are three simple examples to get you started:
Example 1: To send website form submissions to Discord
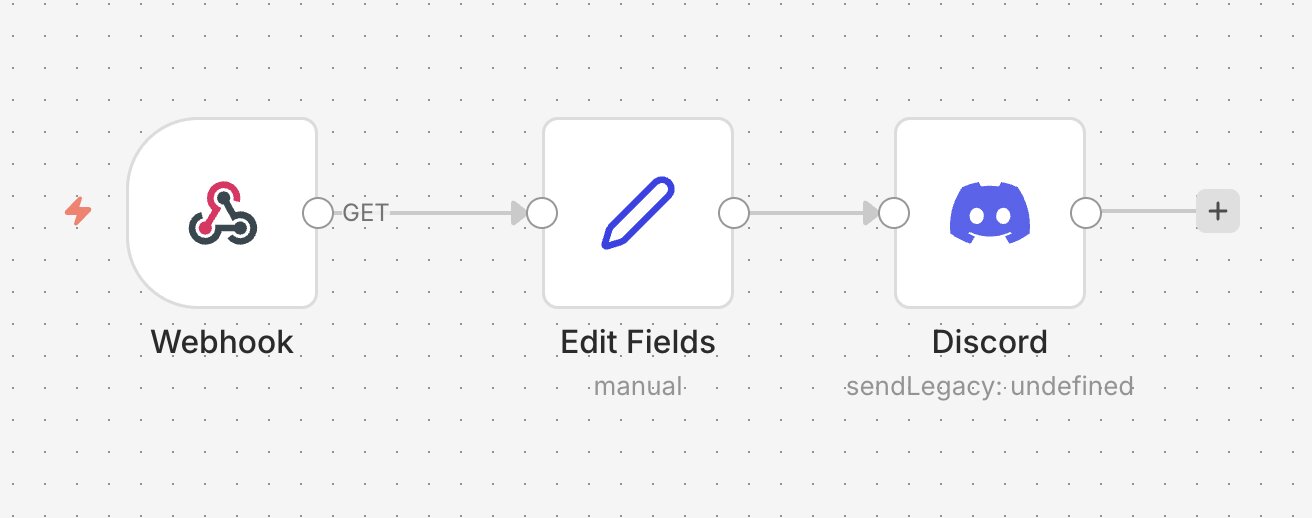
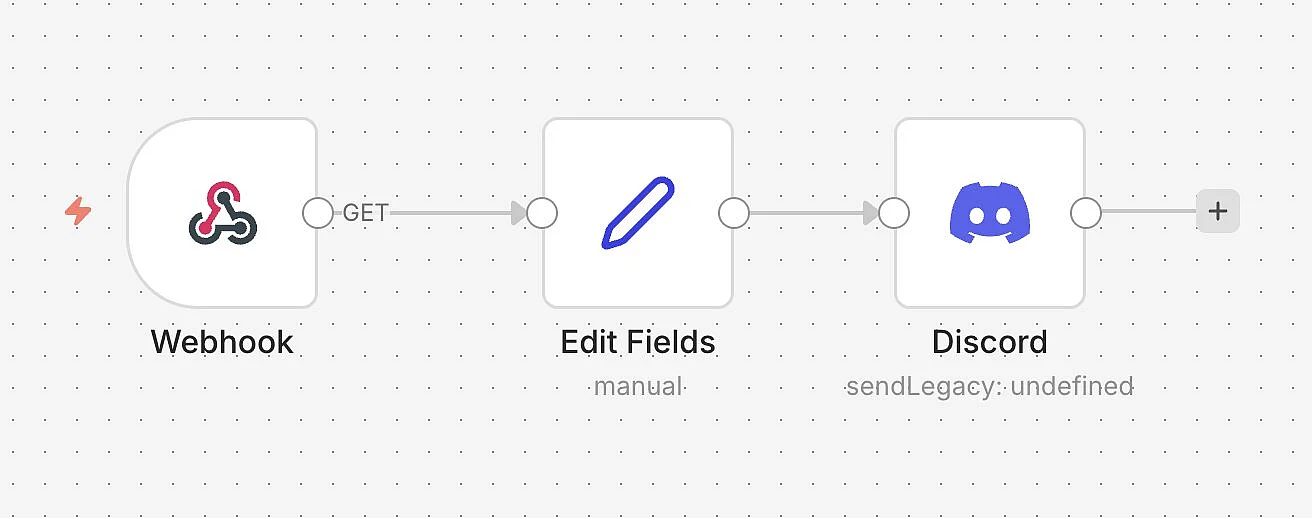
If you run a contact form, application form, or internal reporting form, you can send every new submission straight to Discord. In n8n, this usually starts with a webhook as the trigger. You process the data and then send it to a team channel using the Discord node. This means new requests don’t get buried or lost in inboxes and are visible to your whole team right away. You can use expressions to format details like name, email, subject, or priority. If needed, you can add an If node to control which submissions get sent.
Example 2: To send server or backup errors to Discord
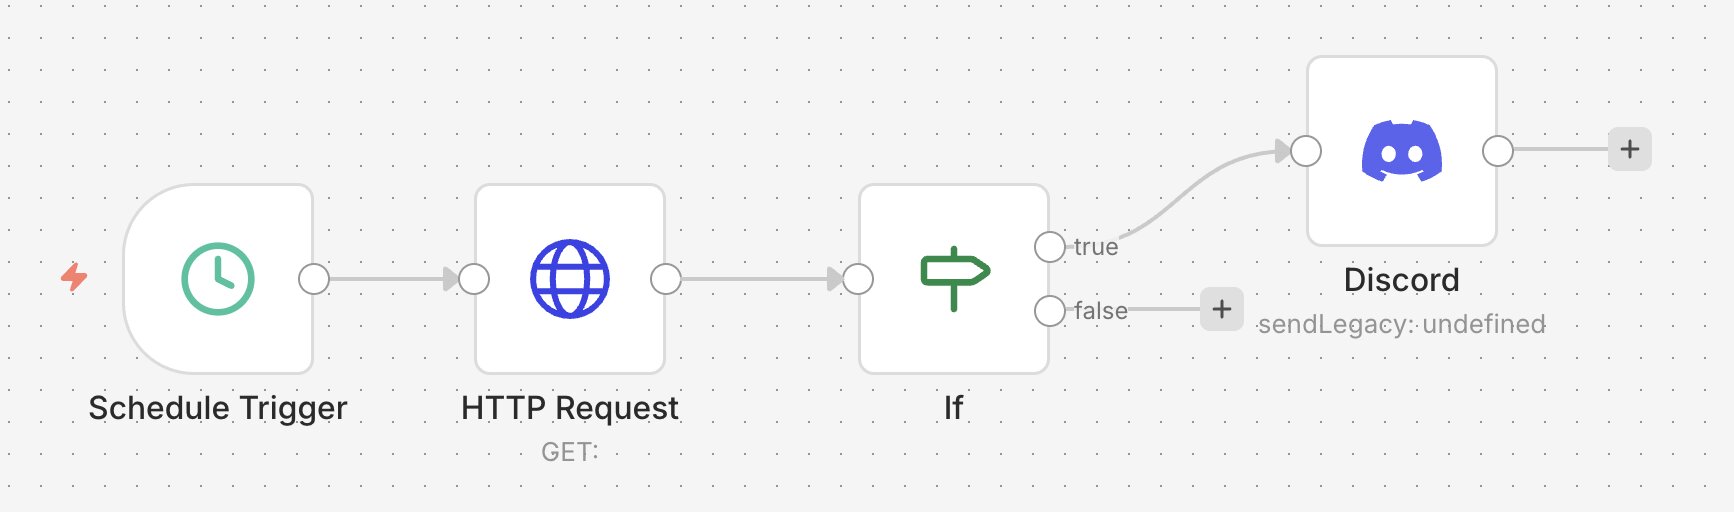
If you’re using n8n for monitoring, you can send alerts to Discord whenever something goes wrong. If a backup fails, a service goes down, or a script returns an error, n8n can automatically send a message to your channel. This way, your team sees issues right away without having to check logs all the time. The trigger often comes from a cron job, a webhook, or an HTTP request to a monitoring system. You can also include details like status icons, error messages, or affected hostnames. For smaller teams, Discord works well as a simple and easy-to-follow alert system.
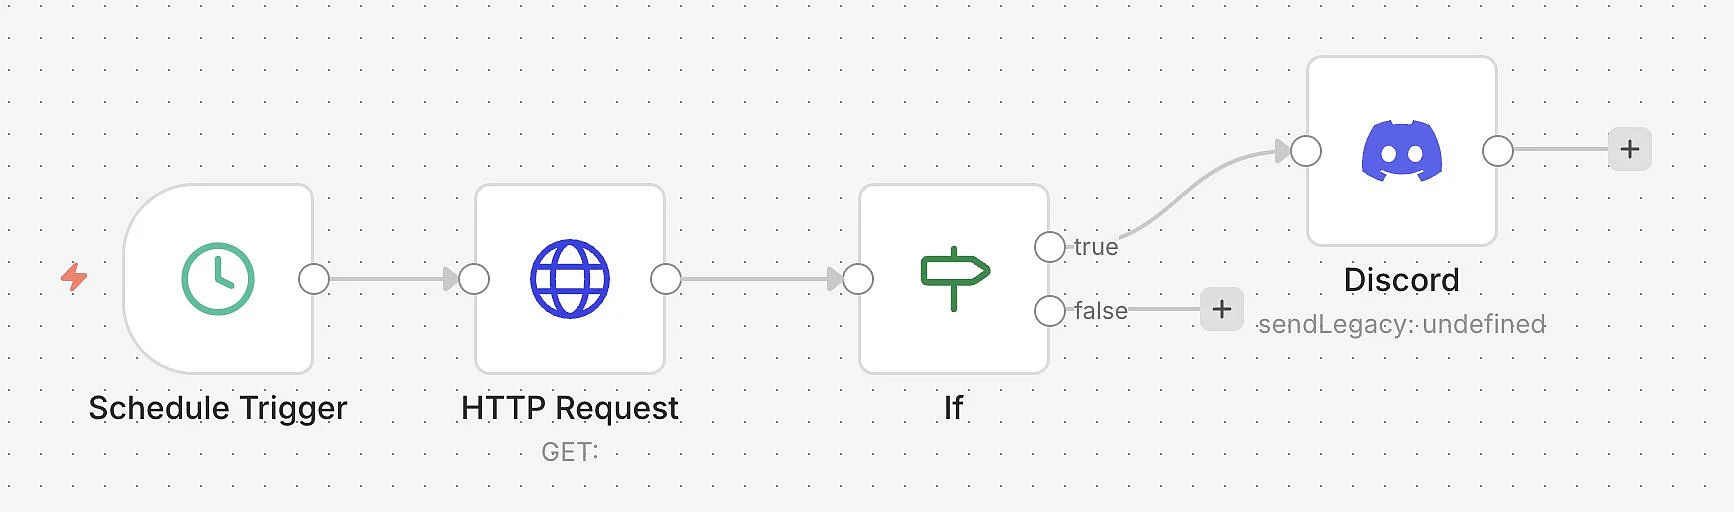
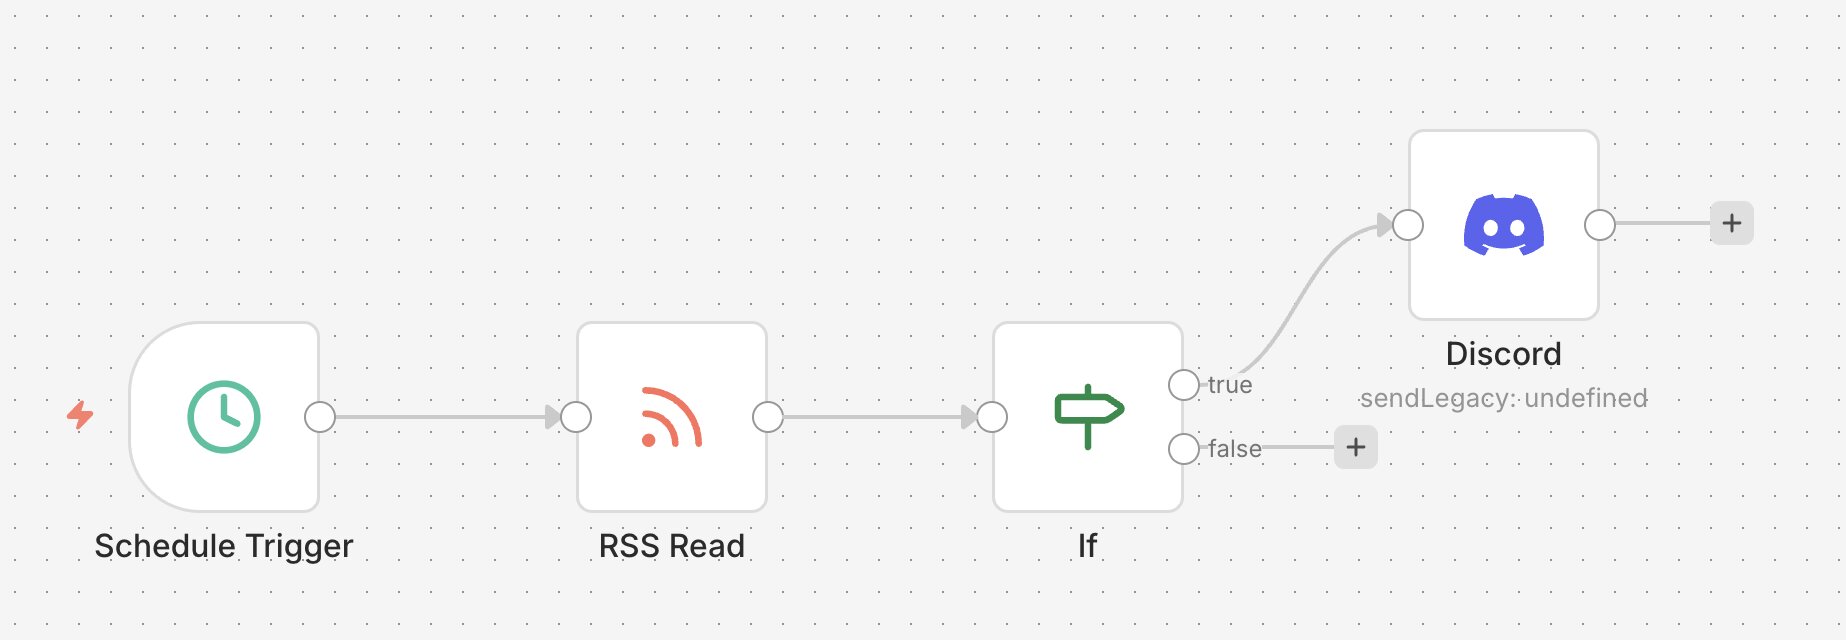
Example 3: To automatically share RSS feeds or news in Discord
If you want to keep track of important websites, blogs, or news sources, you can use n8n to automatically post new content to Discord. To do this, n8n checks an RSS feed for new entries, and sends updates to the Discord channel. This way, you and your team stay up to date without having to check each source manually.
This setup works well for internal teams and competitor monitoring. It’s also great for following industry blogs and product updates. You can also add an If node to make sure only items with a specific keyword in the title are posted. This keeps your channel focussed so only relevant content gets shared. The workflow is simple to set up and easy to expand. For instance, you can include details like the title, link, and publication date in your Discord messages, or choose to process only certain feed items.
Reviewer

Christian Heldmaier
Christian Heldmaier is an experienced online marketing and SEO specialist from Karlsruhe. He has been working as an SEO Manager at IONOS since July 2020.