

How to create a Telegram bot with n8n and AI step by step

You can use an AI-powered n8n Telegram bot to process incoming messages automatically and send intelligent replies. In this article, we’ll show you step by step how to set up the bot, connect it to Telegram and add AI functionality.
What are the benefits of a Telegram bot with n8n and AI?
An n8n Telegram bot lets you automate communication without traditional software development. Instead of programming a bot from scratch, you use the low-code tool n8n to connect individual building blocks in a clear workflow. This allows you to receive messages, analyse them, send them to an AI and automatically return the response in Telegram. A major advantage is that you can expand the workflow at any time, for example with database queries, API integrations or notifications. This makes the setup useful for smaller companies, teams and individual users that want to simplify recurring communication tasks. n8n is also a good fit if you want to self-host your n8n Telegram bot and keep full control over your automations.
Step 1: Create the prerequisites for the Telegram bot
Before you start creating your Telegram bot, make sure a few basic requirements are in place. These include:
- A running n8n instance: Your n8n environment must be accessible so you can create workflows and use webhooks or triggers.
- A Telegram account: You need a regular Telegram user account to create a bot via BotFather.
- An API access for AI: You need a service that can generate text responses, for example via an LLM model or a suitable AI provider.
- Basic access to the n8n interface: You should be able to create workflows, open nodes, and store credentials.
If you haven’t set up n8n yet, installing it with Docker is a good place to start. An n8n Docker installation is quick to set up and works well for both initial testing and production use on servers. For larger or more scalable environments, you can also run n8n with container orchestration. For example, an n8n Kubernetes installation lets you run workflows with high availability and more flexibility in complex infrastructures.
Step 2: Create a Telegram bot with BotFather
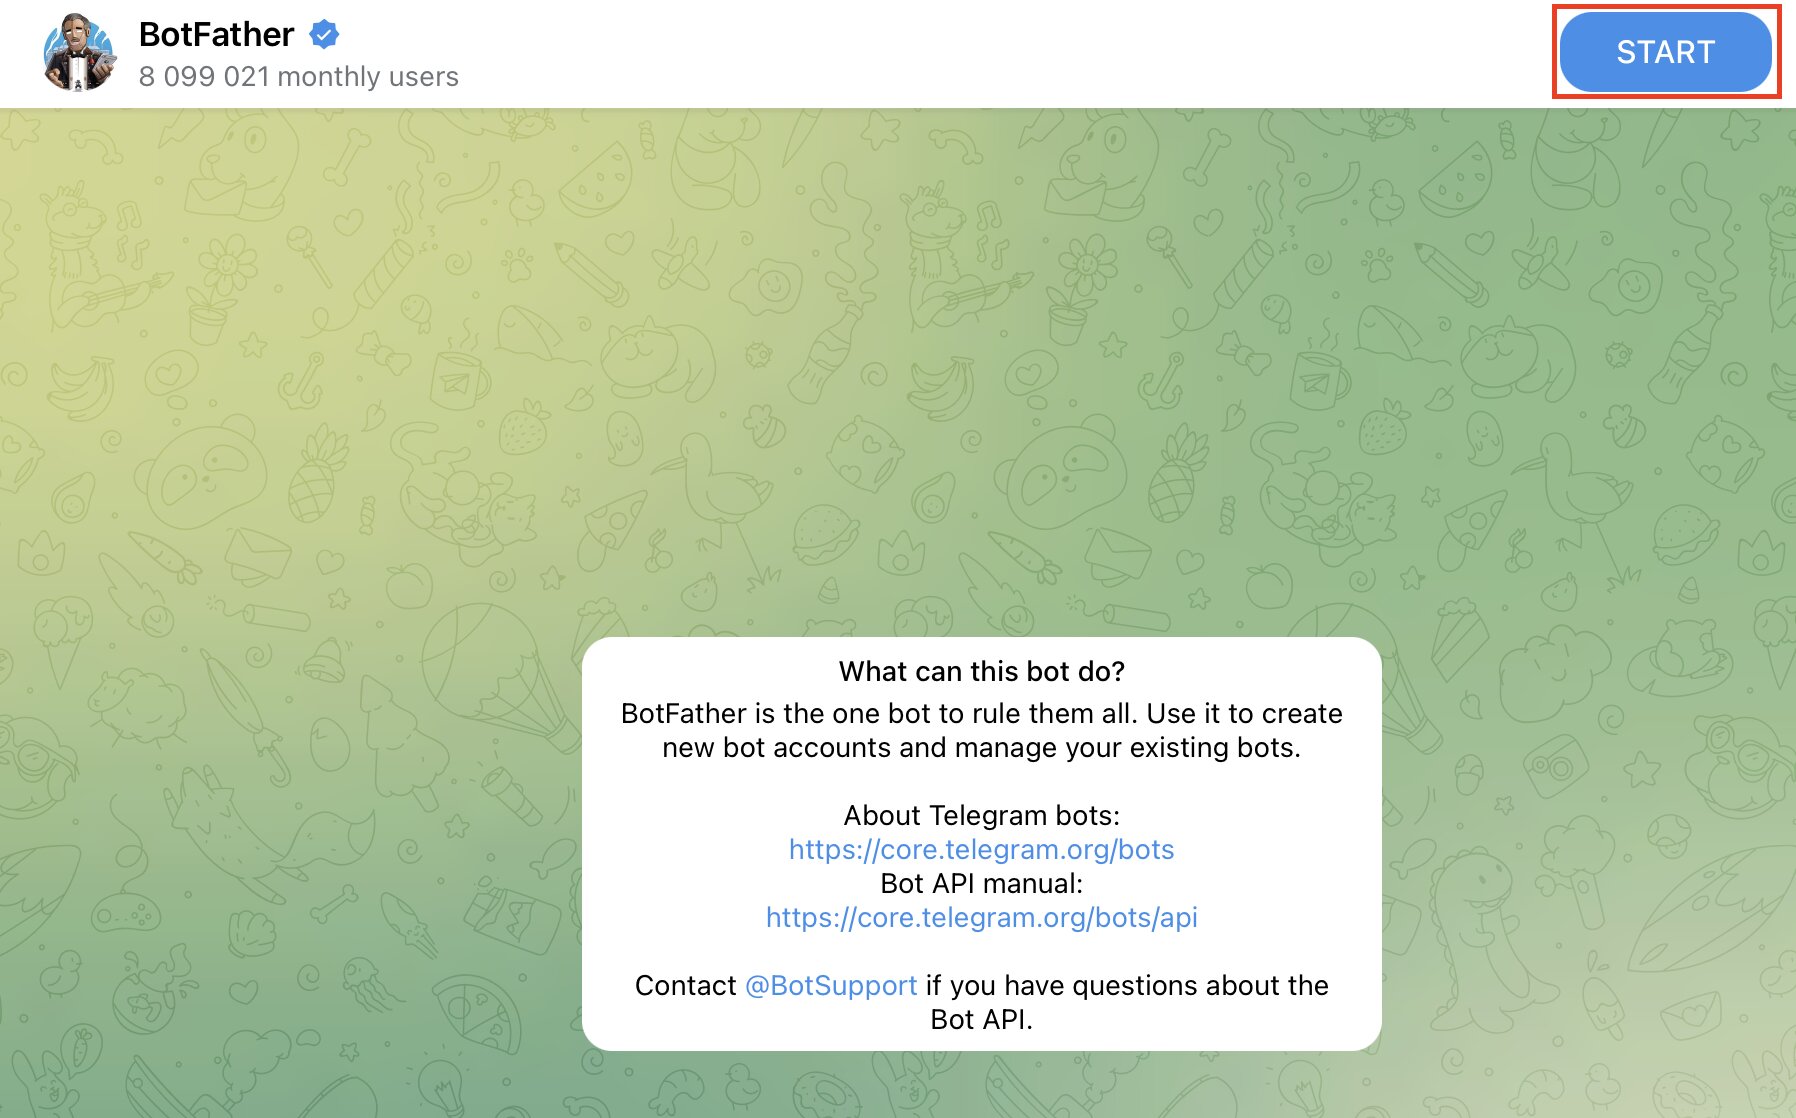
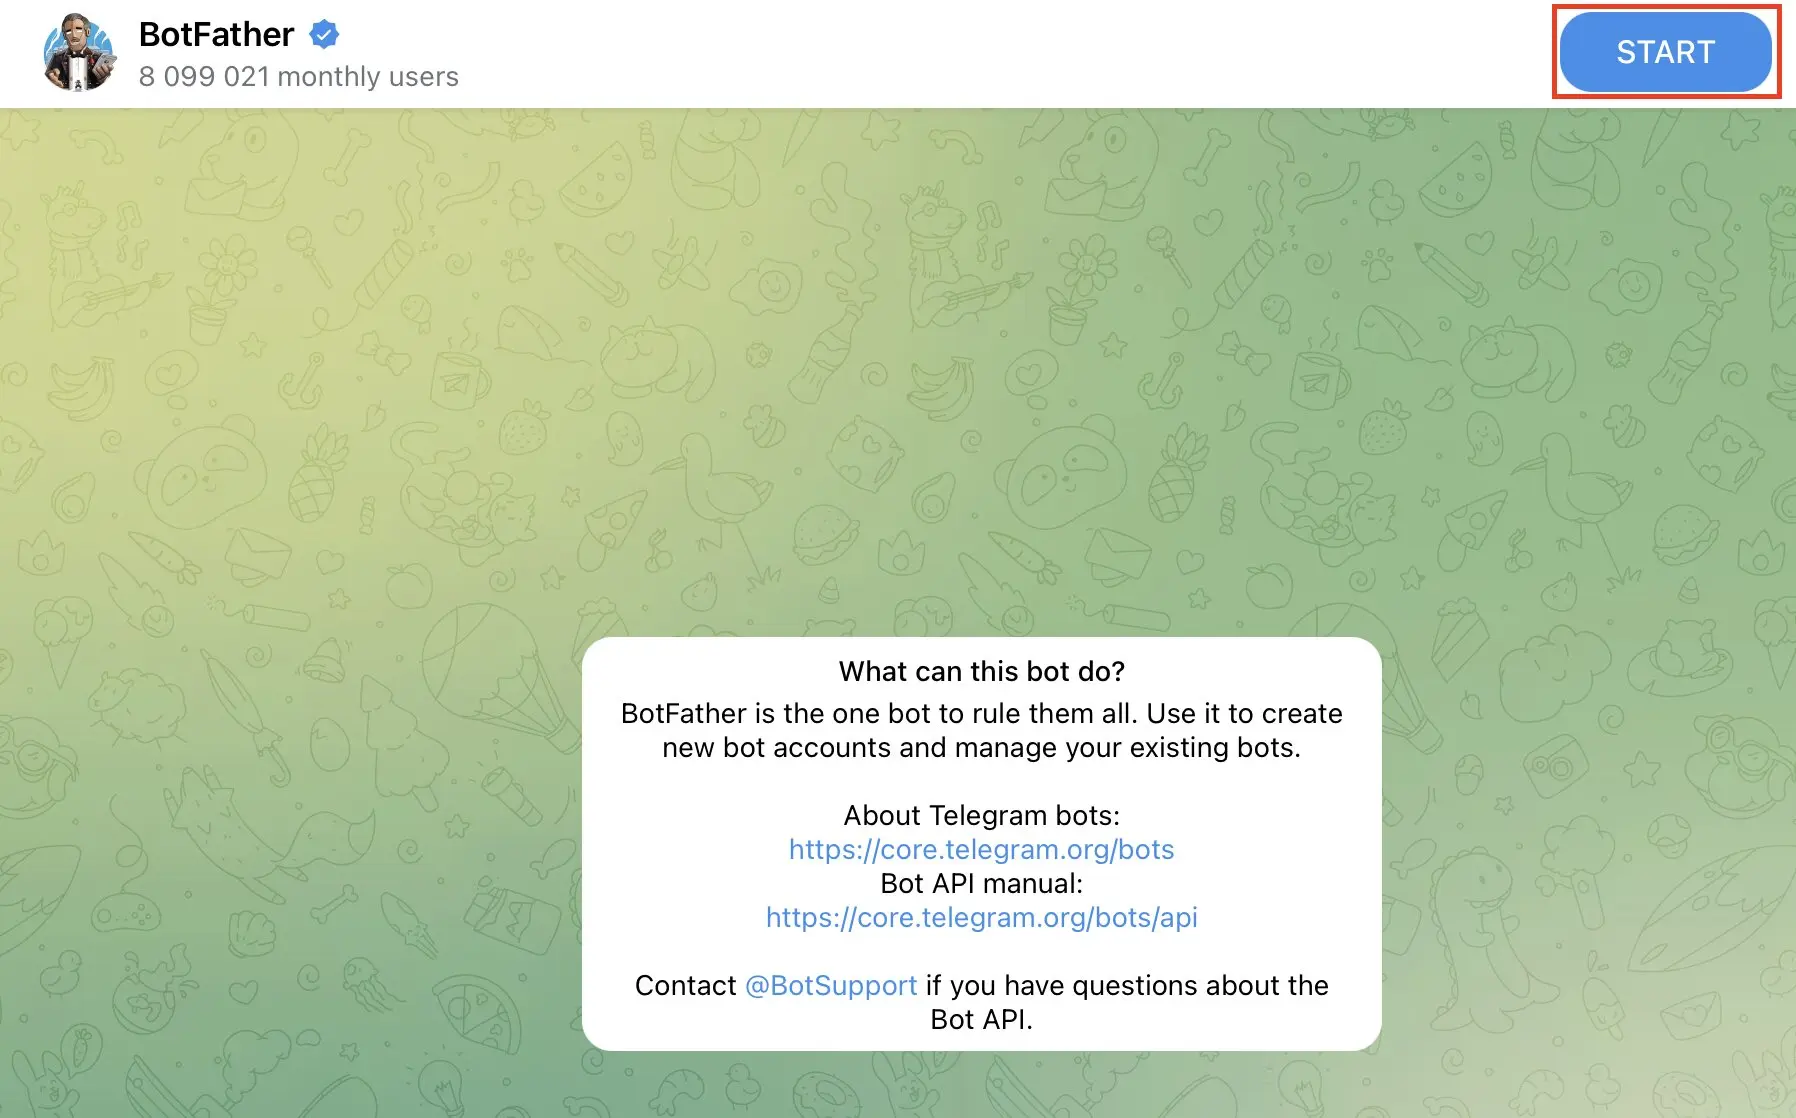
Before you can build your n8n workflow, you need to create your own bot in Telegram. To do this, use the official Telegram account BotFather, which you can use to create and manage new bots. Open Telegram, search your chats for ‘BotFather’, and start the chat.
Then send the command /newbot to create a new bot.
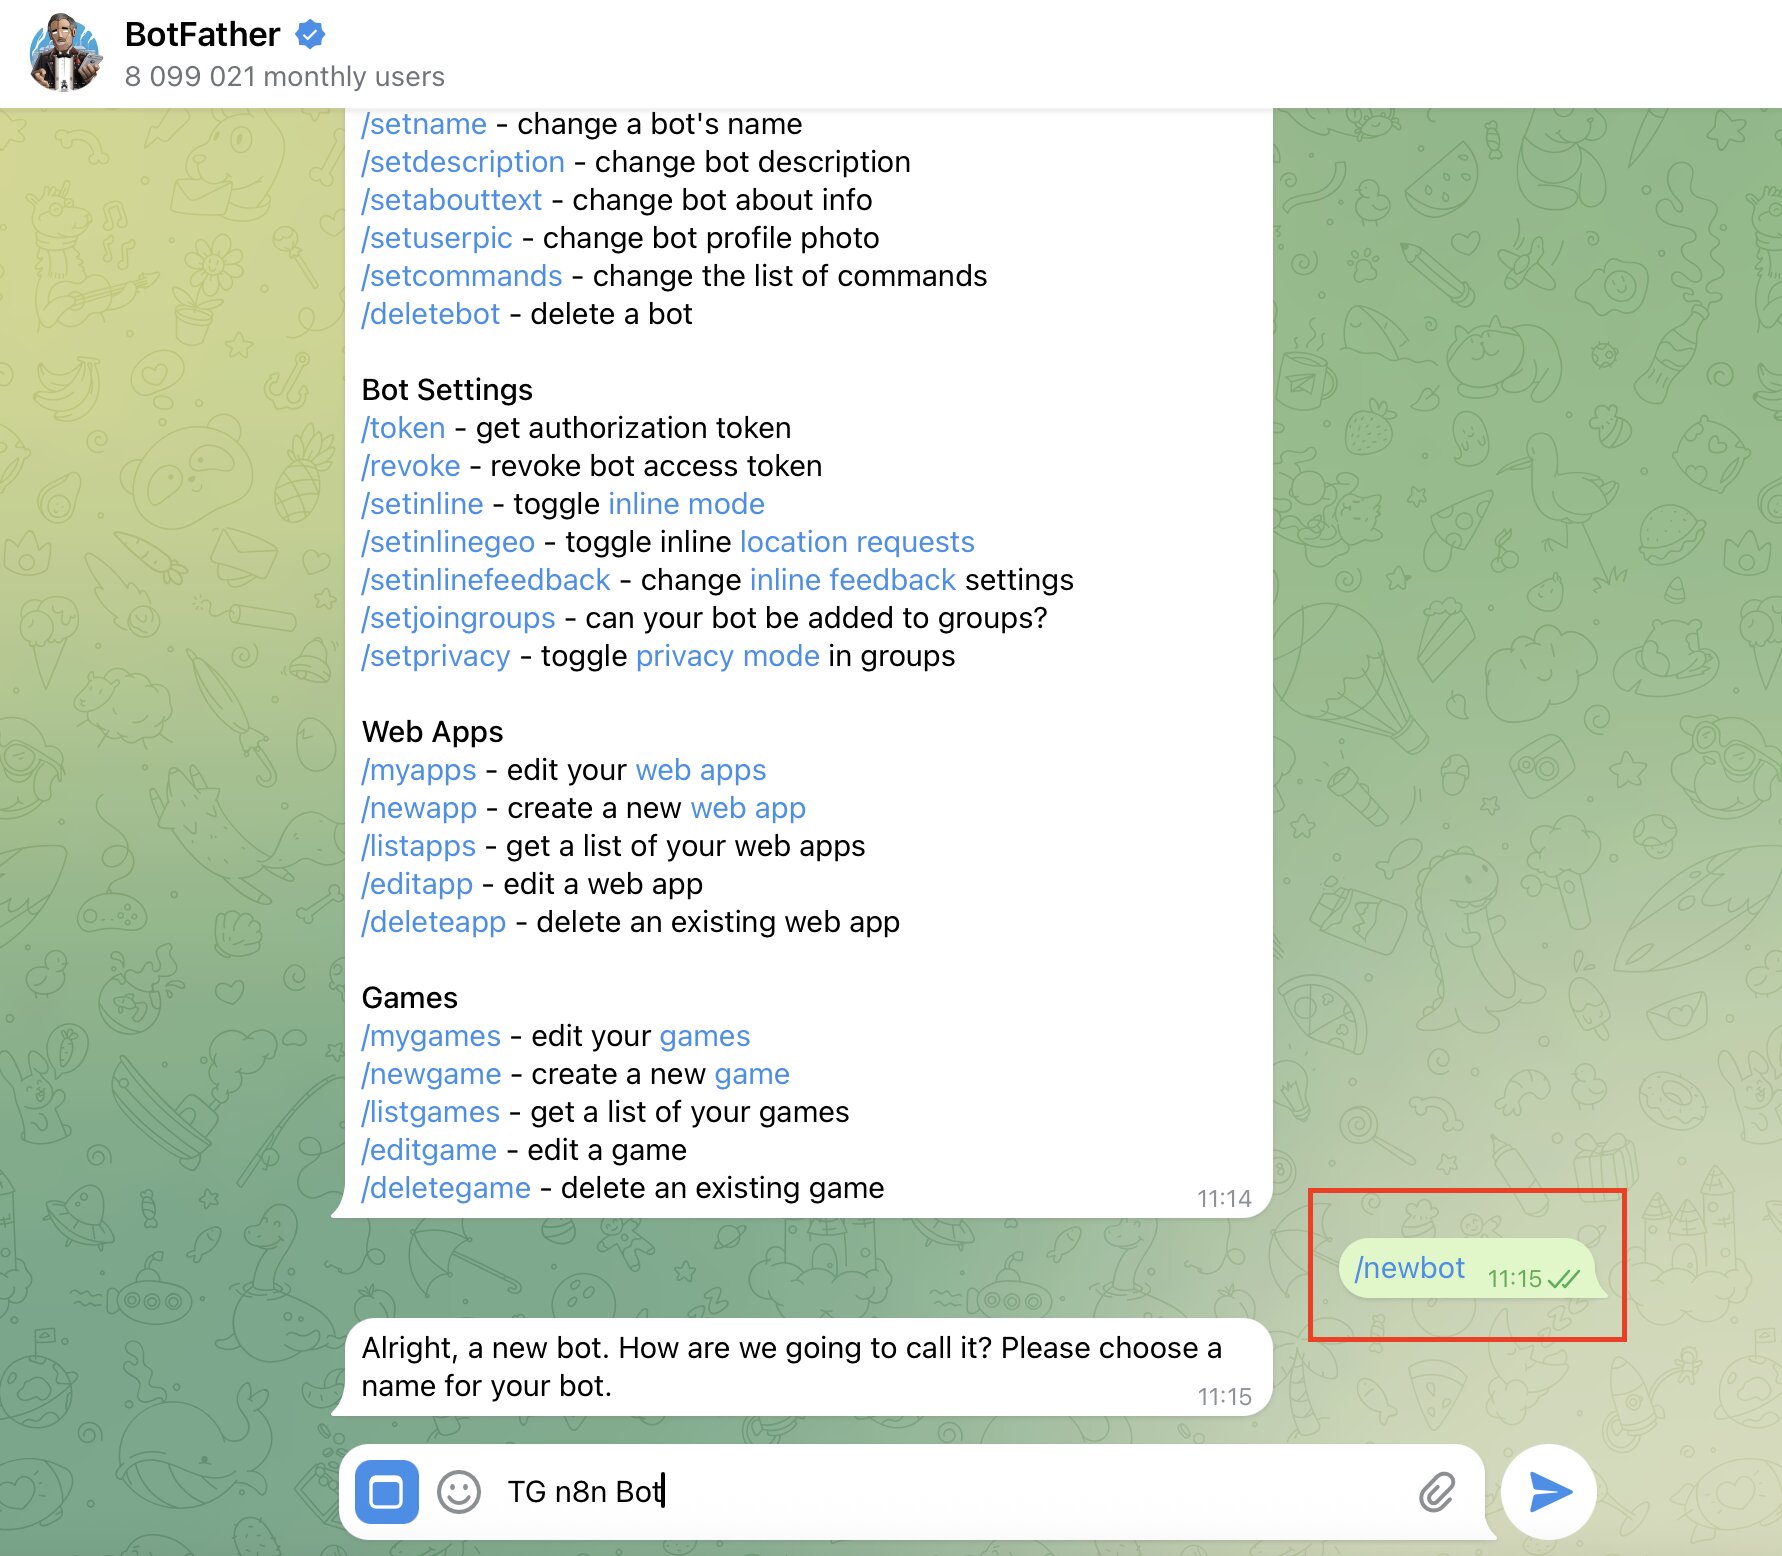
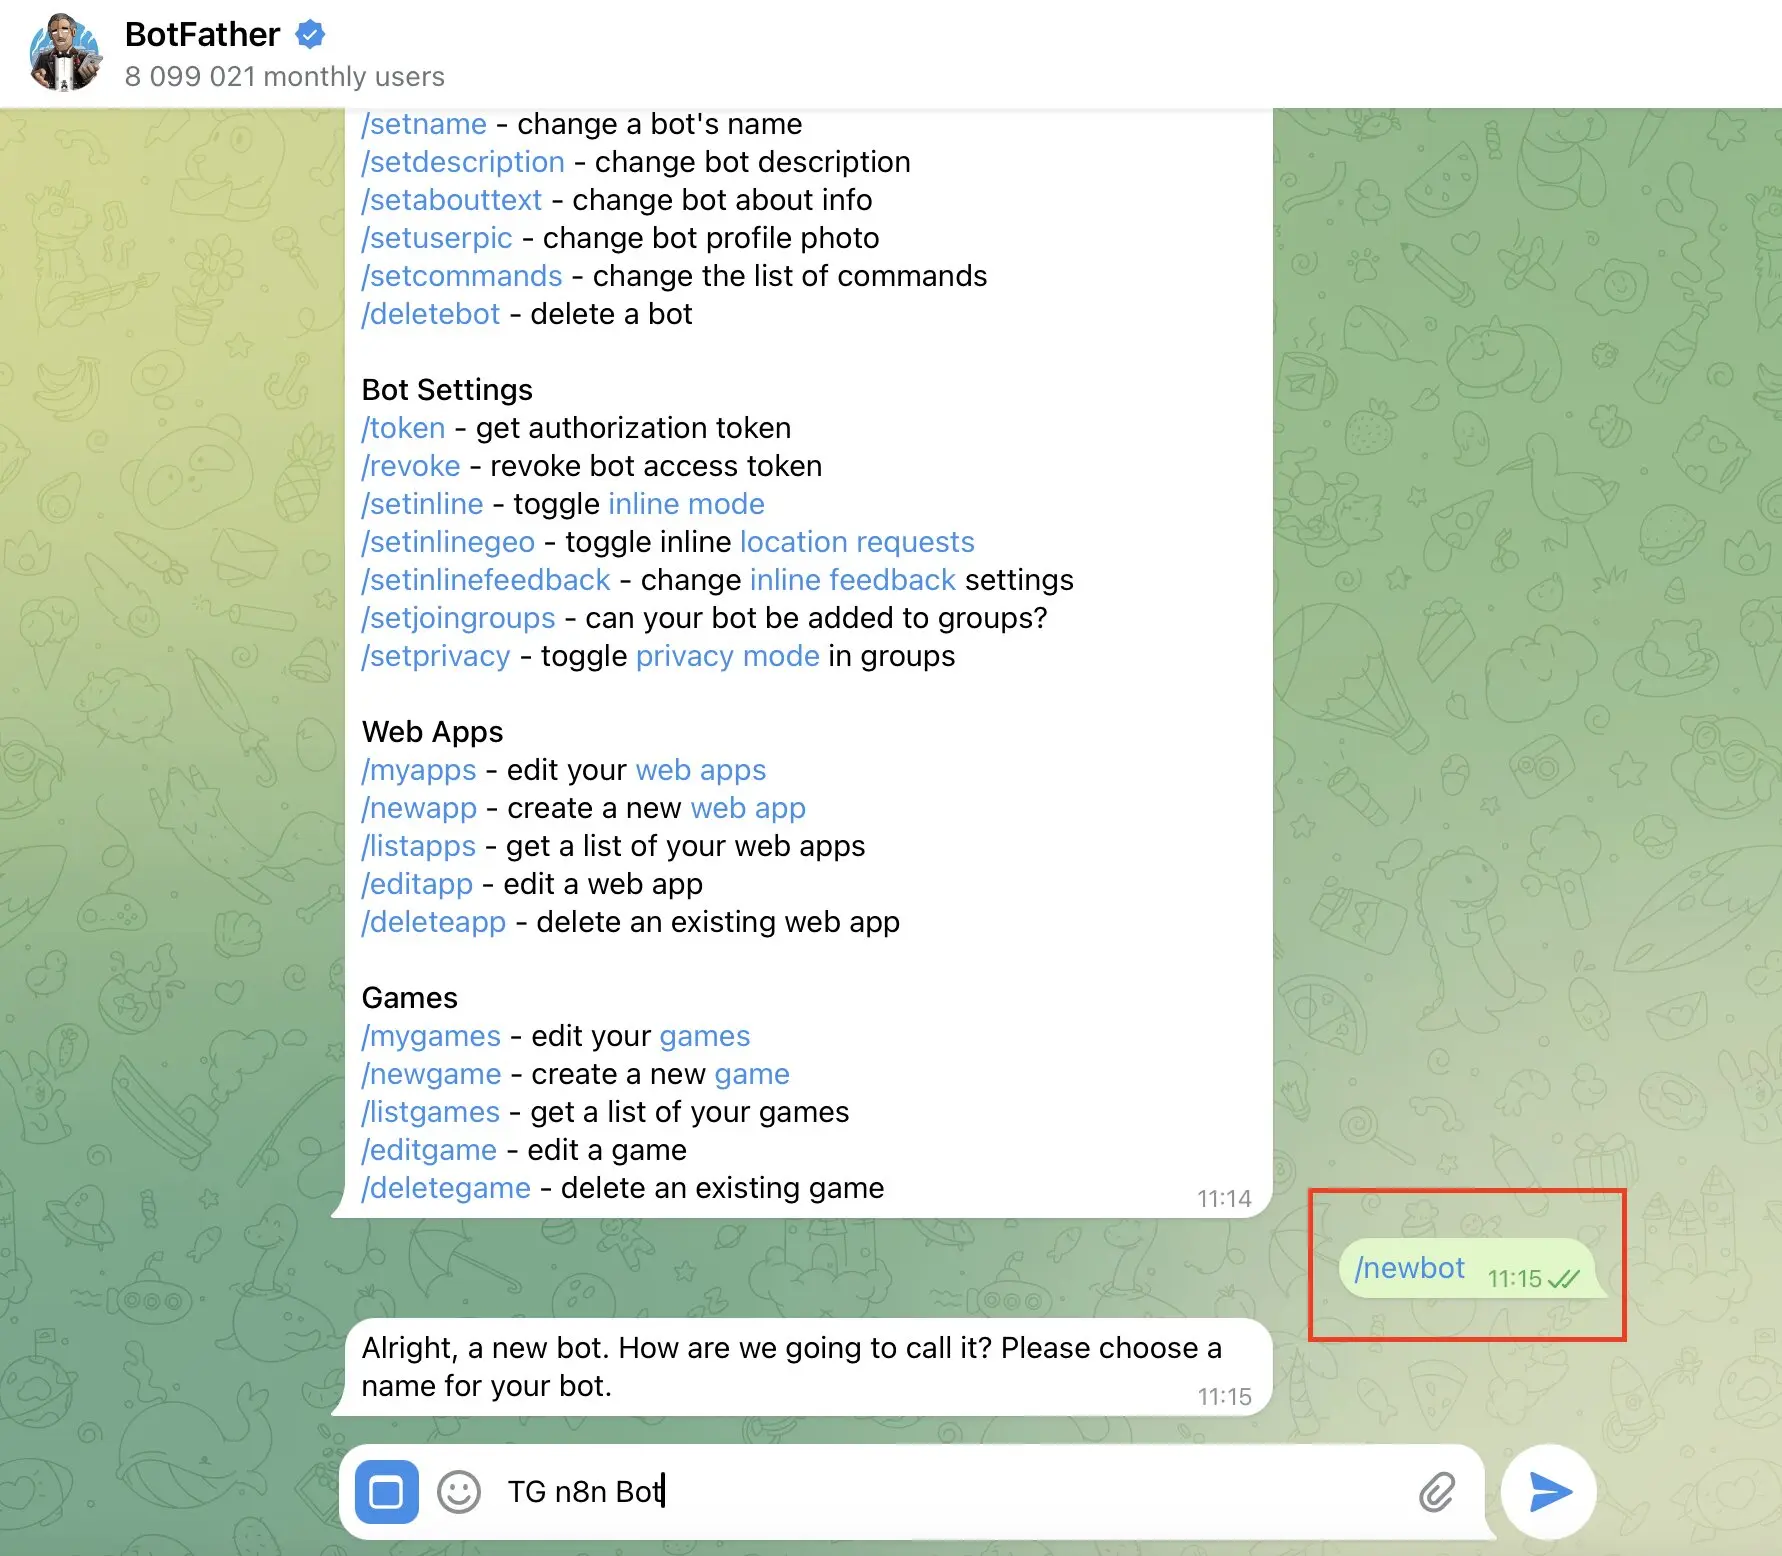
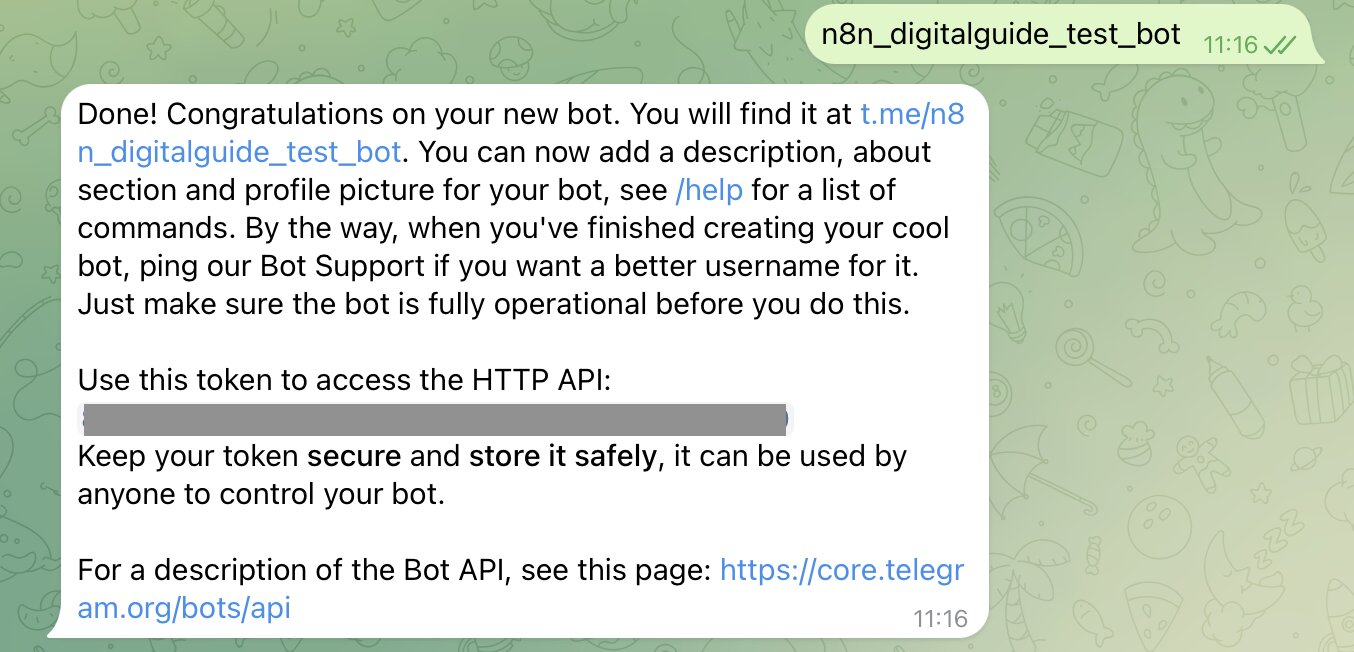
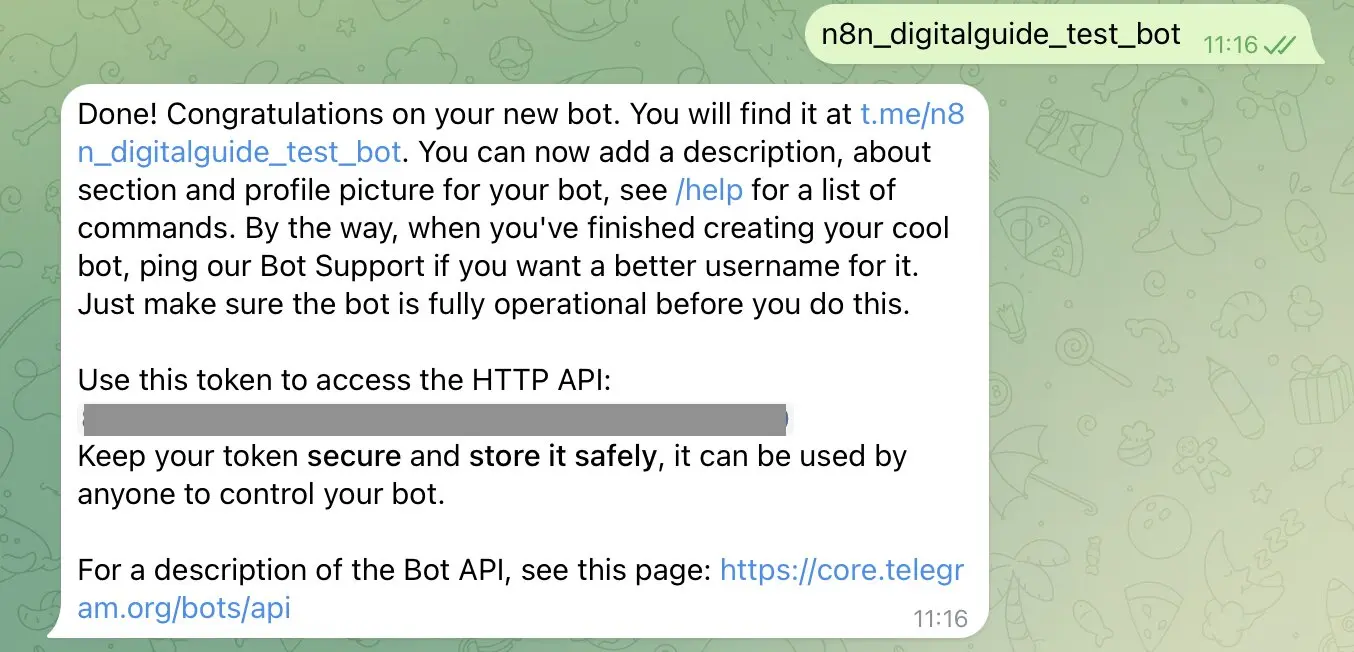
Telegram first asks you to choose any display name for the bot. Then you must define a unique username that ends with ‘bot’, for example ‘n8n_digitalguide_test_bot’. Once the name is accepted, BotFather gives you what’s known as an API token. This token is very important because it will later be stored in n8n so your workflow is allowed to send and receive messages.
Step 3: Prepare n8n and create a new workflow
After you have created the bot, switch to your n8n interface. There, create a new workflow so you can visually design how Telegram messages are processed. In n8n, every single processing step is represented as its own node. This makes the flow very easy to understand, even for beginners, because you can clearly see when a message comes in, when it is passed on to the AI, and when the reply is sent back to Telegram.
Ideally, give the workflow a clear, distinctive name right away. That way, you can easily find it later when you’re managing multiple automations in your n8n instance. Save the workflow as early as possible so your initial changes aren’t lost.
Step 4: Set up a Telegram trigger in n8n
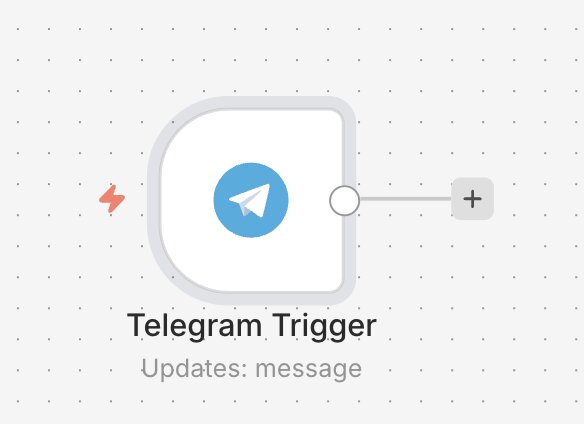
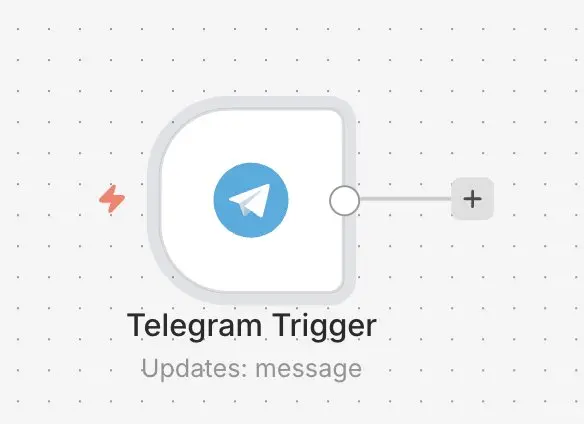
Now add the first important node, which is the Telegram Trigger. This node ensures that n8n automatically reacts as soon as someone sends a message to your bot. Open the node selector in n8n, search for Telegram, and select the appropriate trigger node.
Next, you need to store your bot’s access data. To do this, first create new Telegram credentials in n8n and enter the token you previously received from BotFather. After that, n8n can communicate with your bot. This way, the trigger immediately detects incoming Telegram messages and provides their contents as data in the workflow.
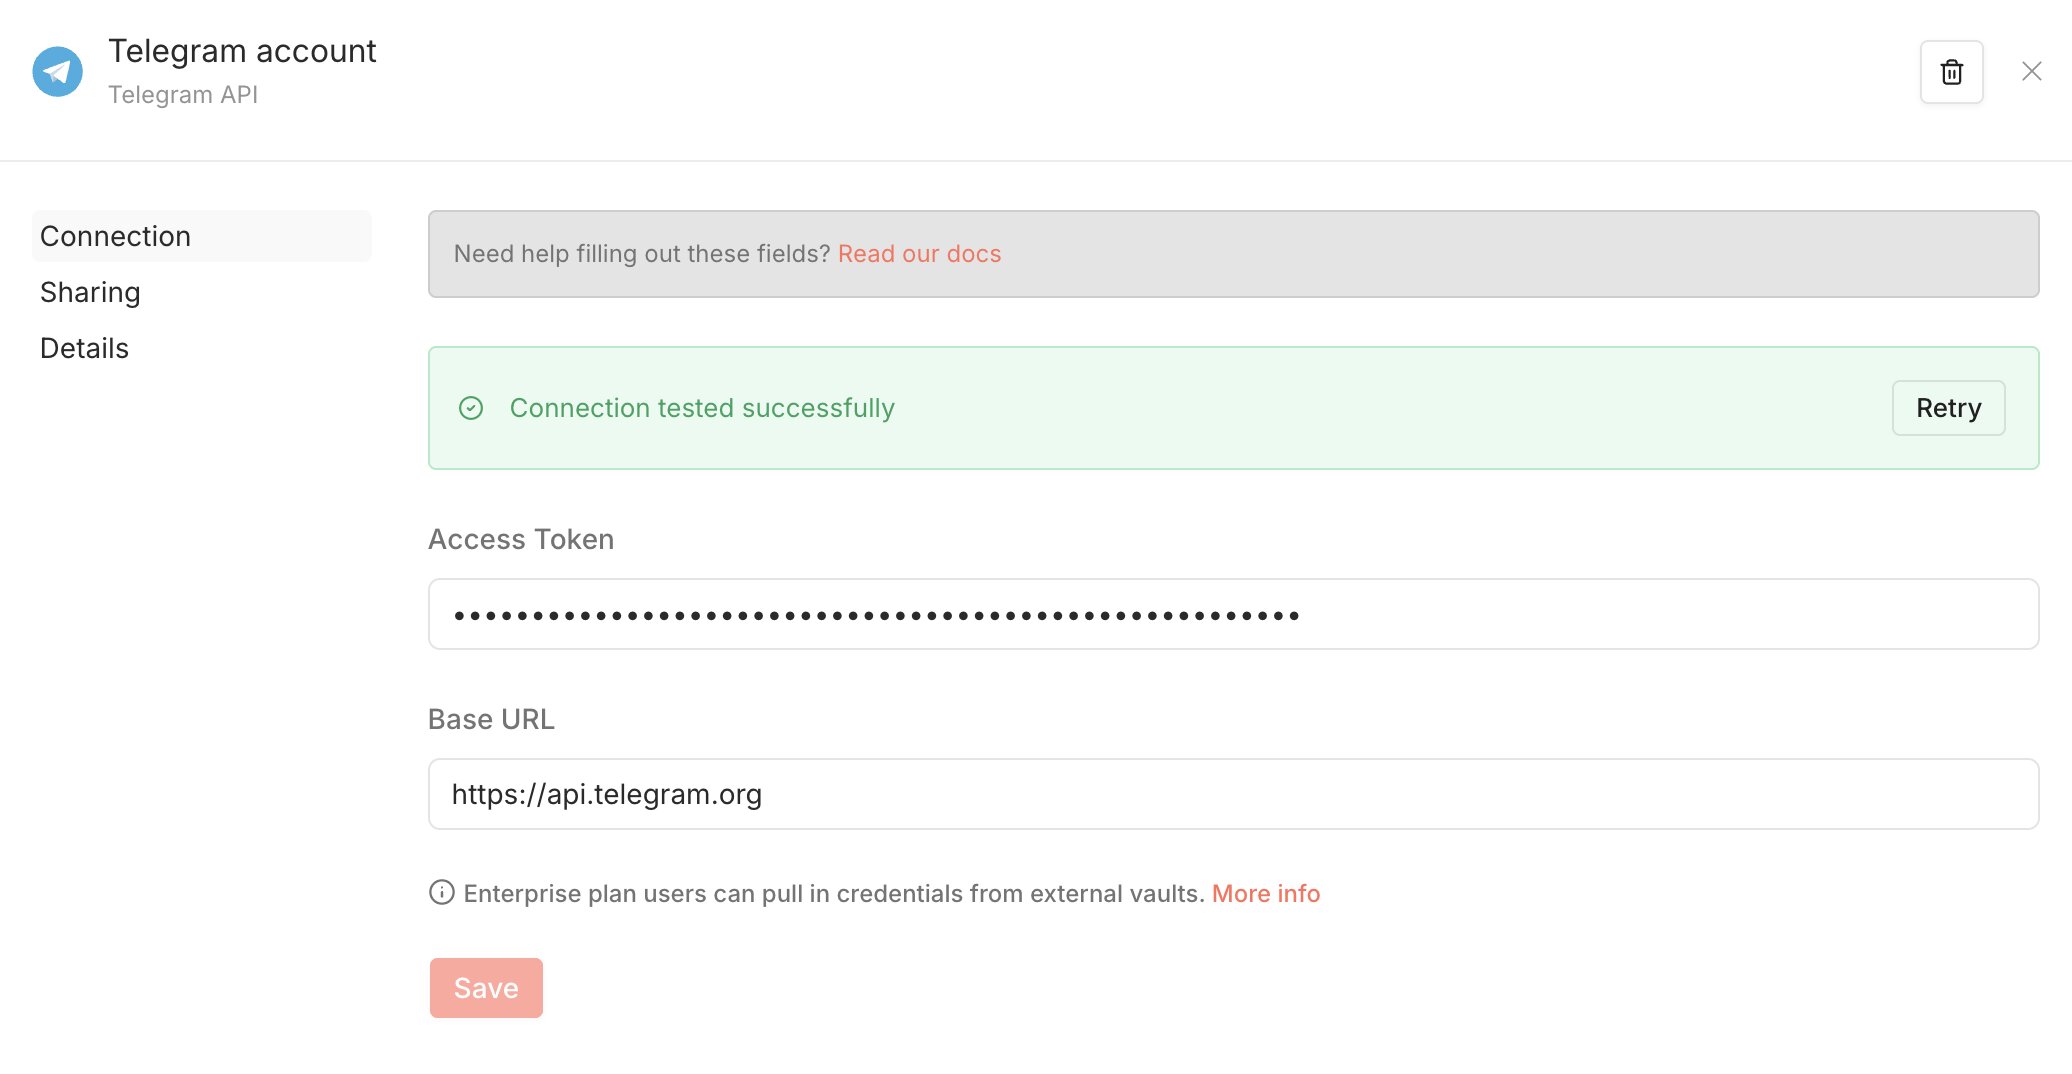
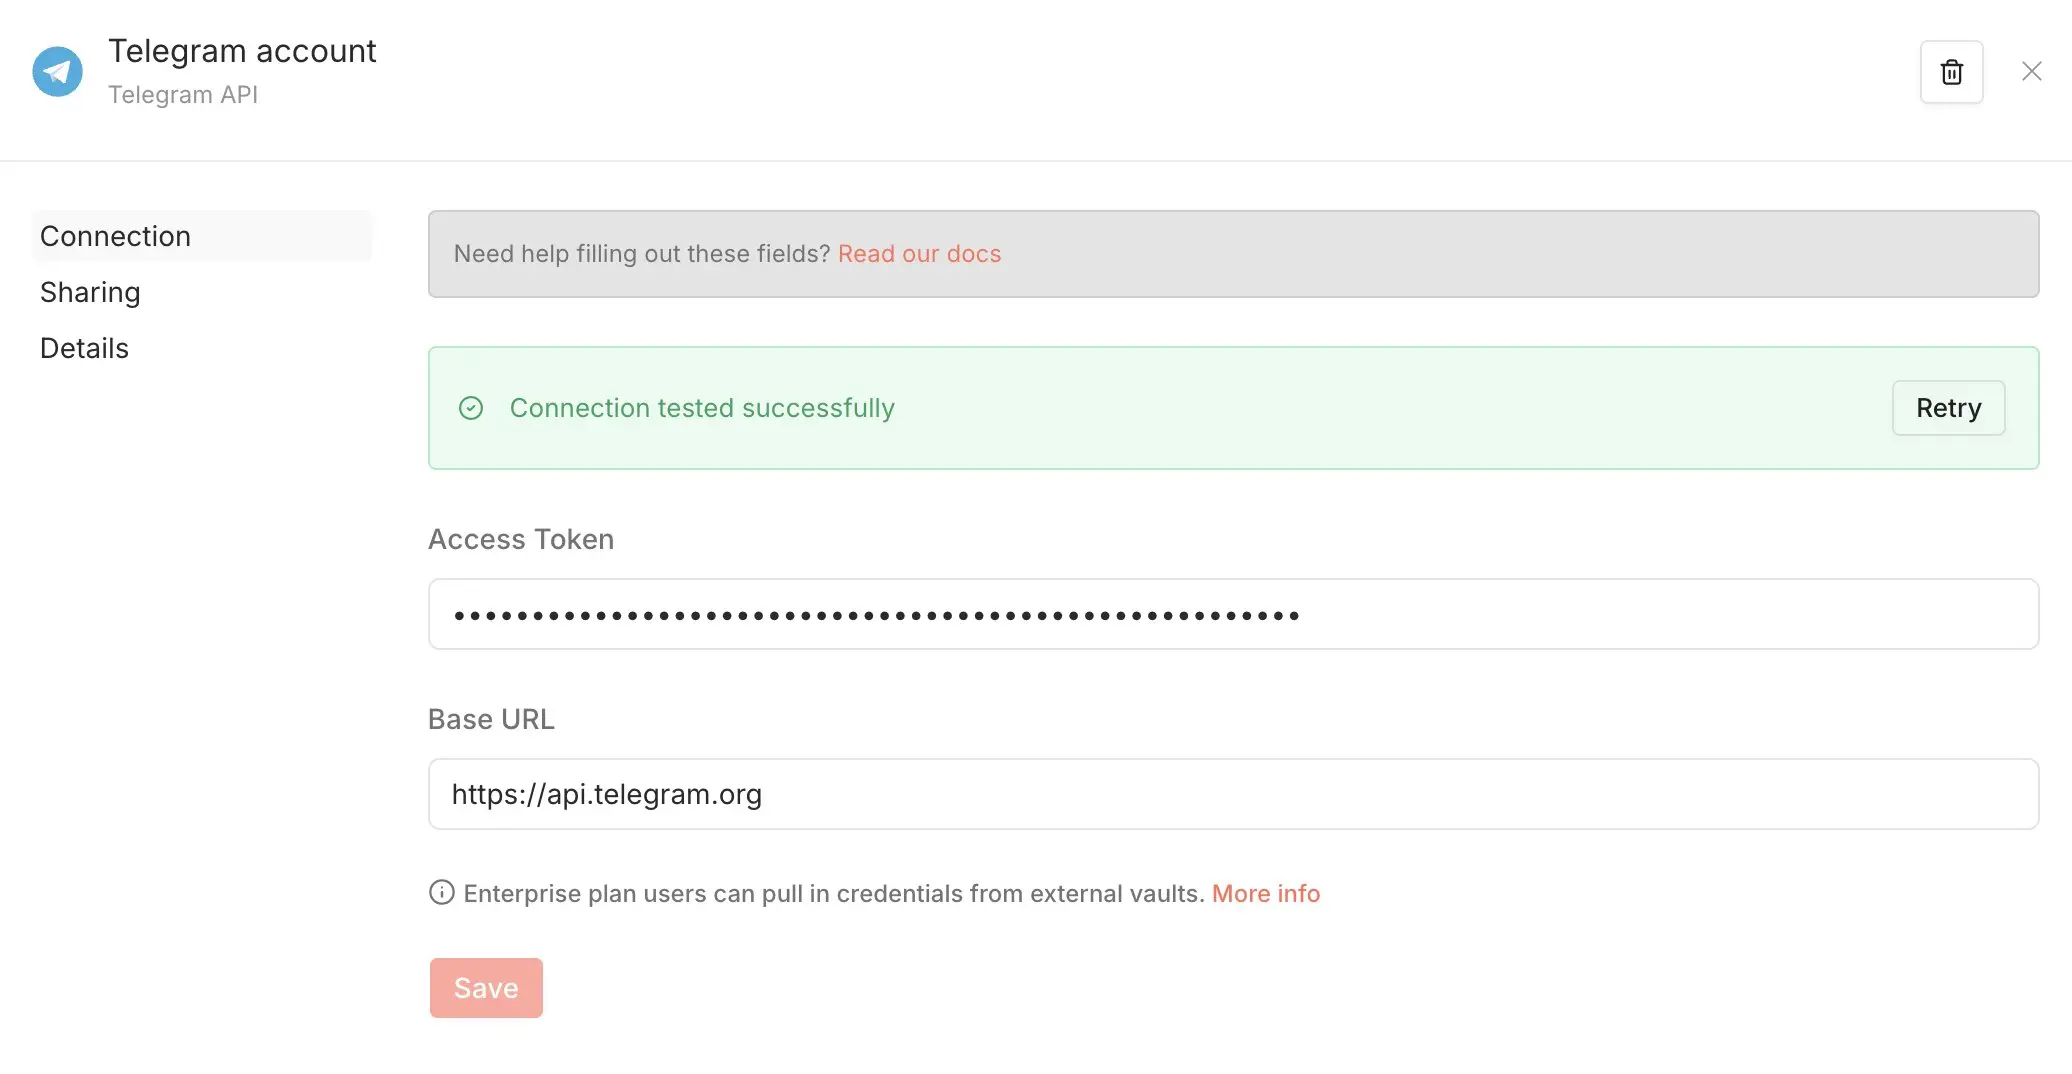
For the Telegram trigger in n8n to work reliably, your n8n instance should be publicly accessible via HTTPS. The reason being that Telegram usually delivers incoming messages to your n8n environment using a webhook. If the instance isn’t reachable from the outside or isn’t properly secured with HTTPS, Telegram can’t correctly call the trigger. So first check whether your n8n URL is valid, publicly accessible, and protected with an SSL certificate.
Step 5: Send a test message to the bot and check receipt
Before you connect the AI directly, you should first check whether your n8n Telegram bot is receiving messages correctly at all. To do this, open your workflow, click the Telegram node, and select the ‘Execute Step’ option at the top of the editor. n8n will then actively wait for incoming events—in this case, a message sent to your bot.
In the next step, switch to the Telegram app. There, search for your bot’s username and open the chat. If you’re using the bot for the first time, you must first click ‘Start’ or send the /start command to activate it. After that, you can enter a normal message, for example ‘Hello’. This message is then transmitted by Telegram to your bot.
If everything has been set up correctly, n8n should receive the message immediately. Switch back to the n8n interface. The trigger node should now show a successful execution, and you’ll see the received data in the output. This data contains all relevant information about the message. This intermediate test is especially important because it lets you quickly check whether the connection between Telegram and n8n is working.
In the output, pay close attention to the data structure. The actual message text is usually located in the message.text field, while the chat ID is stored separately under message.chat.id. These two values are crucial later on for passing the message to the AI and sending the reply back to the correct user.
A typical excerpt of the received data might look like this, for example:
{
    "message": {
        "message_id": 12,
        "text": "Hello",
        "chat": {
            "id": 123456789,
            "type": "private"
        },
        "from": {
            "id": 987654321,
            "username": "exampleuser"
        }
    }
}Step 6: Prepare incoming text for the AI
Next, convert the incoming message text into a format that you can pass cleanly to an AI service. To do this, use an Edit Fields node in n8n. The goal is to reduce the nested Telegram data to the two pieces of information you actually need, which are the message text and the chat ID.
Add a new node and connect it directly to the Telegram Trigger. Open the node and create two new fields. In the first field, enter user_message as the name. For the value, click ‘Expression’ and select the field that contains the message text from the incoming data. In the second field, create chat_id and select the chat ID. n8n then automatically pulls these values from the previous node’s output.
A possible field mapping in the node could look like this:
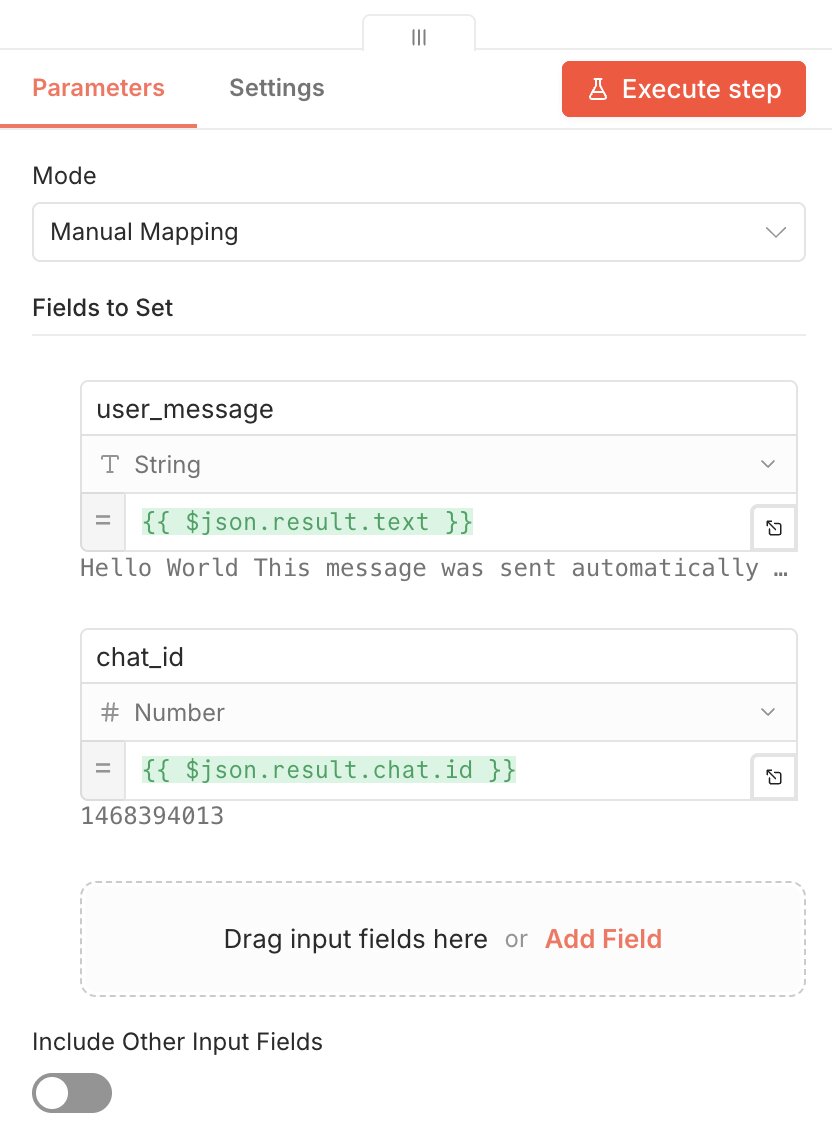
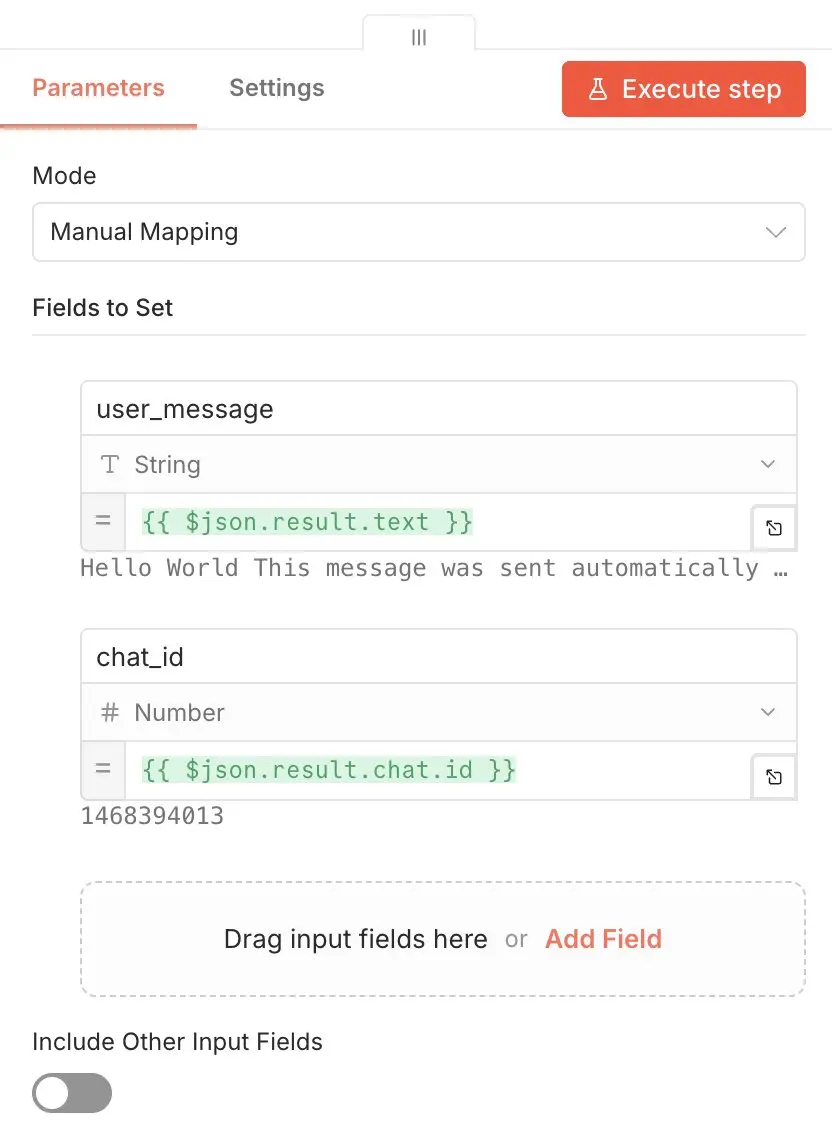
After this step, you have two clearly structured values available that you can pass directly to the AI and reuse to send the response back to the correct chat.
Step 7: Insert AI node or HTTP request for text generation
The next step is the core of your bot, which is AI processing. Depending on your setup, you can use an existing AI node or call an external AI service via an HTTP request. The basic principle stays the same. The text from Telegram is sent to a language model, processed there and then returned to n8n as a response.
In this example, we’ll use the built-in OpenAI node. This lets you access the data from the previous node and create a prompt that fits your specific use case.
Step 8: Extract the AI response from the return data
After the request has been sent to the AI, extract the response from the returned data. The exact structure depends on the provider or node you’re using, so check the output in the n8n node carefully.
A separate Edit Fields node is useful here as well. You can use it to save the AI response in its own field, such as bot_reply. This keeps your workflow clearly structured and helps you avoid complex expressions in later nodes. This step is also helpful if you want to post-process the AI output, for example by shortening it or filtering out certain content.
Step 9: Send the response back to the user with a Telegram node
Once the AI response is available, add another Telegram node to send the message back to the user. In this node, select the action for sending a message. Then enter the previously extracted chat ID as the recipient and use the field containing the AI response as the message text.
This creates a complete loop. Telegram receives a user message, n8n takes over the data, the AI generates a response and Telegram sends it back to the user.
Step 10: Test the complete workflow
Now test the full process from start to finish. Send a normal question to your Telegram bot and check each executed node in n8n one by one. This shows you where the data is passed on correctly and where issues may occur. If the AI response appears in Telegram at the end, the basic setup of your bot is working.
If you encounter errors, check the data at each step of the workflow separately. Typical issues include incorrect field paths, misconfigured API credentials or a response structure that is different from expected. During the first tests, small adjustments are completely normal. Once the test runs successfully, you can easily expand the bot.
Step 11: Improve the bot with simple rules
A working basic bot is a good starting point, but in practice, you’ll usually want more control over how it behaves. That’s why it’s worth adding extra rules to your workflow. For example, you can use an IF node to check whether a message is empty, contains certain keywords or should trigger a fixed default reply. This helps you avoid unnecessary AI requests and improves the user experience at the same time.
It’s also useful to protect the workflow against overly long or inappropriate inputs. For example, you can shorten very long messages or respond with a friendly note. Simple greetings can often be handled more efficiently with a fixed reply instead of sending them to the AI. This keeps your workflow more cost-effective, faster and easier to control.
A simple special rule could look like this:
If message = “/start “, send a fixed greeting. Otherwise, pass the message on to the AI.
Step 12: Activate the workflow and use it in production
If all tests have been successful, you can activate the workflow in n8n by clicking ‘Publish’ in the upper right corner. From that moment on, your n8n Telegram bot automatically responds to incoming messages without you having to start test mode again. The published version now runs in production, as long as the Telegram webhook is accessible.


Three practical ideas for Telegram bots with n8n and AI
A simple question-and-answer bot only scratches the surface of what you can do with an n8n Telegram bot. It becomes much more useful when you connect it to other services, data sources or internal processes. This turns it from a basic chatbot into an automation assistant that not only replies to messages but also handles tasks for you.
1. Support bot for frequently asked questions
A common use case is a support bot that automatically answers recurring questions. Users can ask about opening hours, return processes, products or internal procedures, for example. The message is first sent from Telegram to n8n. From there, an AI can interpret the question and generate a suitable answer based on fixed instructions or existing knowledge content. This means simple standard requests no longer need to be answered manually.
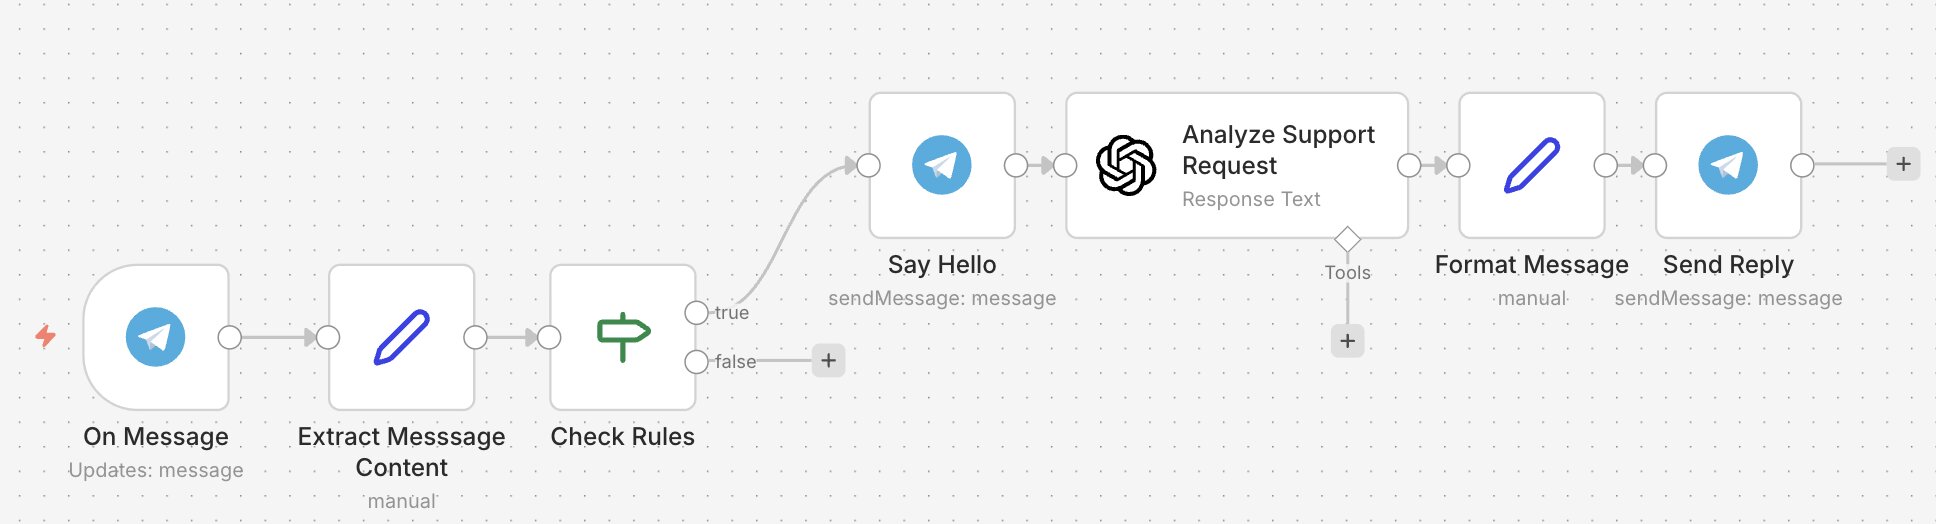
This approach is especially useful if your team regularly receives the same questions. You can expand the workflow so that certain terms are recognised and matched with predefined information. For more complex issues, the bot can forward the request to a person or send an internal notification by email or via n8n to Discord. You could also pass the results on to a ticket system using an n8n integration for Jira. This creates a useful pre-filter that saves time and speeds up responses.
2. Internal assistant for quick team queries
Another practical option is an internal Telegram assistant for small teams or workgroups. Employees can send the bot short questions about project status, appointments, responsibilities or internal information, for example. n8n can pass the request to an AI and retrieve information from other systems at the same time. Possible sources include calendar data, database entries, CRM information or content from internal APIs.
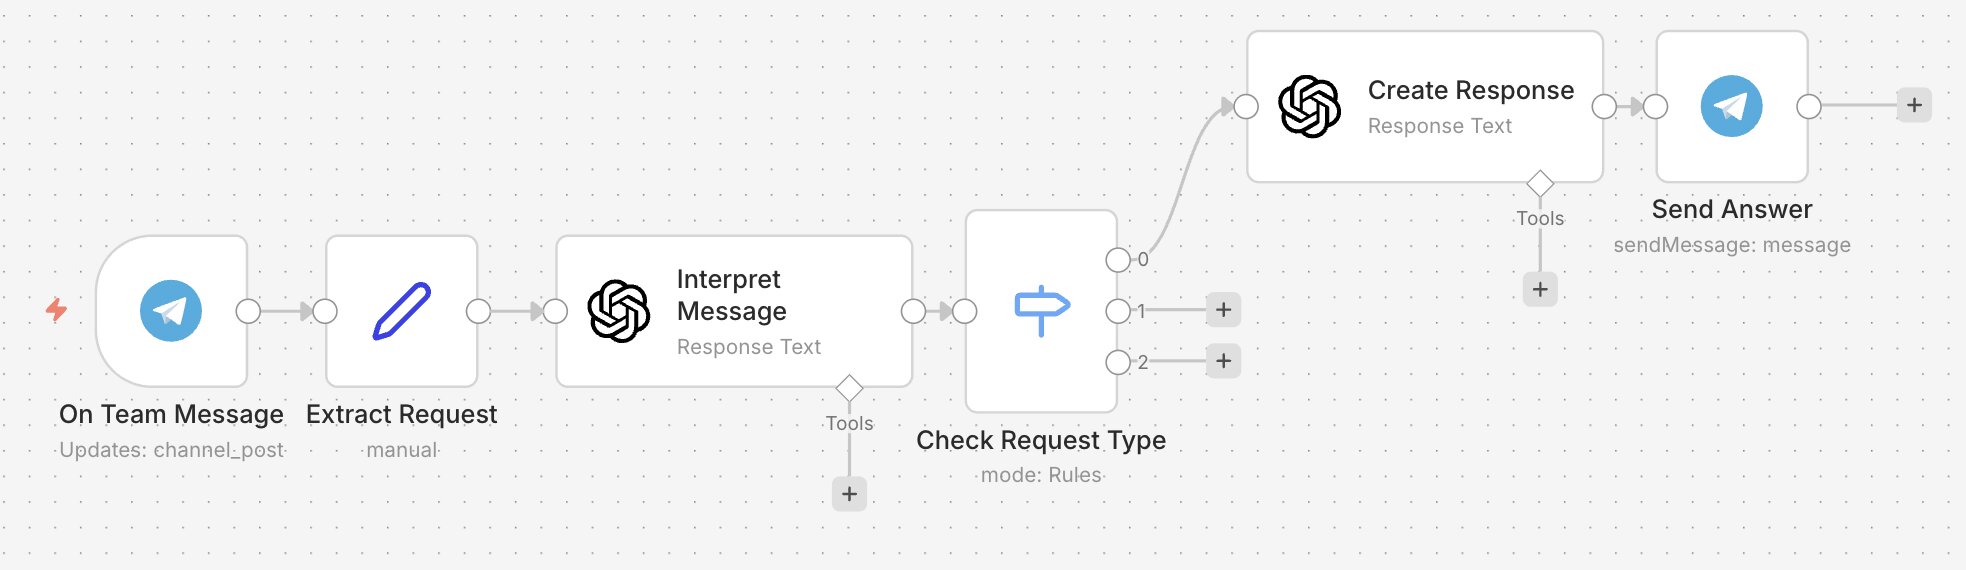
In this setup, the AI mainly interprets the request and turns the result into a clear response. Users don’t need to learn fixed commands and can simply write in natural language. This makes the bot much easier to use in day-to-day work. It is especially useful for smaller automations where people need quick information without opening several tools each time.
3. Automatic content or idea bot
Another option is a Telegram bot that creates content or provides ideas. For example, you could ask the bot to generate social media ideas, email drafts, short summaries, topic lists, or text suggestions. The user simply sends a request in Telegram. n8n then passes this message to the AI, which turns it into a structured suggestion. The result is then sent directly back to Telegram.
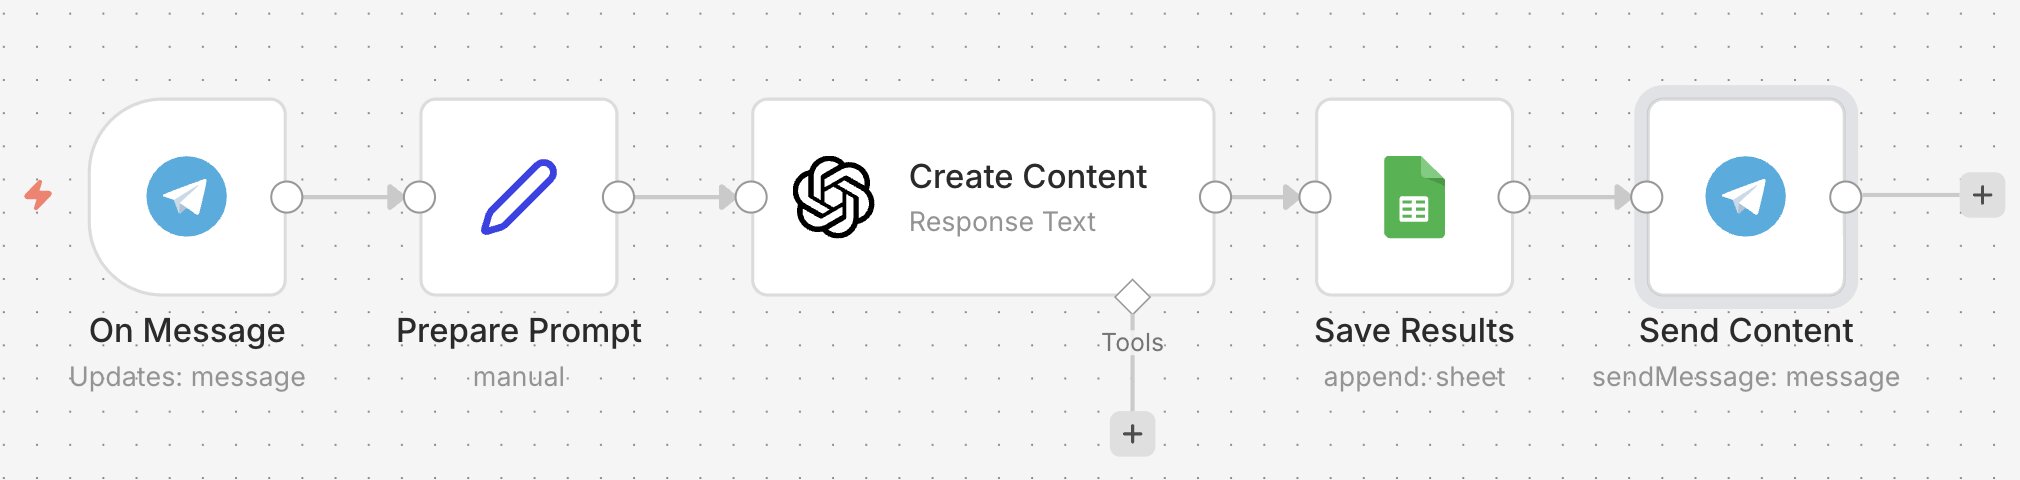
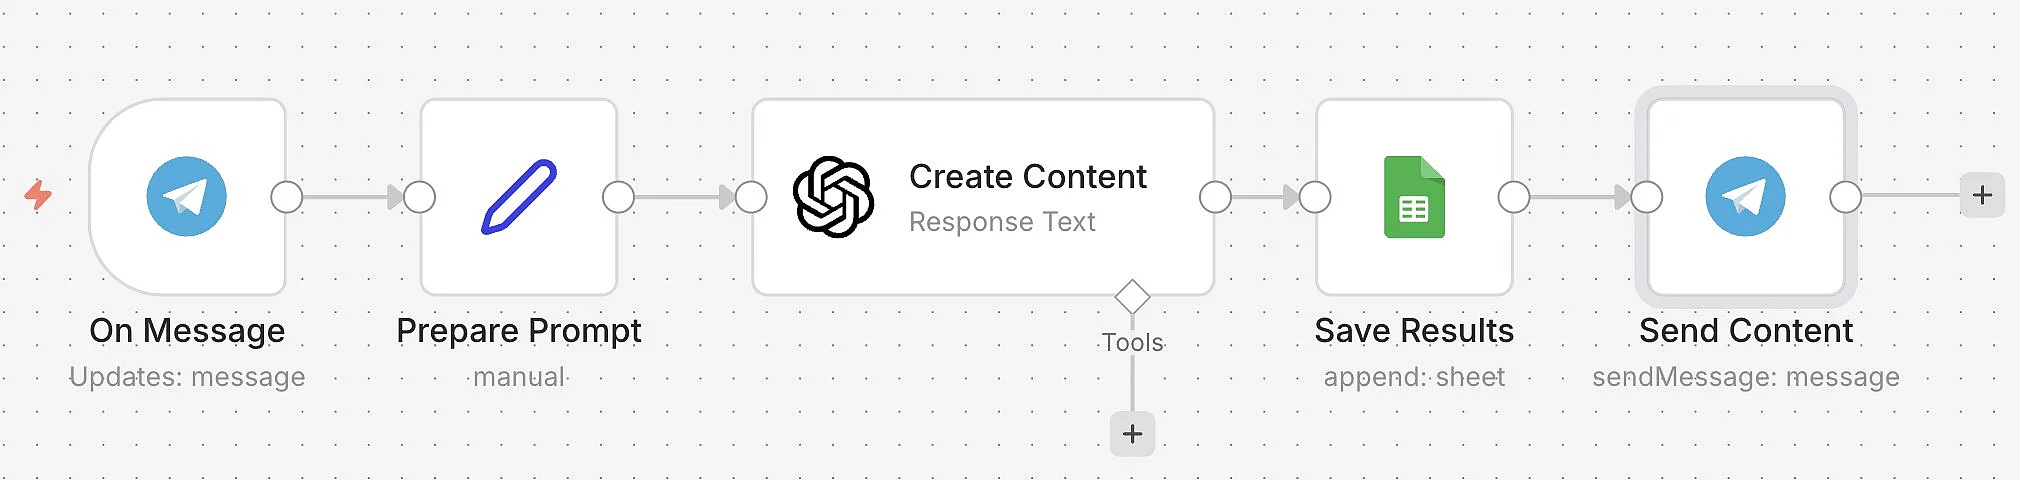
This use case is useful because Telegram works as a quick input channel. You don’t need to open a separate AI tool and can capture spontaneous ideas directly in the messenger. You can also expand the workflow so that results are saved, categorised or forwarded to other systems. For example, useful ideas can be added automatically to Google Sheets or a project management tool.
Reviewer

Christian Heldmaier
Christian Heldmaier is an experienced online marketing and SEO specialist from Karlsruhe. He has been working as an SEO Manager at IONOS since July 2020.