S/MIME: How to encrypt and sign your emails?
When you send an email, you want the message to arrive safely in the desired recipient’s inbox and that they are the first to read it. When you receive emails yourself, you also want to be the only one to read the content and for it not to be manipulated in any way by any third parties. In addition, the specified sender should also be the actual sender of the email and not just pretend to be it. The only way to ensure this is to use encryption and electronic signatures, because without them, it makes it easier for cyber criminals to pounce, despite having spam protection and anti-virus software. A standard procedure that allows you to use both security features is S/MIME, defined in 1999.
Professional Email Address & Personal Domain Name
Give the right first impression with a custom email address and a free matching domain name!
What is S/MIME?
In RFC 1847, two security enhancements were specified for the emmail standard MIME (Multipurpose Internet Mail Extension) in 1995: the format multipart/signed for signing messages, and multipart/encrypted for encrypting them. Four years later, the Internet Engineering Task Force (IETF) released the MIME extension, S/MIME , described in RFC 2633, a standard that supports the first mentioned signature format.
For the encryption, however, the process uses its own application/pkcs7-mime. With S/MIME, you can choose whether you want the email to either be encrypted or signed, or both.
S/MIME encryption and signing is possible across all popular email clients, such as Microsoft Outlook, Thunderbird, and Apple Mail. One well-known alternative that supports both multipart/signed and multipart/encrypted is OpenPGP, which was defined in 2007.
How do S/MIME encryption and signing work?
S/MIME is based on an asymmetric encryption method and therefore uses a key pair, which consists of a private key and a public key. While the public key is shared with all email contacts, the private key is only open for the user. On the one hand, it is needed to send encrypted emails in combination with the recipient’s public key, and, on the other hand, to decrypt received messages. An S/MIME certificate enables the email client to generate and exchange keys – this certificate can be obtained from various providers.
For email encryption to work, each S/MIME message is preceded by header data that provides the receiving client with the information needed to collect and process the content. Among other things, the content type – for encrypted data, for example, ‘enveloped data’ – the corresponding file name (i.e. smime.p7m for signed or encrypted data) or the coding form are specified for this purpose. For example, a possible header for an encrypted email could look like this:
Content-Type: application/pkcs7-mime; smime-type=enveloped-data; name=smime.p7m
Content-Transfer-Encoding: base64
Content-Disposition: attachment; filename=smime.p7m
The S/MIME signature, which can be automatically pinned to the email when composing it, is useful for several reasons: it provides the recipient with the public key for secure communication so that they can also send you messages with encrypted content. In addition, the signature proves to the recipient that you sent the email. Unlike PGP, adding a signature does not result in cryptic characters appearing. If the receiving email client encounters inconsistencies when checking the received signature, the legitimacy of the message won’t be confirmed, which could mean that the content has been manipulated.
If no digital signature is used, the public key can also be passed on in other ways, for example, by publishing it on a key server, or on your own website, or by passing it on in file form on an external storage medium.
How do you obtain an S/MIME certificate for your own email communication?
As previously mentioned, using S/MIME requires a certificate (X.509). Basically, it is possible to create one yourself, however, you first need a root certificate, which also needs to be generated in this case. Furthermore, all communication partners must first import this root certificate before the actual key exchange can be initiated. The much simpler and less complicated solution is to purchase a certificate from an official certification authority where there are both paid and free versions available. Generally, the available certificates fall into the following three classes:
- Class 1: The certificate created by the certification authority ensures the authenticity of the specified email address.
- Class 2: The certificate assures the authenticity of the specified email address and the associated name. The company is also confirmed, if relevant. The verification of the information takes place via third-party databases or ID card copies.
- Class 3: These certificates differ from class 2 certificates since the sender needs to identify themselves personally.
If you want to encrypt your emails with S/MIME and look for a certificate, you should not lose sight of its core function: it should protect your email communication by preventing messages from being manipulated and stopping any that are. For this reason, it makes sense to put a lot of effort into choosing the most trustworthy provider.
A recommended service, whose certificates are claimed to be trusted by 99% of all email clients, is Sectigo (previously known asComodo). The certification authority, which is known for high-quality SSL certificates, offers a choice of certificates for private use with its ‘Free Secure Email Certificate’ (starting from £13.00 per year). ‘Secure Email Certificates’ (from £30.00 per year) provide a solution for businesses that want to implement a safe end-to-end email encryption with S/MIME. A reputable partner for creating free certificates is the Italian web hosting provider Actalis.
How to set up S/MIME in your email program
To incorporate the email security process into your email client, you’ll need the S/MIME certificate – so researching providers is the first step to getting a secure inbox. You then have to create a personalised certificate and install it. The exact procedure varies slightly, but it is generally similar for all providers. After installation, configure the respective email program in such a way that it uses S/MIME and the integrated certificate. In general, the setup process is completed by restarting the client, which then unlocks specific features for manual or automatic encryption or for signing messages.
The following sections provide detailed instructions for setting up S/MIME on Windows and macOS desktop systems as well as on iOS and Android mobile systems. The aforementioned free certificate service, Actalis, is used as the certification authority.
Setting up S/MIME on Windows – how it works
If you want to use the S/MIME technology on a windows PC, but you don’t want to invest in Outlook or Microsoft Office, you can use the free alternative Thunderbird instead, which is a Mozilla product like Firefox. If you haven’t already installed the client and set up an account, you should make that your first step. Then, in order to enable S/MIME encryption and signing for this account, follow these steps:
- Go to the Actalis website and follow the link “Free S/MIME certificates” to request and create a free S/MME certificate.
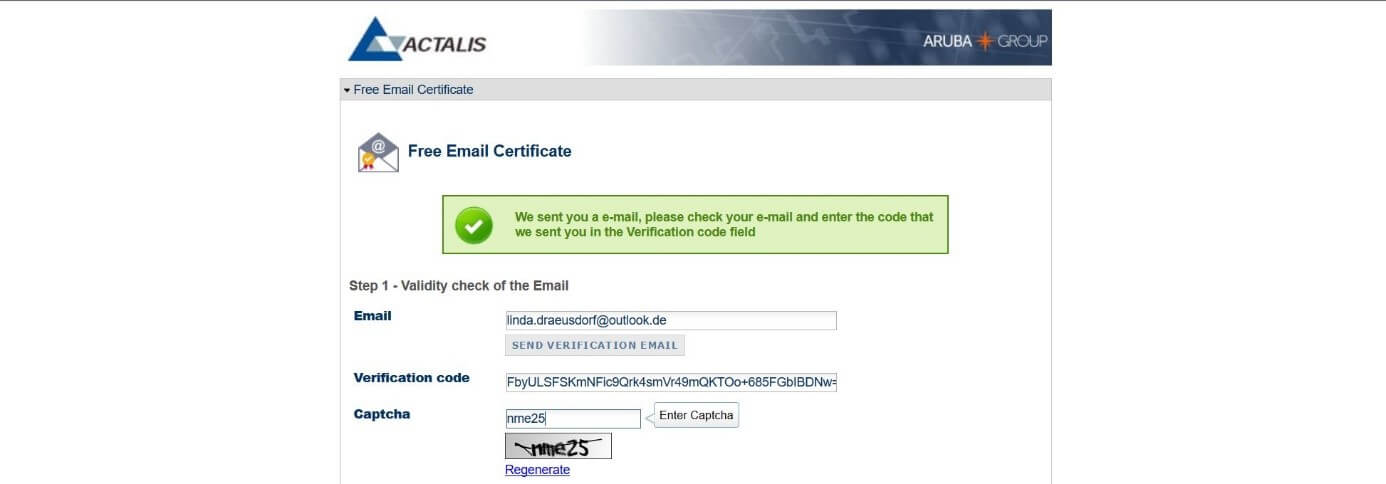
- A form will open and prompt you to provide the email address for which you want to generate a certificate. Then click on “Send Verification Email”. Actalis then sends your individual registration code to that email address. Copy the code into the “Verification code” line and fill out the captcha field requirement:
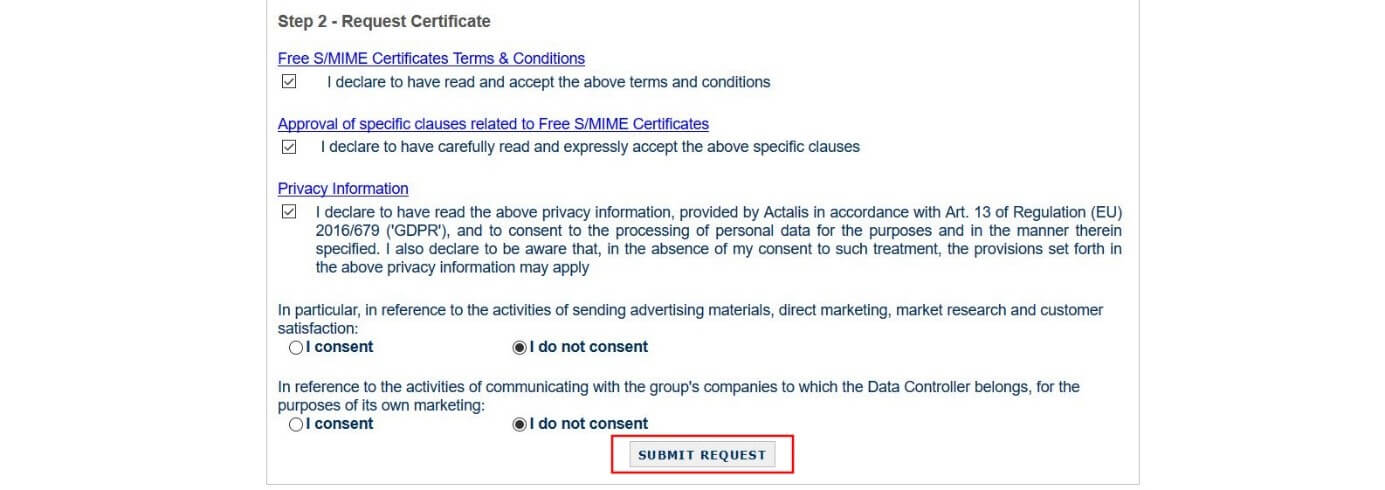
- In the next section, you must confirm that you comply with the general conditions and other specific provisions attached to a free S/MME certificate by ticking the boxes next to each statement. By ticking the third box, you confirm that you have read the above information and agree to the use of your data provided by Actalis. You can opt out of having your data collected for marketing purposes by selecting the “I do not consent” tickbox before finally clicking “Submit request”.
- Your browser will then provide you with a personal password to use the S/MME certificate, which will be sent to the specified email address. Since you won’t receive this password through any other means, it’s worth writing down the password in another location, or printing off a copy of the page.
- To use it in Thunderbird, you must first download the certificate in the mailbox and unzip it using any directory file (ZIP file).
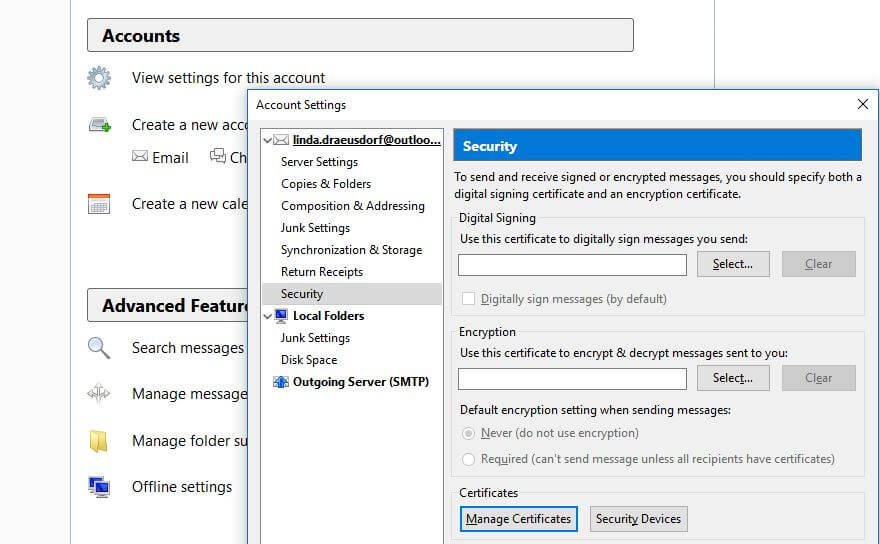
- Now start Thunderbird and open the account settings. Under the menu item “Security”, you will find the “Manage Certificates” button, which will take you to the corresponding menu.
- Select the “Your certificates” tab and import the previously saved certificate by clicking “Import” and selecting it. You then need to enter your password to complete the process.
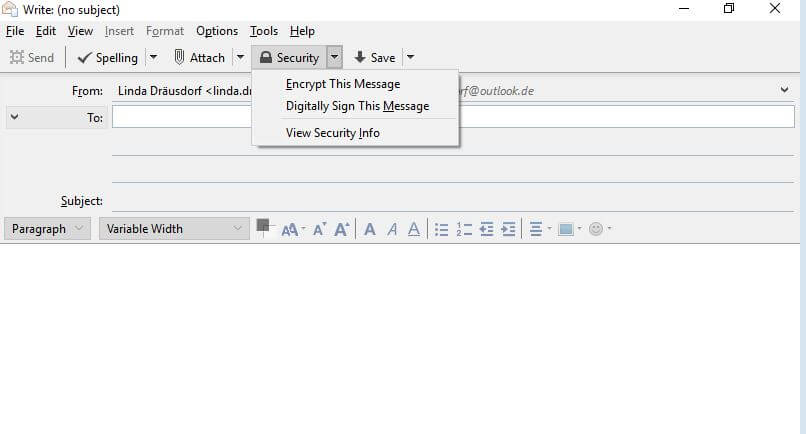
- In the security menu, you can now select the S/MIME certificate for encryption and signatures. In addition, you can set the digital signature as the default and make encryption mandatory by selecting “Required” under the default encryption settings. If you compose an email, you can also select or deselect the procedures individually using the S/MIME button in the toolbar:
How does the S/MIME setup work for macOS and iOS?
Apple devices already have a solution installed in the form of in-house client “Mail”, which enables you to encrypt and sign emails with S/MIME from the very beginning. If you have an email account, you can create a certificate directly with Actalis without having to install any further programs. The procedure is the same as for Windows: go to the Actalis website, click on “Sign Up Now” and then create the certificate based on your personal data. Then follow the instructions to install the certificate and set up S/MIME encryption:
- Open the email sent by Actalis and download the certificate to any folder. The resulting file can be opened on macOS by double-clicking on it and adding it to the keychain administration. If you want to use S/MIME for your iPhone or iPad, you must first convert the certificate to the .p12 format. You can then send it to your mobile device by email.
- After installation, all you need to do is start Apple Mail to integrate the encryption and signing process.
- You can now test S/MIME by sending yourself an encrypted and signed message. To do this, you will find two corresponding buttons in the email window (lock for encryption, gear for signature). Both symbols are also found in an additional line under the subject of the rest message if the encryption and signature worked as planned.
How to configure S/MIME for your Android device
Like Windows, Android does not have its own client for integrating S/MIME. However, there are several applications that support the process and can be downloaded from the Google Play Store. One of the free solutions is the MailDroid application, developed by Flipdog solutions, although you have to pay if you want the ad-free version. Just like with setting up S/MIME encryption and signatures on Windows and macOS, you will first need a valid certificate, which you can generate as described above. The next steps are as follows:
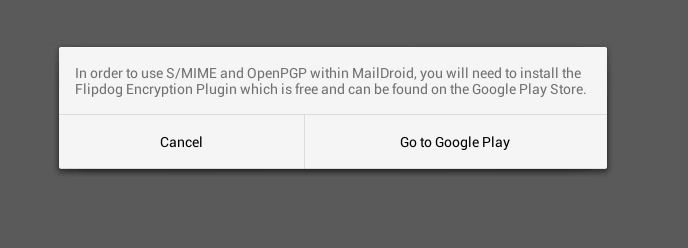
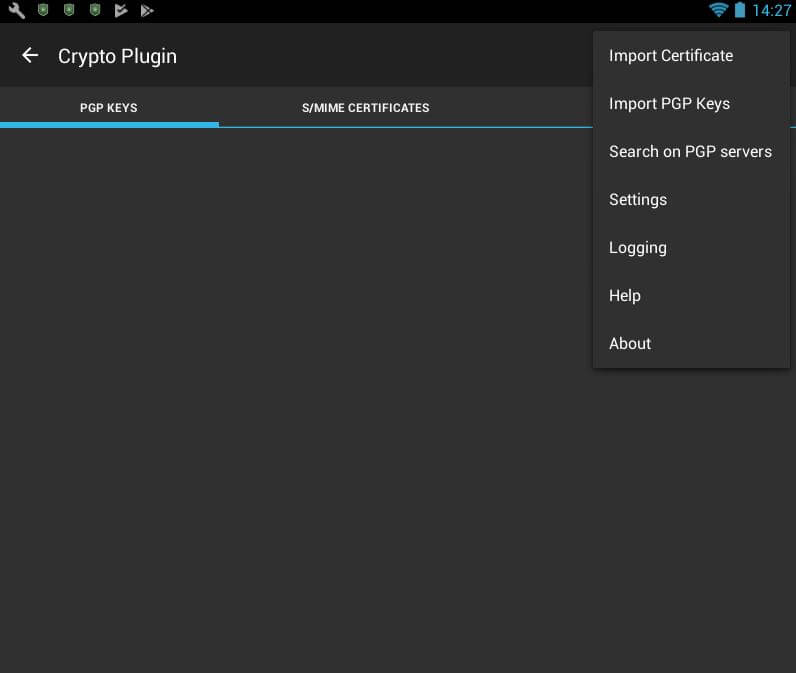
- MailDroid has integrated buttons for encrypting and signing your emails as default settings. To use these functions, however, you need the free FlipdogSolutions Crypto plugin, which can be downloaded in the first step.
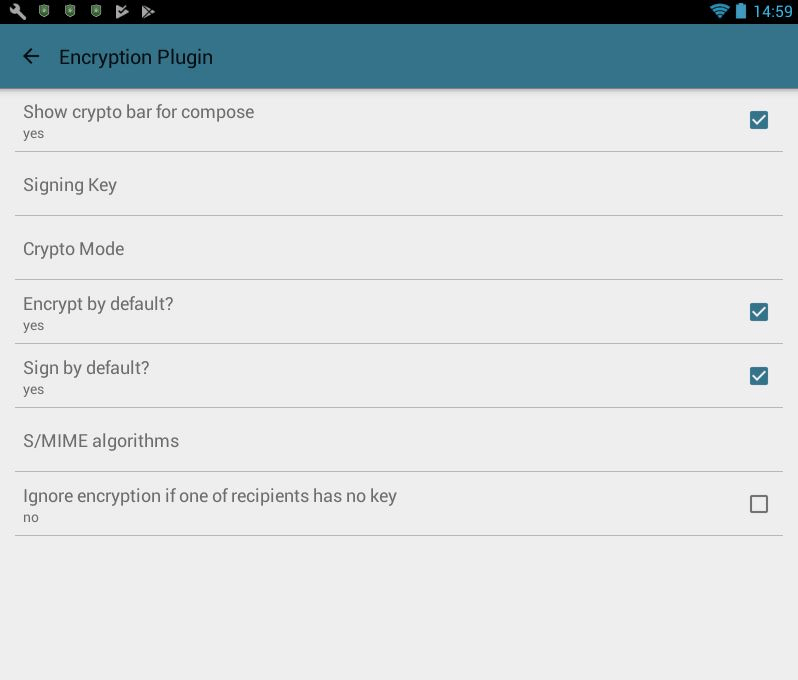
- Go back to MailDroid and open the settings menu. Under the menu item “Encryption plugin”, you can now specify the certificate and the desired S/MIME configuration. By ticking the box, you can decide whether encryption and signing should be carried out by default or whether the encryption should not be used if the party doesn’t have the key they require.
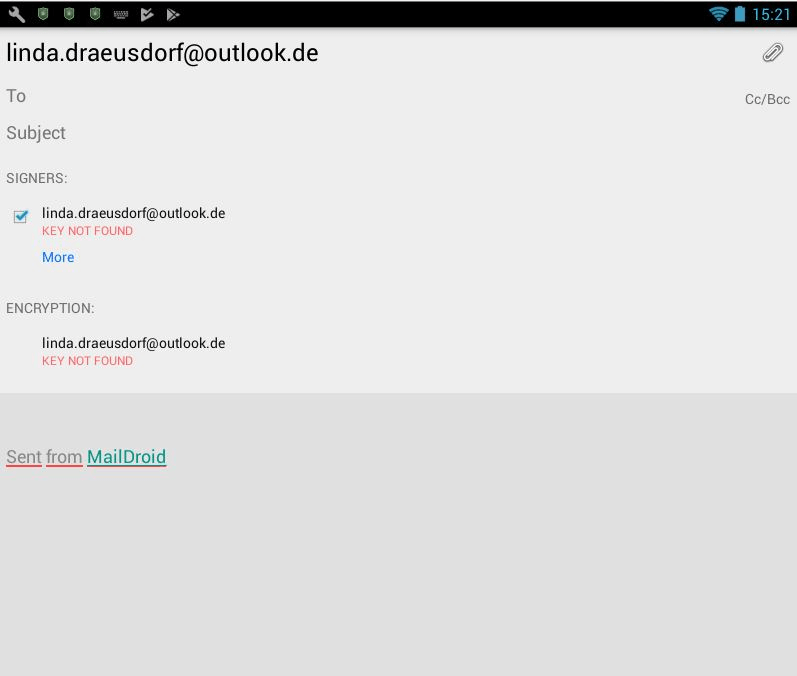
- If you compose messages from now on, encryption and the signature will be added automatically – as long as you have chosen this as an option in the previous step. Otherwise, you can use the buttons at the end of the message window to activate the protection mechanisms. If coding and signing do not work because the certificate or a key is invalid or has expired, for example, MailDroid will clearly display this:
Hosted Exchange with IONOS
The prefect solution for your business! Improve your productivity with the latest version of the world’s leading email and calendar solution hosted by IONOS!
