

What is Google Tag Manager and how does it work?

If you integrate external services into your web project, you normally have to juggle a large number of code snippets. In addition to requiring some programming know-how, this also demands a high level of oversight. To address this, Google released Google Tag Manager a few years ago, which significantly simplifies integrating different codes.
What is Google Tag Manager?
The Google Tag Manager (GTM) is a web-based tag management system from Google that lets you centrally manage tracking, marketing, and analytics tags without having to modify the source code directly every time you make a change. Instead of manually inserting individual snippets into your website or app, you control all tags through a single interface and publish versioned changes with just a few clicks. With these tags, you can analyse and evaluate user behaviour on your website to improve your UX. Originally, GTM was primarily intended for Google services like Google Analytics or Google Ads, but today it supports a wide range of third-party tags, including:
- Tracking, remarketing, affiliate, and conversion tags
- Integrations for consent management platforms (CMP)
- Testing tools or personalisation solutions
- Custom JavaScript tags
In today’s tracking landscape, Google Tag Manager plays a central role in:
- implementing Google Analytics 4 (GA4),
- integrating conversion tracking for Google Ads,
- setting up Consent Mode v2,
- enabling server-side tracking with server-side tagging,
- using a structured data layer to pass event and e-commerce data.
- Our experts run your campaign
- Increase your online visibility
- Save money thanks to greater efficiency
How does Google Tag Manager work exactly?
Google Tag Manager (GTM) acts as a central control unit for tracking and marketing tags. After you add a container snippet to your website’s source code once, this connects your site to the GTM platform. All additional tracking codes are no longer embedded directly in the HTML code, but are managed in the container via the tag manager’s web-based interface.
In Google Tag Manager, you create tags that send specific data to analytics or advertising platforms. Triggers define when these tags fire, such as when someone views a page, clicks a button, or submits a form. You can test changes first and then publish them as a new container version. This allows you to adjust tracking flexibly without editing the source code each time.
Sensible data processing using server-side tagging
In addition to the classic web container, Google Tag Manager also supports server-side tagging. This requires an additional container of the ‘Server’ type, which does not run in the browser but on a dedicated server or in a cloud environment.
Unlike traditional client-side tracking, events are not sent directly from the browser or web container to third-party services such as Google Analytics or Google Ads. Instead, the data is first sent to your own server endpoint. The server container processes this information and then forwards it to the relevant target platforms in a controlled way. This model offers several advantages:
✓ Greater data control: You decide which parameters are passed on to external services.
✓ More flexible data processing: Event data can be filtered, adjusted, or enriched on the server side.
✓ More robust data collection: Because fewer third-party scripts run directly in the browser, tracking can be less affected by ad blockers and browser restrictions.
✓ Better foundation for privacy and consent logic: Sensitive information can be anonymised or removed before it is forwarded.
However, server-side tagging does not automatically replace legal requirements such as consent prompts. Even in server-side setups, consent decisions must be taken into account and processed correctly. For smaller websites, a classic web container is usually sufficient. For larger, data-driven projects, especially in e-commerce or performance marketing, server-side tagging can be an important building block of a modern tracking architecture.
Tags, triggers, and variables in Google Tag Manager
For the container to correctly capture the desired events, interactions, and states and forward them to analytics, marketing, or third-party services, three core components work together in Google Tag Manager: tags, triggers, and variables. GTM provides numerous templates for all three elements. You can also use custom configurations or custom code. The following brief overviews explain exactly what roles tags, triggers, and variables play.
Tags
Tags are the central control units in Google Tag Manager. They define which information is sent to which services. Functionally, a tag corresponds to a tracking or marketing snippet, but instead of being embedded directly in the source code, it is managed centrally in the container. Typical tag types include:
- Google tags
- Google Ads conversion tags
- Remarketing tags
- Consent initialisation tags
- Custom HTML or JavaScript tags
- Server-side forwarding tags (for server containers)
Unlike older tracking architectures, modern GA4 setups with Google Tag Manager work entirely event-based. This means that instead of only measuring page views, you define individual events such as page_view, add_to_cart, or purchase, which are triggered via corresponding tags.
Triggers
Triggers determine when a tag is fired. In other words, triggers are specific events or user interactions with the web project that should cause code to execute. Typical triggers include:
- Page views
- Clicks on buttons or links
- Form submissions
- Scroll depth
- Custom events from the data layer
- Specific consent statuses
In addition, triggers can be combined with conditions, for example:
- Only on specific URLs,
- Only for specific element classes,
- Only when ad consent is active.
A trigger can be assigned to multiple tags, which makes it possible to efficiently map complex tracking logics.
Variables
Variables provide the dynamic values that tags and triggers need. They access information available when a page loads or when an event occurs. In practice, variables help refine trigger conditions. For example, a trigger can define that a tag should fire on a page view, while a variable can specify exactly which page or URL this should apply to.
In an e-commerce context, product IDs, basket values, or transaction IDs can be read via data layer variables and passed on to GA4 or other systems. Common types of variables include:
- built-in variables, such as URL, click ID, or referrer,
- data layer variables,
- custom JavaScript variables,
- consent status variables.
Data layer for structured data transfer in modern tracking
The data layer is a JavaScript data structure, usually an array, that acts as the central interface between your website and Google Tag Manager. It passes structured information to the container. Google Tag Manager continuously ‘listens’ for new entries in the data layer and responds with the corresponding triggers and tags. When specific actions occur on your website, such as a purchase, a click, or a form submission, you can ‘push’ the relevant information into the data layer.
In practice, this can look as follows. A person completes a purchase on your website. The website then writes structured data into the data layer:
dataLayer.push({
  event: "purchase",
  transaction_id: "T12345",
  value: 99.99,
  currency: "GBP"
});Google Tag Manager detects the purchase event and then activates a defined trigger that fires a tag to track the user’s interaction. Typical use cases for the data layer include:
- E-commerce tracking (product data, basket values, transactions)
- Lead tracking (form submissions with contextual data)
- Consent status transfer
- Custom events
- Personalisation logic
How to manage consent correctly with Consent Mode
Since 2024, Consent Mode v2 has been required in the EU/EEA and the UK for companies that use Google Ads or Google Analytics 4 and want to run personalised Google ads. Consent decisions must be transmitted to Google correctly at a technical level. Google Consent Mode allows Google services to be used even before full user consent has been granted. In this case, only limited, non-personalised signals are processed. Full tracking may only be activated once the relevant consent has been given.
Consent Mode v2 therefore includes two additional consent signals that indicate whether personal advertising data may be processed and whether personalised ads may be served:
ad_user_dataad_personalization
Google Tag Manager takes over the technical control in this context and ensures that tags are correctly fired or blocked depending on the respective consent status.
What are the advantages of Google Tag Manager?
Google Tag Manager is now much more than a convenient tool for managing tracking snippets. In modern tracking setups, it plays a central role in data control, privacy management, and performance optimisation. The most important advantages include:
| Advantage | Description |
|---|---|
| Central tag management | ✓ Analytics, marketing, and conversion tags can be configured, tested, and published through a single interface ✓ Changes can be made without repeatedly editing the source code |
| Greater independence from IT | ✓ Marketing and analytics teams can adjust tags independently |
| Convenient testing and debugging | ✓ Preview mode, the debug console, and structured error messages make quality assurance easier |
| Versioning and access control | ✓ Workspaces, change history, and role-based access support controlled teamwork |
| Consent integration with Consent Mode v2 | ✓ Tags can be fired or blocked depending on consent status ✓ Integration with consent management platforms is possible |
| Support for server-side tracking | ✓ Web and server containers allow controlled data forwarding via your own server endpoints |
| High tool compatibility | ✓ Numerous third-party tags and testing tools can be integrated |
| Asynchronous integration | ✓ Tags load independently of the main content and generally do not block the page |
| Structured data transfer via the data layer | ✓ Events and e-commerce data can be passed on in a standardised way |


How to use Google Tag Manager for your own web project
How do you implement Google Tag Manager? Google Tag Manager is free and web-based, so you do not need to install any software. The only requirement is a valid Google account. If you already use services such as Gmail or Google Drive, you already have one. Otherwise, you first need to create a Google account.
The following tutorial explains how to use Google Tag Manager for your own web project, create a web container, and integrate Google Analytics 4.
Step 1: Set up a Google Tag Manager account and create a container
- Go to the official Google Tag Manager website.
- Sign in with your Google account.
- Click ‘Create Account’.
- Enter an account name (e.g., company name) and the country.
- Assign a container name (e.g., domain name) and select the target type. For traditional websites, choose ‘Web’.
- Click ‘Create’ and accept the terms of service.
Google now creates the container. Typically, each website uses its own dedicated container.
Step 2: Add the Google Tag Manager container snippet
It may take a moment for Google Tag Manager to create the container. Once the process is complete, Google Tag Manager displays two GTM container code snippets. Add them as follows:
- Copy and paste the first container code into the
<head>section of your pages. - Copy and paste the second container code into the
<body>section.


If you use a content management system like WordPress, the container snippet can often be integrated via a plugin or theme.
Step 3: Create the Google tag
When configured accordingly, the Google tag can automatically track page views, scrolling, outbound link clicks, site search, video engagement, and file downloads. To set up the Google tag, have your GA4 Measurement ID ready. You can find it in your Google Analytics account in the format G-XXXXXXXXXX.
The Measurement ID corresponds to the destination ID used in Google Analytics 4.
Here’s how to set up the Google tag:
- In Google Tag Manager, go to ‘Overview’ and select the ‘Add a new tag’ option.
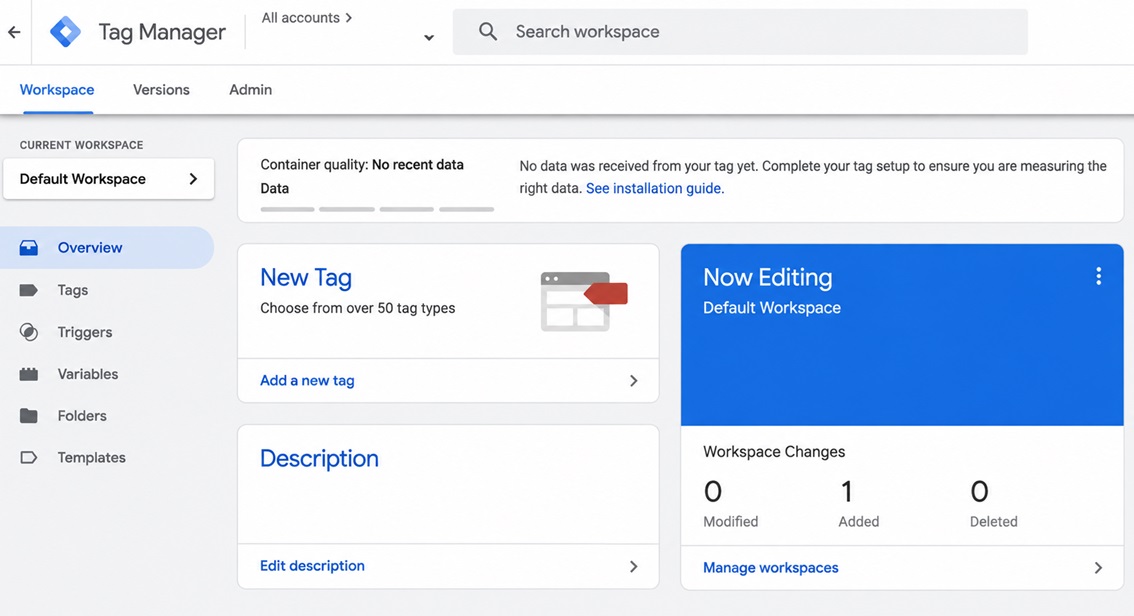
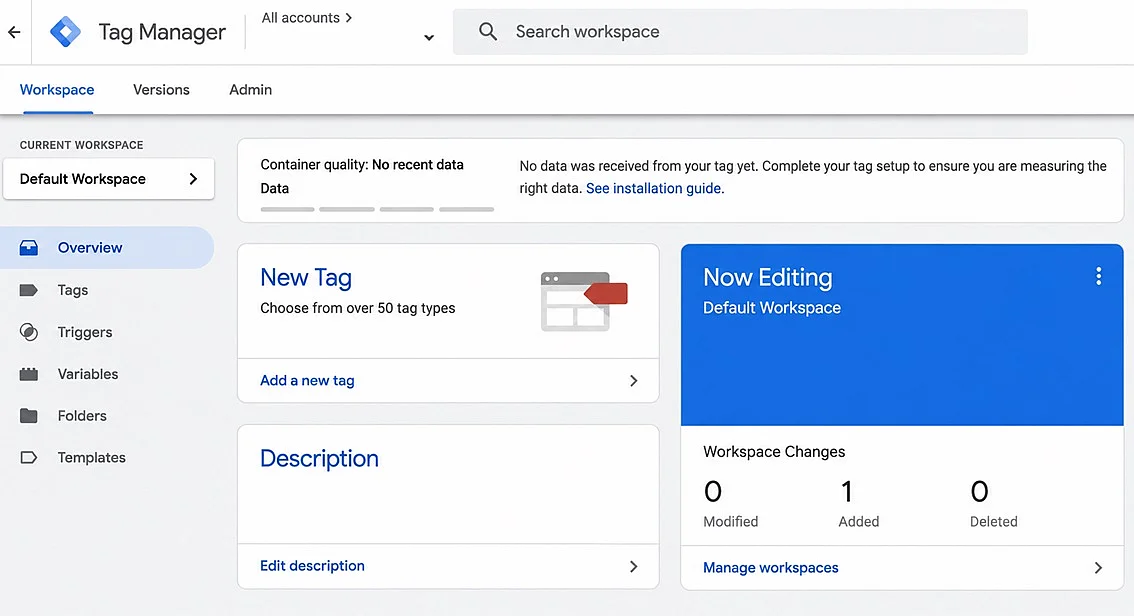
- In the Tag Configuration section, select the tag type ‘Google tag’ and enter your Measurement ID.
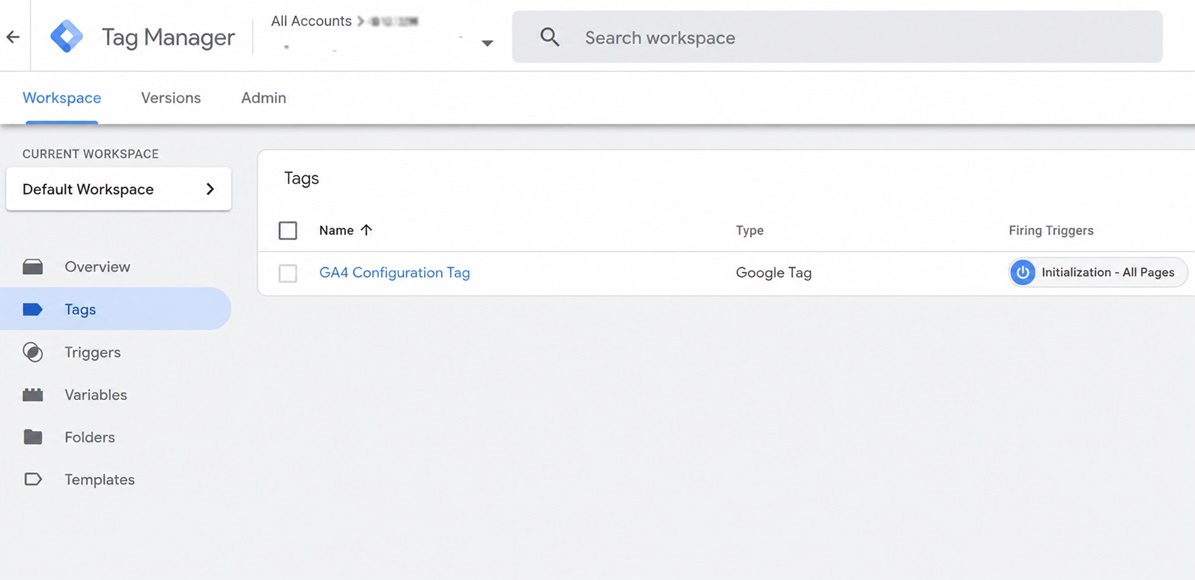
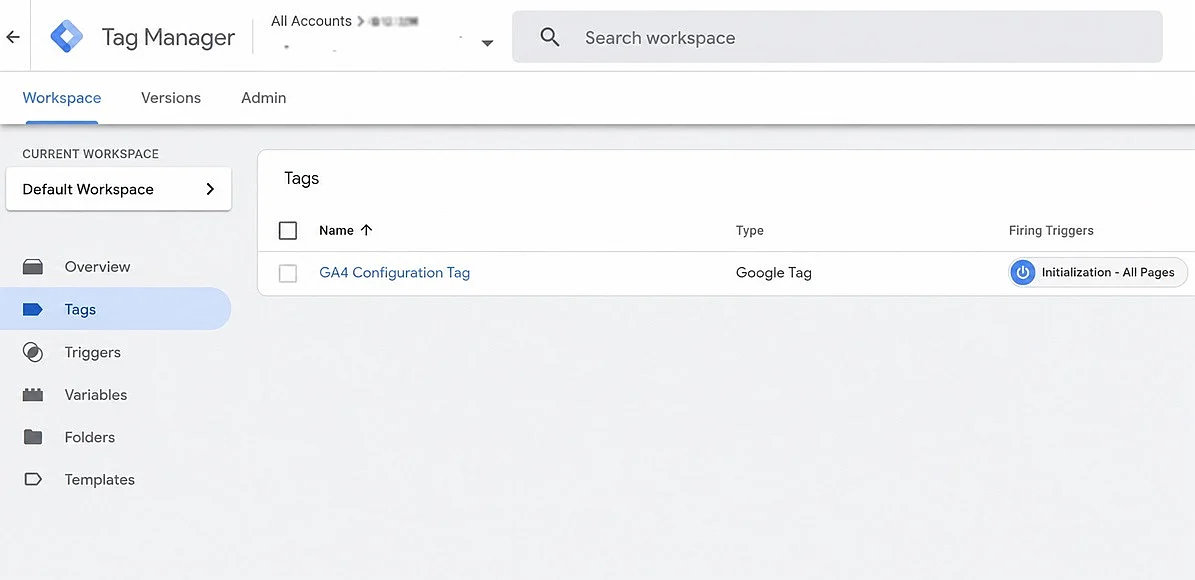
- In the Trigger section, select ‘Initialization – All Pages’.
- Name the newly created tag; in this example, we use ‘GA4 Configuration Tag’, and then save the tag.
Step 4: GA4 event tags
In addition to the information that the Google tag measures for you (page views, scrolling, clicks on outbound links, site search, video engagement, and file downloads), you can also collect other data about user behaviour. For this purpose, Google provides so-called ‘recommended events’, which you must activate yourself but which already have a name and predefined variables. If you want to track a recommended event, you need to set up a corresponding GA4 event tag.
The Google tag forms the basis for GA4 tags: It loads first and establishes the connection to GA4. The GA4 event tags then run afterwards to send detailed usage data based on the Google tag configuration.
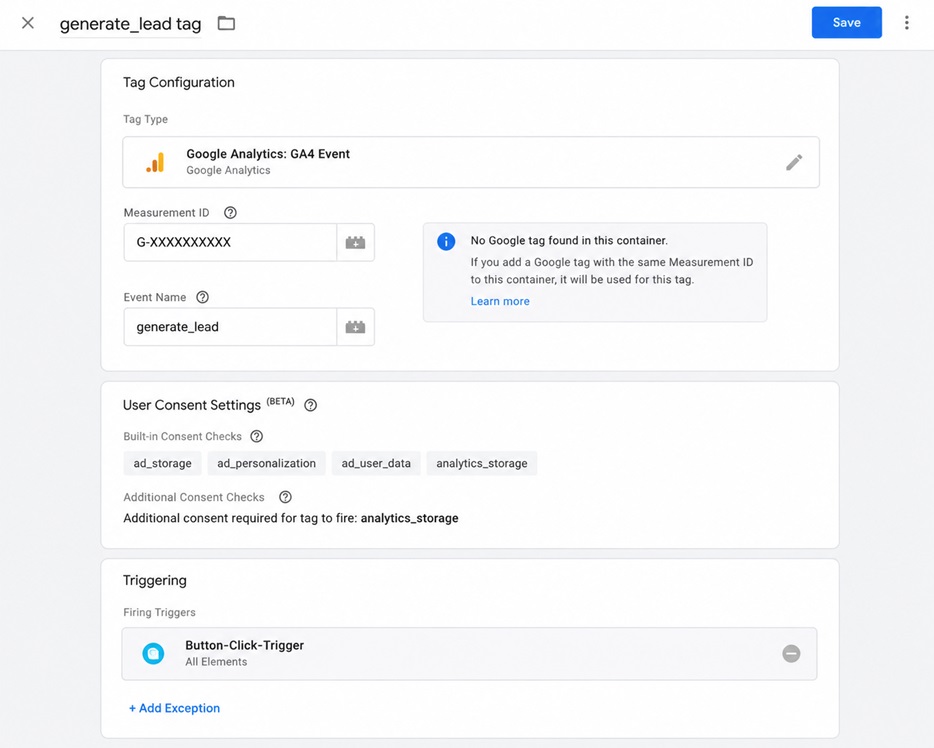
Recommended events include the GA4 event generate_lead, for example. This event records user behaviour using predefined parameters. Using generate_lead as an example, the following steps show how to activate GA4 event tags in Google Tag Manager.
To activate a GA4 event tag, you first need to identify the right trigger. GA4 specifies the recommended event name and the associated parameters, but not the trigger that starts the transmission of the event-specific data. For the generate_lead event, the key question is therefore what technical action creates a lead in your web project? The answer depends on the project. Google Tag Manager offers several suitable options.
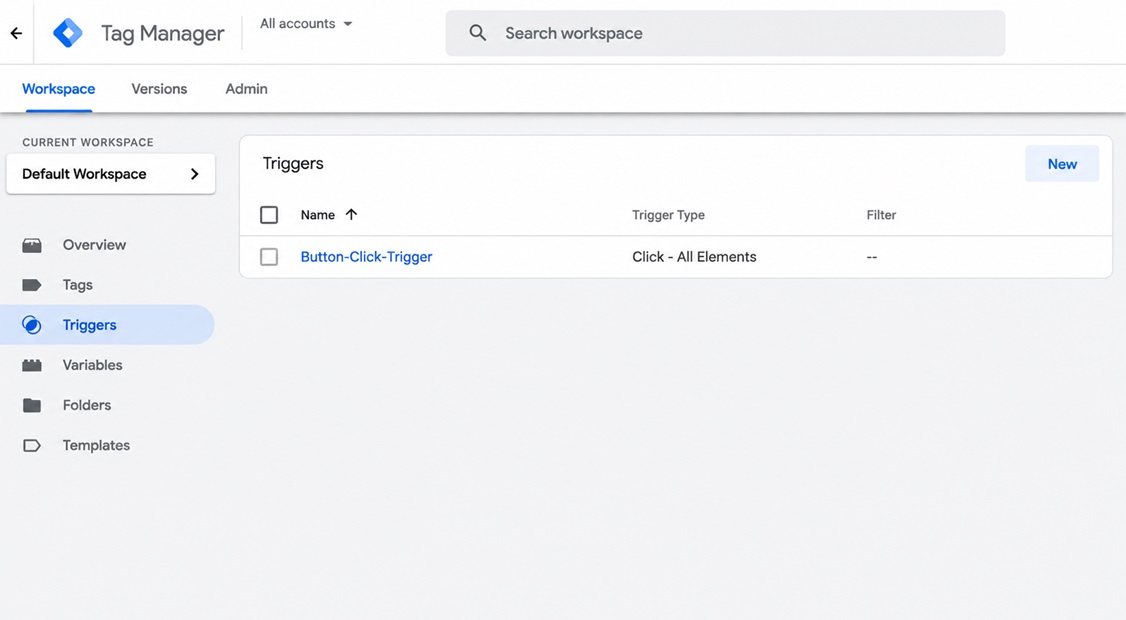
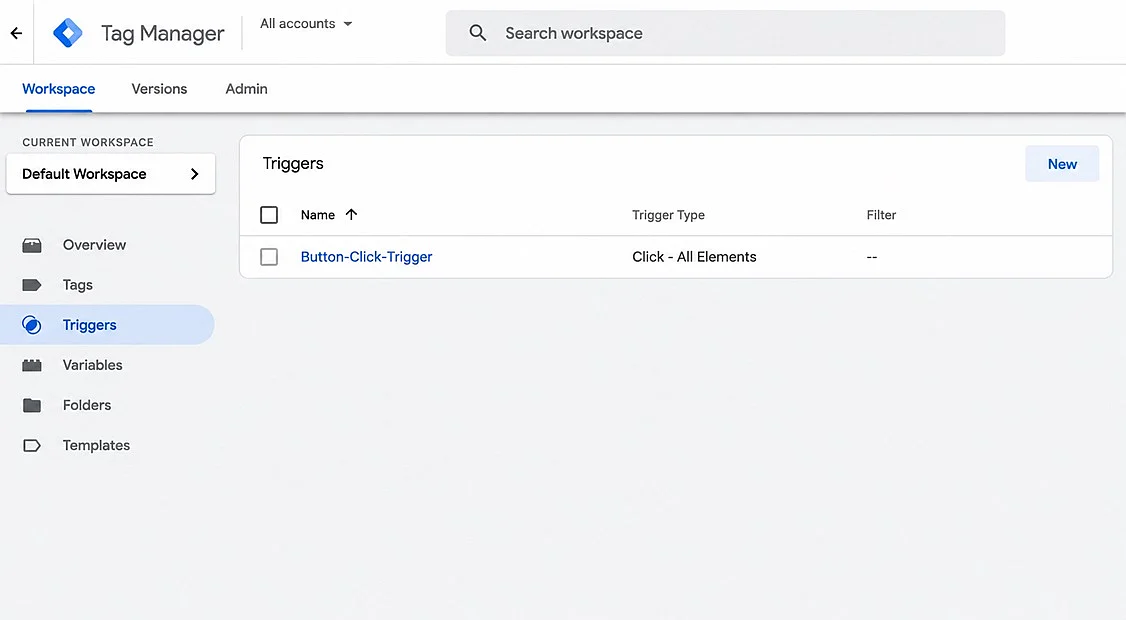
In our example web project, a button click serves as the trigger for the generate_lead event. To set up the tag correctly, follow these steps:
- In the side menu, open the ‘Triggers’ section and click ‘New’.
- Select the trigger type ‘Click – All Elements’.
- Give the trigger a name. In this example, we use ‘Button-Click-Trigger’.
- Save the newly created trigger.
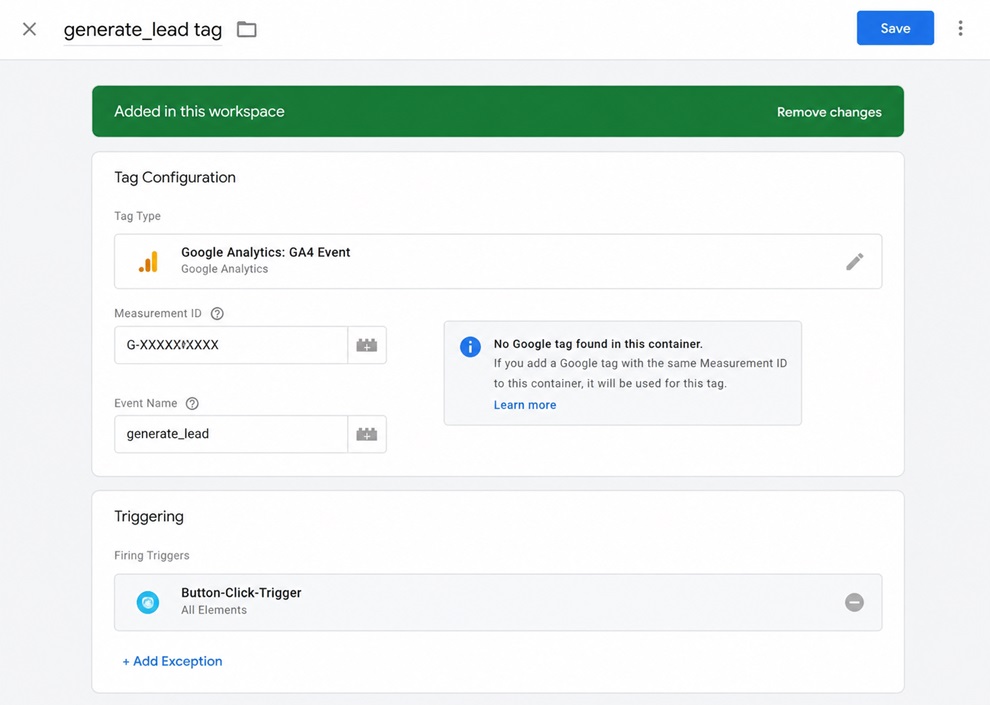
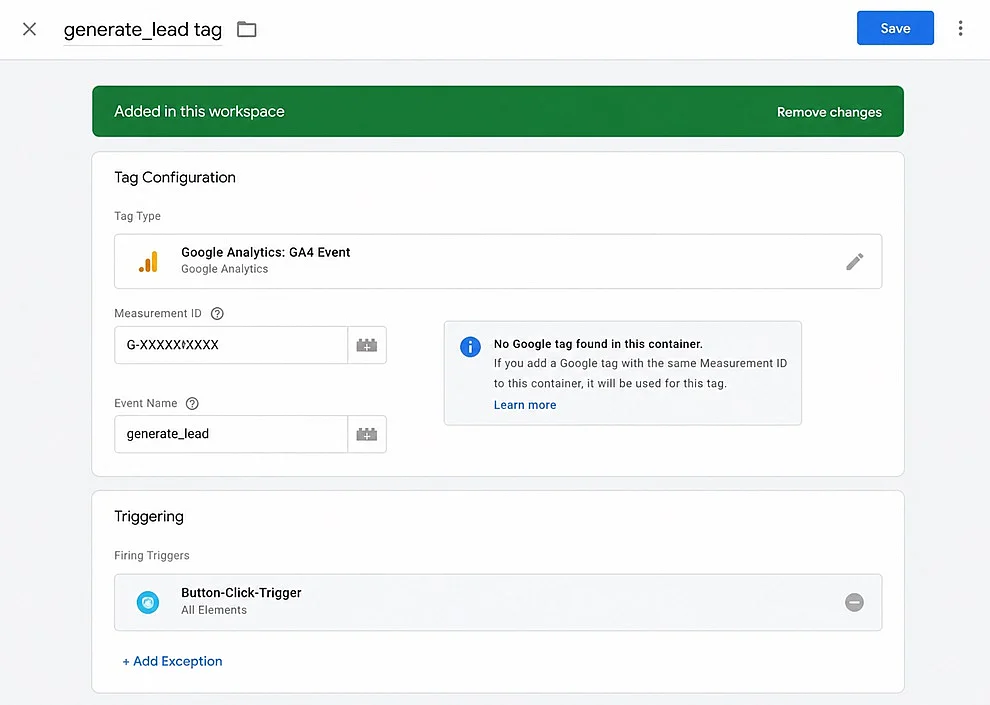
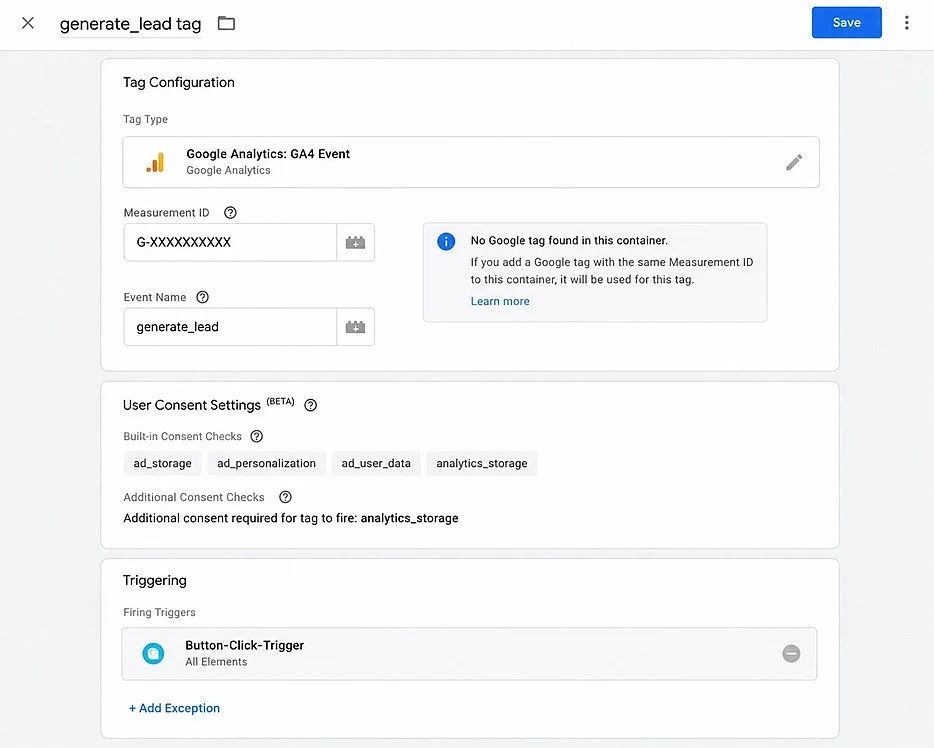
- In the Google Tag Manager side menu, open ‘Tags’ and click ‘New’ to create a new tag of the type ‘Google Analytics: GA4 Event’.
- Enter your measurement ID. If you have not yet created a Google tag for this measurement ID container, as described in step 3, the system will detect this and display a note.
- In the ‘Event Name’ field, enter the name of the recommended event. In this example, this is
generate_lead. - Select the trigger you created earlier as the firing condition.
- Give the new tag a name, such as ‘generate_lead tag’, and save it.
Step 5: Take Consent Mode into account (relevant in the EU/EEA, UK, and Switzerland)
If you use Google Analytics 4 or Google Ads and rely on personalised advertising, conversion tracking, or remarketing, you must enable Google Consent Mode v2 to obtain explicit user consent for certain tracking and advertising activities. This requirement applies if your site reaches users in the EU/EEA, the UK, or Switzerland—in the UK it is underpinned by UK GDPR and PECR, which likewise require prior opt-in consent for advertising and most other non-essential cookies (limited exceptions apply, for example for certain statistical cookies). Google Consent Mode sends consent information to Google services and runs tags, depending on the consent status, either:
- in full,
- in a limited way,
- or blocks tags entirely.
To set up Consent Mode v2, proceed as follows:
- Implementation of a CMP: First, you need a consent banner (cookie banner) that asks users for their approval. This is done via a Consent Management Platform (CMP). Your CMP must support Consent Mode v2 and have it enabled.
- Prepare Google Tag Manager: In Google Tag Manager, go to ‘Admin’ and enable the ‘Consent Overview’ in the ‘Container Settings’. After that, you can manage consent settings for your tags.
- Set default consent: Before users make a choice, a default value has to be set. In the EU/EEA and UK, this is usually all consent types set to ‘denied’. To do this, you set up a Consent Initialisation tag (often via a CMP template) that fires with the ‘Consent Initialization – All Pages’ trigger. This ensures that no full tracking starts before consent is given.
- Adjust tags: Review your existing tags (e.g., GA4 or Google Ads) in the ‘Consent Settings’ section for the required consents:
- GA4 tags require
analytics_storage - Google Ads tags require
ad_storage - Tags for personalised advertising additionally require
ad_user_dataandad_personalization
Step 6: Test the setup and Google tags (Tag Assistant)
Once you have fully set up your container, you should review your configurations before publishing:
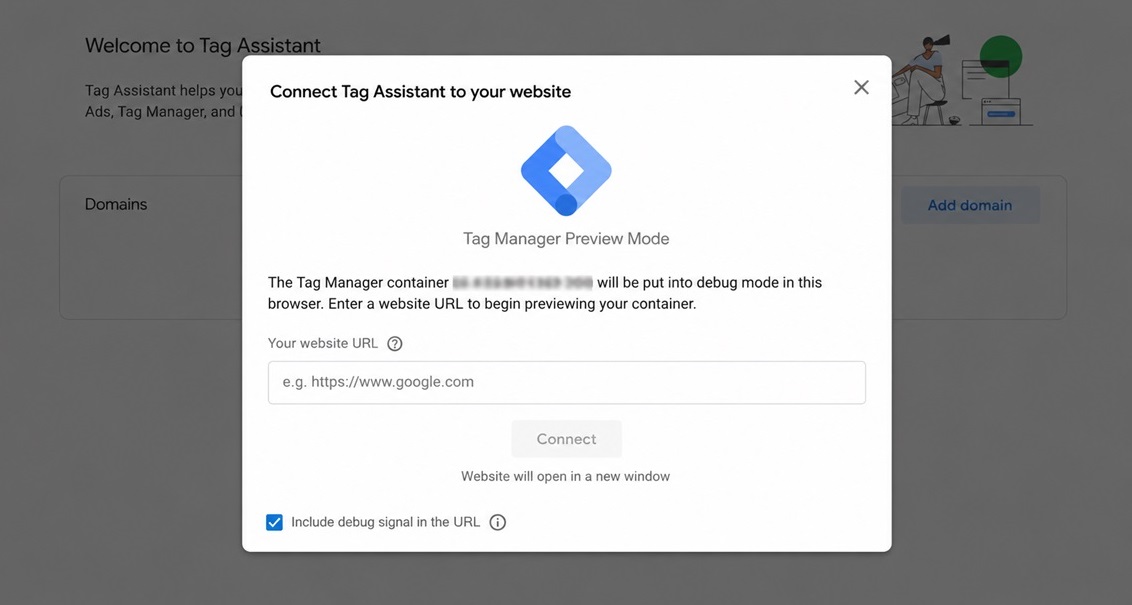
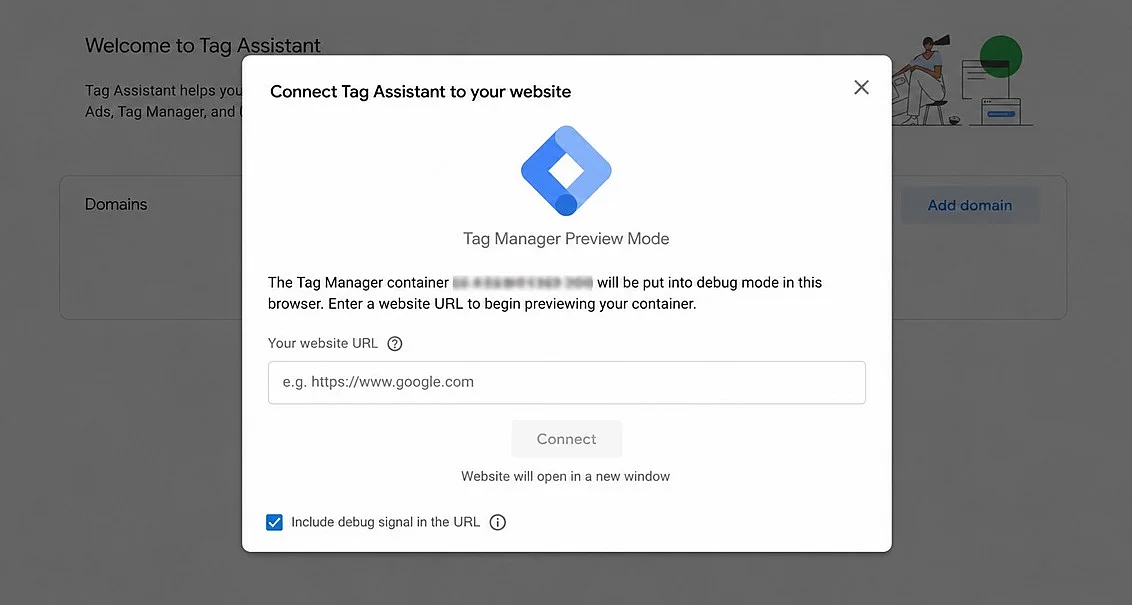
- In the Google Tag Manager workspace, click ‘Preview’ in the top right corner.
- Enter your website URL.
- Tag Assistant opens. Check the following: Was the GA4 Configuration tag fired? Are events being sent correctly? Are consent rules being respected?
Step 7: Publish the container
If all tests are successful and you want to make your changes live, you can carry out the final step:
- In the Google Tag Manager workspace, click ‘Submit’.
- Select ‘Publish and Create Version’.
- Assign a version name. If there are tags whose consent configurations have not yet been set, you will see a corresponding message at the bottom of the window.
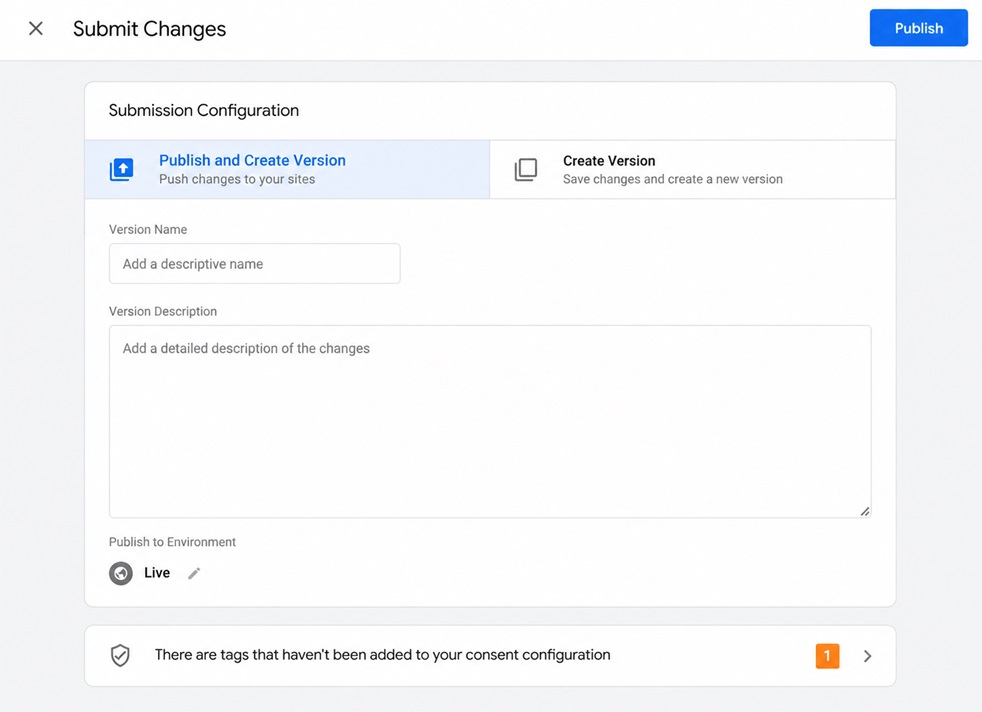
- If no tags need to be revised, click ‘Publish’. Your changes are now live.
Reviewer

Melissa Senn
Melissa Senn has been with IONOS since 2016 and focuses on website, e-commerce, social media, and AI in the Digital Guide. As a digital strategist, she uses her extensive SEO and GEO experience to transform complex technological trends into practical content.