
Creating a blog: step by step guide

For most people, a blog represents the chance to share thoughts, ideas, and interests with the rest of the (online) world. What started with the idea of a weblog – an online logbook, like an internet diary – has now become one of the most successful and widespread forms of publishing. Bloggers are often more than just private writers. They are advertisers, influencers, and experts on specific topics. In our series on blogging, we’ll be accompanying newcomers on their way to starting their own blog.
If you want to create a fashion blog, food blog, or a travel blog, you’ve come to the right place. In our blogger series, we accompany beginners as they create their own blogs. Here, you will find the answers to questions such as: What is needed to create a blog? Where can I create a good free blog? Why should you create a blog at all? How can I create my own blog? In this step-by-step guide/tutorial, you will learn how to create your first blog and later hopefully make money with it.
Part 1: how to create a blog. We will introduce the concept of blogging and offer a step-by-step guide to starting a blog.
- Choose the right software
- Plan your blog with our checklist
- Share your ideas with the world
Free blog providers
There are many free options for those searching for a suitable blog platform. The most popular providers are WordPress, Blogger.com, and tumblr.com. For newcomers to blogging, these platforms offer attractive solutions for starting a blog free of charge. They are also relatively simple to work with. Users can blog without technical knowledge of topics like servers, hosting, or web design. The provider also takes care of updates, backups, and spam protection. These blogging services are based on the software-as-a-service principle, in which the blog provider takes care of the technical administration and the user can concentrate on blogging. The principle behind this is that a user can create a blog in just a few clicks without a financial outlay and get right down to it - but there are certain restrictions as well. These begin with the URL. Free blog platforms utilise this as advertising space, ensuring that every URL contains their name (e.g. blogname.wordpress.com). Another drawback is the limited choice plugins, and modifications (e.g., customisable themes) available.
The pros and cons of free blog providers:
| Pros | Cons |
|---|---|
| ✓ Free | ✗ Unpersonalised URL |
| ✓ Simple and fast setup | ✗ Limited webspace |
| ✓ No technical know-how required | ✗ Fewer designs and themes |
| ✗ Restricted customisation | |
| ✗ Typically only for non-commercial use |
Free blog providers may be the perfect solution for those wanting to start a small, private blog, but they are not suitable for a professional blogging environment. Most of these providers ban commercial blogging from the start. Blogs also have to accept on-page advert displays that finance the providers.
An overview of free blog providers
Below is a brief overview of different providers that allow you to create a free blog. The three best-known blog providers are listed but you have to decide for yourself if one of them would be suitable for your aims. Each provider has its advantages and disadvantages.
WordPress
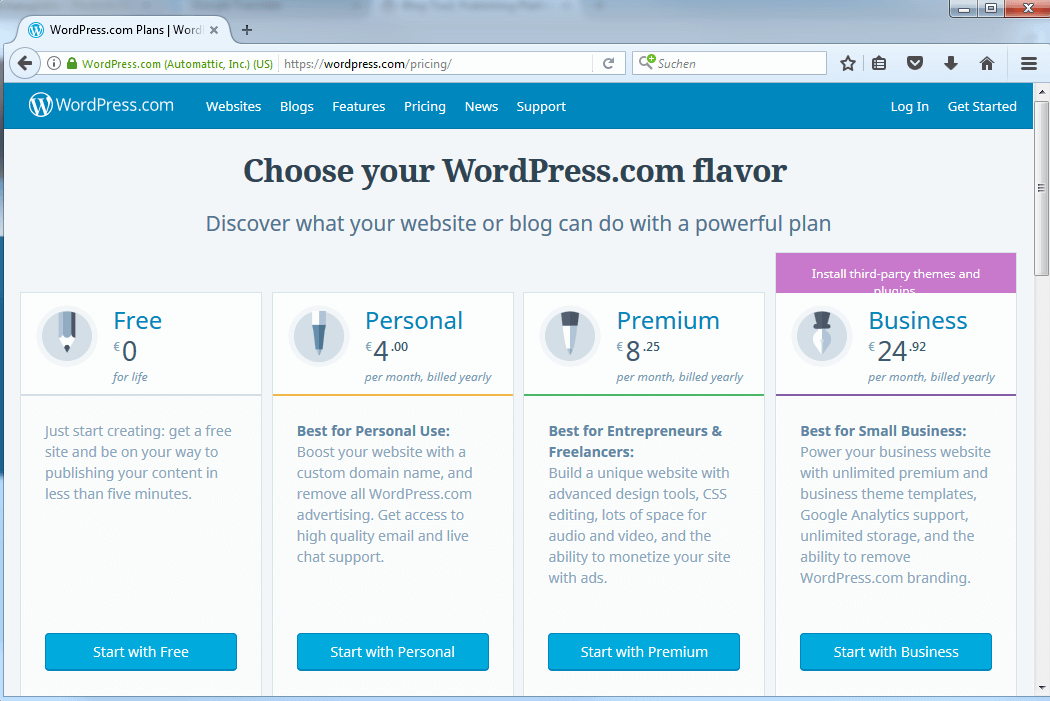
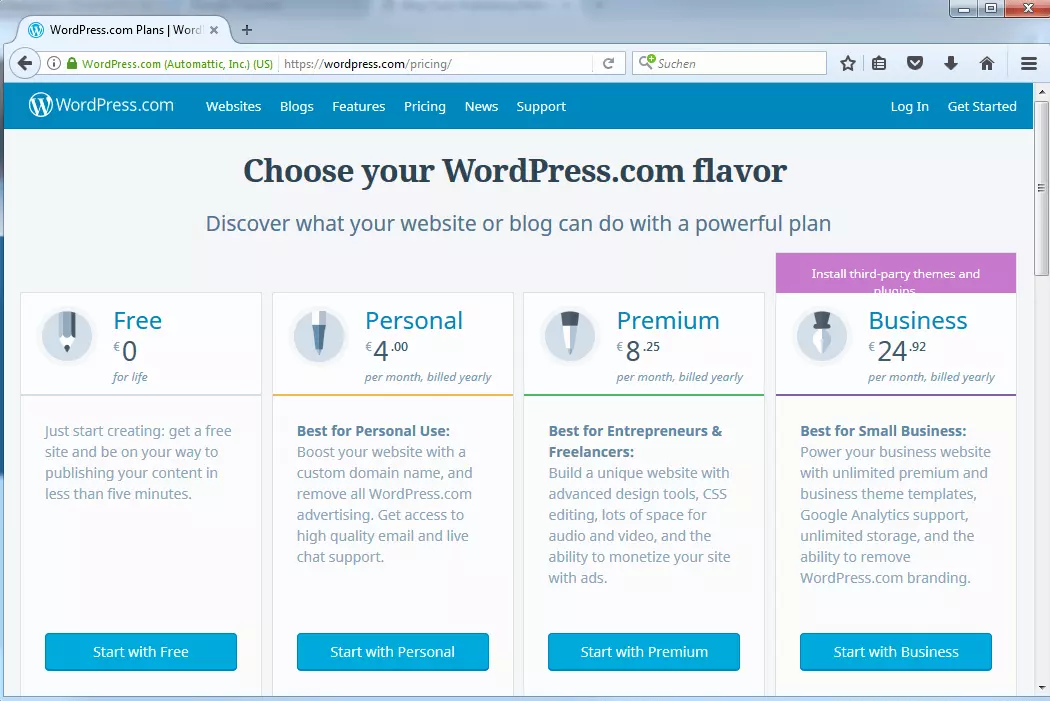
WordPress is both free blog software, as well as a blog provider that enables you to create and host blogs for free. With a simple registration, you can start blogging. There are many different themes and design possibilities. The most important standard extensions (known as 'plugins'), such as statistic plugins, SEO plugins (plugin for search engine optimisation) or security plugins, are already pre-installed. However, if you want to install your own themes or plugins, you have to host the blog yourself. WordPress is usually free in the basic version. If you want to have more features, such as your own domain, more memory, and most importantly, no advertising, there are three fee-based tariffs to choose from.
- Stress-free, no matter your skill level with easy AI tools
- Full customisation with themes and plugins
- Hassle-free updates and less admin
Blogger.com
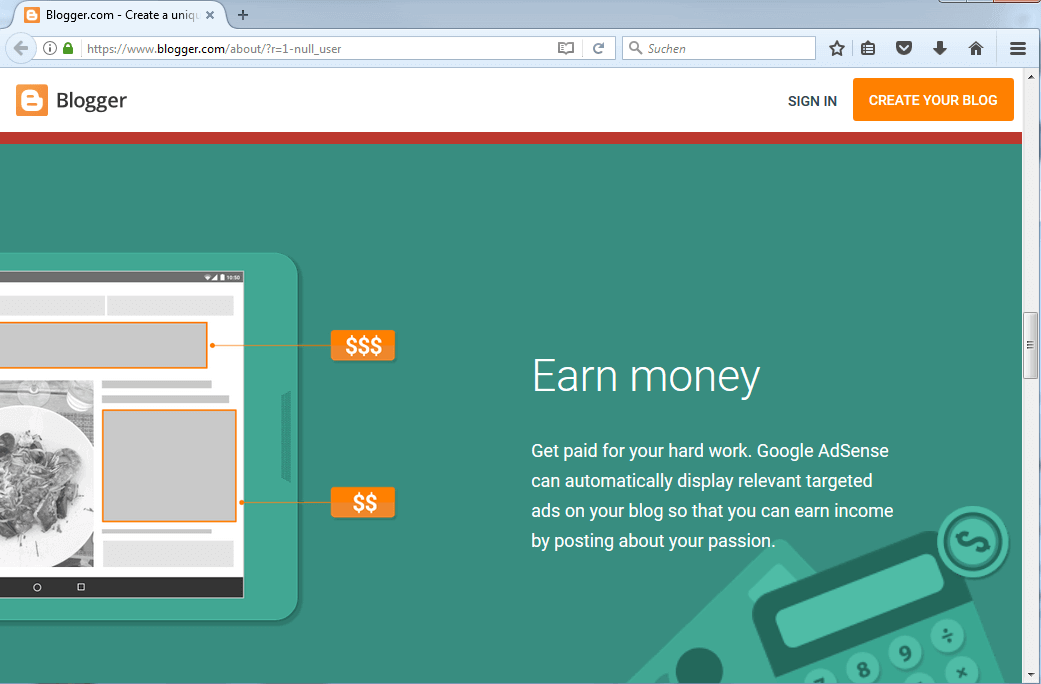
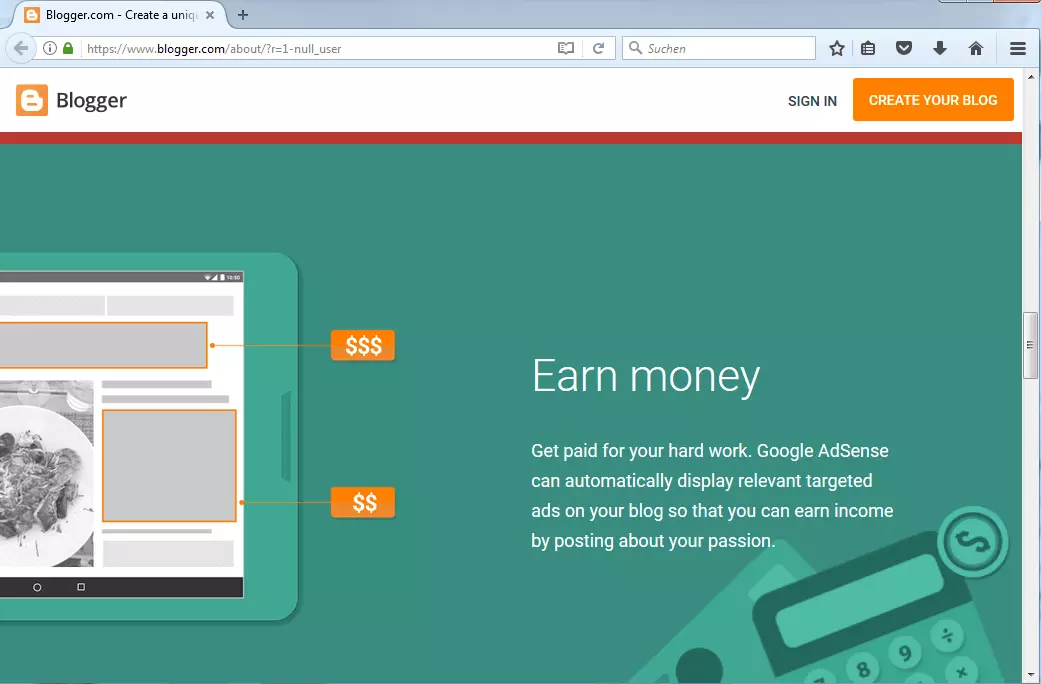
Blogger.com is a blog service that was purchased by the search engine operator, Google, in 2003. As with WordPress, you can start to create your own blog via Blogger after a quick registration and just a few clicks. Compared to WordPress, Blogger is completely free from advertising but the range of functions is much more limited. Although there’s the option of choosing between different design templates when it comes to the blog and also modifying or creating them yourself, there are fewer standard templates available for beginners. If you want to make money with your blog, then Blogger.com is the right place. Contrary to WordPress, Blogger.com not only enables commercial blogs to be created, it actively promotes them. Google is not just a search engine operator, it’s also an advertising marketer and provides context-sensitive advertising via Google AdSense. You may be familiar with this, for example, from Google’s search engine, where the first search results are displayed through Google’s own marketing network. In order to earn money as a blog operator, you have to register with Google AdSense so you can then add advertising to your blog with just a few clicks. Google AdSense will then automatically display ads relating to the content. If for example, your blog is about animals, the advertisements might show animal food. As a blog operator, you make money every time a visitor clicks on this ad.
Tumblr
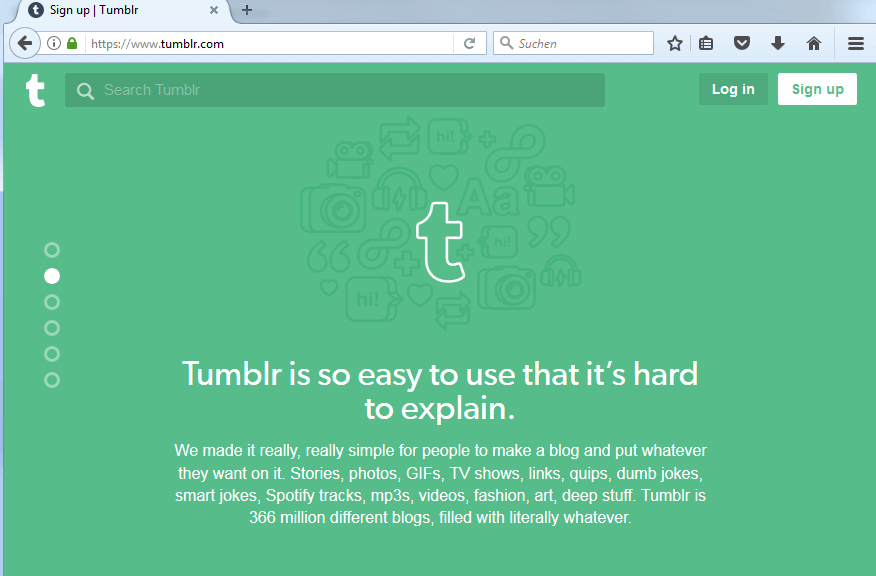
If you compare Tumblr with the first two featured blog services, you will notice that this is a relatively new blog provider. This is especially evident in the way the platform is used, which is very different from WordPress and Blogger. Even the name is curious as it seems to suggest confusion and disarray, coming from the verb 'to tumble'. Via Tumblr, it’s possible to create a blog and write your own posts, as well as making it easy to share posts from other people’s blogs. This so-called 'reblogging' is an important aspect of the platform and one of the main reasons why Tumblr has a large and active community. In order for this 'reblogging' to be legally safe, every post is automatically made available for free usage. This prevents any possible infringement of the copyright law. Tumblr promotes the culture of sharing, which was the basic idea of the internet. Other legal aspects regarding blog creation and running blogs can be found later in this article.
How to start a blog independently
Readers wanting to start a blog from scratch, for professional purposes, and without restrictions should consider starting a self-hosted blog. Aside from the obvious choice of a personal domain name, independent bloggers also have control over all design aspects of the blog. Every option can be customised and personalised but this comes at a price (albeit a fairly manageable one). The cost of hosting a website (domain included) is now quite affordable and starts at just a few pounds a month. The real cost comes with the technical implementation and maintenance of creating a blog. There is an alternative, middle-ground option here: managed blog hosting. In this scenario, the blogger concentrates entirely on the blog content, while the host provider takes care of the technical side.
Pros and cons of hosting a blog independently:
| Pros | Cons |
|---|---|
| ✓ No restrictions on functionality and design | ✗ Big technical outlay |
| ✓ Domain of choice | ✗ Responsibility for security and backups |
| ✓ No host-advertising | ✗ Hosting costs |
| ✓ Commercial use |
As mentioned above, free blogging services are the best option when creating a small, private blog but aren’t suitable for professional blogging. When it comes to commercial blogs, most of the providers can be ruled out from the start. On top of that, you often have to accept advertising on your blog, which is how the provider finances their site.
Blog solutions
If you opt for a paid hosting provider, there are several ways in which you can create your own blog. You can differentiate between website building kits, which include an integrated blog module, special blog hosting offers, as well as normal web-hosting offers, which a blog can be operated on.
Website building kit
With a website building kit, beginners can quickly create their own website. Building kits are built with modules (via so-called apps). Depending on which functionality the site should have, you can activate or deactivate the function via the app with one click. Most website building kits also have an integrated blog module that includes the basic blog features. If you do not regularly blog and want to familiarise yourself with the subject, these building kits are the perfect solution. However, ambitious bloggers should use a specific blog or general hosting options.
- Intuitive website builder with AI assistance
- Create captivating images and texts in seconds
- Domain, SSL and email included
Blog hosting offers
Blog hosting offers can also be found under the name 'WordPress hosting' or also 'Managed Hosting for WordPress' in the respective host’s range of products. It’s known as Hosting for WordPress because WordPress is the blog system that is almost always used. These web-hosting offers are specifically designed for running a WordPress blog. As with a free blog service, you get a fully functional WordPress blog when you become a customer, and you only have to make a few clicks without having to grapple with technical details during the installation. It’s not only the installation that is complete after just a few clicks but also the blog’s setup. The most important plugins, themes, and other extensions are automatically installed.
With a 'managed' offer, the host usually takes care of automatically importing crucial security updates and provides comprehensive support for any question you might have about your blog. Specific blog hosting offers like these are ideal for beginners, who want some support at the beginning but then who want to have more freedom towards the end when they feel more comfortable and want to feel less restricted when expanding their blog.
Web-hosting
The usual web-hosting offers provide the most freedom and the greatest flexibility and full control when creating a blog. As a user, you can rent web space from a host and install different applications on it, e.g. blogs. Since most blog systems now also have simple and understandable installation setups, you don’t have to have any programming knowledge for the installation process. In some cases, one-click installations are also available as an option, which facilitates the process even further. In order to exploit the full potential of your web-hosting offer, you should already know something about the topics of web space, databases, important configuration files, etc.
- Loading 3x faster for happier customers
- Rock-solid 99.99% uptime and advanced protection
- Only at IONOS: up to 500 GB included
If you want to be completely flexible when up-scaling your aspiring blog business, a cloud hosting solution is the best option. The advantage of cloud hosting: you actually pay for the amount of performance that you use. If the number of visitors to your blog increases at certain peak times, the capacity of web hosting can be increased to compensate.
Instructions: creating your own blog in 7 steps
With a self-hosted blog, you remain independent but you also have to deal with the system setup and maintenance. We will show you how this works in a step by step way: from the domain name to the blog structure.
Step 1: Selecting the domain
For the first step, you have to find the appropriate domain name for your blog. There are many different factors that make up a good domain name: it should be unique, concise and have recognition value. You should always have the target audience in mind when searching for a domain since a well thought out name can be enough to attract readers to your blog. You can check whether your desired domain is available by carrying out a domain check with the host provider.
Top-level domains
Apart from the actual domain name, the domain ending is also an important factor when selecting a domain. In addition to country-specific domain endings such as .co.uk for the UK or .mx for Mexico, there are also generic domains such as .com for commercial websites and blogs, or .info for informational topics. These so-called top-level domains (TLD) are almost as old as the internet itself and, therefore, are already taken in most cases. With domain endings like these, you have to be creative.
New top-level domains
The selection is significantly bigger when it comes to new top-level domains (nTLDs). Here you can combine your domain name with specific domain endings, such as .online or .web.
.blog offers you the perfect ending if you want to start a blog.
These nTLDs are usually somewhat more expensive compared to old TLDs, but many domain names are still available and with an unusual domain ending, you’ll be sure to stand out from the crowd.
Step 2: Renting and registering web space
Regarding hosting providers: if the domain name is still available, you have to register it. Depending on the provider, there are different tariffs and hosting packages available, which usually include web space, database, and domain costs. When it comes to larger complete packages, you have some access to various tools and software solutions from the respective provider.
Technical requirements
A weblog is ultimately nothing more than software, which is why it’s often referred to as weblog software or a weblog publication system that has to be installed on the server or web space. Some technical requirements have to be met before you can create your blog. These depend on the selected blog system although the most common systems have the following three requirements:
a) Sufficient free web space
Web space is where a blog system’s files are stored, similar to the place on the local hard drive on your home PC. The blogging system, WordPress, requires about 30 megabytes in the unpacked version. In addition, you still have to save space for themes, plugins, images, and so on. If you plan to create and run a travel blog, you will probably want to publish holiday photos. This is why travel bloggers need a lot of space for blogging, ideally at least 1GB — but the bigger, the better.
b) PHP
PHP is a scripting language and is the programming basis for most blogs. Although it’s not a must for a blogger to be able to program, the server needs to understand this language so that the different blog functions e.g., displaying blog comments, are executable. It is not enough, however, for the web space to simply support the programming language; its correct version must be installed.
c) MySQL-Datenbank
Drafts, posts, and comments must be stored in a structured manner so that processes within the system can be carried out simply and effectively. A suitable data structure is a database, whose structure can be thought of as a table. A post (including the associated components) can be saved in each row. Within the rows, you have different columns so that the actual blog text is stored in one column, for example, while the relevant comment is saved in the next column. This makes it very easy to display the comments on the appropriate post, you just have to look at the row of the post to see that the correct comments have been assigned to the correct post. MySQL is an open source management system for databases like these and is the basis for many dynamic websites. When creating your blog, the various tables are created automatically in the background in the specified MySQL database. Data will later be stored in such tables.
Step 3: Selecting the CMS
WordPress has been mentioned a lot in this article but it’s not always the best choice for everyone when it comes to creating a blog. This is why it makes sense to compare different CMS programs in order to find the right one for you and your blog. Besides WordPress, there is also Joomla!, Typo3 and Drupal that belong to the list of well-known content management systems. These large open-source solutions impress users mainly with the number of free expansion possibilities and strong communities that are constantly working on the systems’ further development. However, smaller, streamlined CMSs may also be the better choice. Here is a short overview of the three best-known blog content management systems. Our CMS comparison provides you with a comprehensive overview to help you decide.
Creating a WordPress blog
WordPress is the most popular blog system based on b2/Cafelog, which was first released in 2003. It’s distinguishable by its ease of use and the fact that it is so easy to expand. Soon after the release of its first version, there were numerous plugins from independent developers, which even beginners could get to grips with and use to create their own blog and expand the functions. This is one of the factors contributing to WordPress’ popularity today. It’s also really easy to run a forum alongside a WordPress blog as well as changing the appearance of your own blog and adapting it without needing to have any web design knowledge. You can download WordPress from this link: https://wordpress.org/download/.
Do you use WordPress? Find out how to disable WordPress comments in our handy how-to article.
Creating a Drupal blog
Compared to WordPress, Drupal doesn’t have such a large selection of finished designs and extensions on offer, but this CMS is no less suitable for creating your own first blog. Drupal also has a modular structure and the basic run of features can be found in its core components, and any additional functions can be created with modules. Drupal is best suited for building communities, or if you want to run the blog together with several people. Thanks to the integrated role and right systems, you can register users as editors with just a few clicks so they can write articles themselves. There’s also the option to register them as proofreaders so they can modify and delete content but can’t add any new content. For more information and to download Drupal, go to this website: https://www.drupal.org.
Creating a Joomla! blog
Joomla! emerged from the open-source project, Mambo. As with the aforementioned content management systems, the functional structure, the actual site content, and the layout are built separately from each other. It’s possible to adjust the blog’s appearance with templates and to expand the variety of functions with plugins. Joomla! is suitable for beginners but unlike WordPress, it’s not as easy to get to grips with. The user often has to play around a bit before finding their feet. Thanks to good documentation and great community support, Joomla! is a CMS that is worth considering for your own blog. More information and to download Joomla! can be found here: https://www.joomla.com/
Step 4: Installing a blog CMS
Once you’ve decided on a blog system, it’s time to install it if you’ve chosen to host your own blog. If you want to familiarise yourself with the system or want to test different blog systems, you can do this locally on your computer at any time. The actual installation is then done on the web space provided by the web host.
Local installation
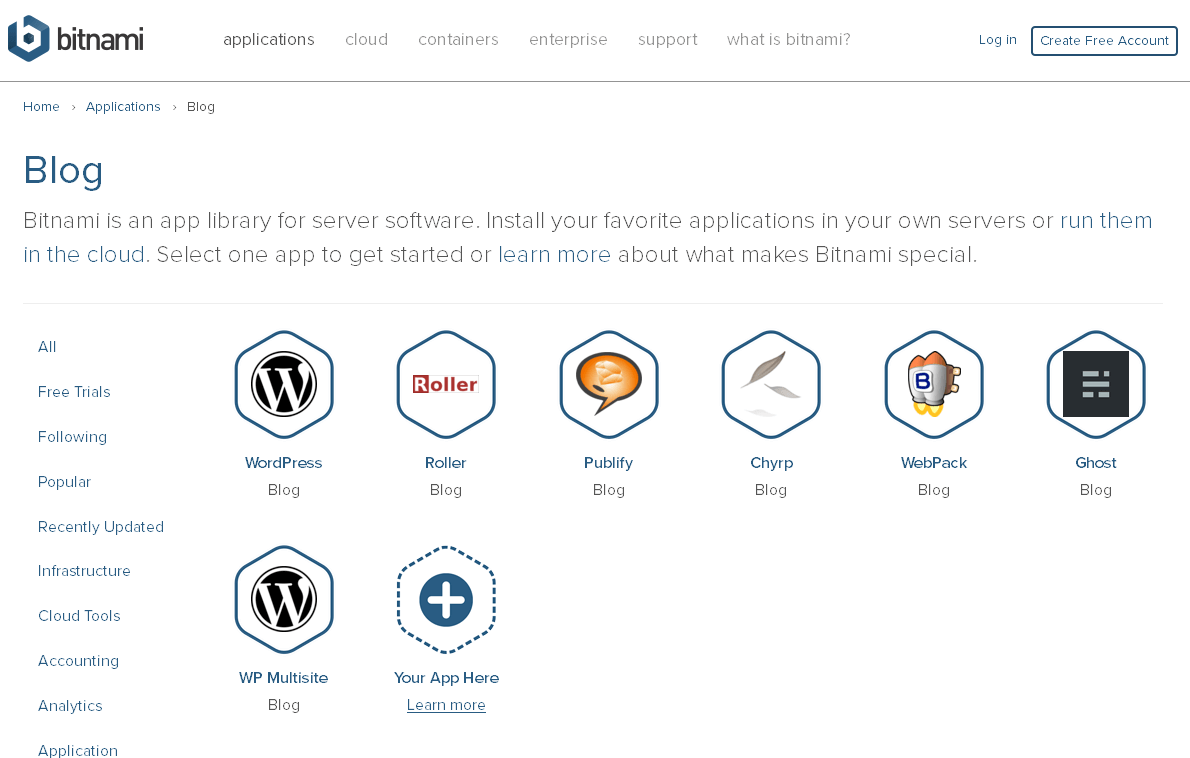
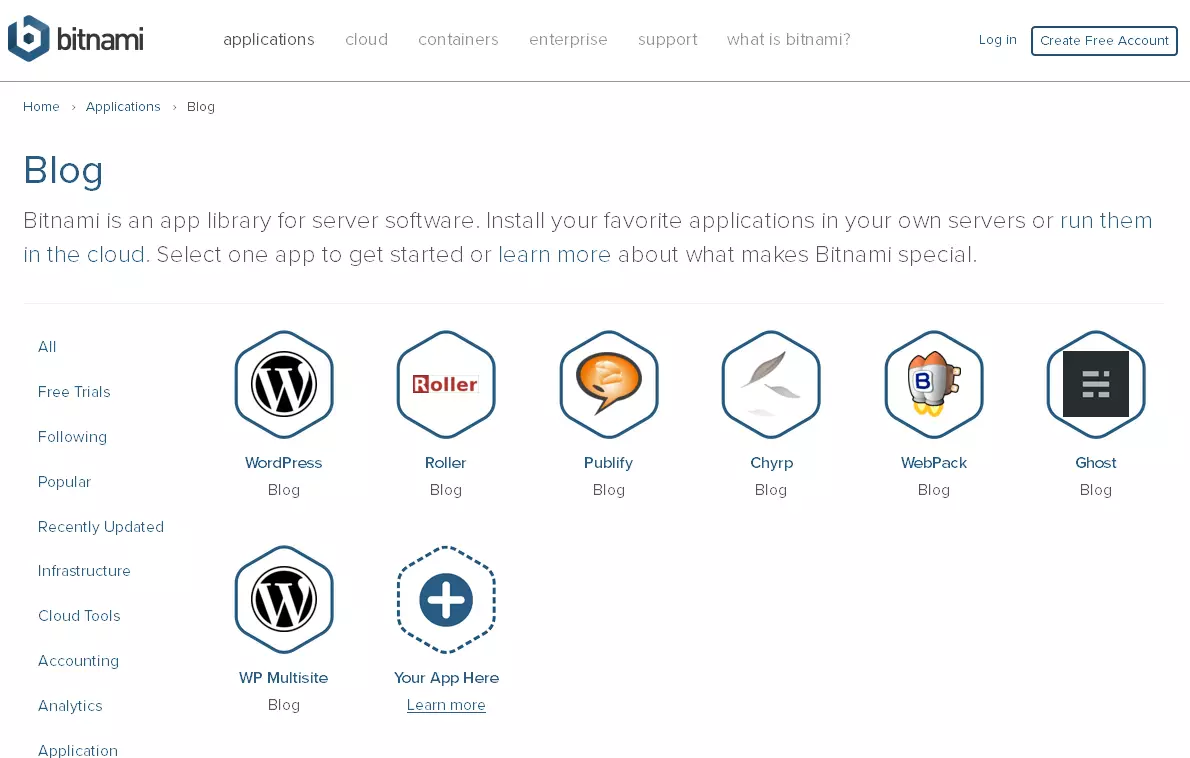
You can install and test your own blog at any time on your computer using local test environments. The free tool XAMPP was designed for exactly this purpose. With Apache server, MySQL, and PHP, you have the most important components for installing a blog on your home computer. The advantage of a local installation is that no-one else has access to your blog and you can try and test the various functions offline. The tests aren’t free but if you are pleased with the result, you can export the local data as well as the database from your own computer to your hosting provider’s server. If you already know a bit about virtual machines and have basic knowledge about the operating system Linux, you can also use an entire virtual machine with your desired pre-installed CMS to create your local blog. Via the portal, Bitnami, you can simply download the desired 'application' for free and create your own blog with just a few clicks.
Another alternative for local blogging is the software, Docker. The blog creation is based on ready-made containers here as well, with each container having a different dependency. If you want to create a WordPress blog, you don’t only need the WordPress container but also a MySQL container. With Docker, you don’t have to install the desired CMS but the downside is that you do require a bit of time to familiarise yourself. If you haven’t dealt with Docker before, it might be a better idea for you to create a blog with a virtual machine or XAMPP.
One-click installation
The one-click installation is a feature that web hosts offer in order to facilitate the installation and setup of a blog. In doing so, the provider takes on full responsibility for the technical and server-side administration, making blog creation child’s play. Since WordPress is by far the most widely used CMS for blogs, many providers are now offering their clients managed solutions like these. Providers often offer additional CMS, which can be set up with a simple one-click installation process.
Manual installation
If you already have some experience with web technologies and don’t mind getting into the technical details, you can install the blog on your own web space at any time. In this case, you have to create a database. This can be done in just a few clicks in the hosting provider’s configuration menu. When the database is created, the database name, database username, database password, and database host (often localhost, but varies from host to host), need to be noted. The database is automatically generated in the background. Lastly, download the blog system of choice from the developer site and upload the data to the web space using FTP. The recorded database information must now be entered into the blog system’s configuration file (or wp-config.php file, in the case of WordPress) so that a connection to the database can be established for the installation and tables for the blog structure can be created there. Alternatively, you can also visit the URL where the blog should be available. There the recorded data can be found and the installation process can begin. After just a few minutes, the blog is created and is ready to use.
Step 5: The structure of a blog
You’ve finally managed to create your own blog and now you’re ready to fill it with content. Before you begin, you should familiarise yourself with the basic structure of a blog. Here are the basic components:
Dashboard
After the blog has been created, the dashboard is the first thing you see after logging in. The dashboard is the command centre of your blog. Here you can create, modify, or delete new blog posts, change the design of the blog, and even install new plugins. This expands the number of features the blog has. Additional plugins enable you to view important data and facts about your blog directly on the dashboard homepage. This way you will never lose track of what’s happening!
Users
When you create the blog, you create the first blog user at the same time. This user is the so-called administrator who has all the rights to the blog. However, if you do not want to run the blog alone, you can add additional users to the blog at any time, or give them the possibility of registering on the blog. Thanks to simple user administration, you can then assign different roles and rights to this user. If the blog system does not have roles and rights management, this feature can be obtained with a plugin.
Plugins
Plugins are software extensions that can add many useful features to your blog after it has been created. Most plugins are offered by external developers and can easily be installed with a few clicks and added in this way. There are currently over 45,000 plugins available for WordPress. From security plugins to forum plugins and anti-spam plugins, there’s a relevant plugin for almost any feature you want to add.
Themes/templates
Themes or templates make up your blog’s appearance. Each blog system includes a few themes to choose from in the default settings. When creating your blog, you can choose a template directly from the settings. If you would prefer a larger selection, you can download free (and also premium fee-based themes) from other design sites and add them to the blog in just a few clicks, as you would with plugins. If you are artistically gifted and can also program a bit, you can create your own themes and give your blog a more personal touch.
Comments
You can use the comment system to let your readers get in touch with you. By default, readers can leave comments and thoughts on their posts without logging in. These then appear under the article, as well as so-called trackbacks or pingbacks. These are automatic notifications that let you know whether your blog was mentioned on another blog.
Feed
Most blog systems have a web feed or newsfeed to make sure readers are kept up-to-date. Readers can subscribe to this feed so that they automatically receive a notification if a new post has been written and published on the blog.
Permalinks
Immediately after creating the blog and before posting the first post, you should adapt and check the permalinks. Permalinks define the structure of the URL, which is what each blog post is filed under. They are generated automatically when you write a post so you don’t have to deal with them yourself. If you do want to include the date or the topic of the post that is to be in the URL, you can set this up using the permalink setting.
Settings
Although the blog is ready to use after you’ve finished creating it, you can still adapt it further if you wish to. Just select 'Settings' in the dashboard, which will then enable you to define the language, time zone, and visibility of the blog. If for example, you don’t want your site to be found on Google, you can prevent this with WordPress by setting the blog to 'private'.
Step 6: Setting up the blog
Now it’s all about individualising the blog. As mentioned earlier, WordPress, Joomla!, and Drupal are open source systems. This means that not only is it free to install the CMS, you also have access to numerous free themes, plugins, and other extensions. The design is a natural part of individualisation and is determined by different themes. With HTML and CSS knowledge, it’s possible to personalise your blog even more. The next step is to adjust the technical framework and expand the basic installation. The basic extensions include various security plugins, backup solutions, and tools for online marketing.
Step 7: Blogging with structure and plan
Now the blog is basically ready to go and you can start to fill it with content. However, it is best to decide on a rough structure and develop a plan. The focus is on basic structures, such as categories, pages, and tags. At the beginning, you’ll probably have lots of topics that you’re itching to write about but it’s better to first define the thematic focus. Ideally, you will find a niche and become an expert in a certain field, build a loyal readership, and pass on your expertise to others. This path is not easy – in part two of our blogging series, we will give you tips on how to find the right theme for your blog and how to win over numerous readers and gain their trust by being an expert in your field.
Creating your own blog with IONOS
Before you can start your blogger career, you first need to choose the right host. IONOS, for example, offers several possibilities for creating your own blog quickly and easily. The flexible offers provide yours with the right solution for every project, whether you’re a professional blogger or are simply doing it as a hobby.
For those new to the world of blogging, the IONOS website is ideal: here you can choose from a number of individually customisable design templates and you can create your own blog with the 'Blog' web app in just a few clicks. Besides this option, there is also the possibility of managed blog hosting. IONOS takes care of the entire technical and server-side administration so that the blogger can fully concentrate on the blog’s content.
In addition to the usual content management systems like WordPress, Joomla!, Drupal, and Typo3m, there are some more exotic solutions like Contao or Redaxo that can be used to create a blog. Once you have found the correct CMS, simply select an arbitrary domain and the appropriate web space and just install using the one-click installation.
IONOS MyWebsite: the perfect start to blogging
MyWebsite from IONOS is aimed at web beginners who want to see results as quickly as possible. Web design templates for more than 200 industries and over 300 web apps enable you to put your website together in just a few clicks. One of these web apps is the app 'BLOG', which you can quickly integrate into your website. The first blog entries can already be published in your newly created blog. The Blog app in MyWebsite offers you many different possibilities, such as setting different time zones or activating/deactivating the comment function. The blog can be put together in very few clicks. There is an app on Android or iOS that helps you create new blog posts. With this app, you can also create, publish, and manage your blog and comments with your smartphone. MyWebsite provides the ideal entry into the blogger world. Blogs can be created quickly and posts are published easily thanks to the app.
- Intuitive website builder with AI assistance
- Create captivating images and texts in seconds
- Domain, SSL and email included
IONOS Webhosting: individual blog hosting for all requirements
The web hosting offer from IONOS offers you lots of flexibility. Users rent this IONOS web space, which is hard disk space that is available online at any time and can be used to install various web applications. Depending on your own expertise, you can either install and configure the applications yourself on the web space, or simply have them be installed automatically by the one-click installation. The advantage of IONOS web hosting is that even exotic blogs can be installed and run on the web space. In addition to the well-known content management systems (CMS), such as WordPress, Joomla!, Drupal, and Typo3, you can also create blogs with Contao or Redaxo. You have full control and can directly engage with the content management system. However, programming skills are an advantage. IONOS web hosting is the right choice when you want to have as much freedom as possible when creating a blog.
- Loading 3x faster for happier customers
- Rock-solid 99.99% uptime and advanced protection
- Only at IONOS: up to 500 GB included
IONOS Hosting for WordPress: starting with the most popular blog application
Hosting for WordPress is the middle ground between the products, MyWebsite, and IONOS web hosting. It combines the simplicity of MyWebsite apps with the flexibility of web hosting. Hosting for WordPress enables you to create a blog with the popular blog system WordPress in just a few clicks. In a couple more clicks you can install recommended plugins and themes and get started right away. Plugins enable you to expand your blog with useful features, such as protection against spam or a contact form. WordPress is free software that was developed in 2003 and is being continuously updated. Special emphasis is placed on usability, web standards, and easy adaptability. With IONOS Hosting for WordPress, you can make use of these benefits and have an established and popular blog system at hand, while at the same time maintaining the security and maintenance of the software and server. Hosting for WordPress is suitable for anyone who wants to create a blog with WordPress without having to worry too much about administrative tasks.
- Stress-free, no matter your skill level with easy AI tools
- Full customisation with themes and plugins
- Hassle-free updates and less admin
Reviewer

Julia Hertler
With over 18 years of experience in content marketing, Julia Hertler has deep expertise in digital communications. For the past 10 years, she has specialised in the areas of domains and hosting at the IONOS Digital Guide, making complex technical topics easy to understand.